
1. Introduction
This manual provides essential instructions for the installation, operation, and maintenance of your BounceyCart Electric Bike Conversion Kit. This kit is designed to transform a standard bicycle into an electric bicycle, offering enhanced power and speed. Please read this manual thoroughly before installation and use to ensure safe and correct operation.
2. Safety Information
- Always wear a helmet and appropriate safety gear when riding an electric bicycle.
- Ensure all connections are secure and correctly wired before operating the kit. Incorrect wiring can damage components.
- This kit is intended for the front wheel of two-wheeled bicycles only. It is not suitable for three-wheelers or multi-wheelers.
- Regularly inspect your bicycle and the conversion kit components for any signs of wear or damage.
- Be aware of local regulations regarding electric bicycle use, speed limits, and power output.
- This kit does not include tires, batteries, or chargers. Ensure you use a compatible 48V 13AH or higher capacity battery.
3. Package Contents
Verify that all components listed below are present in your package:
- 1x Motor Wheel (Front Wheel)
- 1x LCD Display
- 2x Brake Levers (Power-off type)
- 1x Controller
- 1x Thumb Knob Handle (Throttle)
- 1x Controller Bag
- 1x Pedal Assist Sensor (PAS)
- 1x Motor Cord
- 1x Winding Pipe (Cable Management)
- 1x English Instruction Manual
- All necessary accessories for assembly (e.g., zip ties, washers, nuts).

Image: Overview of all included components in the conversion kit.
4. Specifications
| Feature | Specification |
|---|---|
| Material | Aluminum Alloy |
| Color | Black |
| Suspension Type | Front |
| Motor Type | Brushless Gearless Motor |
| Output Voltage | 48V |
| Power | 1000W |
| Speed | 45-55 km/h (28-34 mph) |
| Gear Adjustment | 5 Gears |
| Brake Type | Power-off Brake Lever (Applicable to V Brake, Disc Brake) |
| Recommended Battery | 48V 13AH or Higher Capacity (Not Included) |
| Suitable Wheel Diameter | 28-inch, 29-inch, 700C |
| Minimum Flat Fork Distance | 100mm / 3.94in |
| Loading Capacity | 120kg / 264lbs |
| Item Weight | 10kg / 22lbs (Net) |
| Display Size | 6.8 x 9.6 cm / 2.67 x 3.77 in |
5. Setup and Installation
The installation process requires basic mechanical skills. If you are unsure about any step, it is recommended to seek professional assistance from a bicycle shop.
5.1 Prepare Your Bicycle
- Ensure your bicycle is stable, preferably on a bike stand.
- Remove the existing front wheel from your bicycle.
5.2 Install the Motor Wheel
- Carefully install the new motor wheel into the front fork of your bicycle. Ensure the motor cable exits on the correct side to avoid interference.
- Secure the wheel using the provided nuts and washers. Ensure it is centered and tightened appropriately.

Image: The front motor wheel, ready for installation.
5.3 Mount Display and Controls
- Mount the LCD display and thumb knob handle (throttle) onto the handlebars in a comfortable and accessible position.
- Install the two power-off brake levers onto the handlebars.

Image: LCD display and thumb throttle.
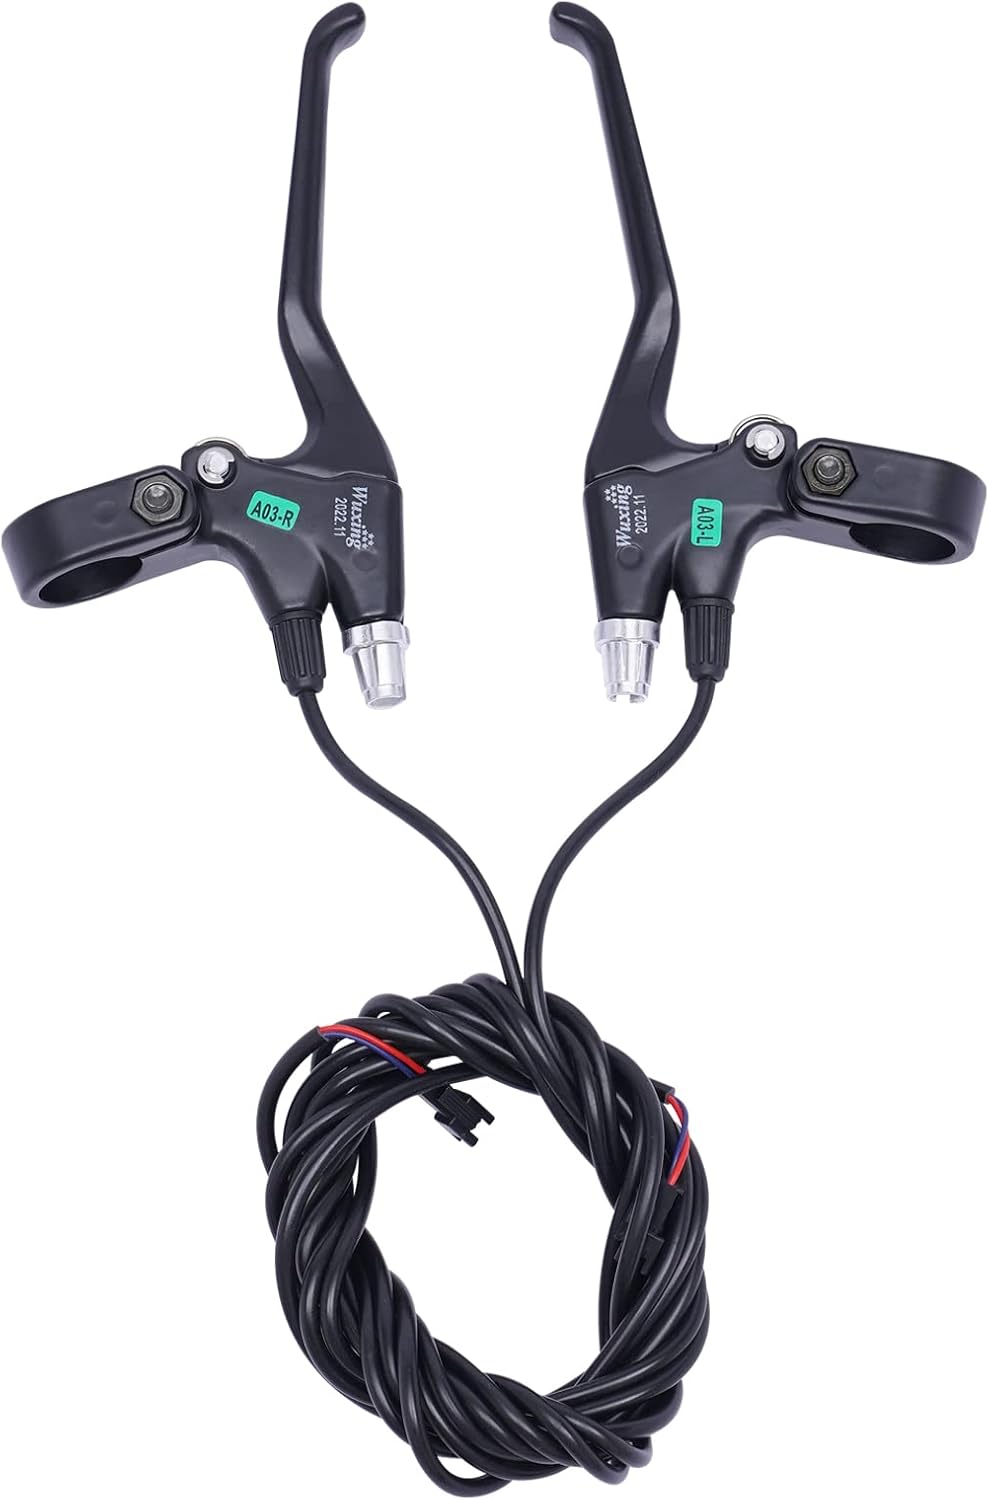
Image: Power-off brake levers.
5.4 Install Pedal Assist Sensor (PAS)
- Install the pedal assist sensor (PAS) on the crank arm near the bottom bracket. Ensure it is correctly aligned with the magnet disc (if separate).
5.5 Connect the Controller and Wiring
- Mount the controller in a secure location, ideally within the provided controller bag.
- Connect all wires to the controller. Important: Match the colors of the wires to the corresponding ports on the controller. Incorrect connections can damage the controller.
- Connect the motor cord from the front wheel to the controller.
- Connect the display, throttle, brake levers, and PAS to the controller.
- Use the winding pipe and zip ties for neat and secure cable management, ensuring no cables interfere with moving parts.
- Connect your 48V battery (not included) to the controller.

Image: LCD display and controller with various wire connections.
6. Operating Instructions
6.1 Powering On/Off
- To power on the system, press and hold the power button on the LCD display.
- To power off, press and hold the power button again.
6.2 Using the LCD Display
The LCD display provides real-time information about your ride, including speed, battery level, and pedal assist level.

Image: LCD display showing operational data.
6.3 Pedal Assist System (PAS)
- The kit features 5-gear speed adjustment. Use the buttons on the display or thumb control to cycle through the pedal assist levels (1-5). Higher numbers provide more motor assistance.
- The motor will engage when you start pedaling, providing assistance based on the selected gear.
6.4 Thumb Throttle
- The thumb knob handle acts as a throttle. Pressing it will provide motor power independently of pedaling.
6.5 Cruise Function
- While maintaining a constant speed, press the designated button (usually on the display or thumb control) for 2-3 seconds to activate the cruise function. The bike will maintain its current speed without further throttle input or pedaling.
- To deactivate cruise control, apply the brakes or briefly use the throttle.
6.6 Power-off Brake Levers
- The brake levers are equipped with a power-off function. When either brake lever is engaged, power to the motor is immediately cut, ensuring safe and responsive braking.
7. Maintenance
Regular maintenance ensures the longevity and safe operation of your electric bike conversion kit.
- Cleanliness: Keep the motor, controller, and display clean and free from dirt and moisture. Use a damp cloth for cleaning; avoid high-pressure washing.
- Connections: Periodically check all electrical connections to ensure they are secure and free from corrosion.
- Cables: Inspect all cables for fraying, cuts, or damage. Replace damaged cables immediately.
- Brakes: Ensure your bicycle's brakes are in good working condition and properly adjusted. The power-off function relies on functional brake levers.
- Tires: Maintain correct tire pressure for optimal performance and safety (tires not included with kit).
- Battery Care: Follow the manufacturer's instructions for your specific 48V battery (not included) regarding charging, storage, and general care.
8. Troubleshooting
If you encounter issues with your conversion kit, refer to the following common problems and solutions:
| Problem | Possible Cause | Solution |
|---|---|---|
| No power to the hub motor |
|
|
| Display not turning on |
|
|
| Motor not assisting when pedaling |
|
|
| Throttle not working |
|
|
For issues not listed here or if troubleshooting steps do not resolve the problem, please contact BounceyCart customer support.
9. Warranty and Support
9.1 Warranty Information
This BounceyCart Electric Bike Conversion Kit comes with a 1-year warranty from the date of purchase. The warranty covers manufacturing defects and malfunctions under normal use. It does not cover damage caused by improper installation, misuse, accidents, or unauthorized modifications.
9.2 Customer Support
For technical assistance, warranty claims, or any questions regarding your BounceyCart Electric Bike Conversion Kit, please contact BounceyCart customer support through the retailer where you purchased the product or refer to the contact information provided in your purchase documentation.