Important Safety Instructions
Please read and save these important safety instructions before using this fan. Failure to follow these instructions may result in electric shock, fire, or serious personal injury.
- Always unplug the fan before cleaning, assembling, or disassembling parts.
- Do not operate any fan with a damaged cord or plug. Discard fan or return to an authorized service facility for examination and/or repair.
- Do not run cord under carpeting. Do not cover cord with throw rugs, runners, or similar coverings. Arrange cord away from traffic area and where it will not be tripped over.
- Do not insert or allow fingers or foreign objects to enter any ventilation or exhaust opening as this may cause an electric shock or fire, or damage the fan.
- Do not use outdoors. This fan is intended for indoor use only.
- Place the fan on a stable, flat surface to prevent it from tipping over.
- Keep children and pets away from the fan during operation.
Product Overview
The PELONIS 16'' Oscillating Pedestal Standing Fan is designed to provide powerful and quiet air circulation for various indoor spaces. It features a durable AC motor, three-speed settings, 90° oscillation, adjustable height, and a convenient remote control with a timer function.

Image: Two PELONIS 16-inch oscillating pedestal fans, black in color, shown with their respective remote controls. The fans feature a round base, an adjustable pole, and a circular fan head with a protective grille.
Assembly and Setup
Follow these steps to assemble your PELONIS Pedestal Fan:
- Step 1: Attach the Base. Secure the fan pole to the round base using the provided screw and washer. Ensure it is firmly tightened for stability.

Image: A hand securing the fan pole into the circular base from underneath.
- Step 2: Connect the Pole to the Motor Housing. Insert the top part of the pole into the motor housing unit. Tighten the securing screw on the motor housing to fix it in place.
Image: A hand inserting the pole into the fan's main body and tightening a screw.
- Step 3: Install the Rear Grille. Place the rear grille onto the motor housing, aligning the notches. Secure it with the provided locking nut.
Image: A hand attaching the rear protective grille to the fan motor housing.
- Step 4: Attach the Fan Blades. Slide the fan blades onto the motor shaft, ensuring they are properly seated. Secure them with the blade cap.
Image: A hand securing the fan blades onto the motor shaft.
- Step 5: Install the Front Grille. Place the front grille over the rear grille, aligning the clips. Secure the two grilles together using the clips or screws provided.
Image: A hand attaching the front protective grille to the fan assembly.
- Step 6: Power Connection. Plug the fan into a standard electrical outlet.
Operating Instructions
Your PELONIS Pedestal Fan can be operated using the control panel on the fan unit or the included remote control.
Control Panel and Remote Functions:
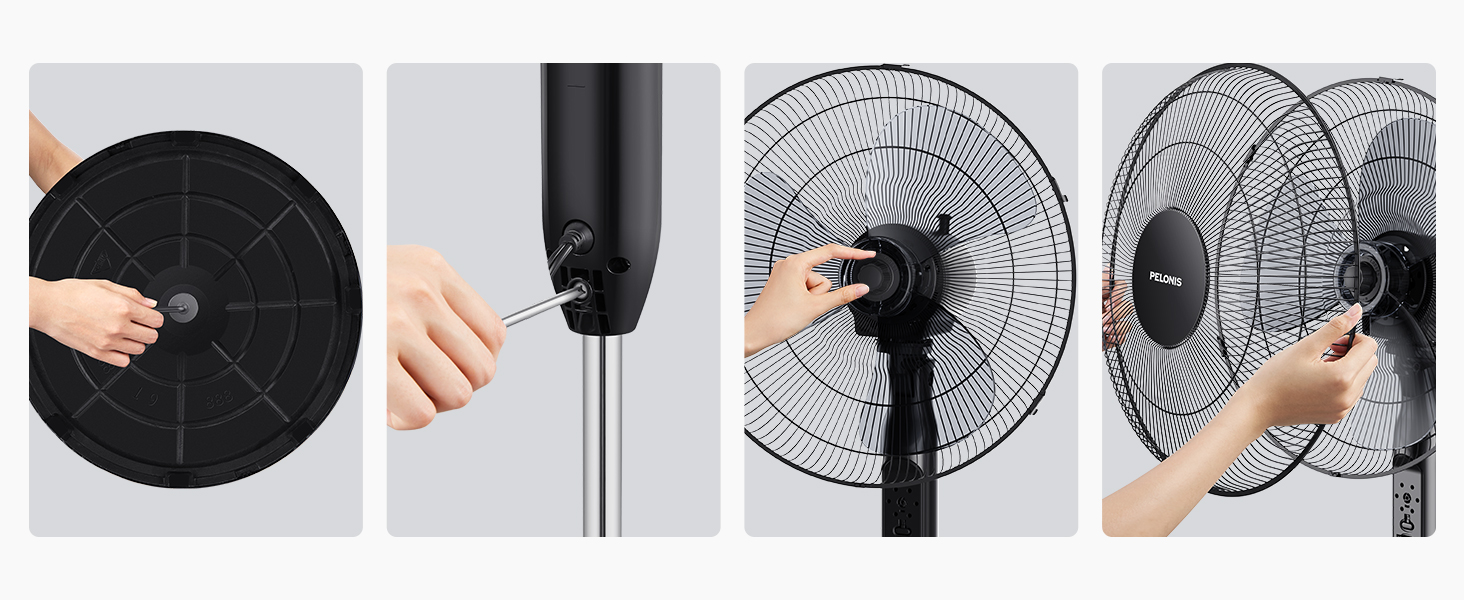
Image: A detailed view of the fan's control panel with buttons for Speed, Timer, and On/Off, alongside the remote control.
- ON/OFF Button: Press to turn the fan on or off.
- SPEED Button: Press repeatedly to cycle through the three speed settings: Low, Medium, and High.
- TIMER Button: Press repeatedly to set the automatic shut-off timer for 1 hour, 2 hours, 4 hours, or a combined 7 hours.
- Oscillation: The fan features a 90° wide-range oscillation. To activate or deactivate oscillation, press the dedicated oscillation button on the control panel (if available) or use the remote control.
- Adjustable Height: Loosen the height-adjustable knob on the pole, adjust the fan to your desired height, and then tighten the knob securely.
- Adjustable Tilt: Manually adjust the fan head up or down to direct airflow.
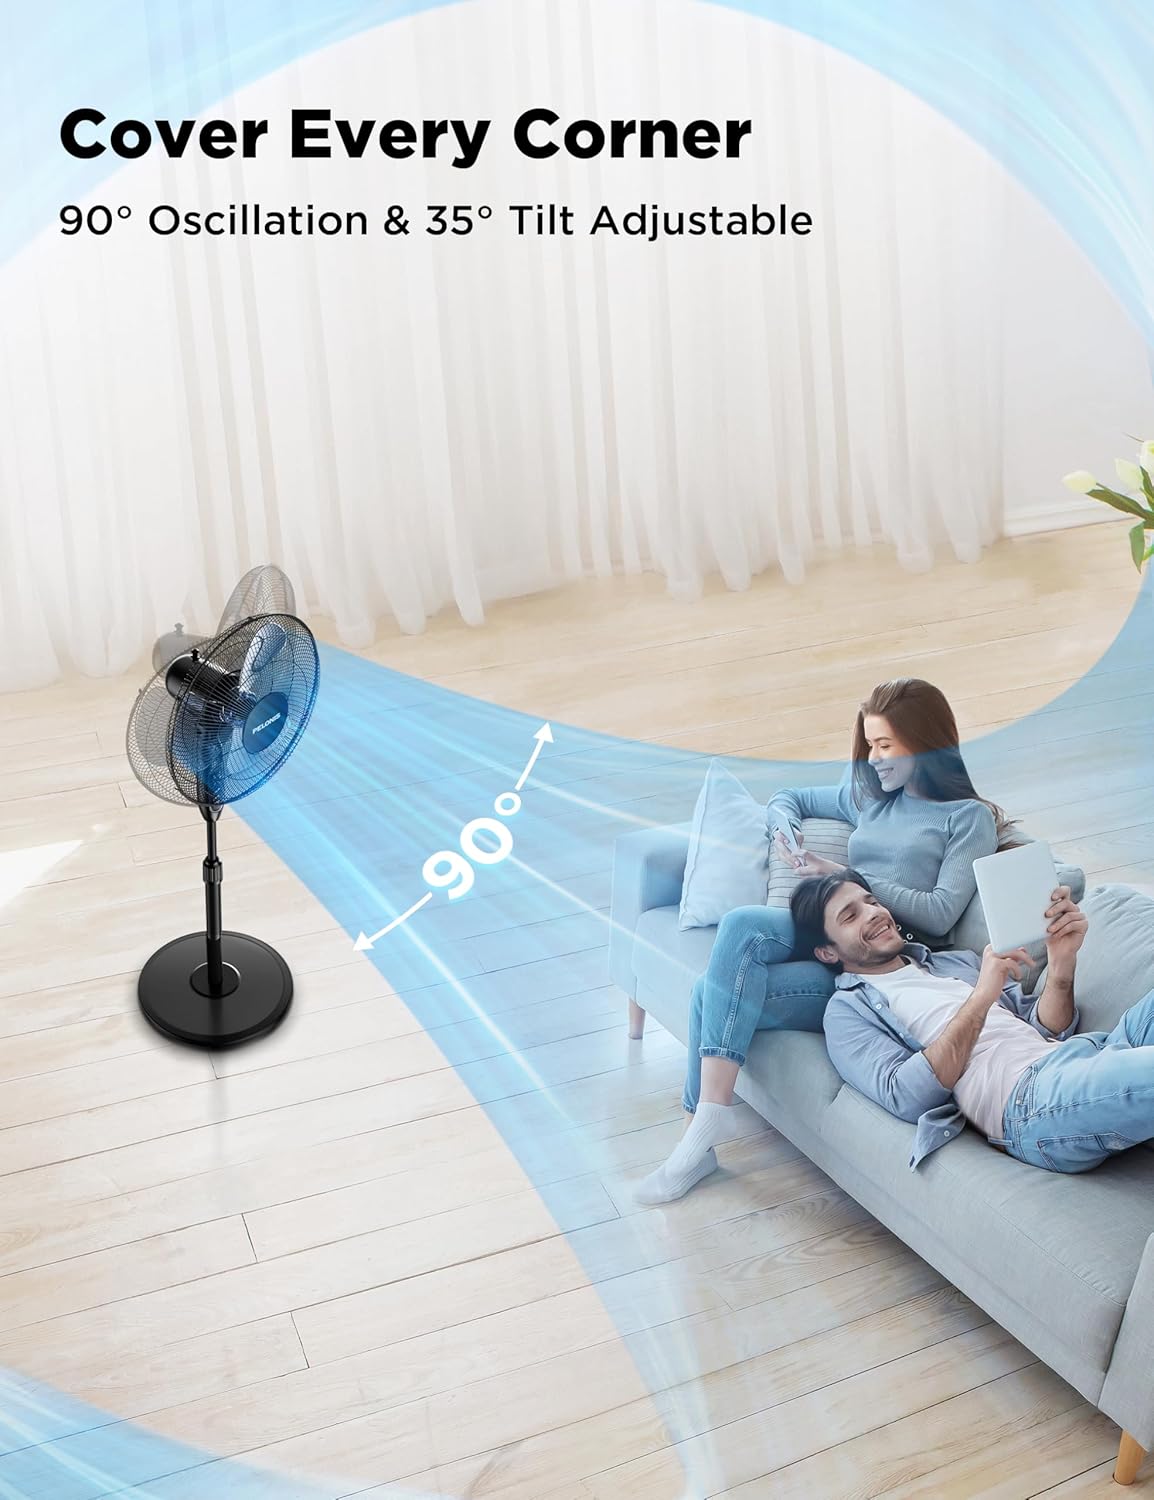
Image: A PELONIS fan illustrating its 90-degree horizontal oscillation and 35-degree vertical tilt capabilities, showing airflow covering a wide area.

Image: A PELONIS fan demonstrating its three adjustable speed settings, visually representing the airflow for Low, Medium, and High.
Maintenance
Regular maintenance helps ensure the longevity and optimal performance of your fan.
- Cleaning: Always unplug the fan from the power outlet before cleaning. Use a soft, damp cloth to wipe the exterior surfaces. Do not use abrasive cleaners or harsh chemicals, as they may damage the fan's finish.
- Grille Cleaning: The front and rear grilles can accumulate dust. Periodically remove the front grille (refer to assembly instructions in reverse) and gently wipe the blades and grilles with a soft cloth or use a vacuum cleaner with a brush attachment.
- Storage: When not in use for extended periods, store the fan in a cool, dry place, preferably in its original packaging to protect it from dust and damage.
Troubleshooting
If your fan is not operating correctly, please check the following common issues and solutions:
| Problem | Possible Cause | Solution |
|---|---|---|
| Fan does not turn on. | No power supply; Fan not plugged in; Power outlet not working. | Ensure the fan is securely plugged into a working electrical outlet. Check the circuit breaker. |
| Weak or no airflow. | Fan speed set too low; Obstruction in front/rear grille; Dirty blades. | Increase the fan speed setting. Remove any obstructions. Clean the fan blades and grilles. |
| Fan is noisy during operation. | Loose parts; Fan not on a stable surface; Obstruction. | Check that all assembly screws are tightened. Place the fan on a flat, stable surface. Ensure no objects are interfering with the blades. |
| Remote control not working. | Batteries are dead or incorrectly inserted; Remote not pointed at receiver. | Replace the batteries (2x AAA, not included). Ensure the remote is pointed directly at the fan's control panel. |
Specifications
| Feature | Detail |
|---|---|
| Brand | PELONIS |
| Model Name | PFS16R0APK2 |
| Product Dimensions | 17.9"D x 15"W x 48.4"H |
| Item Weight | 28.1 pounds |
| Color | Black |
| Power Source | AC |
| Number of Power Levels | 3 (Low, Medium, High) |
| Noise Level | 45 dB |
| Special Features | Adjustable Height, Adjustable Tilt, Remote Controlled, Timer (7H) |
| Control Method | Remote, Manual Buttons |
| Blade Material | Plastic |
| Indoor/Outdoor Usage | Indoor |
| Included Components | Cord, Remote |


