
1. Introduction
The GZLMMY P21 is a versatile Car Head Up Display (HUD) that integrates OBD2, GPS, and smart slope meter functions into a single device. Designed for universal compatibility, it provides essential driving data directly in the driver's line of sight, enhancing safety and convenience. This manual provides detailed instructions for the installation, operation, and maintenance of your P21 HUD.
2. Key Features
- Three-in-One System: Combines OBD2, GPS, and smart slope meter functionalities.
- Dual System Compatibility: Supports both OBD2 and GPS modes. OBD2 mode is compatible with most vehicles manufactured after 2008. GPS mode is universally compatible with all vehicles.
- Multiple Display Interfaces: Offers 11 distinct display interfaces for customizable data presentation.
- Atmosphere Light: Features an ambient light with red, blue, and purple color options, adjustable brightness, and an alarm function that flashes red during abnormal driving conditions.
- Electronic Slope Meter: Monitors real-time pitch and tilt angles of the vehicle, providing crucial information for off-road driving.
- Plug & Play Operation: Automatically powers on and off with the vehicle's engine.
- Flexible Installation: Can be installed on the dashboard or inverted on the windshield.
- High-Precision GPS: Built-in GPS+Beidou and Galileo chip modules receive signals from up to 32 satellites for accurate altitude, time, latitude, longitude, and compass data.
3. Package Contents
Please verify that all items are present in the package:
- 1 x GZLMMY P21 HUD Car Head Up Display
- 1 x OBD Cable
- 1 x USB Cable
- 1 x Bracket
- 1 x User Manual (this document)
- 1 x 3M Sticker
4. Setup and Installation
The P21 HUD offers two primary installation methods:
4.1 Device Overview and Connections

Image: Diagram illustrating the GZLMMY P21 HUD with its dimensions, power button, increase/decrease/setting buttons, bracket interface, photosensitive component, OBD interface, and buzzer.
Familiarize yourself with the device's buttons and ports as shown in the diagram above. The bracket interface is located on the bottom, and the OBD interface is on the rear.
4.2 Power Connection
- For OBD2 Mode: Locate your vehicle's OBD2 port (typically under the dashboard on the driver's side). Connect the provided OBD cable to the HUD and then to the vehicle's OBD2 port.
- For GPS Mode: If your vehicle does not support OBD2 protocol or you prefer GPS mode, connect the provided USB cable to the HUD and then to a USB power source in your vehicle (e.g., car charger, USB port).
4.3 Mounting the Device
The P21 HUD comes with a split bracket that can be rotated 360 degrees, allowing for flexible placement.
- Dashboard Installation: Attach the bracket to the bottom of the HUD. Use the 3M sticker to secure the bracket firmly onto your vehicle's dashboard. Ensure the device is positioned where it does not obstruct your view of the road.
- Windshield Installation (Inverted): The device can also be mounted inverted on the windshield. Attach the bracket and secure it to the windshield using the 3M sticker. The display can be rotated 180 degrees in the settings to ensure correct orientation.
5. Operating Instructions
Once connected, the P21 HUD will automatically power on when the vehicle starts and power off when the engine is turned off. The device will automatically detect the connection type (OBD2 or GPS) and display relevant data.
5.1 Basic Operation
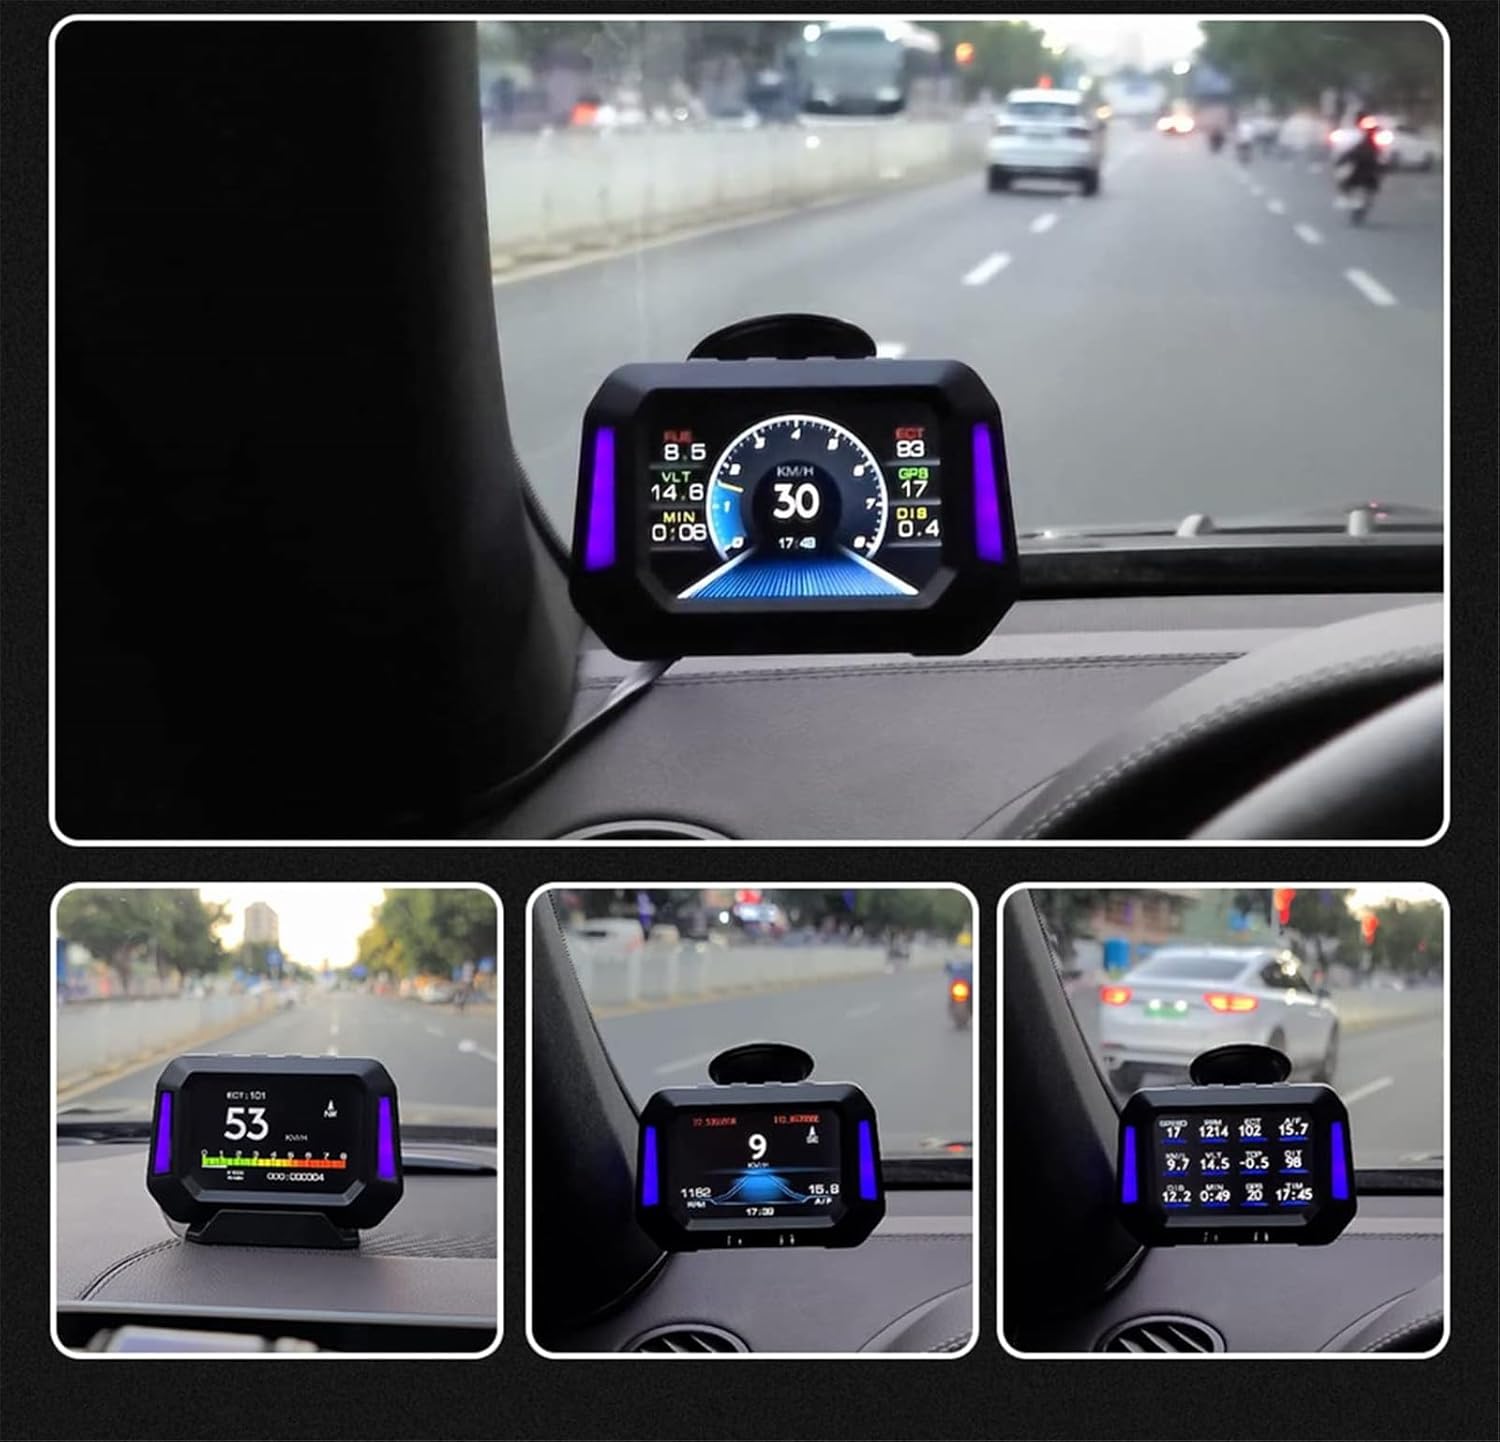
Image: The GZLMMY P21 HUD mounted on a dashboard, showing real-time vehicle speed, RPM, and other data during driving.
- Power Button: Located on the side of the device. Press and hold to manually power on/off.
- Increase/Decrease Buttons: Used to navigate through menus, adjust settings, or switch display interfaces.
- Setting Button: Used to enter the settings menu, confirm selections, or switch between different data displays.
5.2 Displayed Information
The P21 HUD can display a wide range of vehicle information, including but not limited to:
- Vehicle Speed (MPH/KMH)
- Engine RPM
- Water Temperature
- Voltage
- Fuel Consumption
- Clock
- Travel Time & Distance
- Altitude
- Travel Direction (Compass)
- Up/Down Slope Angle
- Left/Right Tilt Angle
- Acceleration Test Results
- Brake Test Results
5.3 Alarm Functions
The device includes various alarm functions to alert the driver to potential issues:
- Water Temperature Warning
- Over-speed Alarm
- RPM Alarm
- Voltage Alarm
- Overworked Driving Alarm
- Tilt Alarm
- Vehicle Failure Warning (OBD2 mode)
6. Display Interfaces
The P21 HUD offers 11 different display interfaces, allowing you to customize the information presented. Use the 'Setting' or 'Increase/Decrease' buttons to cycle through these interfaces and select your preferred view.

Image: A collage demonstrating the 11 distinct display interfaces of the GZLMMY P21 HUD, each presenting vehicle data in a different layout.
7. Ambient Light Function
The P21 HUD features an ambient light bar that enhances visibility and provides visual alerts.

Image: The GZLMMY P21 HUD demonstrating its ambient light feature, showing blue, red, and purple light options, and indicating how the light changes during alarms.
- Normal Operation: The ambient light automatically adjusts its brightness based on the environment. You can choose between blue, red, or purple colors.
- Alarm Indication: During an alarm condition (e.g., over-speed, high water temperature), the ambient light will flash red and an audible beep will sound, drawing immediate attention to the warning.
- Customization: The ambient light can be configured to change color based on RPM, vehicle speed, or remain constantly bright with a user-selected color. It can also be turned off if desired.
8. Troubleshooting
If you encounter issues with your P21 HUD, consider the following:
- No Display/Power: Ensure the OBD or USB cable is securely connected to both the HUD and the vehicle's power source. Check if the vehicle's ignition is on.
- OBD2 Data Not Displaying: If your vehicle's OBD2 protocol is incompatible, the device will automatically switch to GPS mode. Ensure the OBD cable is correctly inserted. For vehicles older than 2008, OBD2 compatibility may be limited.
- Inaccurate GPS Data: Ensure the device has a clear view of the sky to receive satellite signals. Avoid placing it under metallic objects that may interfere with GPS reception.
- Incorrect Speed Reading: The speed display can usually be calibrated within the device settings to match your vehicle's speedometer. Refer to the on-screen menu for calibration options.
- Alarm Sounds Continuously: Check the displayed parameters to identify the cause of the alarm (e.g., high water temperature, over-speed). Adjust driving behavior or address vehicle issues as necessary. Alarm thresholds can often be adjusted in the settings.
- Clearing Fault Codes: In OBD2 mode, the device may allow you to read and clear vehicle fault codes. Consult your vehicle's manual or a qualified mechanic if persistent fault codes appear.
9. Specifications
| Specification | Detail |
|---|---|
| Model Number | P21 |
| Unit Size | 11.5 x 8.2 cm (4.52 x 3.23 inches) |
| Dimensions (L x W x H) | 13.21 x 9.14 x 10.92 cm |
| Item Weight | 270 g (0.5 KG) |
| Color | Black |
| Display Interfaces | 11 |
| Material | Plastic |
| Measurement Accuracy | +/-5% |
| Connectivity | OBD2, GPS, USB |
| Manufacturer | GZLMMY |
| UPC | 799748218197 |
10. Maintenance
To ensure the longevity and optimal performance of your P21 HUD:
- Cleaning: Use a soft, dry cloth to clean the display screen and device exterior. Avoid abrasive cleaners or solvents that may damage the surface.
- Temperature: Do not expose the device to extreme temperatures (hot or cold) for extended periods, as this may affect its electronic components.
- Cable Management: Ensure all cables are routed safely and are not pinched or exposed to excessive wear.
- Storage: If storing the device for a long period, disconnect it from the vehicle's power source.
11. Warranty and Support
For warranty information, please refer to the documentation included with your purchase or contact GZLMMY customer support directly. If you require technical assistance or have questions not covered in this manual, please reach out to the manufacturer's support channels.