
1. Introduction
This manual provides detailed instructions for the installation, operation, and maintenance of your ANTSKU 5-Step Wrought Iron Outdoor Handrail. Please read this manual thoroughly before installation and use to ensure proper function and safety. This handrail is designed to provide stable support for 4 or 5 steps on various outdoor surfaces such as concrete, brick, or wood.
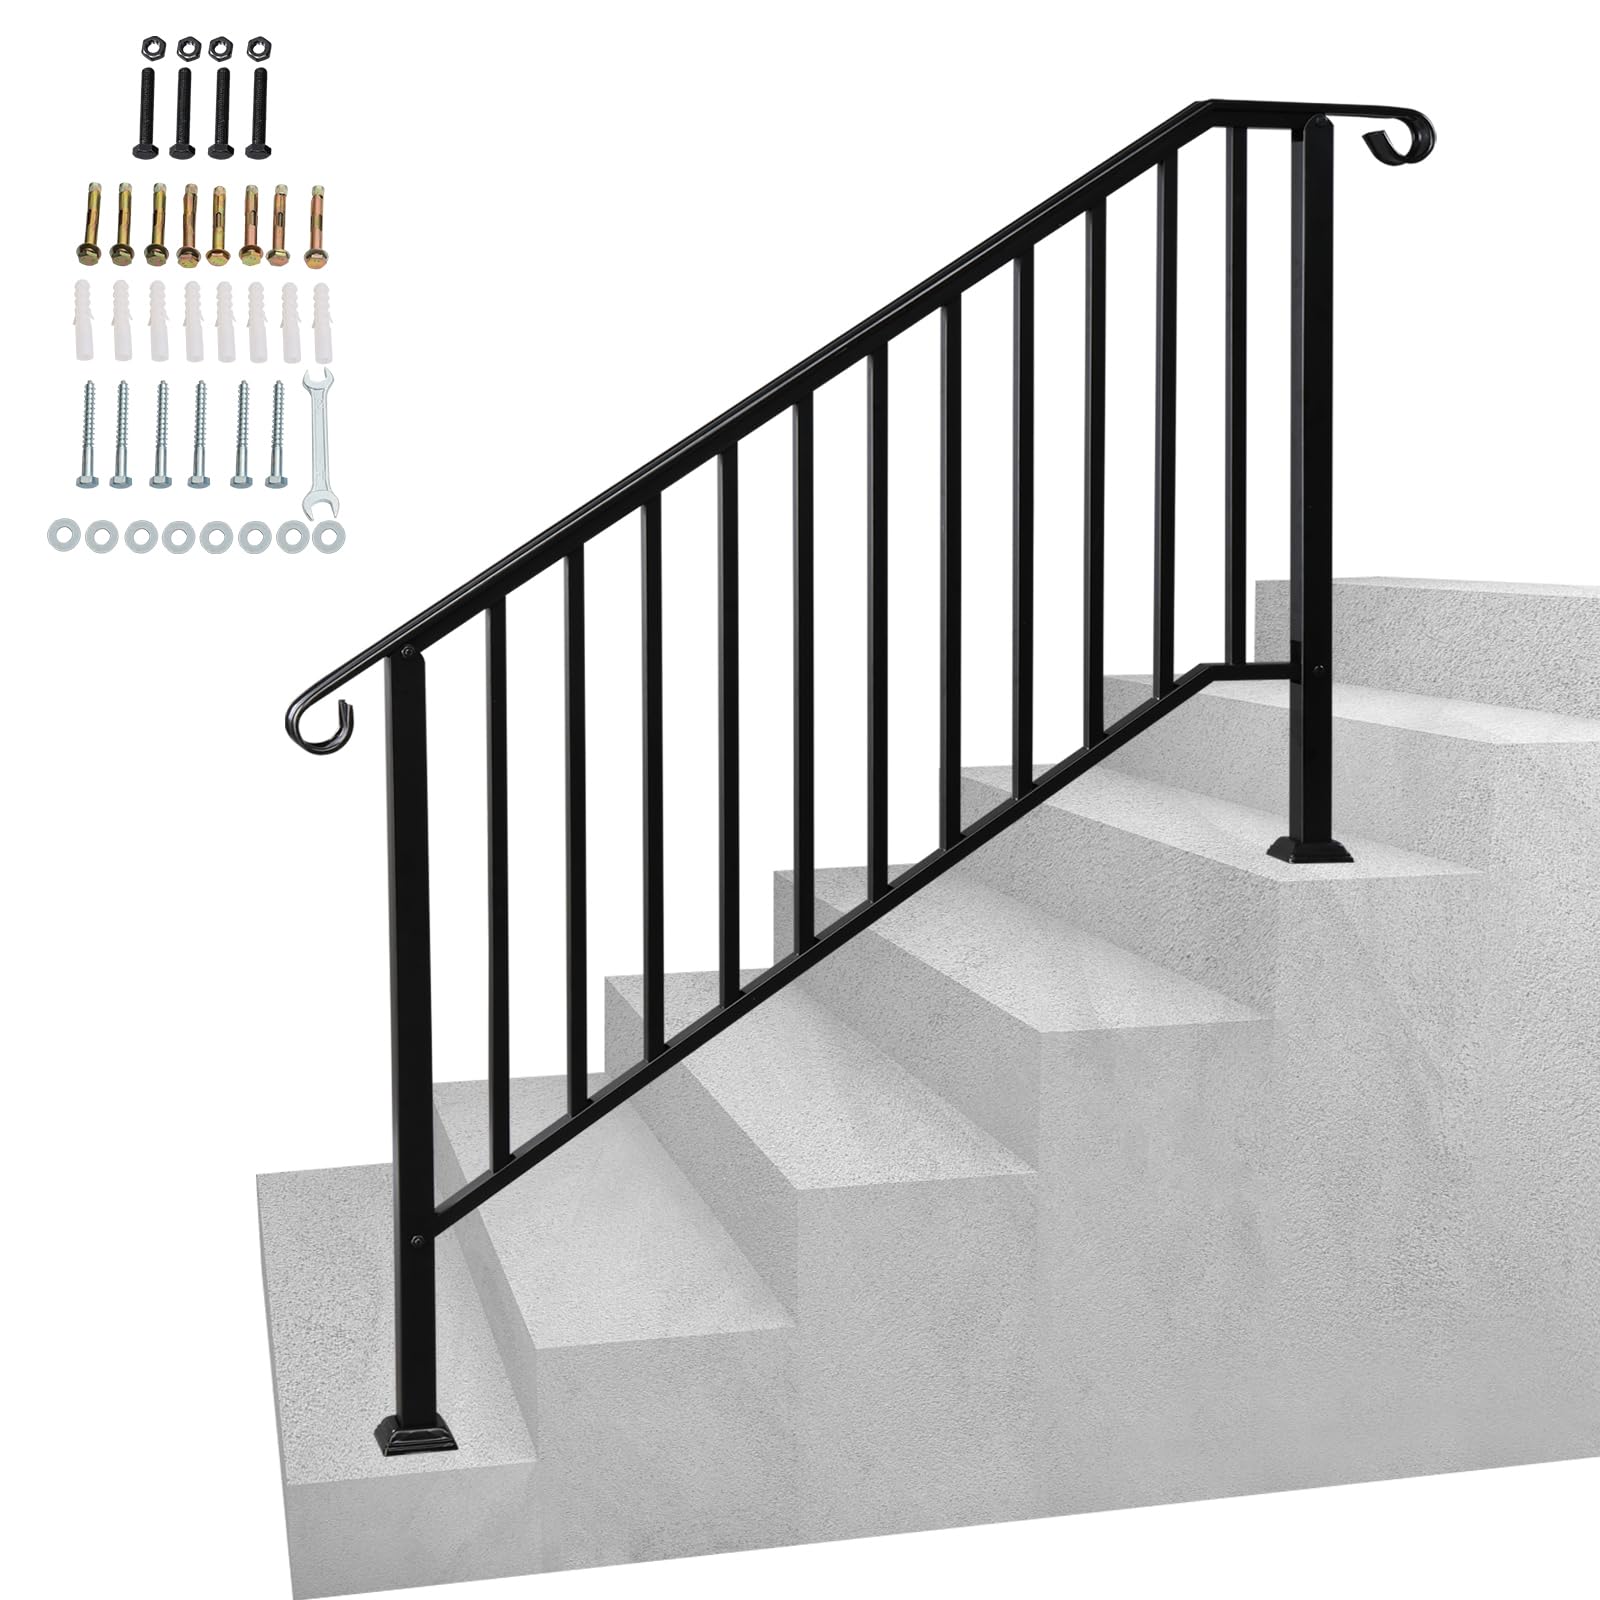
Image: ANTSKU 5-Step Wrought Iron Outdoor Handrail installed on brick steps, providing support.
2. Product Features
- Flexible Height Adjustment: Designed to fit 4 or 5 steps with a maximum step height of 32 inches.
- Durable Construction: Made from high-quality wrought iron, ensuring long-term durability and stability in various weather conditions.
- Ergonomic Design: Features a comfortable grip for enhanced safety and ease of use.
- Easy Installation: Includes a complete installation kit and detailed instructions for quick assembly.
- Versatile Application: Suitable for concrete, brick, or wooden steps on porches, balconies, gardens, and other outdoor areas.
- Stylish Finish: Black powder-coated surface with a classic curly design for both practicality and aesthetic appeal.

Image: Detailed view of the handrail's matte finish, sturdy base, non-slip grip, and secure screw connections.
3. Specifications
| Brand | ANTSKU |
| Model Number | Handrail-5 |
| Material | Wrought Iron (Cast Iron) |
| Color | Black |
| Finish Type | Powder Coated |
| Item Weight | 21.5 Pounds |
| Weight Capacity | Maximum 300 Pounds |
| Max Step Height | 32 inches |
| Distance Between Posts | 37.4 inches |
| Grip Surface Length | 52.8 inches + 11.4 inches (total 64.2 inches) |
| Grip Surface Width | 2 inches |
| Upper Post Height | 38.2 inches |

Image: Dimensional diagram of the handrail, illustrating key measurements.
4. Package Contents
Please check the package to ensure all components are present and undamaged before beginning installation.
- Handrail sections (main rail, vertical balusters, posts)
- Mounting hardware (screws, bolts, washers, anchors)
- Base trims/covers
- Wrench (for assembly)
- Installation Manual (this document)

Image: All components of the handrail laid out, including the main rail, balusters, posts, and hardware.
5. Safety Information
Read and understand all safety warnings and instructions before installing and using this product. Failure to follow these instructions may result in injury or property damage.
- Always wear appropriate safety gear, including eye protection, during installation.
- Ensure the mounting surface is structurally sound and can support the handrail and anticipated loads.
- Do not overtighten screws or bolts, as this may damage the material.
- Regularly inspect the handrail for any signs of wear, damage, or loose connections. Tighten fasteners as needed.
- Keep children and pets away from the installation area.
- This handrail is designed for support; do not use it for climbing or other unintended purposes.
6. Installation (Setup)
Follow these steps for a secure and proper installation of your ANTSKU handrail. It is recommended to have a second person assist during certain steps.
- Assemble Handrail Sections: Before mounting, loosely assemble the handrail sections. Do not fully tighten screws until all parts are connected and the handrail is positioned correctly. This allows for minor adjustments.
- Positioning: Place the assembled handrail on your steps to determine the desired mounting location. Ensure it is level and provides adequate support. Mark the positions for drilling holes on the mounting surface through the base plates.
- Drill Holes: Using an electric drill, create 12mm holes at the marked positions. The depth of the holes should match the length of the provided anchors.
- Insert Anchors: Insert the appropriate anchors into the drilled holes.
- Mount with Bolts: Align the handrail base plates with the drilled holes and secure the handrail using the provided bolts and washers. Tighten all fasteners firmly.
- Place Base Trims: Once the handrail is securely mounted, place the decorative base trims over the fasteners at the bottom of the posts to conceal them and provide a finished look.
Important Note: Do not fully tighten any screws until all components are assembled and the handrail is in its final position. This allows for necessary adjustments during installation.

Image: Visual guide for the installation process, from marking positions to securing the base trim.
7. Operating (Usage)
The ANTSKU 5-Step Wrought Iron Outdoor Handrail is designed to provide stable support and enhance safety when ascending or descending steps. It is particularly useful in wet, icy, or uneven conditions.
- Grasp the handrail firmly for balance and support.
- Use the handrail to assist individuals who may have difficulty with stairs, such as seniors, children, or those with mobility challenges.
- Ensure the handrail is free from obstructions before use.

Image: Handrail providing support on outdoor stone steps.

Image: Handrail installed on wooden steps, offering stability.
8. Maintenance
Proper maintenance will extend the life and ensure the continued safety of your handrail.
- Regular Cleaning: Wipe down the handrail with a damp cloth to remove dirt and debris. For stubborn grime, use a mild soap solution and rinse thoroughly. Avoid abrasive cleaners.
- Inspect Fasteners: Periodically check all screws and bolts to ensure they are tight. Retighten any loose connections to maintain stability.
- Check for Damage: Inspect the handrail for any signs of rust, chips in the powder coating, bends, or cracks. Address any damage promptly to prevent further deterioration.
- Drainage: Ensure that water does not collect inside the posts, especially in freezing climates. If water accumulation is observed, consider drilling small drainage holes (e.g., 1/8 inch) at the very bottom of the posts or sealing the top openings to prevent water entry.
9. Troubleshooting
| Problem | Possible Cause | Solution |
|---|---|---|
| Handrail feels wobbly or not sturdy. | Loose mounting bolts or inadequate anchors. | Ensure all mounting bolts are fully tightened. If the issue persists, consider using stronger anchors or consulting a professional for installation on your specific surface. |
| Water collecting in posts, leading to potential damage in freezing weather. | Openings at the top or bottom of posts allowing water entry and retention. | Inspect the top and bottom of the posts. If water is entering from the top, consider sealing the top opening. If water is collecting at the bottom, drill small drainage holes (e.g., 1/8 inch) at the very bottom of the posts to allow water to escape. |
| Bolts holding railing to posts protrude and catch fingers. | Incorrect bolt length or design. | If possible, replace protruding bolts with shorter ones that sit flush. Alternatively, cover the exposed bolt ends with protective caps or a suitable sealant to prevent injury. |
| Scratches on the surface during installation. | Contact with tools or abrasive surfaces during assembly. | Handle components carefully during installation. Use protective padding or cloths when placing parts on hard surfaces. Minor scratches can be touched up with black rust-inhibiting paint. |
10. Warranty and Support
For specific warranty information or technical support, please refer to the documentation included with your purchase or contact ANTSKU customer service directly. Keep your purchase receipt as proof of purchase.
Contact Information: Please visit the official ANTSKU website or refer to your purchase platform for the most current customer support contact details.