1. Introduction
Thank you for choosing the Yuwei Wireless Backup Camera. This manual provides essential information for the proper installation, operation, and maintenance of your new device. Please read this manual thoroughly before using the product to ensure safe and optimal performance. Keep this manual for future reference.
2. Product Overview
The Yuwei Wireless Backup Camera is designed to enhance vehicle safety by providing a clear view of the area behind your vehicle. It features a 1080p resolution camera with a 170-degree wide-angle view, ensuring comprehensive coverage. The wireless design simplifies installation, and its robust construction allows it to withstand various environmental conditions.
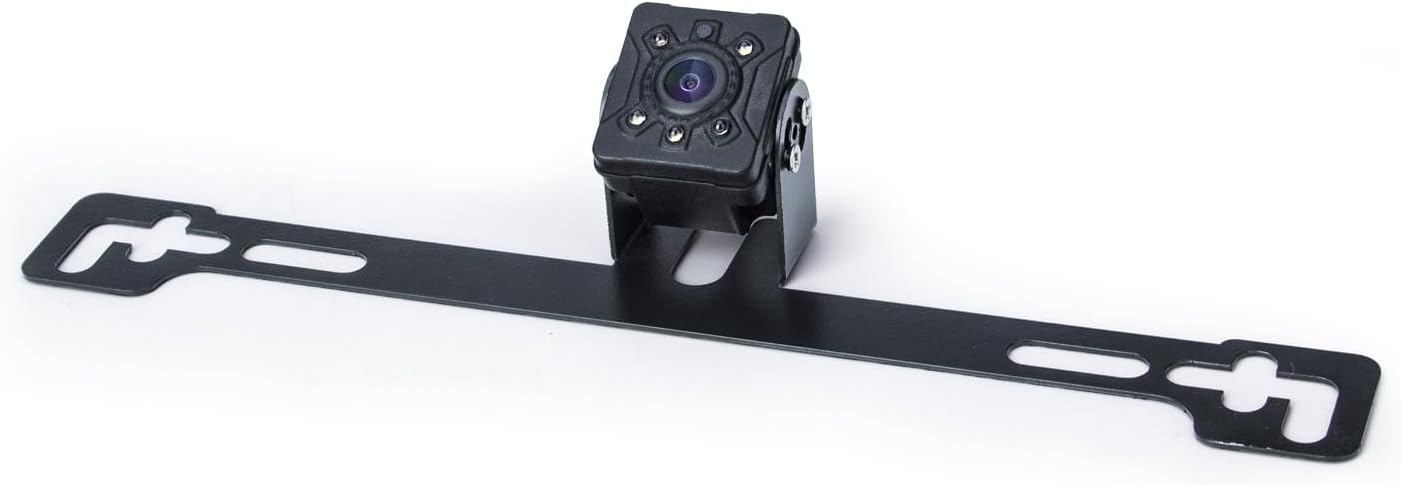
Figure 2.1: Yuwei Wireless Backup Camera with License Plate Bracket.
This image displays the main components of the Yuwei Wireless Backup Camera system, including the camera unit and its integrated license plate mounting bracket. The camera is compact and designed for discreet installation.
2.1 Package Contents

Figure 2.2: Package Contents.
The package includes the wireless backup camera with its mounting bracket, power cables, connection accessories (such as wire connectors), mounting screws, and an instruction leaflet. A desiccant packet is also included to protect against moisture.
2.2 Key Features
- Wireless Connectivity: Simplifies installation by eliminating the need for long video cables.
- High Definition Video: Captures clear 1080p resolution video.
- Wide Viewing Angle: 170-degree real angle of view for comprehensive coverage.
- Durable Construction: Zinc metal material for anti-vibration and anti-corrosion.
- IP69 Waterproof Rating: Ensures reliable operation in wet conditions, including car washes.
- Extreme Temperature Resistance: Operates effectively in temperatures from -4°F (-20°C) to 158°F (70°C).
- Night Vision: Provides clear visibility up to 20 feet in low-light conditions.
- CMOS Optical Sensor: Advanced sensor technology for improved image quality.
3. Setup and Installation
Proper installation is crucial for the optimal performance of your wireless backup camera. Follow these steps carefully.
3.1 Pre-Installation Check
- Ensure all package contents are present as listed in Section 2.1.
- Verify the camera and cables are free from visible damage.
- Familiarize yourself with your vehicle's wiring system, particularly the tail lights or reverse lights.
3.2 Mounting the Camera
The camera is designed for surface mounting, typically near the license plate. Two common installation methods are available:
- Method 1 (Above License Plate): Mount the camera bracket directly above your vehicle's license plate using the provided screws.
- Method 2 (Below License Plate): Mount the camera bracket directly below your vehicle's license plate using the provided screws.
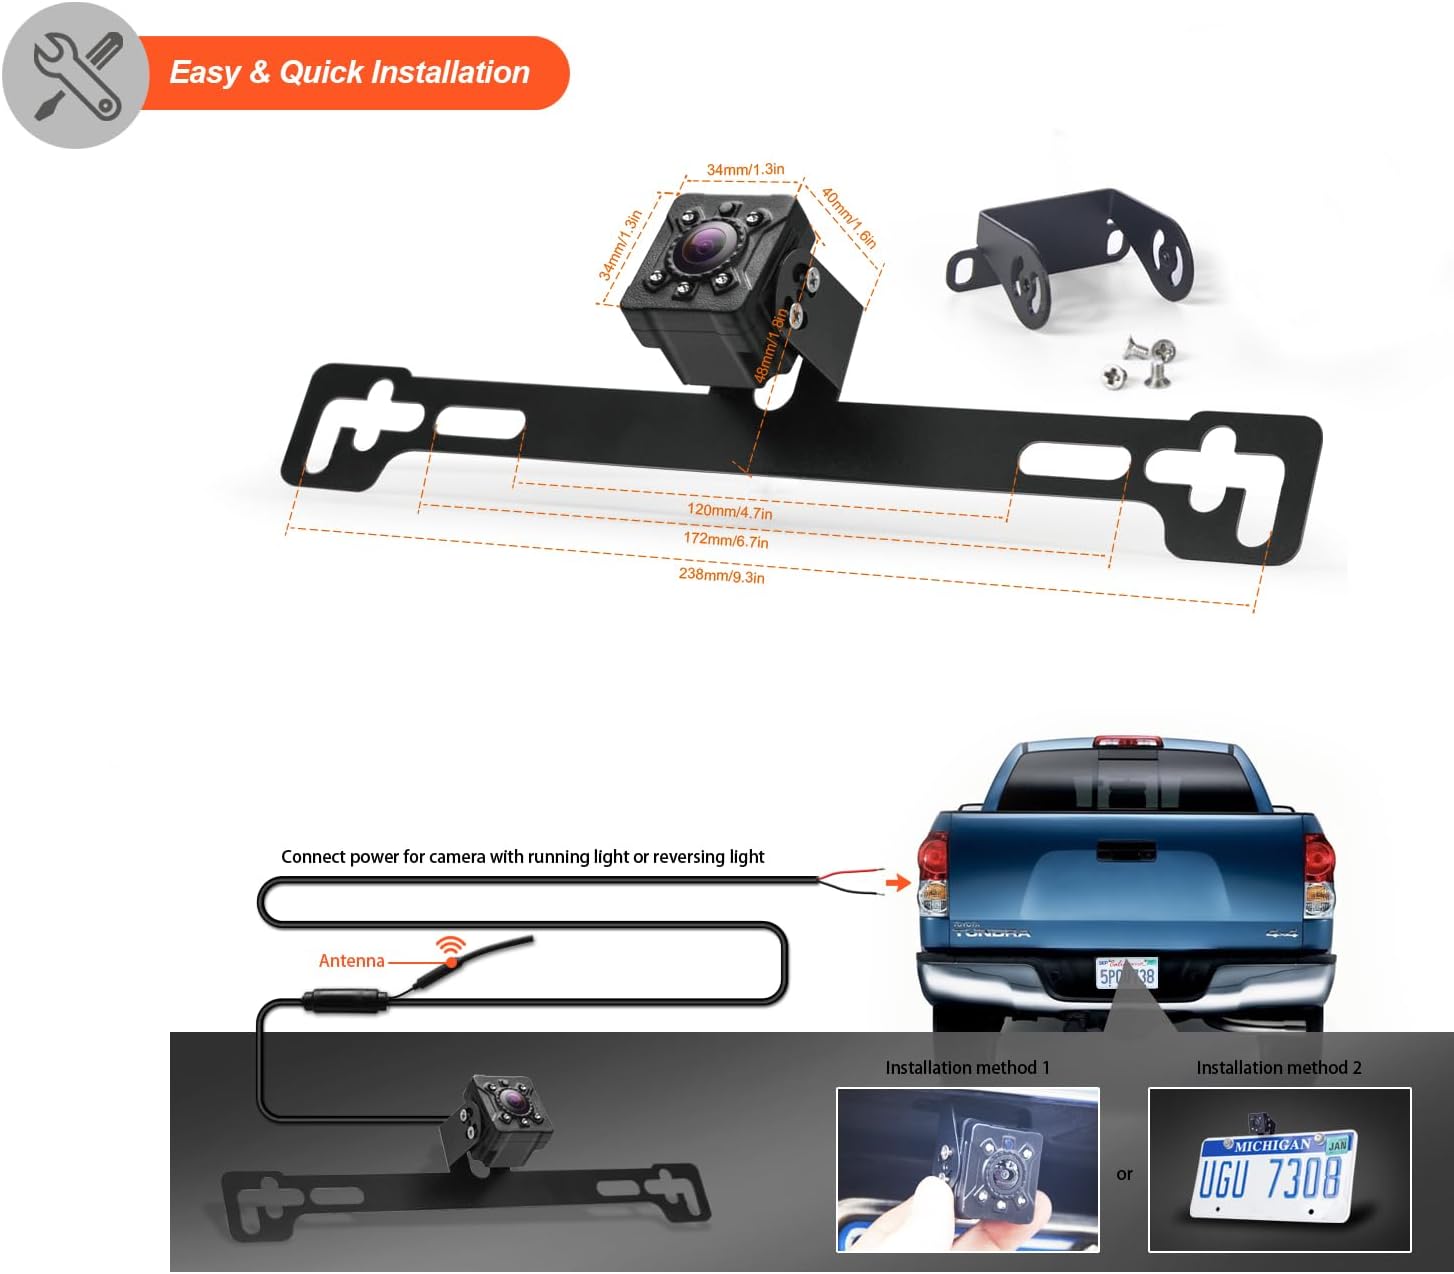
Figure 3.1: Easy & Quick Installation Diagram with Dimensions.
This diagram illustrates the physical dimensions of the camera unit and its bracket, providing measurements in both millimeters and inches. It also shows two common installation methods for mounting the camera near the license plate, along with a visual representation of connecting the camera's power to the vehicle's running or reversing lights and the antenna.
3.3 Wiring the Camera
Connect the camera's power cable to your vehicle's electrical system. It is recommended to connect the camera's power to either the running lights or the reversing lights, depending on when you want the camera to activate.
- For continuous operation (running lights): Connect the camera's positive wire to the positive wire of your vehicle's running lights. Connect the camera's negative wire to a suitable ground point on the vehicle chassis.
- For reverse-only operation (reversing lights): Connect the camera's positive wire to the positive wire of your vehicle's reversing lights. Connect the camera's negative wire to a suitable ground point on the vehicle chassis.
- Ensure all connections are secure and properly insulated to prevent short circuits and water damage.
3.4 Connecting to Monitor
The camera transmits video wirelessly to a compatible monitor (sold separately). Ensure your monitor is powered on and set to the correct input channel to receive the camera's signal. The camera uses an RCA connector type for video output, which is wirelessly transmitted.
4. Operating Instructions
Once installed and powered, the camera will automatically transmit video to your paired monitor.
4.1 Basic Operation
- If connected to reverse lights, the camera will activate automatically when the vehicle is shifted into reverse.
- If connected to running lights, the camera will be active whenever the vehicle's running lights are on.
- Adjust your monitor's settings (brightness, contrast, color) for optimal viewing.
4.2 Camera Pairing (for multiple cameras)
If you are adding an extra camera to your system, pairing may be required. Refer to your monitor's instruction manual for specific pairing procedures. Typically, this involves selecting an available channel (CH1 or CH2) on your monitor and initiating a pairing process while the camera is powered on.
5. Maintenance
Regular maintenance ensures the longevity and performance of your camera.
5.1 Cleaning the Camera Lens
- Periodically clean the camera lens with a soft, damp cloth to remove dirt, dust, or water spots that may obstruct the view.
- Avoid using abrasive cleaners or solvents that could damage the lens or housing.
5.2 Environmental Considerations

Figure 5.1: Environmental Adaptability.
This image highlights the camera's robust design, featuring an IP69 waterproof rating, indicating complete protection against dust and high-pressure water jets. It also shows the camera's ability to withstand extreme temperatures, from 158°F (70°C) heat to -4°F ( -20°C) cold, making it suitable for various climates and conditions.
- The camera is designed to adapt to various harsh environments, including heavy rain, snow, and extreme temperatures.
- Its IP69 waterproof rating ensures it can withstand high-pressure water sprays, such as those from car washes.
- Despite its durability, avoid intentionally submerging the camera in water.
6. Troubleshooting
If you encounter issues with your camera, refer to the following common problems and solutions.
| Problem | Possible Cause | Solution |
|---|---|---|
| No image on monitor |
|
|
| Flickering or distorted image |
|
|
| Image is blurry or unclear |
|
|
7. Specifications
| Feature | Detail |
|---|---|
| Product Dimensions | 1.3 x 1.3 x 1.6 inches (1.3"L x 1.3"W x 1.6"H) |
| Item Weight | 9.6 ounces |
| Brand | yuwei |
| Screen Size (Compatible Monitor) | 7 Inches (typical) |
| Compatible Devices | Monitor |
| Installation Type | Surface Mount |
| Video Capture Resolution | 1080p |
| Optical Sensor Technology | CMOS |
| Real Angle of View | 170 Degrees |
| Connector Type | RCA (for wireless transmission) |
| Optical Sensor Size | 1/3 inch |
| Other Display Features | Wireless |
| Manufacturer | yuwei |
| Date First Available | December 15, 2023 |
8. Warranty and Support
Yuwei products are manufactured to high-quality standards. For warranty information and technical support, please refer to the documentation included with your purchase or visit the official Yuwei website. Keep your purchase receipt as proof of purchase for any warranty claims.
For further assistance, please contact Yuwei customer support through the contact information provided on the product packaging or the official brand website.


