
Introduction
Thank you for choosing the INJORA CNC Aluminum Front and Rear Bumper Set with integrated LED lights for your 1/18 TRX4M RC vehicle. This high-quality aluminum bumper set is designed to enhance both the durability and appearance of your RC model. This manual provides detailed instructions for installation, operation, and maintenance to ensure optimal performance and longevity of your product.
Setup and Installation
This bumper set is crafted from CNC machined aluminum, offering a robust upgrade for your RC car. While designed for compatibility with the stock body, some minor adjustments may be beneficial for optimal fitment, as detailed below.
Components Overview
- CNC Aluminum Front Bumper with integrated LED lights.
- CNC Aluminum Rear Bumper with integrated LED lights and removable tow hitch.
- Mounting hardware (screws, zip ties, light connectors).

Image: Front bumper components including LED lights and zip ties.

Image: Rear bumper components including the removable tow hitch.
Front Bumper Installation
- Carefully remove the existing front bumper from your 1/18 TRX4M RC vehicle.
- Position the new INJORA CNC Aluminum Front Bumper onto the chassis mounting points.
- Secure the bumper using the provided screws. Ensure all screws are tightened firmly but do not overtighten.
- Connect the white LED lights from the front bumper to the appropriate power source on your RC vehicle. Use the provided zip ties to manage wiring.
- When reattaching the RC body, you may find it easier to insert the body at an angle, gently guiding the body clip past the bumper. For some TRX4M Defender models with a protruding grill or fake winch, an aftermarket flat grill may improve body fitment and ease of attachment.
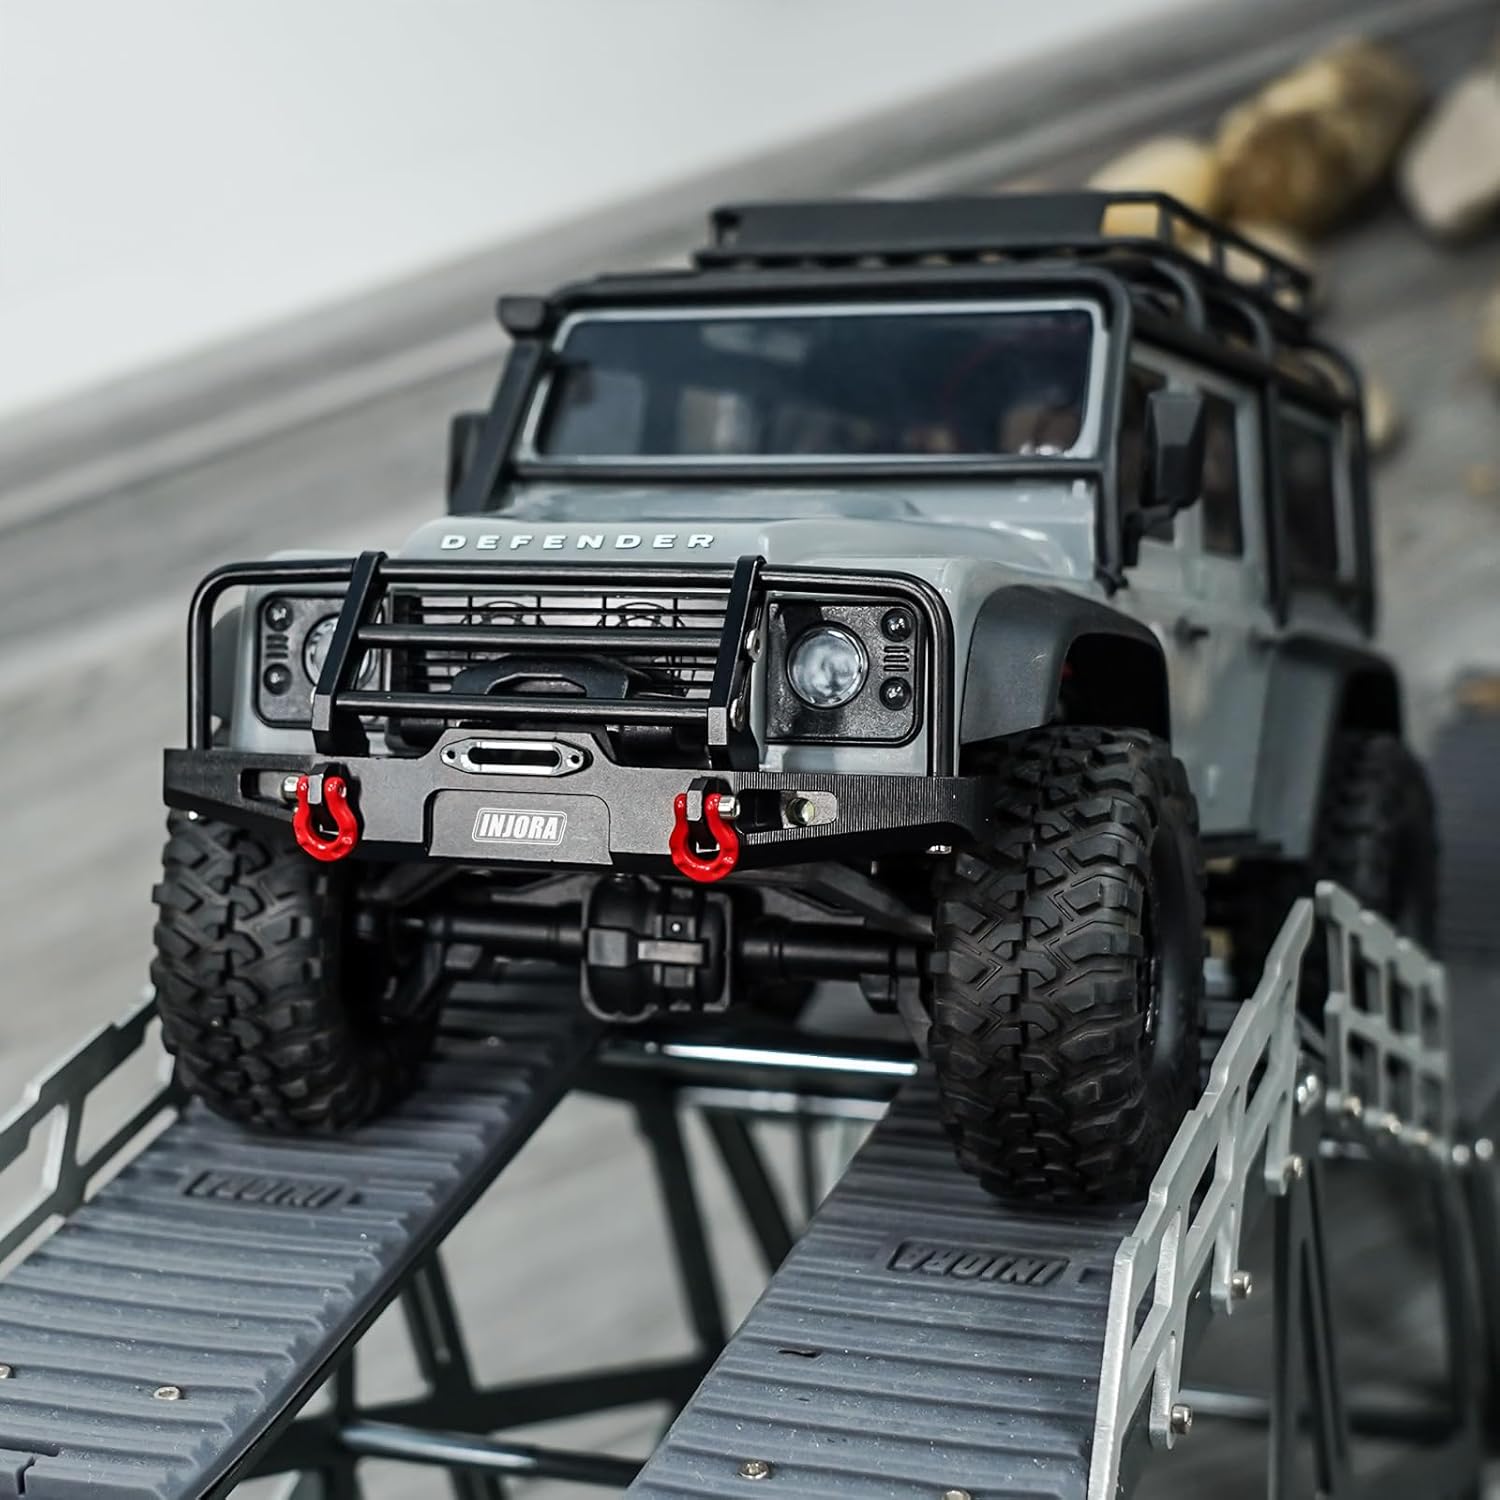
Image: Front bumper installed on a 1/18 TRX4M RC Defender.
Rear Bumper Installation
- Remove the existing rear bumper from your 1/18 TRX4M RC vehicle.
- Align the new INJORA CNC Aluminum Rear Bumper with the chassis mounting points.
- Fasten the bumper securely with the provided screws.
- Connect the red LED lights from the rear bumper to the appropriate power source on your RC vehicle. Use zip ties for neat cable management.
- The rear bumper includes a removable tow hitch. Attach it as desired.
- When reattaching the RC body, if you experience difficulty sliding the body over the rear bumper, minor trimming of the body's lower edge with a hobby knife may be necessary for a smoother fit.

Image: Rear bumper installed on a 1/18 TRX4M RC Defender.
LED Light Connection
The bumpers are equipped with LED lights. Ensure these are connected to a compatible power source on your RC vehicle. If you are integrating multiple light accessories, consider using servo Y-splitters (not included) to manage connections efficiently.

Image: Close-up of LED light wiring connection.
Operating Instructions
LED Lights
Once properly connected, the front (white) and rear (red) LED lights will illuminate when your RC vehicle's power system is active. These lights provide enhanced visibility and a realistic appearance.
Tow Hitch
The rear bumper features a removable tow hitch, allowing you to attach compatible RC trailers or accessories. Ensure any attached trailer is securely fastened and does not exceed the RC vehicle's towing capacity.
Age Recommendation
This product is an RC accessory and is not a toy. It is recommended for users aged 14 years and older due to small parts and the nature of RC hobby equipment.
Maintenance
Regular maintenance will help preserve the condition and functionality of your INJORA bumpers.
- Cleaning: Wipe the aluminum bumpers with a soft, damp cloth to remove dirt and debris. Avoid abrasive cleaners or solvents that could damage the finish.
- Fasteners: Periodically check all screws and mounting points to ensure they remain tight. Vibrations during RC operation can sometimes loosen fasteners.
- LED Lights: Inspect the LED wiring for any signs of wear, fraying, or loose connections. Ensure the lights are clean and free of obstructions.
- Impact Damage: After significant impacts, inspect the bumpers for any bends, cracks, or damage that could affect their protective capabilities or the RC vehicle's performance.
Troubleshooting
- Issue: Difficulty attaching RC body with front bumper.
Solution: The design of the front bumper, especially with certain TRX4M Defender grills (e.g., those with a fake winch), can make body attachment challenging. Try inserting the body at an angle, pushing the body clip forward as you guide it into place. Alternatively, consider replacing the stock grill with a flatter aftermarket version for easier access. - Issue: Rear body catches on the rear bumper during installation.
Solution: Minor interference can occur. Carefully use a hobby knife to trim a small amount of plastic from the lower edge of the RC body where it contacts the bumper. Proceed slowly and test fit frequently to avoid over-trimming. - Issue: D-ring screws appear too long or protrude excessively.
Solution: Verify that the correct screws are used for the D-rings. If they are still too long, shorter compatible screws may be sourced, or washers can be added to achieve the desired fit. - Issue: Low front clearance affecting approach angles during crawling.
Solution: The robust design of the bumper may reduce the approach angle compared to the stock setup. Be mindful of this during off-road driving and adjust your approach lines accordingly to prevent snagging. - Issue: LED lights are not working.
Solution: Check all electrical connections to ensure they are secure and properly plugged into a compatible power source on your RC vehicle. Verify that the power source is active. If using multiple lights, ensure your power source can handle the combined load, and consider using Y-splitters for proper distribution.
Specifications
| Brand | INJORA |
| Model Number | 4M-88FR |
| Material | CNC Aluminum |
| Color | Black |
| Compatibility | 1/18 TRX4M RC Vehicles |
| Front Bumper Weight | 37g |
| Rear Bumper Weight | 26g |
| Front Bumper Width | 101mm / 3.98in |
| Rear Bumper Width | 91mm / 3.58in |
| Unit Count | 2 Count (Front and Rear) |
| Lights Included | Front (White LED), Rear (Red LED) |
| Educational Objective | Develop fine motor skills and hand-eye coordination through RC car play, and understand vehicle mechanics. |
| Indoor/Outdoor Usage | Outdoor |

Image: Front and Rear Bumper Dimensions.
Warranty Information
Warranty details for this product are not explicitly provided in the available information. Please refer to the retailer's return policy or contact INJORA directly for specific warranty terms and conditions.
Customer Support
For technical assistance, troubleshooting, or inquiries regarding your INJORA CNC Aluminum Front and Rear Bumper set, please contact INJORA Official Direct through their official channels or the retailer where the product was purchased.