
FreedConn
FreedConn FX PRO Motorcycle Bluetooth Headset User Manual
Model: FX PRO
1. Introduction
Thank you for choosing the FreedConn FX PRO Motorcycle Bluetooth Headset. This advanced communication system is designed to enhance your riding experience with features like Bluetooth Mesh Gateway, AI voice recognition, Hi-Res audio, and IP67 waterproof rating. This manual provides detailed instructions for setup, operation, and maintenance to ensure safe and optimal use of your device.
2. Product Overview
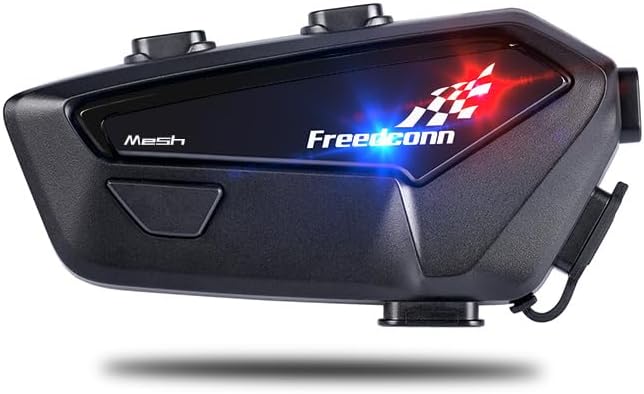
Figure 2.1: FreedConn FX PRO Main Unit
The FreedConn FX PRO features an ultra-thin body with a sleek design, incorporating advanced Bluetooth and AI technologies for seamless communication.
2.1. Product Control Panel & Parts List

Figure 2.2: Control Panel Layout and Included Components
This image illustrates the various buttons on the FX PRO unit, including the Next song/Volume up, Previous song/Volume down, LED Indicator, On/Off/Intercom, Multi-function, MESH (pairing), Type-C charging port, and Earphone Port. It also shows the complete parts list: Bluetooth Host, Speaker & Microphone, Instruction Manual, Charging Cable, Headphone Clips (2), and Velcro Tape Unit.
2.2. Key Features
- Advanced Bluetooth Mesh Gateway: Allows intelligent interaction between FX PRO devices without manual reconnection or pairing.
- AI Voice Recognition: Highly accurate human-machine interaction with up to 99.9% voice recognition accuracy.
- Hi-Res Sound Quality: Headphones recognized by JAS and CEA as design standards, offering high-resolution sound quality with surging bass and clear soprano.
- AI Noise Reduction: Professional AI noise reduction chip handles complex noise environments, ensuring clear communication up to 120km/h.
- Long-lasting Battery: 1100mAh large capacity battery provides 12 hours of intercom time, 12 hours of music time, and 7 days of standby time.
- IP67 Waterproof Rating: Designed to be free from dust and rain, ensuring worry-free travel.
- Multi-audio Mixing: During intercom, navigation broadcast/FM radio/music playback is automatically weakened but continues, allowing simultaneous listening without interference.
- Universal Intercom Compatibility: Can connect with intercoms from other third-party brands.
3. Setup
3.1. Installation onto Helmet
The FreedConn FX PRO supports installation onto most helmet types and brands. There are two primary methods for attaching the unit to your helmet: using a sticker clip or a buckle clip. This section demonstrates the buckle clip method, which causes no damage to the helmet surface.
Video 3.1: Installation Tutorial of FX PRO
This video provides a step-by-step guide on how to install the FreedConn FX PRO onto your helmet, including preparing the helmet by removing liners and attaching the headphone units and microphone.
- Prepare the Helmet: Remove the helmet liners at both sides and on top to access the internal structure. This is typically required for proper cable routing and headphone placement.
- Install Headphones: Locate the shallow grooves reserved for headphones at both ear positions. Attach the headphone with the shorter cord to the left side and the longer cord to the right side. For full-face helmets, it is recommended to use the soft cable mic; for open-face helmets, the hard cable mic may be more suitable.
- Attach Buckle Clip Seat: Securely attach the buckle clip seat to the left side of the helmet's edge.
- Mount FX PRO Unit: Align the back of the FX PRO unit onto the buckle clip seat and slide it into place until it clicks securely.
- Reinstall Liners: Carefully reinstall all helmet liners, ensuring no cables are pinched.
3.2. Initial Charging
Before first use, fully charge the FX PRO unit. Connect the provided Type-C charging cable to the charging port on the device and to a compatible USB power source. The LED indicator will show charging status and turn off when fully charged.
4. Operating Instructions
4.1. Power On/Off
- Power On: Press and hold the On/Off/Intercom button for approximately 2 seconds until the LED indicator lights up.
- Power Off: Press and hold the On/Off/Intercom button for approximately 2 seconds until the LED indicator turns off.
4.2. Bluetooth Pairing (with Phone/GPS)
To pair your FX PRO with a Bluetooth-enabled device (e.g., smartphone, GPS):
- Ensure the FX PRO is powered off.
- Press and hold the Multi-function button until the LED indicator flashes red and blue alternately, indicating pairing mode.
- On your phone/GPS, enable Bluetooth and search for available devices. Select "FreedConn FX PRO" from the list.
- Once connected, the LED indicator will turn solid blue.
4.3. Mesh Intercom Pairing
The FX PRO features an advanced Bluetooth Mesh Gateway for intelligent group communication.
Video 4.1: Mesh Pairing Operation
This video demonstrates how to perform mesh pairing between multiple FX PRO units, allowing for multi-person intercom communication.
- Power On Units: Switch on all main Bluetooth units (FX PRO devices) you wish to pair by pressing the On/Off/Intercom button for 2 seconds simultaneously.
- Initiate Mesh Search: After turning on, long press the MESH (pairing) button on all units for 2 seconds simultaneously. The units will announce "Search network" and automatically search and pair with each other.
- Connection Confirmation: Once connected, the units will announce "Multi-person intercom is connected" and then "Mesh pairing done."
- Managing Mesh Access: If you do not want a third person to join the network, you can cut off their Mesh network access by clicking the MESH button on either FX PRO unit. A "Beep" sound indicates Mesh access is turned off. To make the Mesh network public again, click the MESH button again. "Beep, beep" indicates Mesh access is turned on.
4.4. Pairing with Other Brand Intercoms
The FX PRO can also pair with intercoms from other brands by entering a compatibility mode.
Video 4.2: Pair with Other Brand Intercom
This video demonstrates the process of putting the FX PRO into compatibility mode to pair with non-FreedConn intercom systems.
Refer to the video for detailed steps on how to turn the FX PRO to "Compatibility Mode" for pairing with other brand intercoms or other FreedConn models.
4.5. AI Voice Commands
The FX PRO features advanced AI voice recognition for hands-free control.
Video 4.3: AI Command Operations of FXPRO
This video details how to use the AI voice assistant for various functions, including music control, call management, and activating the assistant itself.
To use AI commands, you must first wake up the FX PRO with a wake-up word. The default wake-up words are:
- "Hello hello"
- "Hi hi"
- "Answer Call"
- "Reject Call"
Once activated, you can use the following command words:
- Music Control: "Previous song", "Next song", "Play music", "Pause playback"
- Volume Control: "Volume up", "Volume down"
- FM Radio: "Play FM", "Pause FM"
You can also customize your wake-up words and command words. Refer to the video for detailed instructions on the customization process.
4.6. Call Management
The FX PRO automatically detects incoming calls during intercom communications. The intercom will cut off automatically once you answer the call. Your intercom communication will resume after hanging up.
4.7. Audio Mixing Function
The Mesh intercom features an audio mixing function. This allows you to talk via intercom and listen to music, navigation broadcasts, or FM radio simultaneously. During intercom, the navigation broadcast/FM radio/music playback volume is automatically lowered but will not stop, ensuring you can hear both audio sources without significant interference.
5. Maintenance
5.1. Waterproof Rating

Figure 5.1: IP67 Waterproof Demonstration
The FX PRO boasts an IP67 waterproof rating, meaning it is protected against dust ingress and can withstand immersion in water up to 1 meter for 30 minutes. This ensures reliable performance in various weather conditions.
5.2. Cleaning and Care
- Wipe the unit with a soft, damp cloth. Do not use harsh chemicals or abrasive cleaners.
- Ensure the Type-C charging port and earphone port waterproof caps are securely closed when not in use to maintain water resistance.
5.3. Battery Care
To prolong battery life:
- Avoid fully discharging the battery frequently.
- Store the device in a cool, dry place when not in use for extended periods.
- Charge the device regularly, even if not in frequent use, to maintain battery health.
6. Troubleshooting
If you encounter issues with your FreedConn FX PRO, please refer to the following common troubleshooting steps:
- No Power: Ensure the device is fully charged. Check the charging cable and adapter.
- Pairing Issues: Ensure both devices are in pairing mode. Try resetting the Bluetooth connection on your phone/GPS and the FX PRO. For mesh intercom, ensure all units are powered on and initiating mesh search simultaneously.
- Poor Sound Quality: Check headphone and microphone connections. Ensure the microphone is positioned correctly. For intercom, check distance and obstacles between units.
- Voice Command Not Responding: Ensure you are using the correct wake-up words and command words. Speak clearly and in a quiet environment. Try re-customizing the wake-up words if needed.
- Intercom Disconnects: Check battery level. Ensure units are within range.
For further assistance, please contact FreedConn customer support.
7. Specifications
| Feature | Specification |
|---|---|
| Model Name | FX PRO |
| Connectivity Technology | Wireless (Bluetooth 5.0) |
| Headphones Jack | No Jack (USB Micro for speaker/mic connection) |
| Battery Life | 25 Hours (Total), 12 Hours (Intercom), 12 Hours (Music) |
| Standby Time | 7 Days |
| Battery Type | 1 AA battery required (included) - Note: This might be a typo in source data, usually Li-ion for such devices. |
| Water Resistance Level | Waterproof (IP67) |
| Frequency Range | 40 Hz - 40,000 Hz |
| Control Method | Voice, Media Control |
| Noise Control | Active Noise Cancellation |
| Product Dimensions | 3.3 x 1.6 x 0.8 inches |
| Item Weight | 10.6 ounces (0.3 Kilograms) |
| Manufacturer | FreedConn |
8. Warranty and Support
For warranty information and technical support, please refer to the official FreedConn website or contact your retailer. Keep your purchase receipt as proof of purchase for warranty claims.
You can visit the official FreedConn Store on Amazon for more information: FreedConn Store
Related documents


Ask a question about this manual
Ask about setup, troubleshooting, compatibility, parts, safety, or missing instructions. Manuals+ will review the question and use this page’s manual context to help answer it.