
ACASIS EC-7352-US
ACASIS External Dual-Drive RAID Enclosure User Manual
Model: EC-7352-US | Brand: ACASIS
1. Introduction
The ACASIS External Dual-Drive RAID Enclosure is a versatile storage solution designed to house two 2.5-inch or 3.5-inch SATA HDDs/SSDs. It supports multiple RAID modes (RAID 0, RAID 1, JBOD, SPAN) to optimize for speed, capacity, or data redundancy according to your needs. Featuring a robust aluminum construction and an integrated cooling fan, it ensures efficient heat dissipation for stable and reliable operation. This manual provides detailed instructions for setup, operation, and maintenance.
Video: Product Overview. This video provides a brief visual introduction to the ACASIS Dual-Drive RAID Enclosure, highlighting its key features and design.
2. Package Contents
Please verify that all items are present in the package:
- 1 x Dual-Bay USB RAID Enclosure
- 1 x 12V4A Power Adapter
- 1 x USB-C Cable
- 1 x C to C Power Cable
- 1 x Mounting Screw Tool
- 1 x English User Manual (this document)
3. Setup
3.1. Drive Installation
Follow these steps to install your 2.5-inch or 3.5-inch SATA HDDs/SSDs into the enclosure:
- Remove Screws: Locate and remove the small screws on the back panel of the enclosure. This will allow you to slide out the internal drive tray.

Image: Removing the screws from the enclosure's back panel to access the drive tray.
- Pull Out Drive Tray: Gently pull the internal drive tray out from the enclosure. It should slide out smoothly once the screws are removed.

Image: The internal drive tray being pulled out from the main enclosure body.
- Insert Drives: Carefully insert your 2.5-inch or 3.5-inch SATA HDDs/SSDs into the designated slots on the drive tray. Ensure they are securely seated.

Image: A hard drive being inserted into one of the slots on the drive tray.
- Slide Tray Back: Once the drives are installed, carefully slide the drive tray back into the enclosure until it is fully seated.

Image: The drive tray being slid back into the enclosure body.
- Secure Screws: Re-insert and tighten the screws removed in step 1 to secure the drive tray in place.

Image: The enclosure with the drive tray secured by screws.
3.2. Initial Connection & Disk Initialization
After installing the drives, connect the enclosure to your computer using the provided USB-C cable and power adapter. The enclosure features a 12V4A power adapter to ensure stable transmission, especially for large capacity drives.

Image: The ACASIS enclosure connected to its power adapter and a computer via USB-C.
For new hard drives, or after changing RAID modes, you will need to initialize and format the disks. This process varies slightly between Windows and Mac operating systems. Refer to the video below for a visual guide on disk initialization for different RAID modes.
Video: How to set up 4 RAID modes. This comprehensive video demonstrates the process of setting up and initializing disks for JBOD, RAID 0, RAID 1, and SPAN modes on both Windows and Mac.
Windows Initialization:
- Right-click on the Windows Start icon and select 'Disk Management'.
- The system will prompt you to initialize the new hard disk(s). Select 'GPT (GUID Partition Table)' as the partition style and click 'OK'.
- Locate the 'Unallocated' area(s) corresponding to your new disk(s).
- Right-click on the 'Unallocated' area and select 'New Simple Volume...'.
- Follow the 'New Simple Volume Wizard'. You can divide the capacity as needed.
- Assign a drive letter.
- For file system, choose 'NTFS' if only used on Windows, or 'EXFAT' if you need to use it on both Windows and Mac. Perform a quick format.
- Click 'Finish' and wait for the initialization to complete. The new drive letter(s) will appear in 'This PC'.
Mac Initialization:
- Open 'Disk Utility' (Applications > Utilities > Disk Utility).
- Connect the enclosure as prompted by the system.
- Select the ACASIS external hard drive from the sidebar.
- Click 'Erase' from the toolbar.
- For format, choose 'APFS' (Apple File System) for macOS 10.13 High Sierra or later, or 'Mac OS Extended (Journaled)' for older macOS versions. Keep the rest as default.
- Click 'Erase' and then 'Done' once the process is complete. The new drive will appear in Finder.
4. Operating Modes (RAID Configuration)
The ACASIS enclosure supports four different RAID modes, configured via DIP switches located inside the drive tray. IMPORTANT: Always back up your important data before changing RAID modes, and ensure the enclosure is powered off during the switch configuration.
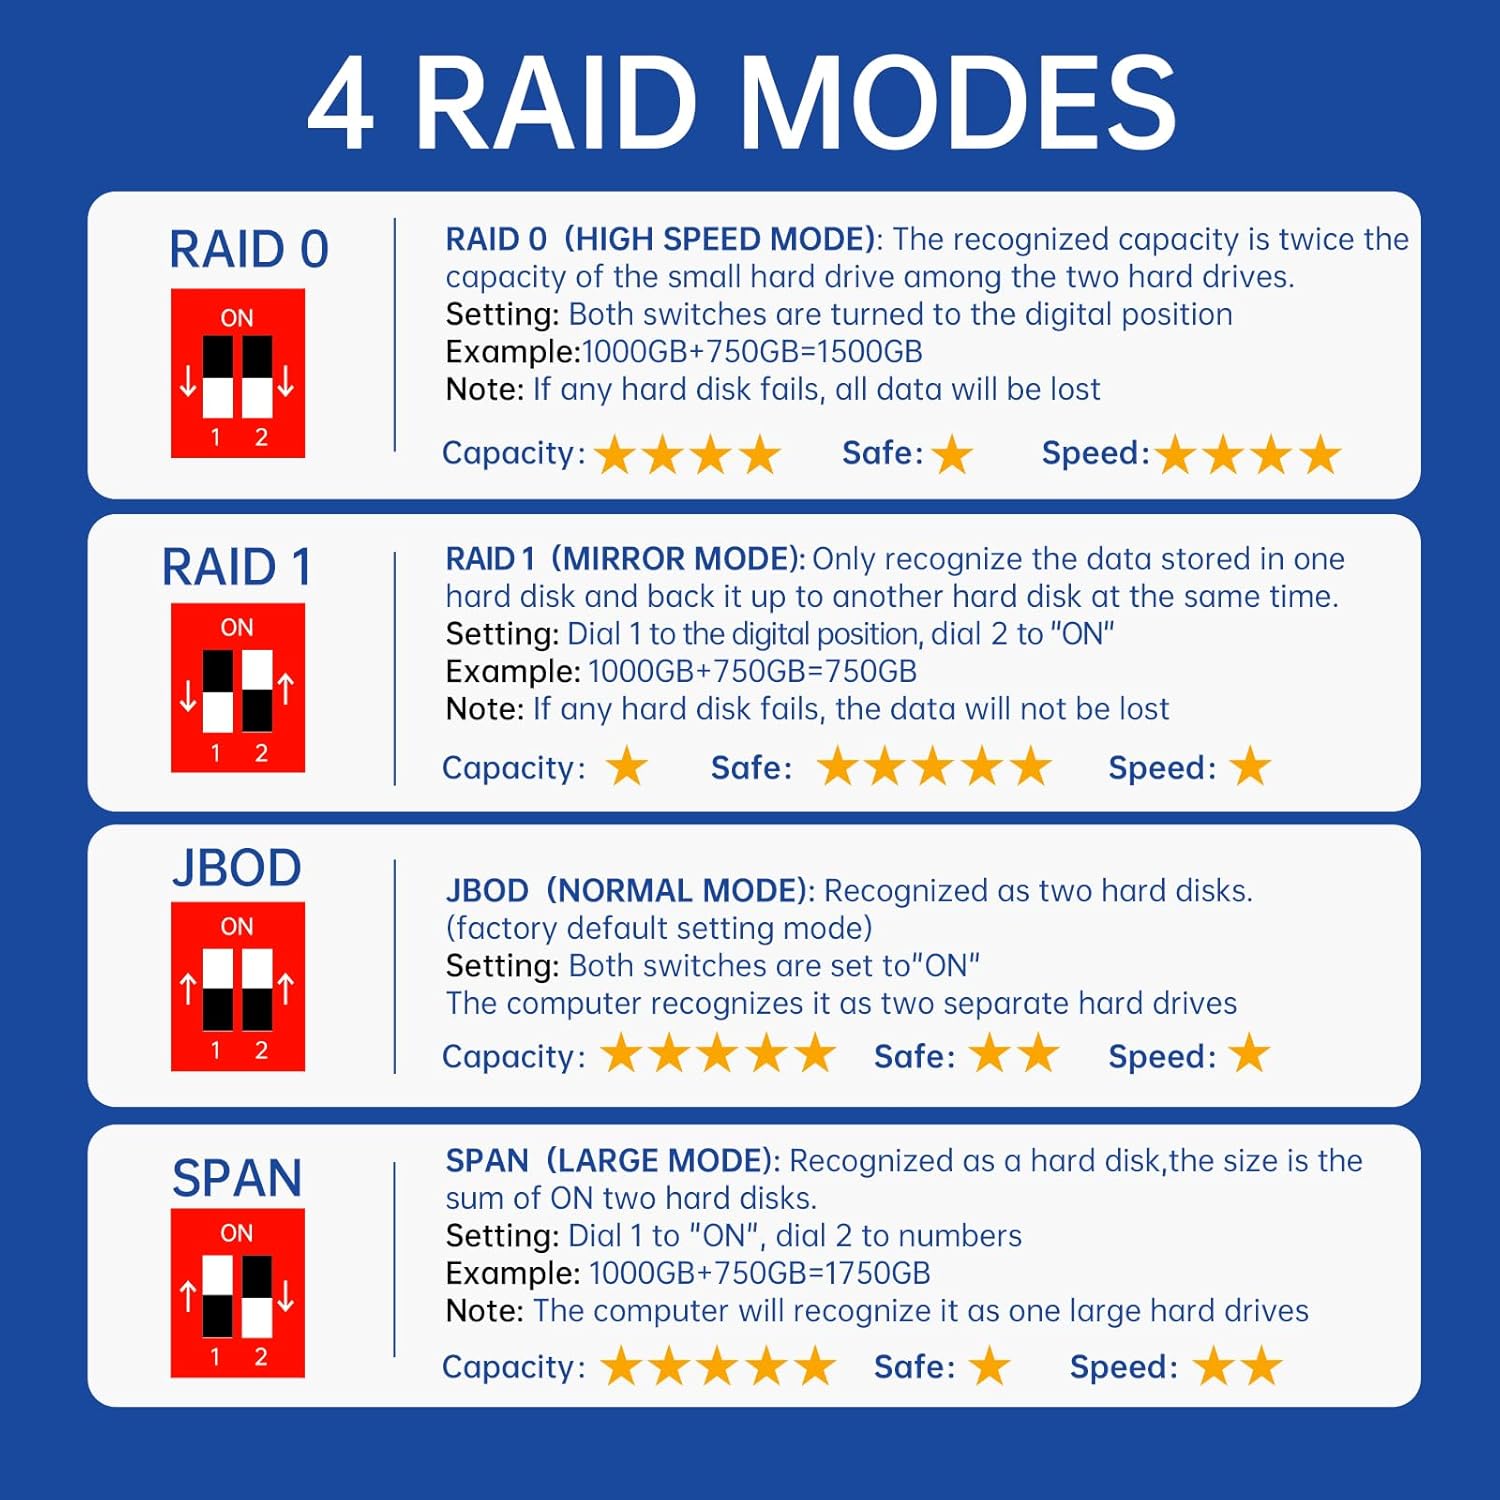
Image: Overview of the four supported RAID modes, their settings, and characteristics.
4.1. JBOD Mode (Normal Mode)
In JBOD (Just a Bunch Of Disks) mode, the computer recognizes each hard disk independently as a separate drive. This is the factory default setting.
- Setting: Both DIP switches (1 and 2) are set to the 'ON' position.
- Capacity: Sum of individual disk capacities.
- Safety: Low (data loss on one disk does not affect the other, but no redundancy).
- Speed: Normal.

Image: DIP switch configuration for JBOD mode (both switches ON).
4.2. RAID 0 Mode (High Speed Mode)
RAID 0 (striping) combines both disks into a single volume, distributing data across them. This significantly increases read/write speeds but offers no data redundancy.
- Setting: Both DIP switches (1 and 2) are set to the digital position (down).
- Capacity: Twice the capacity of the smallest hard drive. (e.g., 1TB + 750GB = 1.5TB)
- Safety: Very Low (if any hard disk fails, all data will be lost).
- Speed: High.

Image: DIP switch configuration for RAID 0 mode (both switches down).
4.3. RAID 1 Mode (Mirror/Safe Mode)
RAID 1 (mirroring) duplicates data across both disks. This provides excellent data redundancy, as one disk acts as a backup for the other. If one disk fails, your data is still safe on the second disk.
- Setting: Dial 1 to the digital position (down), Dial 2 to 'ON' (up).
- Capacity: Only recognizes the data stored in one hard disk (capacity of the smallest drive). (e.g., 1TB + 750GB = 750GB)
- Safety: High (data is mirrored, so if one disk fails, data is not lost).
- Speed: Normal.

Image: DIP switch configuration for RAID 1 mode (Switch 1 down, Switch 2 ON).
4.4. SPAN Mode (Large Mode)
SPAN mode combines the capacity of both disks into a single, larger volume. Data is written sequentially to one disk until it's full, then continues to the next. This maximizes capacity but offers no performance benefits or data redundancy.
- Setting: Dial 1 to 'ON' (up), Dial 2 to the digital position (down).
- Capacity: Sum of both hard disk capacities. (e.g., 1TB + 750GB = 1.75TB)
- Safety: Low (if any hard disk fails, all data will be lost).
- Speed: Normal.

Image: DIP switch configuration for SPAN mode (Switch 1 ON, Switch 2 down).
5. Maintenance
5.1. Heat Dissipation
The ACASIS enclosure is designed for optimal heat dissipation to protect your drives and maintain performance:
- Full Aluminum Body: The robust aluminum construction acts as a large heatsink, efficiently drawing heat away from the internal components.
- Built-in Cooling Fan: A whisper-quiet fan actively circulates air, further enhancing cooling performance.
- Precision Ventilation Openings: Strategically placed vents ensure proper airflow throughout the enclosure.

Image: Illustration of the full aluminum body's role in heat dissipation.
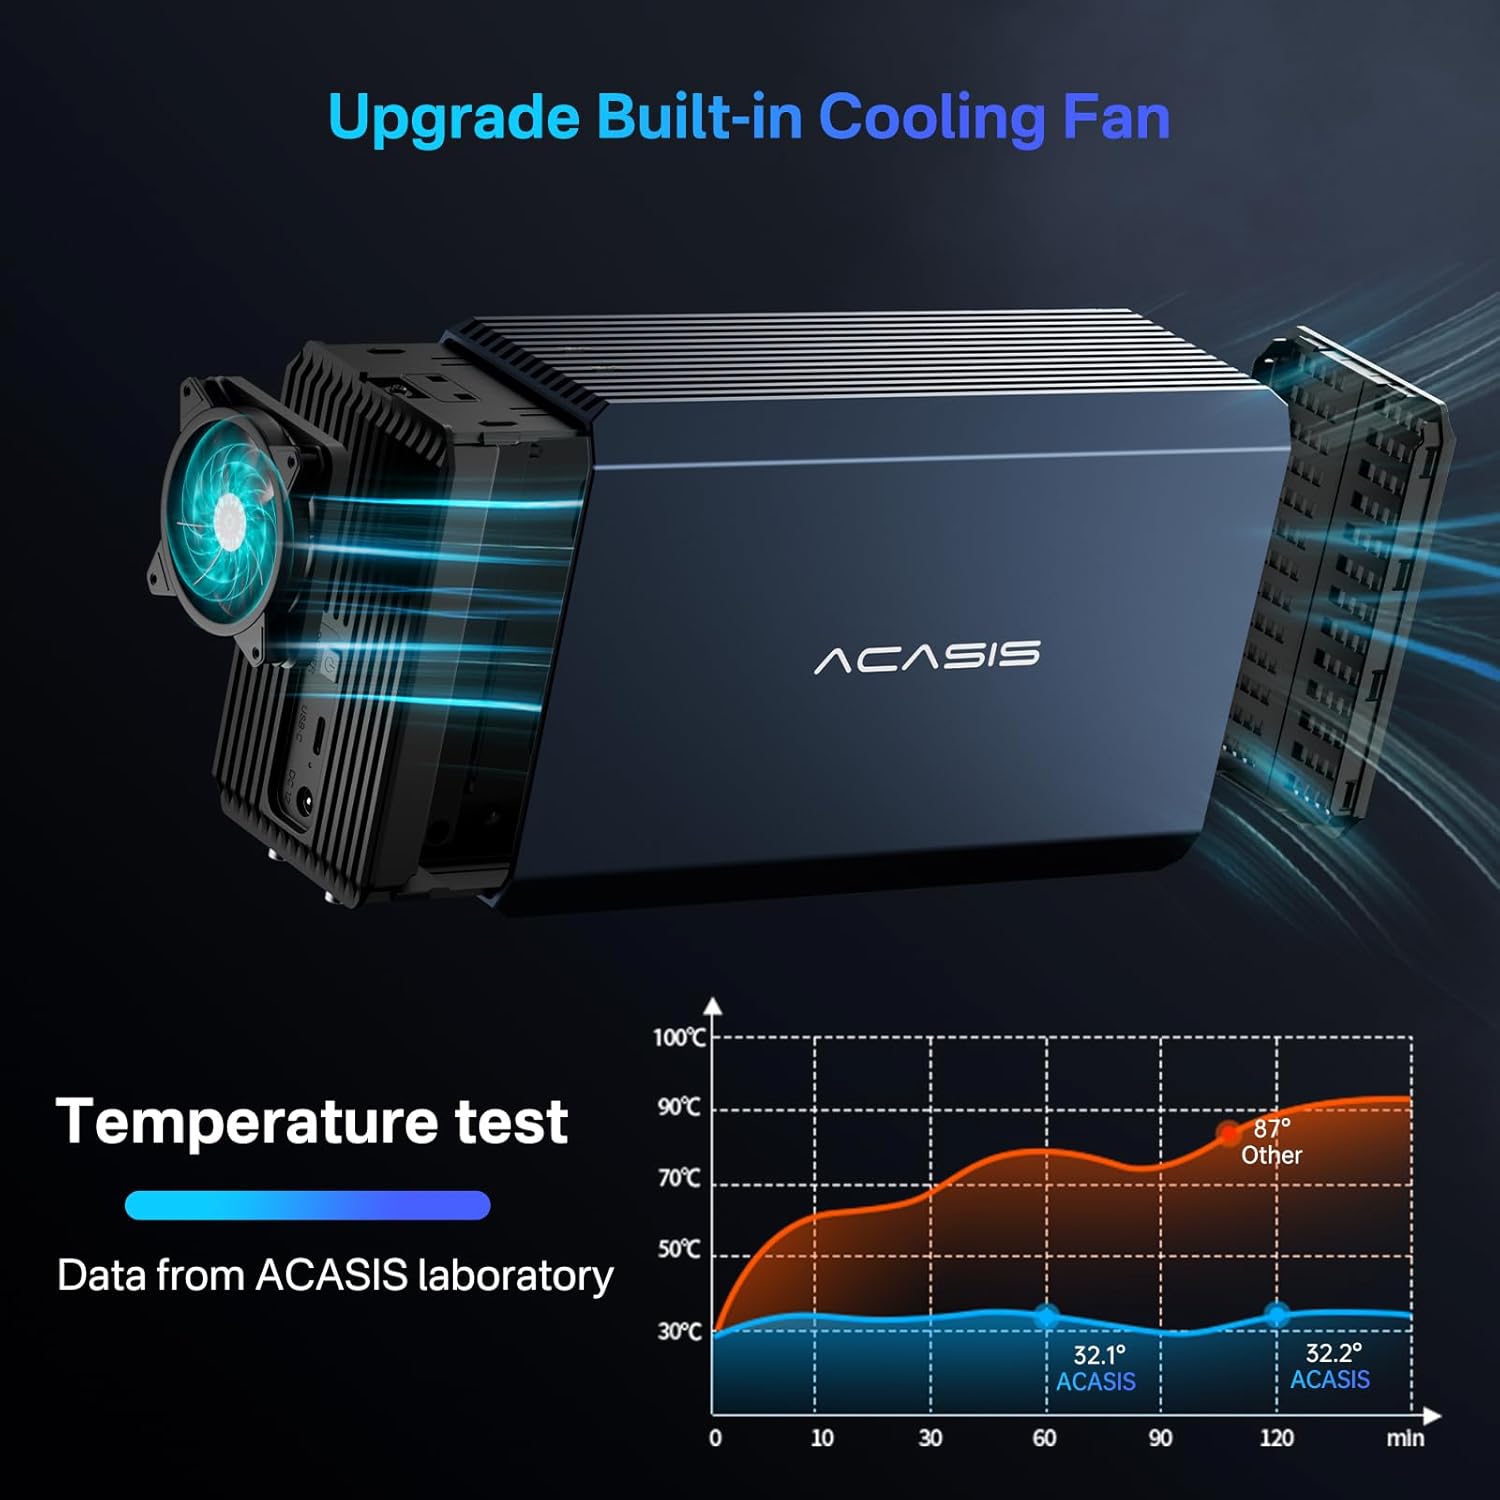
Image: Details of the built-in cooling fan and a temperature comparison chart.
5.2. Auto Sleep Mode
The enclosure features an auto sleep mode that activates after 10 minutes of inactivity to conserve energy and extend drive lifespan. To adjust or disable this feature, you may need to install specific firmware. Please visit the official ACASIS website for firmware updates and instructions: www.acasis.com/pages/firmware
Image: Visual representation of the auto sleep mode feature.
6. Troubleshooting
6.1. LED Indicator Lights
The enclosure features LED indicator lights on the top surface to provide status information:
- Blue Light (Always On): Indicates that the hard drive is identified and data backup is complete.
- Red Light (Always On): Indicates that the hard drive cannot be recognized, possibly due to damage.

Image: Explanation of the blue and red LED indicator lights.
6.2. Common Issues
- Drive Not Recognized: Ensure the drives are properly seated in the tray and the enclosure is securely connected to power and your computer. Check the LED indicator for a red light, which may suggest a damaged drive. Re-initialize the disk if it's new or if RAID mode was changed.
- Sleep Mode Behavior: If the enclosure enters sleep mode too quickly or doesn't wake up as expected, refer to the Auto Sleep Mode section (5.2) for information on firmware updates that can adjust this behavior.
- Data Loss: Always back up important data before installing firmware or changing RAID modes. RAID 0 and SPAN modes do not provide data redundancy; consider RAID 1 for data protection.
7. Specifications
| Feature | Description |
|---|---|
| Model Number | EC-7352-US |
| Material | Aluminum |
| Compatible Drives | 2.5/3.5 inch SATA HDD/SSD |
| Max Capacity | 36TB (up to 24TB per bay, 48TB total) |
| Data Transfer Rate | Max 6Gbps (with UASP) |
| Interface | USB A/C 3.0 |
| RAID Modes | JBOD, RAID 0, RAID 1, SPAN |
| Cooling | Built-in Cooling Fan, Aluminum Construction, Ventilation Openings |
| Power Supply | 12V4A Power Adapter |
| Dimensions | 4.7 x 7.8 x 2.5 inches |
| Weight | 2.2 pounds |
| Compatibility | Windows 7 and above, Mac OS 10 and above, Linux |
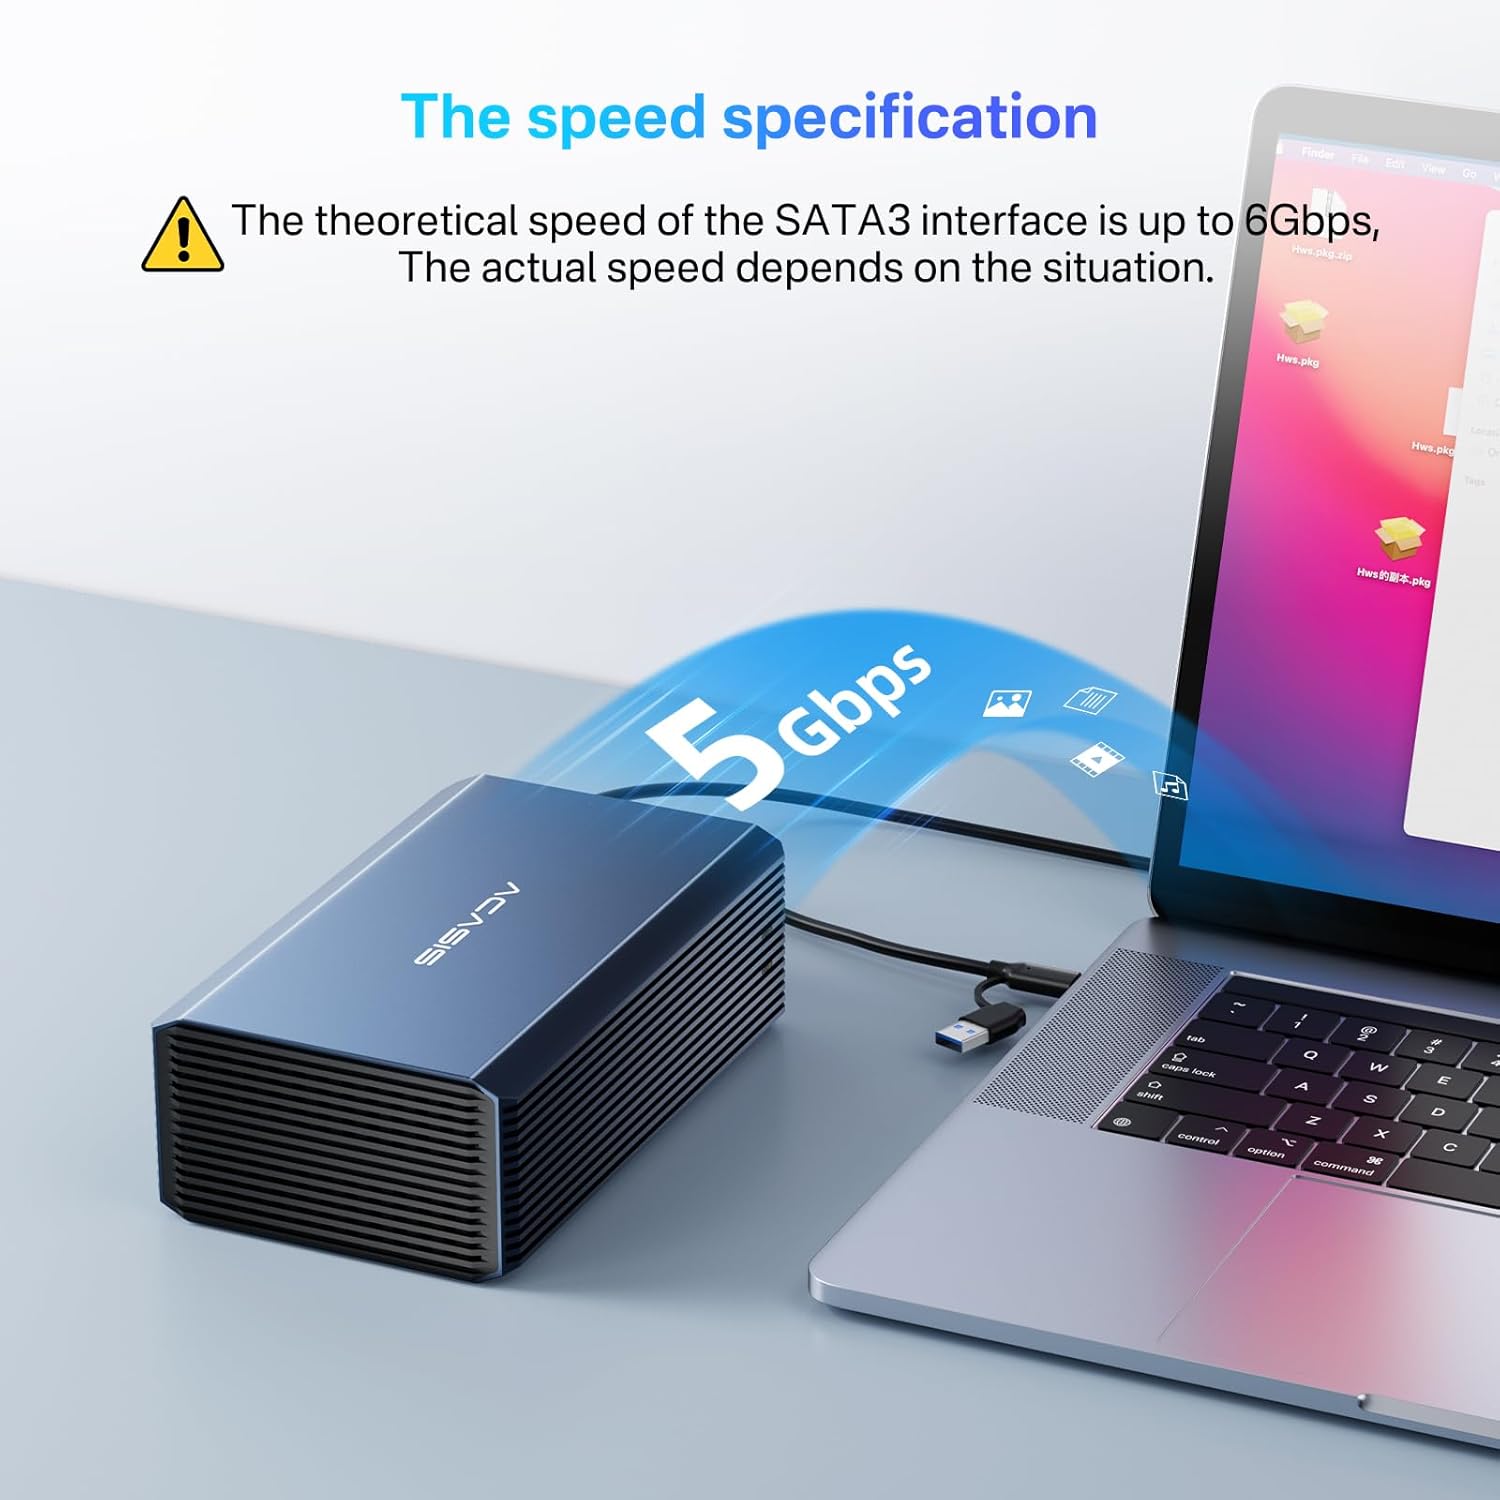
Image: The speed specification, highlighting 5Gbps transfer with UASP.
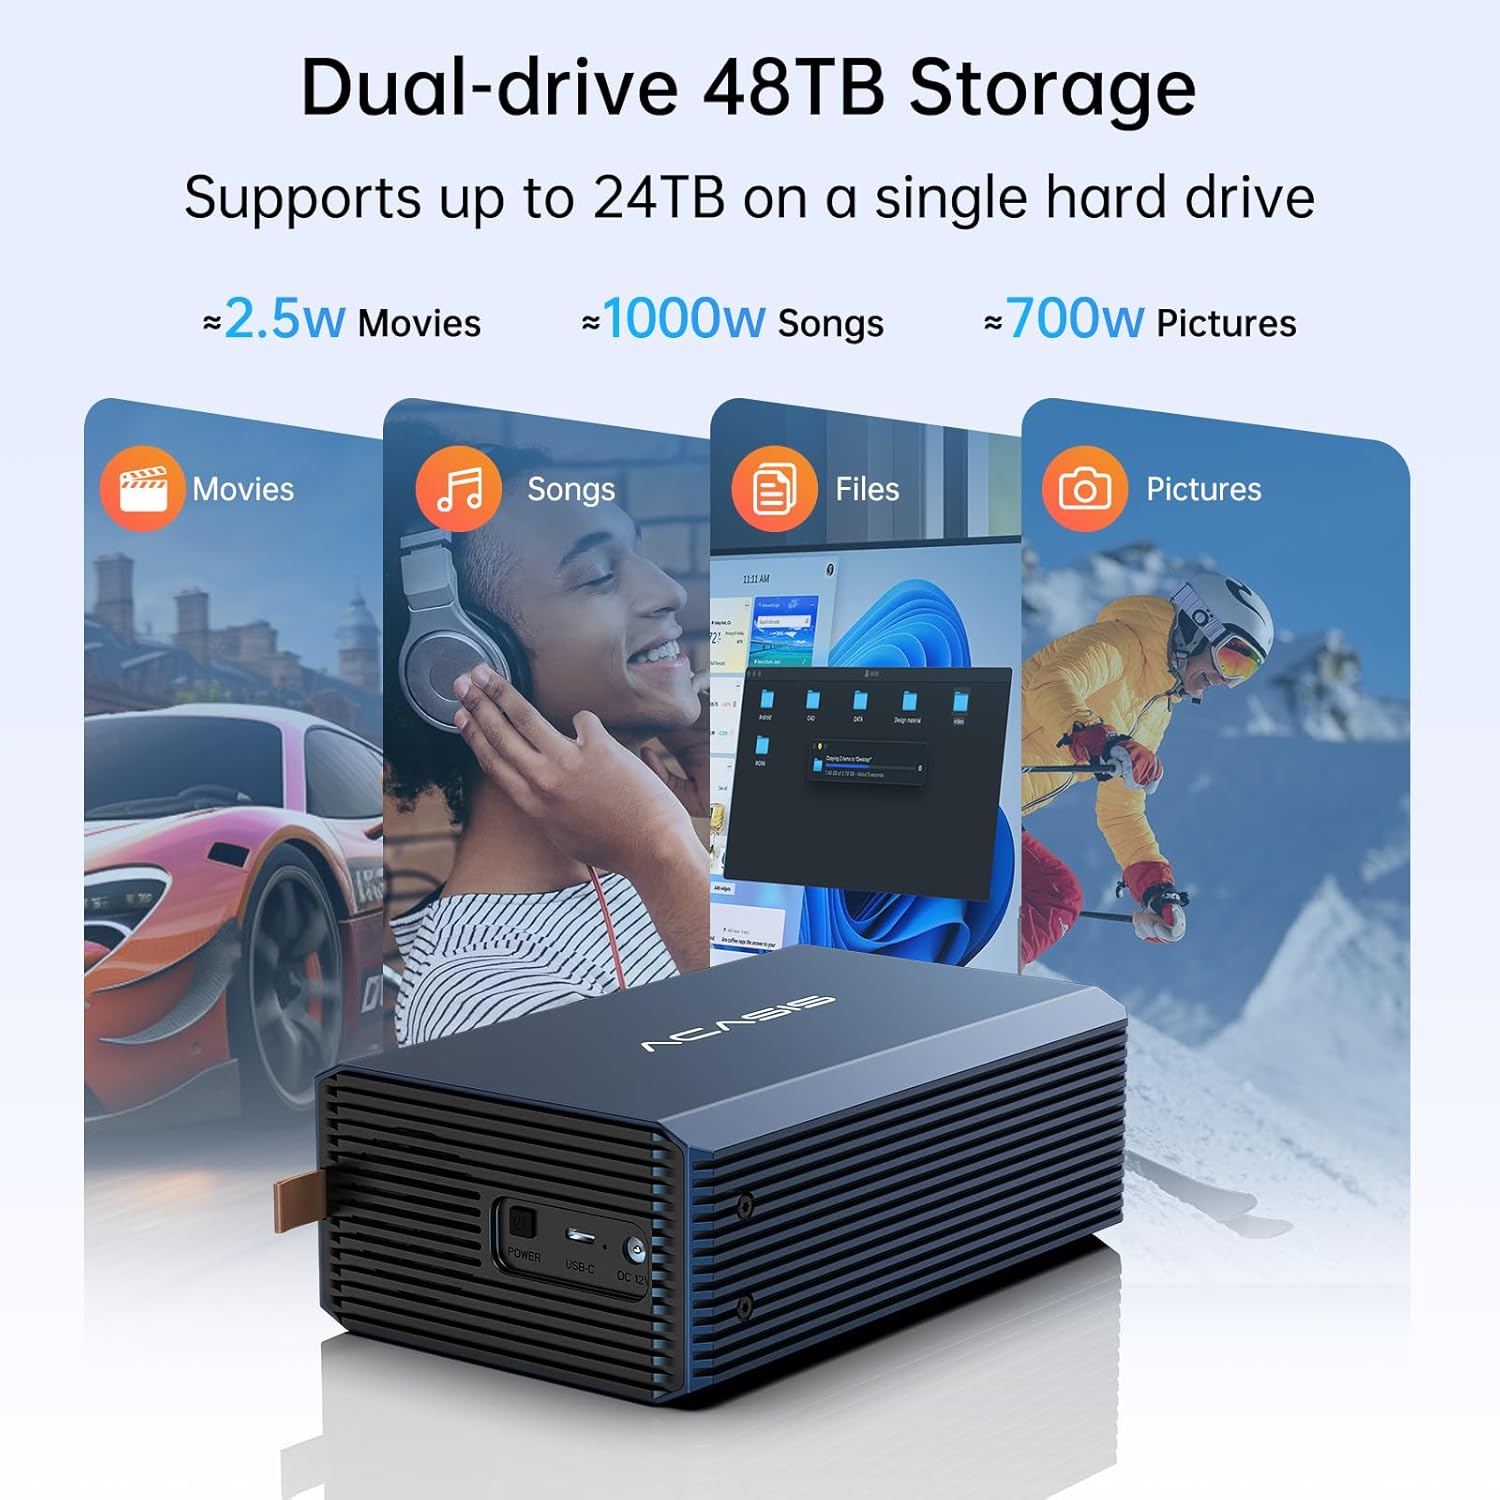
Image: Dual-drive storage capacity, supporting up to 24TB per single hard drive.
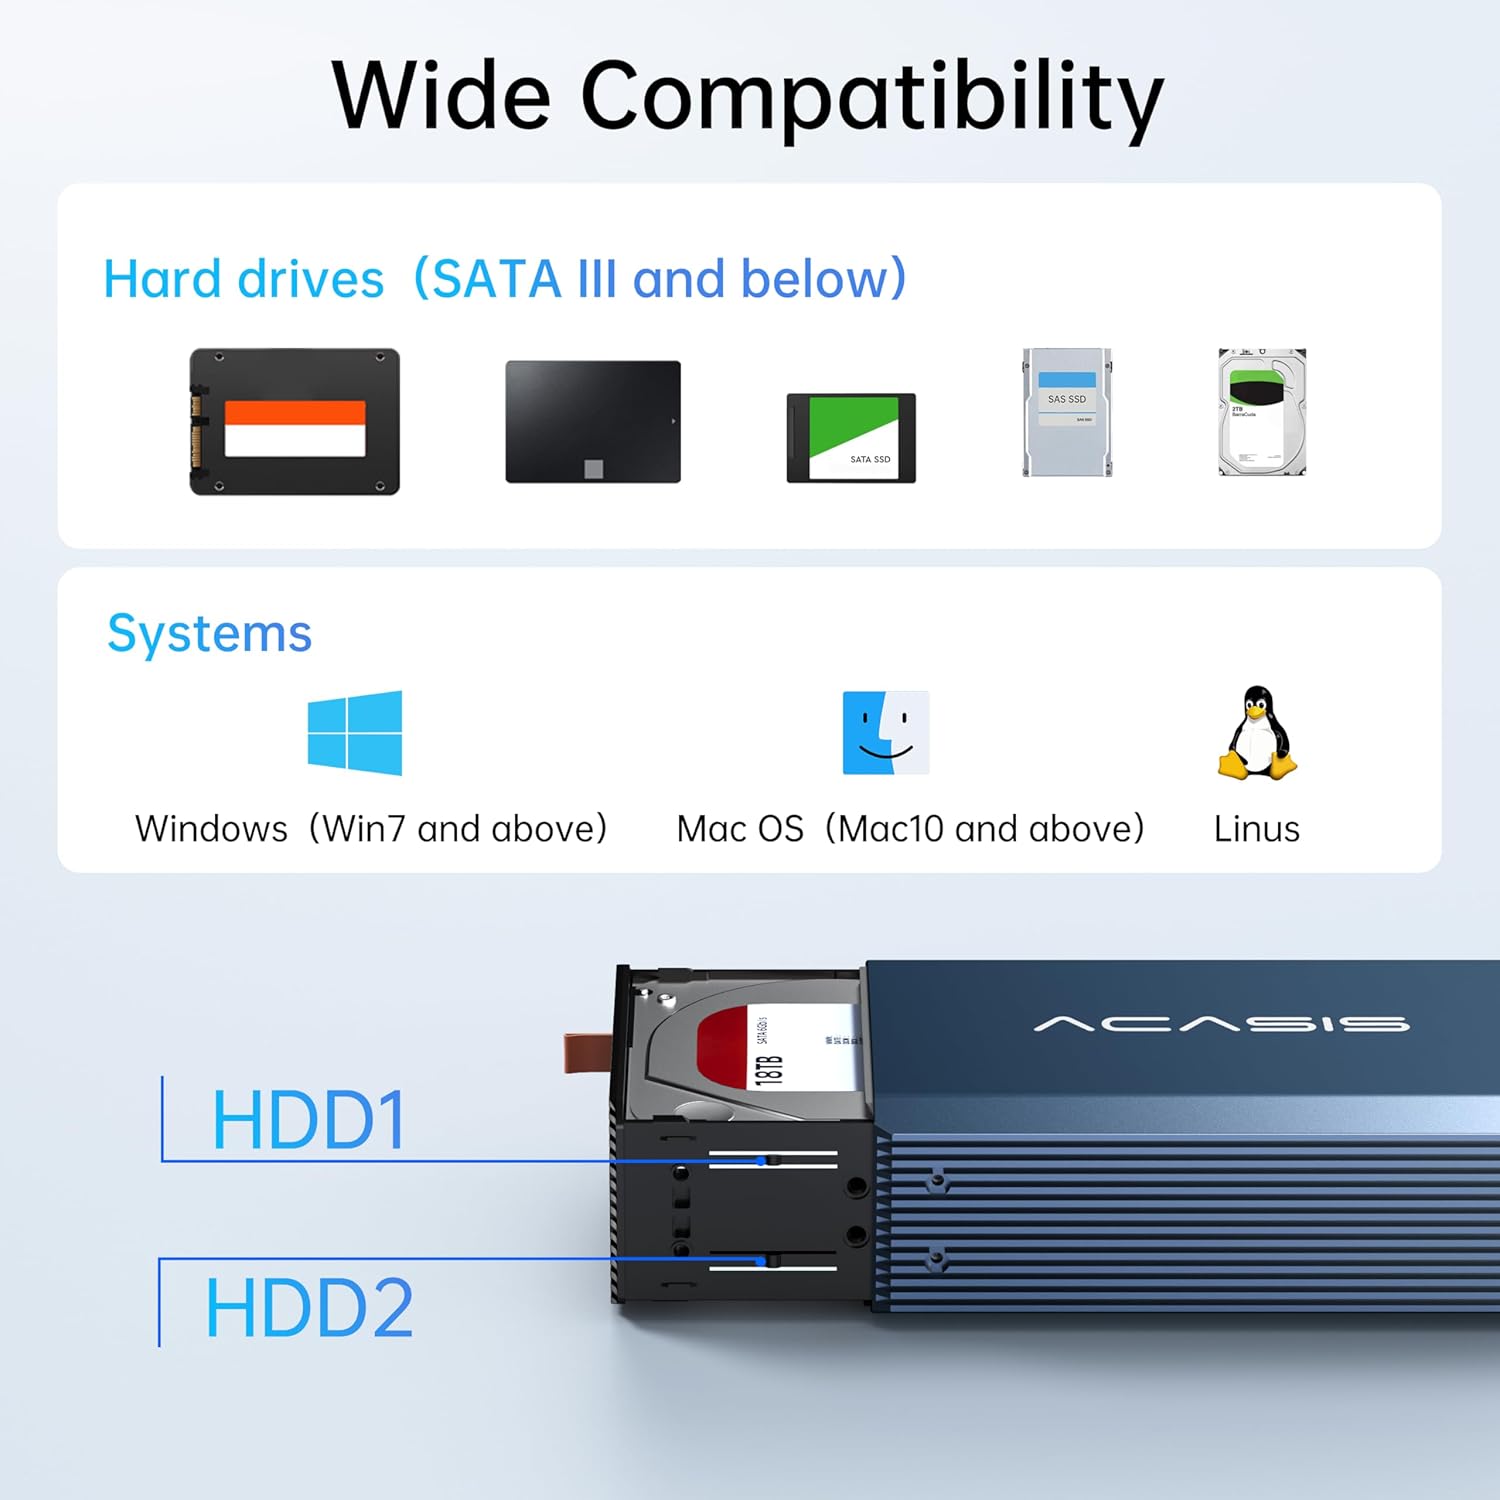
Image: Wide compatibility with various hard drive types and operating systems.
8. Warranty and Support
ACASIS provides life-long technical support for this product. For any technical assistance, inquiries, or support needs, please contact us directly:
Email: support@acasis.com
We are committed to providing high-quality and considerate service to ensure your satisfaction with the ACASIS Dual-Drive RAID Enclosure.
Related documentsEC-7352-US


Ask a question about this manual
Ask about setup, troubleshooting, compatibility, parts, safety, or missing instructions. Manuals+ will review the question and use this page’s manual context to help answer it.