
Loniko G7Pro
Loniko G7Pro Smart Toilet Instruction Manual
Model: G7Pro (G7-1-WP)
1. Introduction
This manual provides detailed instructions for the installation, operation, maintenance, and troubleshooting of your Loniko G7Pro Smart Toilet. Please read this manual thoroughly before installation and use to ensure proper function and safety. Keep this manual for future reference.
2. Safety Information
Observe the following safety precautions to prevent injury or damage to the product:
- Ensure the power supply matches the product's requirements.
- Do not immerse the product in water or spray water directly onto electrical components.
- Unplug the unit from the power outlet before cleaning or performing any maintenance.
- Do not attempt to repair the product yourself. Contact qualified service personnel for assistance.
- Keep children and individuals with reduced physical, sensory, or mental capabilities away from the product unless supervised.
- Avoid using abrasive cleaners or harsh chemicals that may damage surfaces.
3. Product Overview and Dimensions
The Loniko G7Pro Smart Toilet integrates advanced features for hygiene and comfort. Familiarize yourself with the product's design and dimensions for proper placement and installation.

Image 3.1: Overview of Loniko G7Pro Smart Toilet with key dimensions. This image illustrates the top-down view, side profile, and front profile of the toilet, including measurements such as sitting height (17 inches), distance from wall (12 inches), and overall width (15.7 inches) and depth (27.55 inches).
4. Specifications
| Feature | Description |
|---|---|
| Brand | Loniko |
| Model Number | G7Pro (G7-1-WP) |
| Product Dimensions | 69.9D x 40.6W x 43.9H centimetres |
| Material | Ceramic, Acrylonitrile Butadiene Styrene (Seat) |
| Item Weight | 47.17 kg |
| Installation Type | Floor Mounted |
| Shape | Oblong |
| UPC | 765150811295 |
| Included Components | Instruction manual |
5. Setup and Installation
The Loniko G7Pro Smart Toilet is designed for straightforward installation. While professional plumbing services are not typically required, assembly by two people is recommended. Detailed instructional videos are available to guide you through the process, supporting both flange and non-flange setups.
5.1 Pre-Installation Checklist
- Verify all components are present and undamaged.
- Ensure water supply and electrical outlets are correctly positioned according to local codes.
- Turn off the main water supply to the bathroom.
- Clear the installation area.
5.2 Installation Steps (General)
- Prepare the Floor: Ensure the floor is clean, level, and ready for toilet placement.
- Connect Water Supply: Attach the water inlet hose to the toilet and the water supply valve. Ensure all connections are tight to prevent leaks.
- Position the Toilet: Carefully place the toilet over the drain opening, aligning it with the floor flange or prepared area.
- Secure the Toilet: Fasten the toilet to the floor using the provided hardware. Do not overtighten.
- Connect Power: Plug the toilet into a grounded electrical outlet.
- Restore Water Supply: Slowly turn on the main water supply and check for any leaks.
- Initial Flush: Perform a test flush to ensure proper operation.
6. Operating Instructions
The Loniko G7Pro Smart Toilet offers a range of automated and customizable functions for enhanced comfort and hygiene.
6.1 Smart Control System
All features and settings are easily managed via a wireless remote control and a rotary one-touch control button located on the side of the toilet.

Image 6.1: Wireless remote control and rotary knob for easy operation. The image shows the detailed buttons on the remote for various functions like stop, wash, dry, and flush, as well as the rotary knob on the toilet for quick access to female cleaning, one-time press, and hip cleaning.
6.2 Advanced Flushing System
The toilet features 360° Cyclone Flush Technology with pre-moistening and nano-smooth glazing for efficient waste elimination. Multiple flush modes are available:
- One-Touch Flush: Activate via remote or side button.
- Foot Sensor Flush: A sensor at the base allows for hands-free flushing.
- Automatic Departure Flush: The toilet flushes automatically after you leave.
- Emergency Power Outage Flush: Ensures functionality even during power interruptions.

Image 6.2: Illustration of the 360° Super Vortex Siphon Flushing System. This diagram shows the water flow path within the toilet bowl and trap, highlighting how the vortex action efficiently removes waste and stains, including a backup battery for power outages.
6.3 Personalized Cleansing Functions (Bidet)
Customize your hygiene routine with various bidet settings:
- Posterior Wash: For general cleansing (0.17 gallons/min).
- Feminine Wash: Gentle cleansing for sensitive areas (0.19 gallons/min).
- Oscillating Massage: Provides a soothing, moving spray.
- Adjustable Settings: Water pressure and nozzle positions can be adjusted via the remote control to suit individual preferences.
- Self-Cleaning Nozzle: The nozzle performs a self-cleaning cycle before and after each use.

Image 6.3: Multiple Wash Modes for personalized cleansing. This image displays icons for Rear Wash, Lady Wash, Moveable Wash, and Self Cleaning, along with temperature indicators for room temperature, 94°F, 99°F, and 104°F.
6.4 Variable Temperature Control
Enjoy customizable warmth for maximum comfort:
- Heated Seat: Adjustable from 34°C (93°F) to 40°C (104°F).
- Warm Air Dryer: Adjustable from 35°C (95°F) to 55°C (131°F).
- Adjust settings using the remote control to match your personal comfort preferences.

Image 6.4: Heated Seat and Warm Air Dryer features. The image highlights the heated seat area, warm air drying vent, night light, and the buttock sensing area, with temperature scales indicating normal, 94°F, 99°F, 104°F for the seat and normal, 95°F, 113°F, 131°F for the dryer.
6.5 Automatic Lid Operation and Foot Sensor
Advanced radar sensing technology provides hands-free convenience:
- Auto Open: The lid automatically opens upon approach.
- Auto Close & Flush: The lid closes and flushes automatically after use.
- Foot Sensor Controls: Use the foot sensor at the base for hands-free lid opening/closing and flushing.
- Sensor Range Adjustment: Remote adjustments are available to tailor the sensor range, preventing unintended activations.
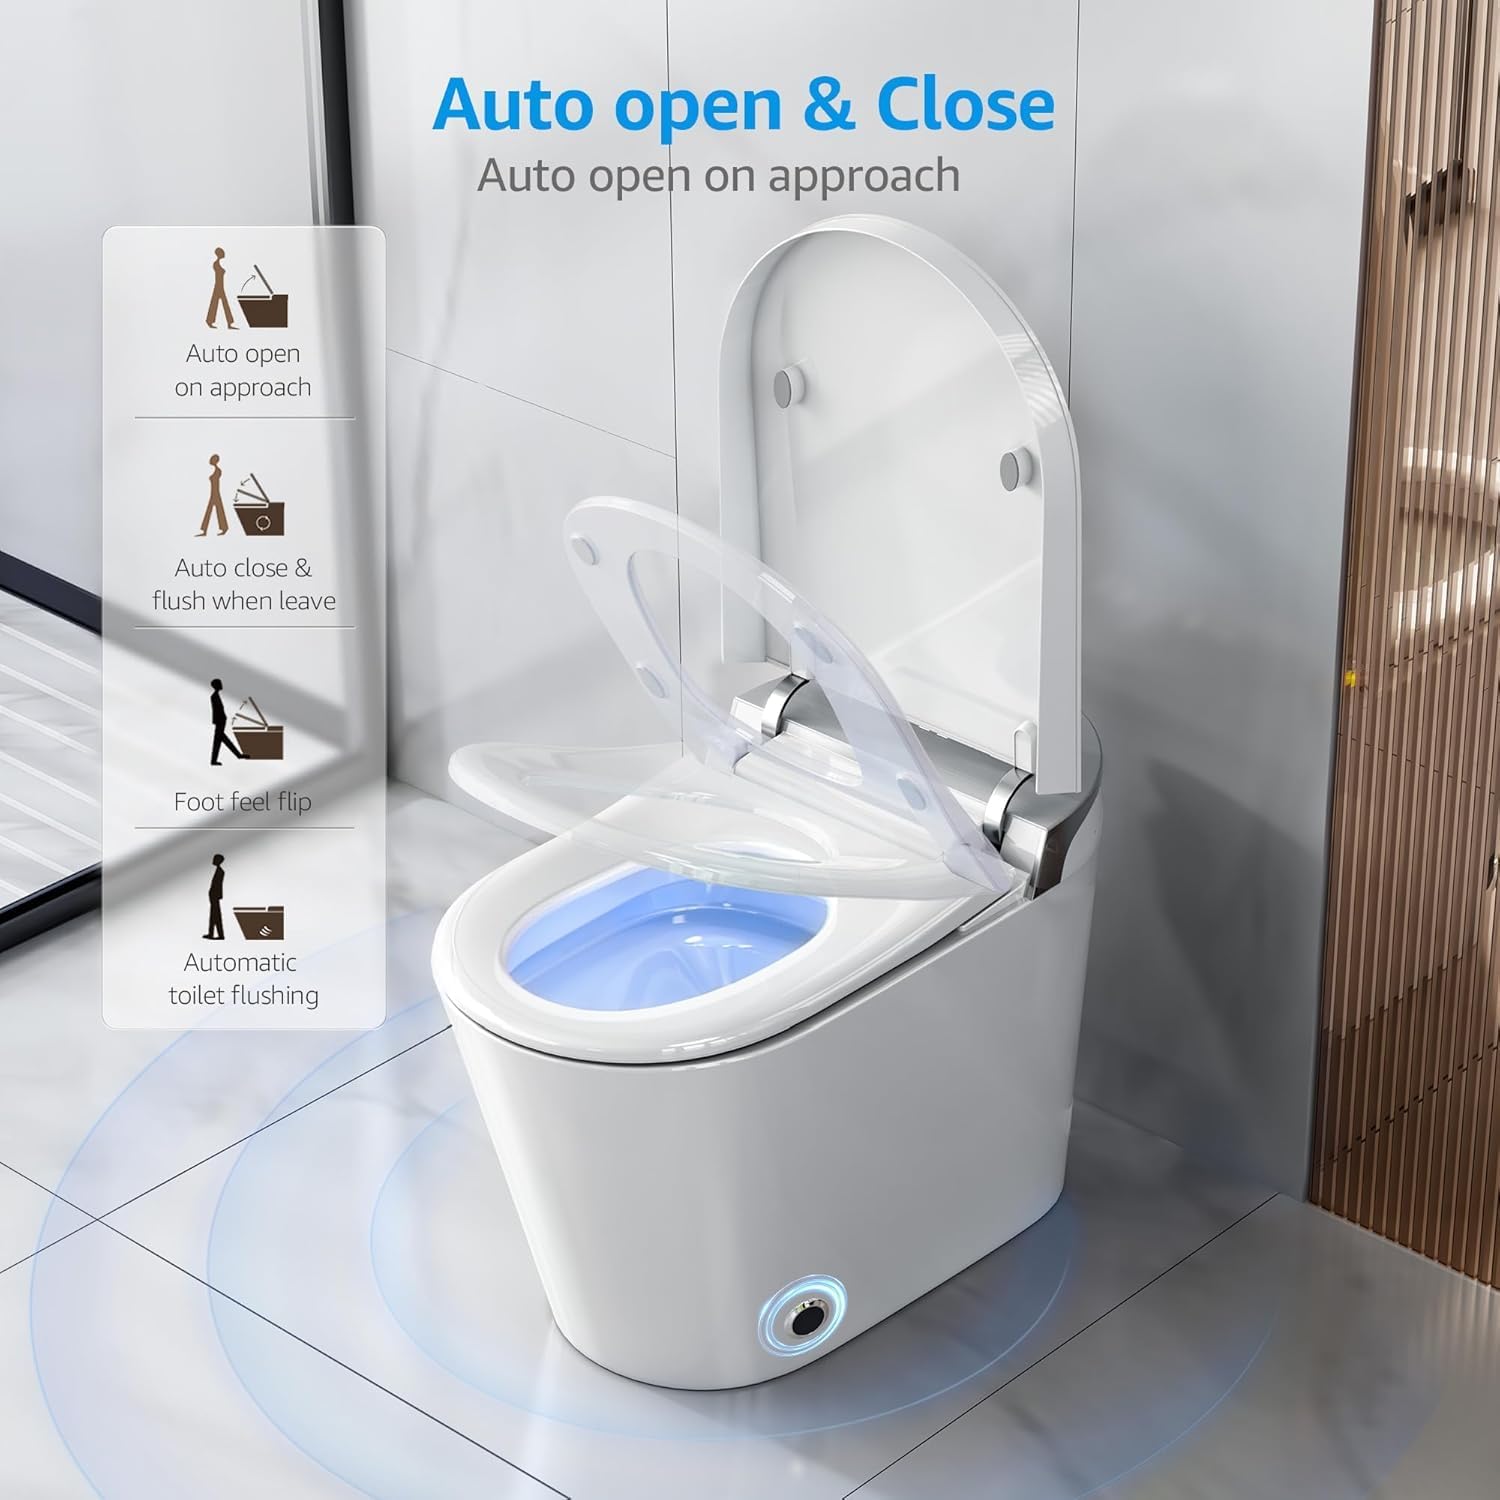
Image 6.5: Auto Open & Close functionality with foot sensor. This image demonstrates the lid opening upon approach, closing and flushing upon departure, and the foot sensor for hands-free control of the lid and flushing.
6.6 Additional Features
- Advanced LCD Display: Shows real-time status of various functions.
- LED Night Light: Provides subtle illumination for nocturnal visits.
- Foam Shield: Creates a protective foam layer in the bowl to prevent splashing, isolate odors, and reduce sticking.

Image 6.6: Foam Shield technology. This image illustrates how the foam shield works to prevent splash, isolate odors, and provide an anti-sticking wall within the toilet bowl.
- Soft Close Seat: The toilet seat and lid close gently and quietly, preventing slamming.

Image 6.7: Soft Close mechanism and Dual Aromatherapy System. The image shows the lid gently closing and highlights the dual aromatherapy system designed to freshen the air.
7. Maintenance and Cleaning
Regular cleaning and maintenance will ensure the longevity and optimal performance of your Loniko G7Pro Smart Toilet.
7.1 General Cleaning
- Exterior: Wipe the exterior surfaces with a soft, damp cloth and a mild, non-abrasive cleaner.
- Seat and Lid: Clean the seat and lid with a soft cloth and a gentle, non-corrosive bathroom cleaner. Avoid harsh chemicals that can damage the ABS material.
- Bowl: Use a toilet brush and standard toilet bowl cleaner for the ceramic bowl.
7.2 Nozzle Cleaning
The bidet nozzle performs an automatic self-cleaning cycle. For deeper cleaning, refer to the remote control instructions to extend the nozzle for manual cleaning with a soft brush and mild soap.
7.3 Filter Maintenance
Periodically check the water inlet filter for any debris. If clogged, turn off the water supply, remove the filter, clean it under running water, and reinstall.
8. Troubleshooting
If you encounter any issues with your Loniko G7Pro Smart Toilet, refer to the following common problems and solutions:
| Problem | Possible Cause | Solution |
|---|---|---|
| No power/Unit unresponsive | Power cord unplugged, circuit breaker tripped, power outage. | Check power connection, reset circuit breaker, verify power supply. |
| Water leakage | Loose water connections, damaged seal. | Tighten connections, inspect seals for damage and replace if necessary. |
| Bidet spray not working | Water supply off, nozzle clogged, low water pressure. | Ensure water supply is on, clean nozzle, check water pressure. |
| Heated seat not warming | Heating function off, temperature setting too low. | Activate heating function via remote, increase temperature setting. |
| Automatic lid not opening/closing | Sensor obstructed, sensor range too narrow, power issue. | Clear sensor area, adjust sensor range via remote, check power. |
If the problem persists after attempting these solutions, please contact customer support.
9. Warranty and Customer Support
The Loniko G7Pro Smart Toilet comes with a comprehensive warranty. For specific warranty terms and conditions, please refer to the warranty card included with your product or visit the official Loniko website. For technical assistance, troubleshooting beyond this manual, or to inquire about replacement parts, please contact Loniko customer support.
Customer Support Contact: Refer to your product packaging or the official Loniko website for the most current contact information.
Related documentsG7Pro


Ask a question about this manual
Ask about setup, troubleshooting, compatibility, parts, safety, or missing instructions. Manuals+ will review the question and use this page’s manual context to help answer it.