
LiGuVCY 2 Gallon Pump Sprayer (B0CPSBMHDS)
User Manual: Heavy Duty Stainless Steel Sprayer
Brand: LiGuVCY | Model: 2 Gallon Pump Sprayer (B0CPSBMHDS)
Introduction
This manual provides essential information for the safe and effective use of your LiGuVCY Heavy Duty Stainless Steel Sprayer. Please read all instructions carefully before assembly, operation, or maintenance. Retain this manual for future reference.
The LiGuVCY 2 Gallon Stainless Steel Sprayer is designed for various applications including lawn and garden watering, floor cleaning, car washing, and pet cleaning. Its robust stainless steel construction ensures durability and reliability.
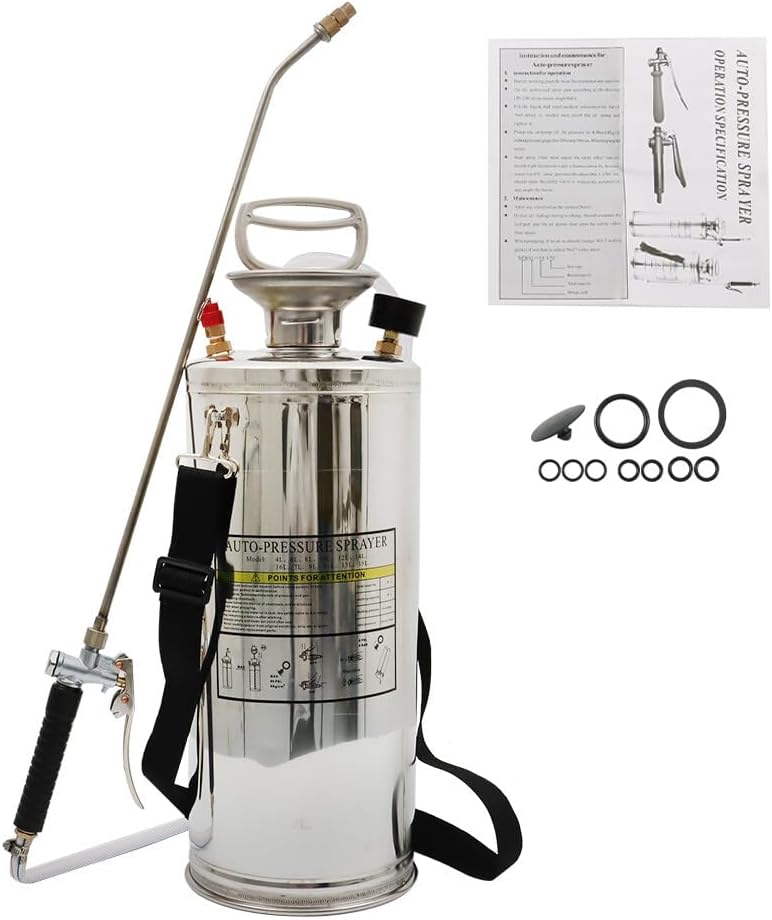
Image 1: The LiGuVCY 2 Gallon Stainless Steel Sprayer, showing the main unit, spray wand, hose, and a small bag of spare parts and instruction sheet.
Important Safety Information
Failure to follow these safety instructions may result in serious injury or property damage.
- Always wear protective eyewear and gloves when using this sprayer to prevent contact with chemicals or pressurized liquids.
- Do not exceed the recommended pressure level. The integrated pressure gauge helps monitor the pressure.
- Regularly inspect the safety valve to ensure it functions correctly. The safety valve is designed to automatically release internal pressure in case of excessive pressure, protecting the user from potential risks.
- Handle with care to avoid sudden release of pressure. Depressurize the sprayer before opening or refilling.
- Do not use with flammable liquids, corrosive chemicals, or hot liquids.
- Keep out of reach of children and pets.

Image 2: Detail of the safety valve (red cap) and pressure gauge on the sprayer, highlighting key safety features.
Product Components
Familiarize yourself with the main parts of your sprayer:
- Stainless Steel Tank: The main reservoir for liquids.
- Pump Handle: Used to build pressure inside the tank.
- Pressure Gauge: Displays the internal pressure of the tank.
- Safety Valve: Releases excess pressure automatically.
- Hose: Connects the tank to the spray wand. (3 feet long)
- Spray Wand: The long extension for directing spray. (20 inches long)
- Adjustable Nozzle: Located at the end of the spray wand, allows for spray pattern adjustment.
- Switch Handle: Ergonomically designed handle on the spray wand for comfortable grip and spray activation.
- Shoulder Strap: For easy carrying of the sprayer.
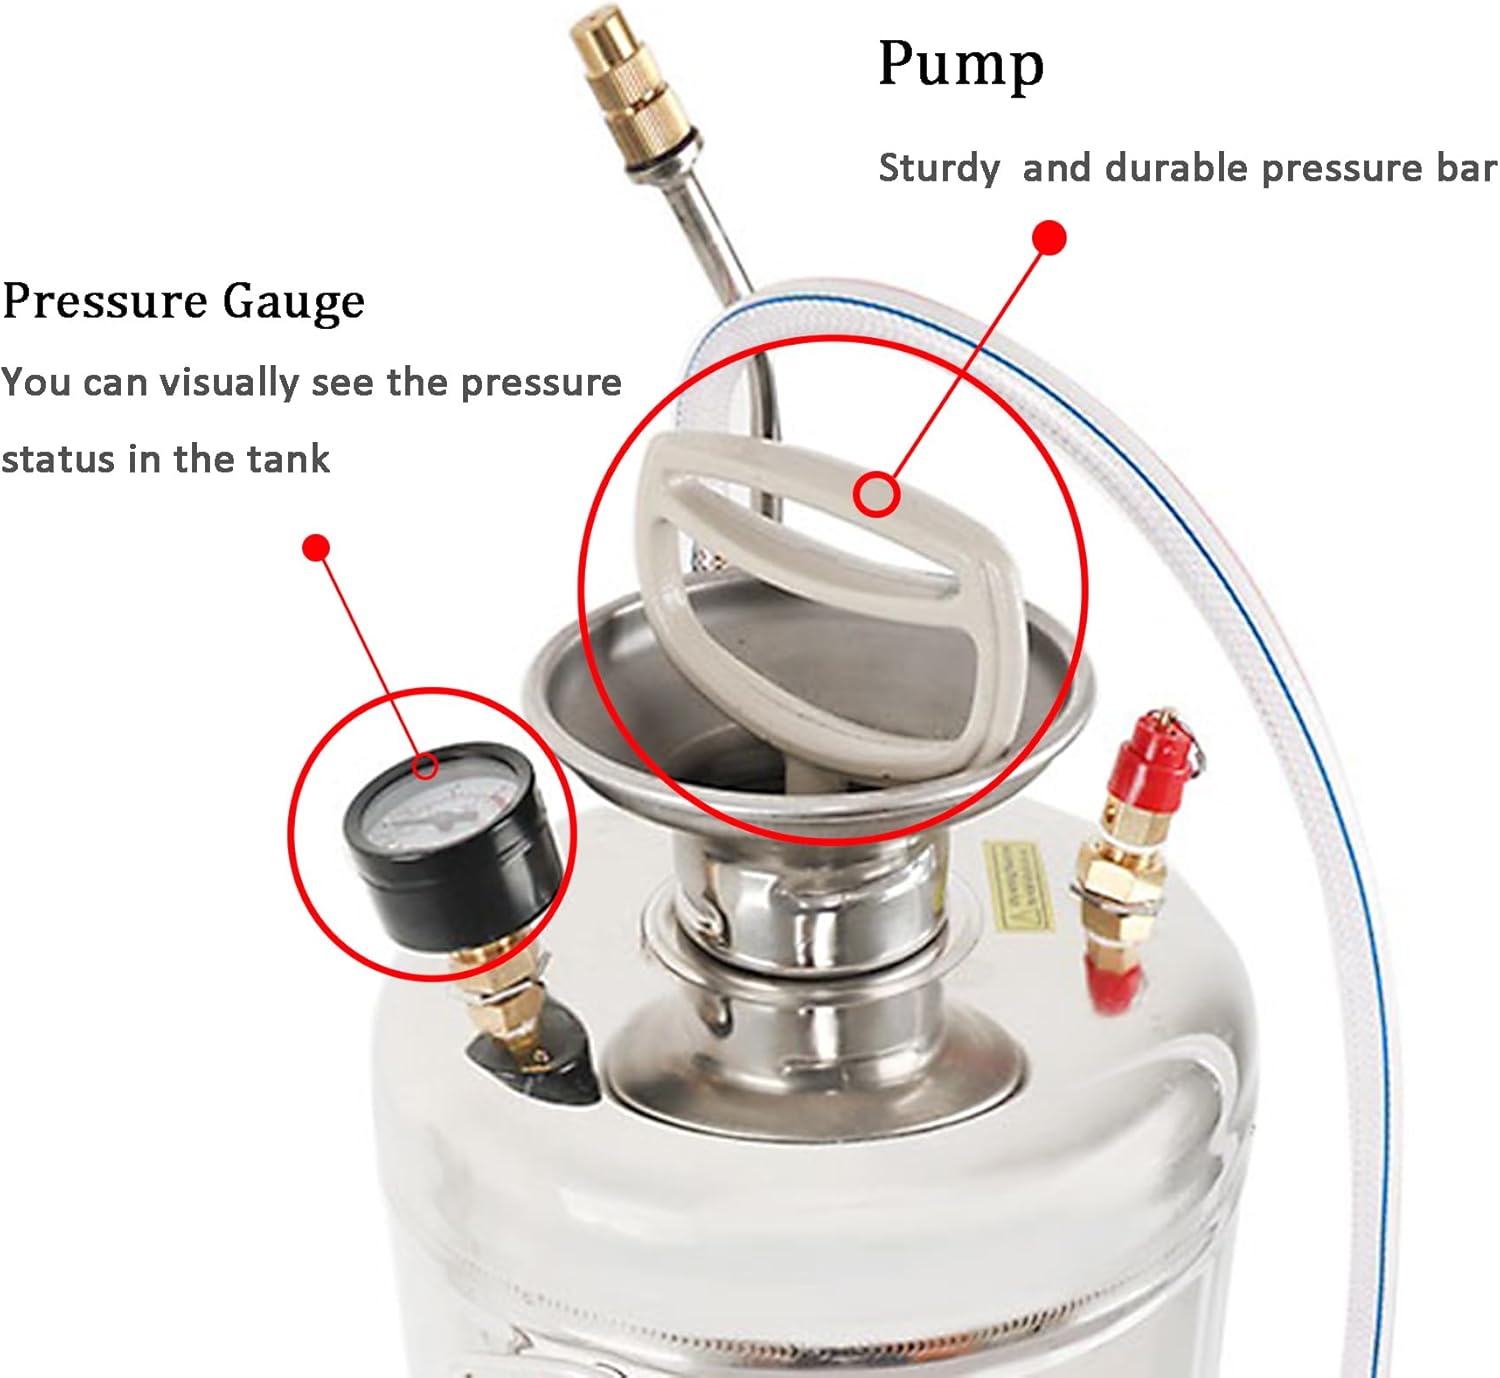
Image 3: Detailed view of the pump mechanism and pressure gauge, indicating their functions. The pump is sturdy and durable.
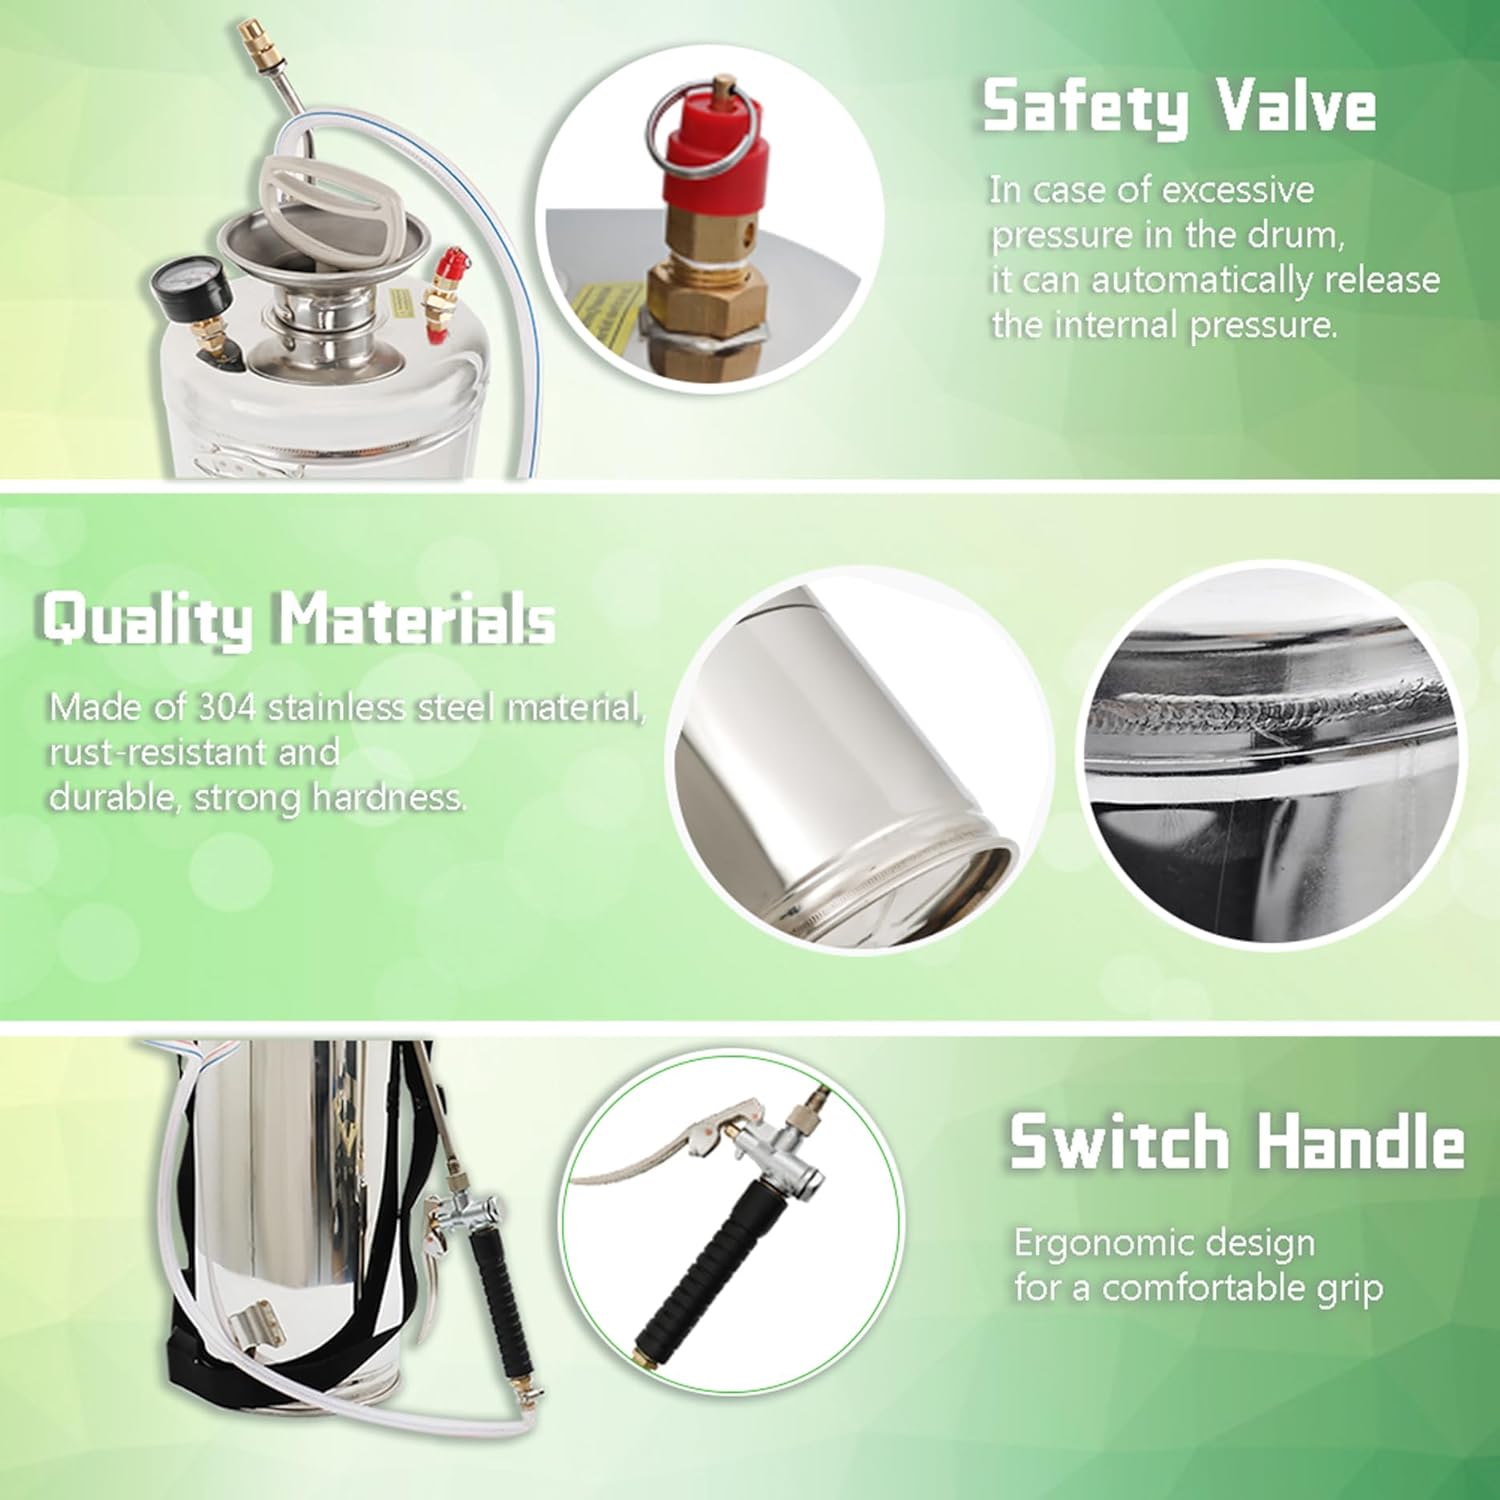
Image 4: Visual representation of key features including the safety valve, the high-quality 304 stainless steel material, and the ergonomic switch handle.
Setup and Assembly
Your sprayer comes partially assembled. Follow these steps to prepare it for use:
- Unpack Components: Carefully remove all parts from the packaging. Check against the parts list (refer to Image 1) to ensure all components are present.
- Attach Hose: Connect one end of the hose to the outlet port on the sprayer tank and the other end to the spray wand's inlet. Ensure connections are tight to prevent leaks.
- Attach Spray Wand: Securely attach the spray wand to the hose.
- Install Shoulder Strap: If desired, attach the adjustable shoulder strap to the designated loops on the sprayer tank for easier portability.
- Initial Inspection: Before first use, inspect all connections and components for any damage or loose parts.
Operating Instructions
1. Filling the Tank
- Ensure the sprayer is on a flat, stable surface.
- Depressurize the tank by pulling the safety valve or pressing the trigger on the spray wand until all air is released.
- Unscrew the pump assembly from the tank by turning it counter-clockwise.
- Pour the desired liquid into the tank, ensuring not to exceed the maximum fill line (2 Gallons / 8 Liters).
- Carefully re-insert the pump assembly and screw it clockwise until securely tightened.
2. Building Pressure
- With the pump assembly securely in place, grasp the pump handle.
- Pump the handle up and down repeatedly to build air pressure inside the tank.
- Monitor the pressure gauge. Stop pumping when the desired operating pressure is reached, or before it enters the red zone (if applicable) to avoid over-pressurization. The safety valve will release pressure if it becomes too high.
3. Adjusting the Nozzle and Spraying
- Point the spray wand away from yourself and others.
- Rotate the adjustable nozzle at the end of the spray wand to change the spray pattern. Turning it one way will produce a fine mist (foggy spray), while turning it the other way will produce a concentrated stream (water column).
- Press the switch handle on the spray wand to begin spraying. Release to stop.

Image 5: The adjustable nozzle, illustrating how it can be rotated to change the spray pattern and intensity.
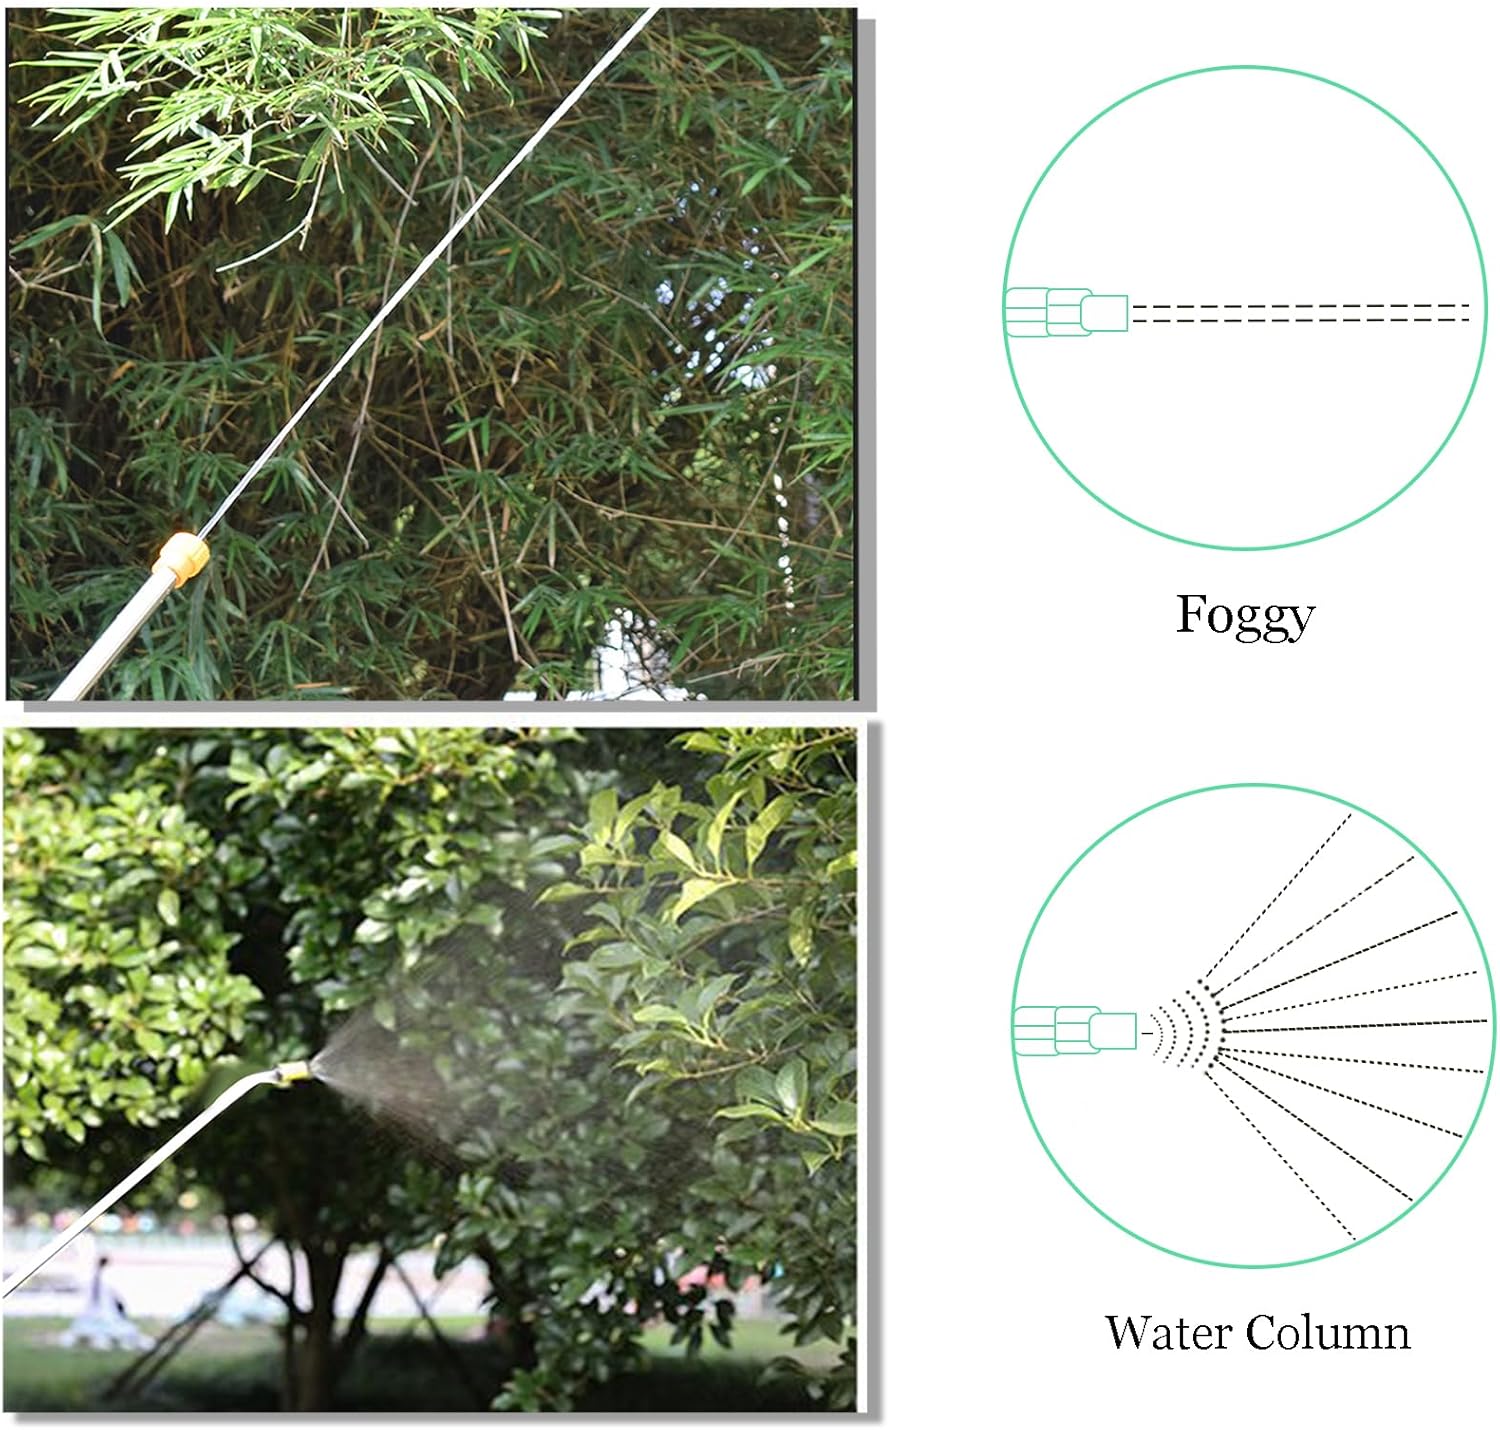
Image 6: Demonstrates the two primary spray patterns: a wide, fine 'Foggy' mist and a concentrated 'Water Column' stream, achievable by adjusting the nozzle.
4. Applications
This versatile sprayer is suitable for a wide range of tasks:
- Garden Spraying: Applying pesticides, herbicides, or fertilizers to plants.
- Watering Lawns: Targeted watering for small areas or specific plants.
- Car Washing: Applying soap or rinse water.
- Pet Cleaning: Gentle rinsing for pets.
- Floor/Surface Cleaning: Applying cleaning solutions to various surfaces.

Image 7: Collage showing the sprayer being used for garden spraying, watering lawns, car washing, and pet cleaning, illustrating its multi-purpose functionality.
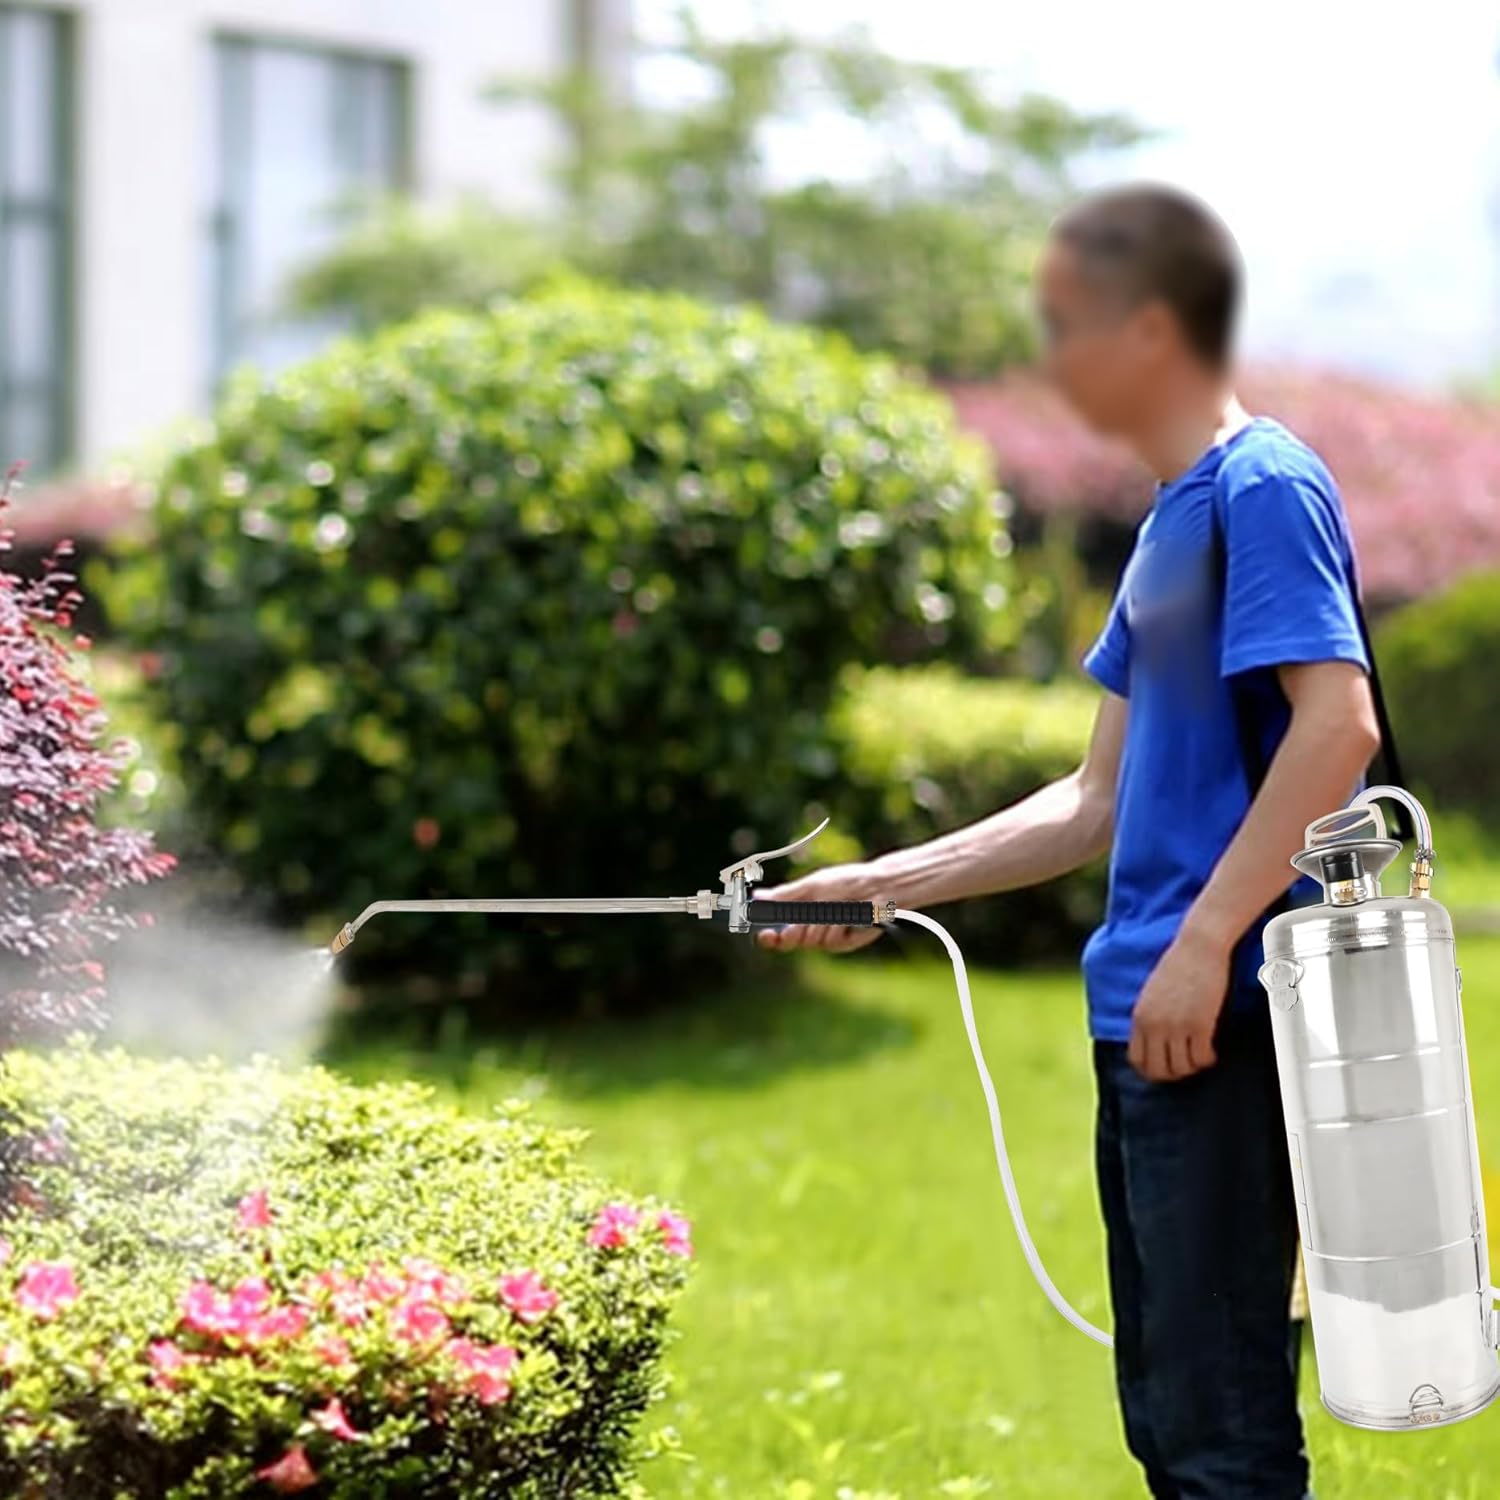
Image 8: A person demonstrating the use of the sprayer in a garden setting, applying a fine mist to plants.
Maintenance and Storage
Proper maintenance ensures the longevity and optimal performance of your sprayer.
- After Each Use:
- Depressurize the tank completely.
- Empty any remaining liquid from the tank.
- Rinse the tank thoroughly with clean water. Pump clean water through the hose and spray wand to flush out any residue.
- Clean the exterior of the sprayer with a damp cloth.
- Nozzle Cleaning: If the nozzle becomes clogged, unscrew it and clean any debris with a small brush or by rinsing under strong water pressure.
- Seal Inspection: Periodically inspect all seals and O-rings for wear or damage. Replace if necessary to maintain proper pressure and prevent leaks.
- Lubrication: Apply a small amount of silicone grease to the pump's O-rings occasionally to ensure smooth operation and prevent drying.
- Storage: Store the sprayer in a cool, dry place, away from direct sunlight and freezing temperatures. Ensure the tank is empty and depressurized before storage.
Troubleshooting
| Problem | Possible Cause | Solution |
|---|---|---|
| No pressure builds up. |
|
|
| Liquid leaks from connections. |
|
|
| Nozzle sprays unevenly or is clogged. |
|
|
| Pressure drops quickly. |
|
|
Specifications
| Feature | Detail |
|---|---|
| Brand | LiGuVCY |
| Model | 2 Gallon Pump Sprayer (B0CPSBMHDS) |
| Tank Volume | 2 Gallons (approx. 8 Liters) |
| Material | Stainless Steel (304 grade) |
| Color | Silver |
| Power Source | Air Powered (Manual Pump) |
| Hose Length | 3 Feet |
| Spray Wand Length | 20 Inches |
| Product Dimensions | 21.65 x 7.87 x 7.87 inches (approx. 55 x 20 x 20 cm) |
| Item Weight | 6.82 pounds (approx. 3.1 kg) |
| Recommended Uses | Watering, Cleaning, Vehicle Washing, Garden Spraying, Pet Cleaning |
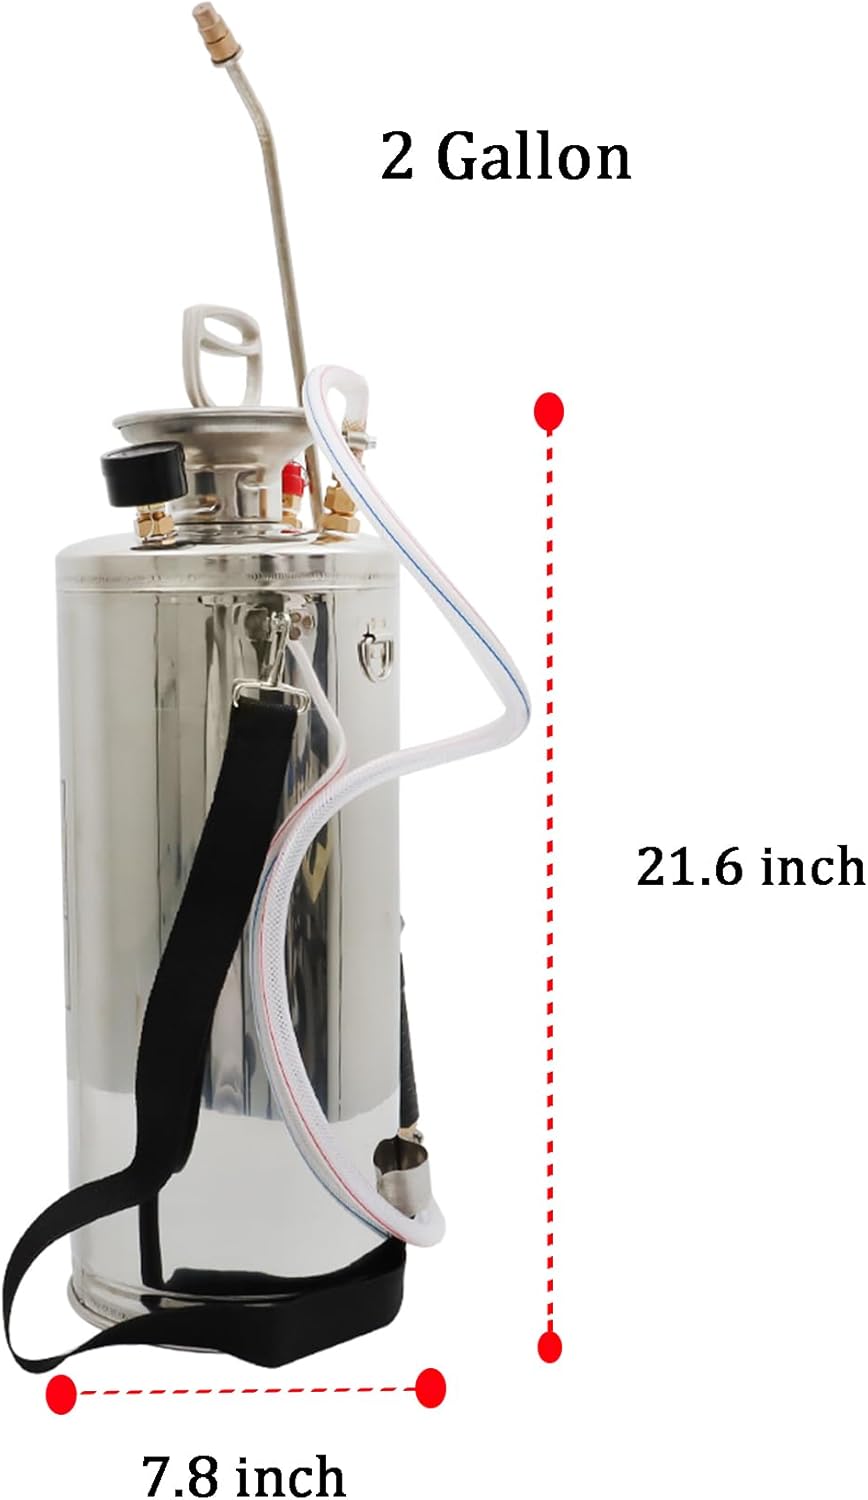
Image 9: The 2 Gallon sprayer with key dimensions indicated: approximately 21.6 inches in height and 7.8 inches in diameter.
Warranty and Support
For information regarding product warranty, please refer to the documentation included with your purchase or contact LiGuVCY customer support. While specific warranty details are not provided in this manual, LiGuVCY is committed to product quality.
For technical support, replacement parts, or any inquiries, please contact the retailer where the product was purchased or visit the official LiGuVCY store on Amazon: LiGuVCY Store.
Ask a question about this manual
Ask about setup, troubleshooting, compatibility, parts, safety, or missing instructions. Manuals+ will review the question and use this page’s manual context to help answer it.