Introduction
This user manual provides detailed instructions for the safe and efficient operation of your AFU 67.2V 10A Li-ion Battery Smart Charger. Please read this manual thoroughly before using the product and retain it for future reference.
Package Contents

Image: Contents of the AFU Smart Charger package, including the charger unit, power cable, operating manual, and spare fuses.
- 1x AFU 67.2V 10A Smart Charger (Model: AF800-67210B-C13)
- 1x US Standard Power Cable
- 1x Operating Manual
- 2x Spare Fuses
Product Features
- OLED Charging Display: Provides real-time information on voltage, current, temperature, and power.
- Three-stage Intelligent Charging: Utilizes Constant Current (CC), Constant Voltage (CV), and Trickle charging modes for optimal battery health and full charge.
- Robust Aluminum Casing: Durable and aids in heat dissipation.
- Integrated Cooling Fan: Ensures efficient heat management during operation.
- LED Indicators: Clearly shows power status and charging progress.
- Multiple Protection Features: Includes overvoltage, overcurrent, short circuit, and reverse protection for enhanced safety.
- Automatic Shut-off: Charger automatically stops charging when the battery is fully charged.

Image: Front view of the AFU Smart Charger, highlighting the OLED display and charging indicators.

Image: Visual representation of the charger's multiple protection features, including super heat dissipation, overvoltage, overcurrent, short circuit, balance function, voltage protection, anti-protection, and temperature protection.
Specifications
| Product Name | 67.2V 10A Charger |
| Model | AF800-67210B-C13 |
| Dimensions | 170 x 90 x 63 mm (6.7 x 3.54 x 2.48 inches) |
| Weight | Approximately 1.17 kg (2.57 pounds) |
| Color/Material | Black/Aluminum Case |
| Suitable Battery Type | 16S 60V Lithium Battery Pack |
| AC Input | 100~120Vac, 50~60Hz |
| Output Voltage | 67.2 Volts (DC) |
| Output Current | 10 Amp |
| Battery Protection | SCP (Short Circuit Protection), OVP (Overvoltage Protection), OCP (Overcurrent Protection), OTP (Over Temperature Protection) |
| Charging Mode | Constant Current - Constant Voltage - Trickle (three-stage intelligent charging) |
| Charging Efficiency | ≥85% |
| Working Temperature | -20 ℃ ~ +40 ℃ (-4°F ~ +104°F) |
| Storage Temperature | -40 ℃ ~ +70 ℃ (-40°F ~ +158°F) |
| DC Connector | C13 N+L- Plug (default) |

Image: Diagram illustrating the dimensions (6.7 x 3.54 x 2.48 inches) and weight (3.1 lbs) of the AFU Smart Charger.
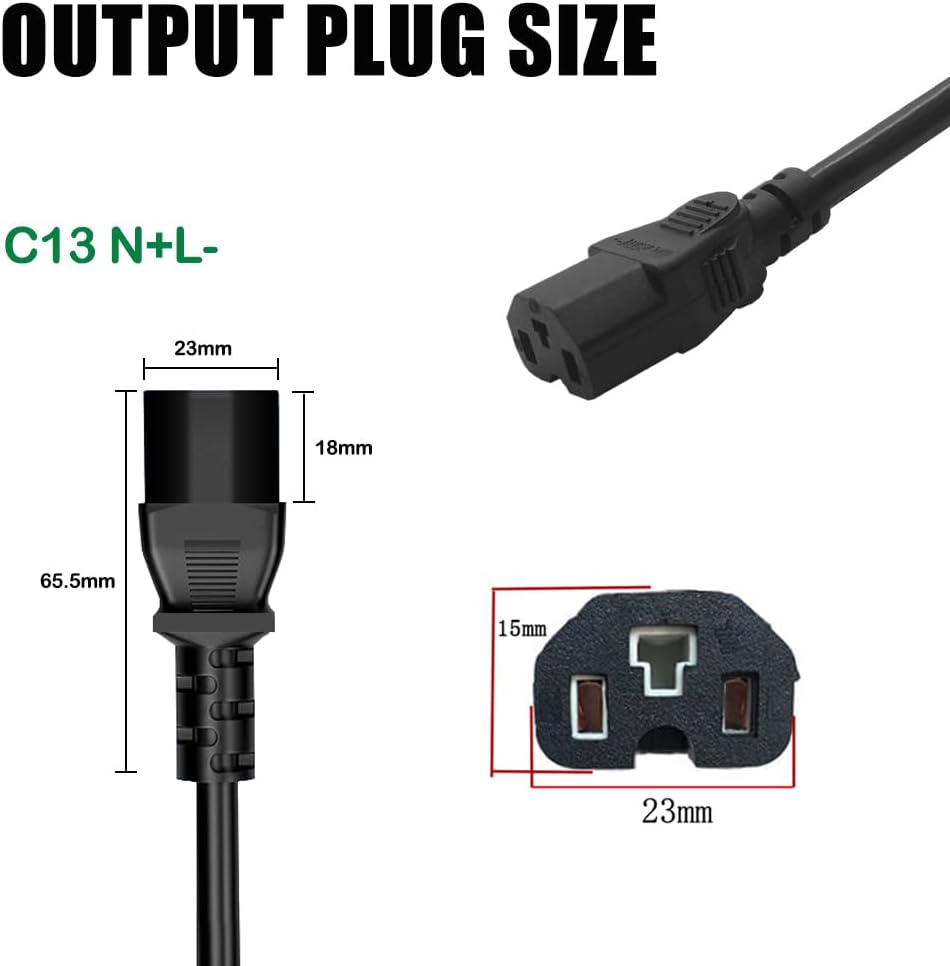
Image: Detailed view of the C13 N+L- output plug, including its dimensions.
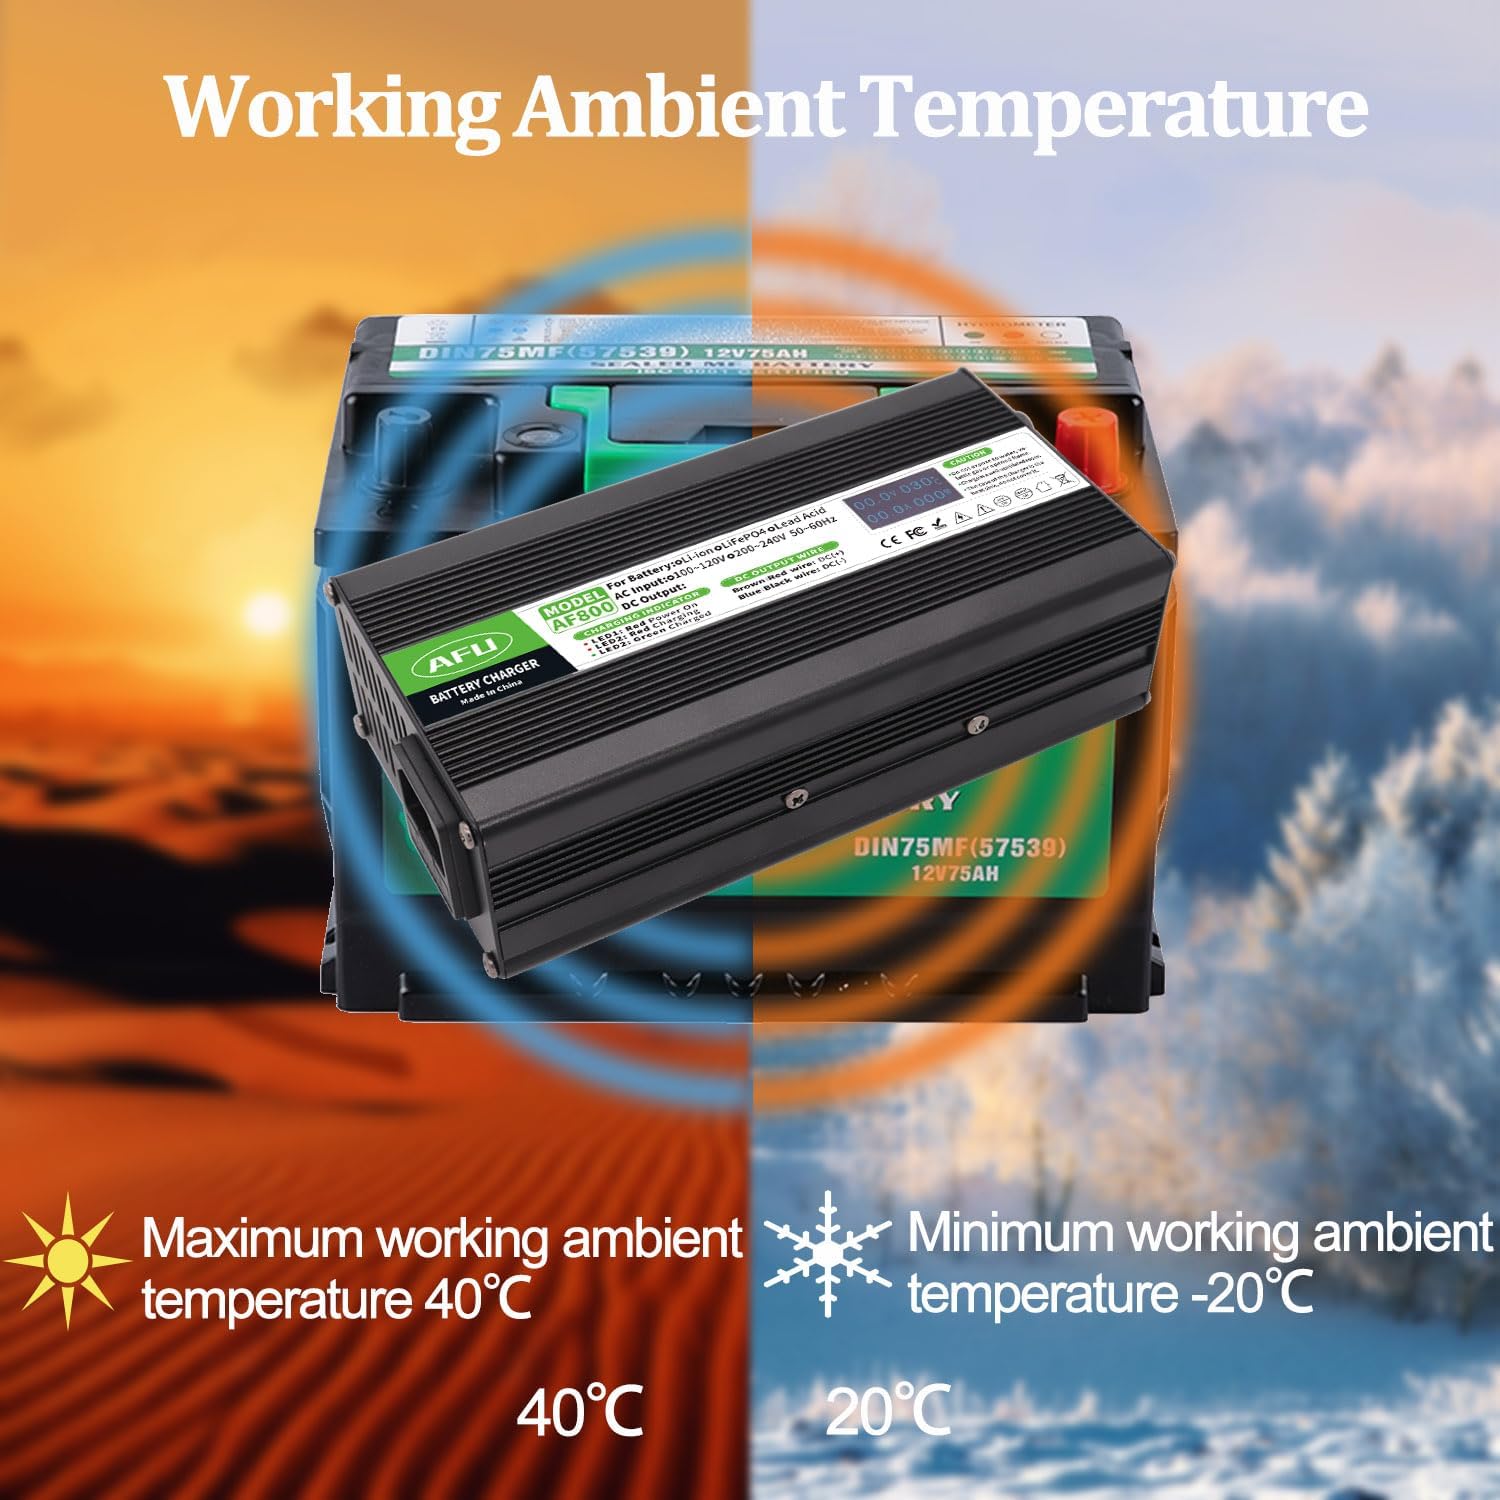
Image: Illustration of the charger's optimal working ambient temperature range, from -20°C to +40°C.
Setup
Before initial use, ensure all components listed in the "Package Contents" section are present and undamaged. Place the charger on a stable, flat surface in a well-ventilated area, away from direct sunlight, heat sources, and moisture.
Connecting the Power Cable
- Locate the AC input interface on the charger (typically at the back).
- Connect the provided US standard power cable to the AC input interface of the charger.
- Ensure the connection is firm and secure.
Video: An overview of the AFU Smart Charger, demonstrating its components, dimensions, and the process of connecting the power cable and observing the OLED display and LED indicators during operation.
Operating Instructions
Follow these steps carefully to charge your 16S 60V Lithium Battery Pack:
- Connect to Battery First: Before connecting the charger to AC power, ensure the DC output terminal of the charger is securely connected to the battery's charging socket.
- Connect to AC Power: After the DC terminal is connected to the battery, plug the AC power cord into a standard 100-120Vac, 50-60Hz wall outlet.
- Monitor Charging: Observe the LED indicators and the OLED display for charging status.
- Disconnect After Charging: Once charging is complete (LED 2 turns green), first unplug the AC power cord from the wall outlet, and then unplug the DC terminal from the battery.
- Storage: When not in use or after charging, always unplug both the DC terminal from the battery and the AC terminal from the wall outlet.
LED Indicator Guide
- LED 1 (Red): Indicates that the charger is powered on.
- LED 2 (Red): Indicates that the battery is currently being charged.
- LED 2 (Flashing Red): Indicates that the battery is nearing a full charge.
- LED 2 (Green): Indicates that the battery has been fully charged.
OLED Display Information
The OLED display provides real-time data during the charging process:
- Voltage (V): Displays the current charging voltage.
- Current (A): Displays the current charging amperage.
- Temperature (°C): Displays the internal temperature of the charger.
- Power (W): Displays the current charging power in watts.
Maintenance
- Cleaning: Regularly wipe the charger's exterior with a soft, dry cloth. Do not use abrasive cleaners or solvents.
- Ventilation: Ensure the cooling fan and ventilation slots are free from dust and debris to maintain optimal heat dissipation.
- Storage: Store the charger in a cool, dry place when not in use, away from extreme temperatures and humidity.
- Fuse Replacement: If the charger stops functioning, check the fuse. Refer to the "Troubleshooting" section for instructions on replacing the fuse.
Troubleshooting
| Problem | Possible Cause | Solution |
|---|---|---|
| Charger not powering on (LED 1 off) | No AC power; Loose power cable; Blown fuse. | Check wall outlet and power cable connection. Replace fuse if necessary (refer to fuse replacement instructions below). |
| LED 2 remains red, battery not charging | DC connector not properly connected to battery; Battery fault. | Ensure DC connector is firmly seated. Check battery for issues. |
| Charger gets excessively hot | Poor ventilation; Overload. | Ensure charger is in a well-ventilated area. Clear any obstructions from cooling fan/vents. Ensure battery is compatible. |
| OLED display is blank or erratic | Power issue; Internal fault. | Check power connection. If problem persists, contact customer support. |
Fuse Replacement
The charger is equipped with a replaceable fuse for protection. If the charger fails to power on, the fuse may need replacement.
- Disconnect Power: Ensure the charger is completely disconnected from both the AC power outlet and the battery.
- Locate Fuse Holder: The fuse holder is typically located near the DC output wire on the charger. It is a small, circular cap that can be unscrewed.
- Remove Old Fuse: Unscrew the fuse holder cap. Carefully remove the old fuse.
- Insert New Fuse: Insert one of the provided spare fuses into the fuse holder.
- Secure Fuse Holder: Screw the fuse holder cap back into place firmly.
- Test Charger: Reconnect the charger to the battery and then to AC power to test its functionality.
Important Safety Information
- Indoor Use Only: This charger is designed for indoor use. Do not expose to water, rain, or excessive humidity.
- Ventilation: Always operate the charger in a well-ventilated area. Do not cover the charger or block its ventilation openings.
- Flammable Materials: Do not use the charger near flammable or combustible materials.
- Battery Compatibility: Only use this charger with compatible 16S 60V Lithium Battery Packs. Using it with incompatible batteries may cause damage or injury.
- Connection Order: Always connect the DC terminal to the battery first, then the AC power. When disconnecting, unplug AC power first, then the DC terminal.
- No User Serviceable Parts: Do not attempt to open or repair the charger. Refer all servicing to qualified personnel.
- Children and Pets: Keep the charger out of reach of children and pets.
- Damage: Do not use the charger if the power cord, plug, or charger casing is damaged.
Caution: Do not expose to water, volatile gas or opened flame. Charge in a well-ventilated room. The case of the charger is the heat sink, do not cover it.
Warranty and Support
For warranty information or technical support, please contact AFU customer service through the retailer where you purchased the product or visit the official AFU Store on Amazon:
Please have your product model number (AF800-67210B-C13) and purchase details ready when contacting support.


