
Introduction
This manual provides instructions for the installation, operation, and maintenance of the Bradley 6A03-110000 Automatic Liquid Soap/Gel Sanitizer Dispenser. This surface-mounted dispenser features contemporary contours and a finish designed to match other accessories in Bradley's designer series. It has a capacity of 27 ounces (800 ml) and is equipped with a hinged cover, concealed mounting plate, vandal-resistant filler hole cover, and a sight gauge for monitoring liquid levels.
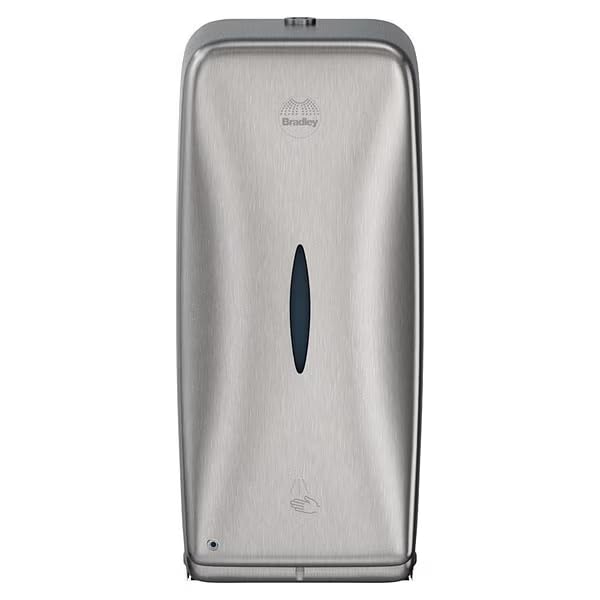
Image: Front view of the Bradley 6A03-110000 Automatic Liquid Soap/Gel Sanitizer Dispenser.
Key Features
- Versatile Dispensing: Offers flexibility to dispense either liquid soap or gel hand sanitizer.
- Compatibility: Compatible with Bradley's 6A20-110000 Hand Sanitizer/Soap Dispenser Stand (sold separately).
- Security Features: Includes a vandal-resistant filler hole cover and a concealed mounting plate.
- Durability: Equipped with a corrosion-resistant sanitizer valve.
- Touch-Free Operation: Ensures hygienic dispensing.
- Large Capacity: Features a tank capacity of 27 ounces (800 mL).
- Liquid Level Monitoring: Integrated sight gauge allows for easy monitoring of soap/sanitizer levels.
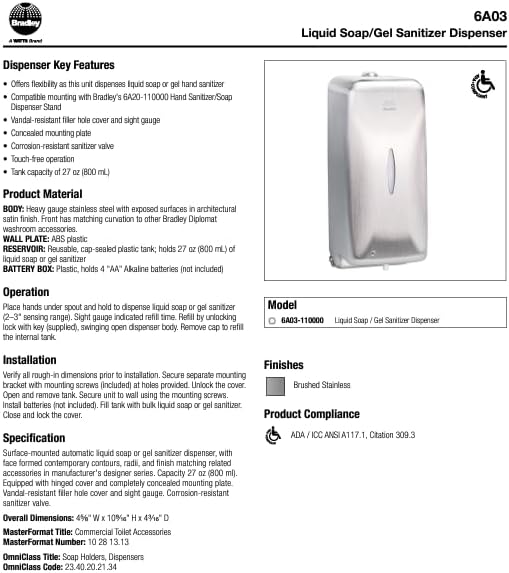
Image: Detailed view of the dispenser, showcasing its design and features.
Product Components
- Body: Heavy gauge stainless steel with exposed surfaces in architectural satin finish.
- Wall Plate: ABS plastic.
- Reservoir: Disposable, snap-sealed plastic tank with 27 oz (800 ml) capacity.
- Battery Box: Plastic, designed to hold 4 "AA" Alkaline batteries (not included).
- Mounting Hardware: Screws and a mounting bracket are included for installation.
- Key: A key is supplied for unlocking the dispenser cover for refilling and maintenance.
Setup and Installation
- Review Dimensions: Before beginning installation, verify all rough-in dimensions to ensure proper placement.
- Mounting Bracket: Secure the separate mounting bracket to the wall using the provided mounting screws. Ensure it is level and firmly attached.
- Access Dispenser Interior: Use the supplied key to unlock the dispenser cover. Open the cover and remove the internal tank.
- Secure Dispenser to Wall: Align the dispenser unit with the mounted bracket and secure it to the wall using the provided screws.
- Install Batteries: Insert 4 "AA" Alkaline batteries (not included) into the battery box. Ensure correct polarity.
- Fill Tank: Fill the internal plastic tank with bulk liquid soap or gel sanitizer. Do not overfill.
- Close and Lock: Reinsert the filled tank, close the dispenser cover, and lock it with the key.

Image: Technical diagram showing installation steps and components.
Operation
To operate the dispenser, place your hands under the spout. The touch-free sensor will detect your hands within a 2-3 inch sensing range and automatically dispense a measured amount of liquid soap or gel sanitizer. The sight gauge on the front of the dispenser indicates when it is time to refill the unit.
Maintenance
Refilling the Dispenser
- Monitor the sight gauge on the front of the dispenser to determine when refilling is necessary.
- Unlock the dispenser cover using the supplied key.
- Swing open the dispenser body to access the internal plastic tank.
- Remove the cap from the internal tank.
- Fill the tank with the appropriate liquid soap or gel sanitizer. Do not overfill.
- Replace the tank cap, close the dispenser body, and lock the cover with the key.
Cleaning
Clean the exterior surfaces of the dispenser regularly with a soft, damp cloth and a mild, non-abrasive cleaner. Avoid using harsh chemicals or abrasive materials that could damage the satin finish. Ensure no liquid enters the battery compartment or sensor area during cleaning.
Battery Replacement
When the dispenser's operation becomes inconsistent or stops, it may be time to replace the batteries. Unlock the dispenser cover, open the body, and access the plastic battery box. Replace the 4 "AA" Alkaline batteries with new ones, ensuring correct polarity. Close and lock the dispenser.
Troubleshooting
- Dispenser Not Activating:
- Ensure hands are placed within the 2-3 inch sensing range directly under the spout.
- Check if the batteries are correctly installed and have sufficient charge. Replace if necessary.
- Verify the dispenser is not obstructed.
- No Soap/Sanitizer Dispensed:
- Check the liquid level via the sight gauge and refill if empty.
- Ensure the internal tank cap is properly secured.
- Confirm the dispenser is locked correctly after refilling.
- Leaking or Dripping:
- Ensure the internal tank is not overfilled.
- Verify the internal tank cap is tightly sealed.
- Check for any damage to the dispenser valve or spout.
Specifications
| Model Number | 6A03-110000 |
| Brand | Bradley |
| Material (Body) | Heavy Gauge Stainless Steel |
| Material (Wall Plate) | ABS Plastic |
| Material (Reservoir) | Disposable, Snap-Sealed Plastic |
| Liquid Volume Capacity | 27 Fluid Ounces (800 mL) |
| Product Dimensions (Overall) | 4.62 x 4.19 x 10.56 inches (W x D x H) |
| Item Weight | 2.66 pounds |
| Power Source | 4 "AA" Alkaline Batteries (not included) |
| Compliance | ADA / ICC ANSI A117.1, Citation 309.3 |
| Material Type Free | Latex Free, Nickel Free, BPA Free |
Dimensions
Refer to the diagram below for detailed product dimensions and recommended mounting heights.

Image: Technical drawing illustrating the dispenser's dimensions from various angles and recommended mounting heights.
Warranty and Support
For warranty information or technical support regarding your Bradley 6A03-110000 Automatic Liquid Soap/Gel Sanitizer Dispenser, please refer to the official Bradley website or contact their customer service department. Keep your purchase receipt for warranty claims.
Official Bradley Website: www.bradleycorp.com