
1. Product Overview
This manual provides essential information for the safe and efficient use of your EMOOR Lift-Up Table with Shelf. Please read it thoroughly before assembly and use, and keep it for future reference.
The EMOOR Lift-Up Table is designed to adapt to various needs, transforming from a low coffee table to a comfortable workspace. It features a lift-up tabletop and integrated storage compartments.

Image 1.1: EMOOR Lift-Up Table with Shelf in Stone Gray.
2. Safety Information
WARNING: To avoid the risk of finger pinching, always hold the designated slit part when raising or lowering the tabletop. Do not hold other parts of the tabletop. Exercise extreme caution, especially when children are operating the table.
Ensure all components are securely fastened during assembly. Do not overload the table or storage compartments beyond the specified weight limits.
3. Setup and Assembly
Assembly is required for this product. It is recommended to have two people for assembly, though one person can manage with care. Estimated assembly time is approximately 90 minutes.
3.1. Package Contents
Verify that all parts are present before beginning assembly. Refer to the included parts list in your packaging.
3.2. Assembly Steps
- Unpack all components and lay them out on a clean, soft surface to prevent scratches.
- Attach the legs to the main table body using the provided screws. Ensure they are tightened securely.
- Assemble the internal shelf and storage dividers according to the diagrams.
- Install the lift-up mechanism and gas cylinders. Pay close attention to the orientation.
- Carefully attach the lift-up tabletop to the mechanism. This step may require two people to align and secure properly.
- Ensure all screws are tightened, and the table is stable before use.

Image 3.1: Illustration of the table's components and assembly process.
4. Operating Instructions
4.1. Lifting the Tabletop
- Locate the slit on the front edge of the lift-up tabletop.
- Place your fingers firmly in the slit.
- Gently lift the tabletop upwards. The gas cylinder mechanism will assist in a smooth lift.
- The tabletop will lock into its raised position, creating a comfortable desk height for working or dining while seated on a sofa.

Image 4.1: Demonstrating the lift-up function for a comfortable workspace.
4.2. Lowering the Tabletop
- Place your fingers firmly in the slit on the front edge of the lift-up tabletop.
- Gently push the tabletop downwards. The gas cylinder will provide resistance for a controlled descent.
- Ensure the tabletop is fully lowered and flush with the main table body for use as a coffee table.

Image 4.2: The table in its lowered position, ideal for relaxation.
4.3. Storage Compartments
The table features two types of storage:
- Under-tabletop Storage: This hidden compartment is ideal for neatly storing items you want out of sight, such as laptops, magazines, or documents. Access it by lifting the tabletop.
- Open Shelf Storage: The side shelf provides easy access for items you use frequently, like books, remote controls, or small electronic devices.

Image 4.3: View of the spacious storage area beneath the lift-up tabletop.

Image 4.4: The convenient open shelf for quick access items.
5. Maintenance
To ensure the longevity and appearance of your EMOOR Lift-Up Table, follow these maintenance guidelines:
- Cleaning: Wipe the table surface with a soft, damp cloth. Avoid abrasive cleaners or harsh chemicals that may damage the finish.
- Spills: Immediately wipe up any spills to prevent staining or damage to the printed reinforced paper board.
- Inspection: Periodically check all screws and fasteners to ensure they remain tight. Retighten if necessary.
- Movement: When moving the table, lift it rather than dragging it to prevent damage to the legs and floor.
6. Troubleshooting
6.1. Tabletop does not lift smoothly
- Check for any obstructions in the lift mechanism.
- Ensure the gas cylinders are properly installed and not damaged.
- Verify that all assembly screws related to the lift mechanism are securely tightened.
6.2. Table feels wobbly
- Ensure all leg attachment screws are fully tightened.
- Check that the table is placed on a flat, even surface.
6.3. Striped pattern on surface
- The striped pattern is a characteristic wood grain often seen in oak material, even on the stone gray finish. This is not a defect.
7. Specifications
| Feature | Detail |
|---|---|
| Overall Dimensions | Approx. W90 x D50 x H45-59 cm |
| Lift-up Tabletop Dimensions | Approx. W61 x D50 cm |
| Storage Area Dimensions | Approx. W59.5 x D46.5 cm |
| Material | Printed reinforced paper board, Steel (powder coating) |
| Color | Stone Gray |
| Load Capacity (Tabletop) | Approx. 20 kg |
| Load Capacity (Lift-up Tabletop) | Approx. 7 kg |
| Load Capacity (Storage Area) | Approx. 10 kg |
| Load Capacity (Shelf) | Approx. 10 kg |
| Assembly Time | Approx. 90 minutes |
| Country of Manufacture | China |
| Package Weight | Approx. 19.22 kg |
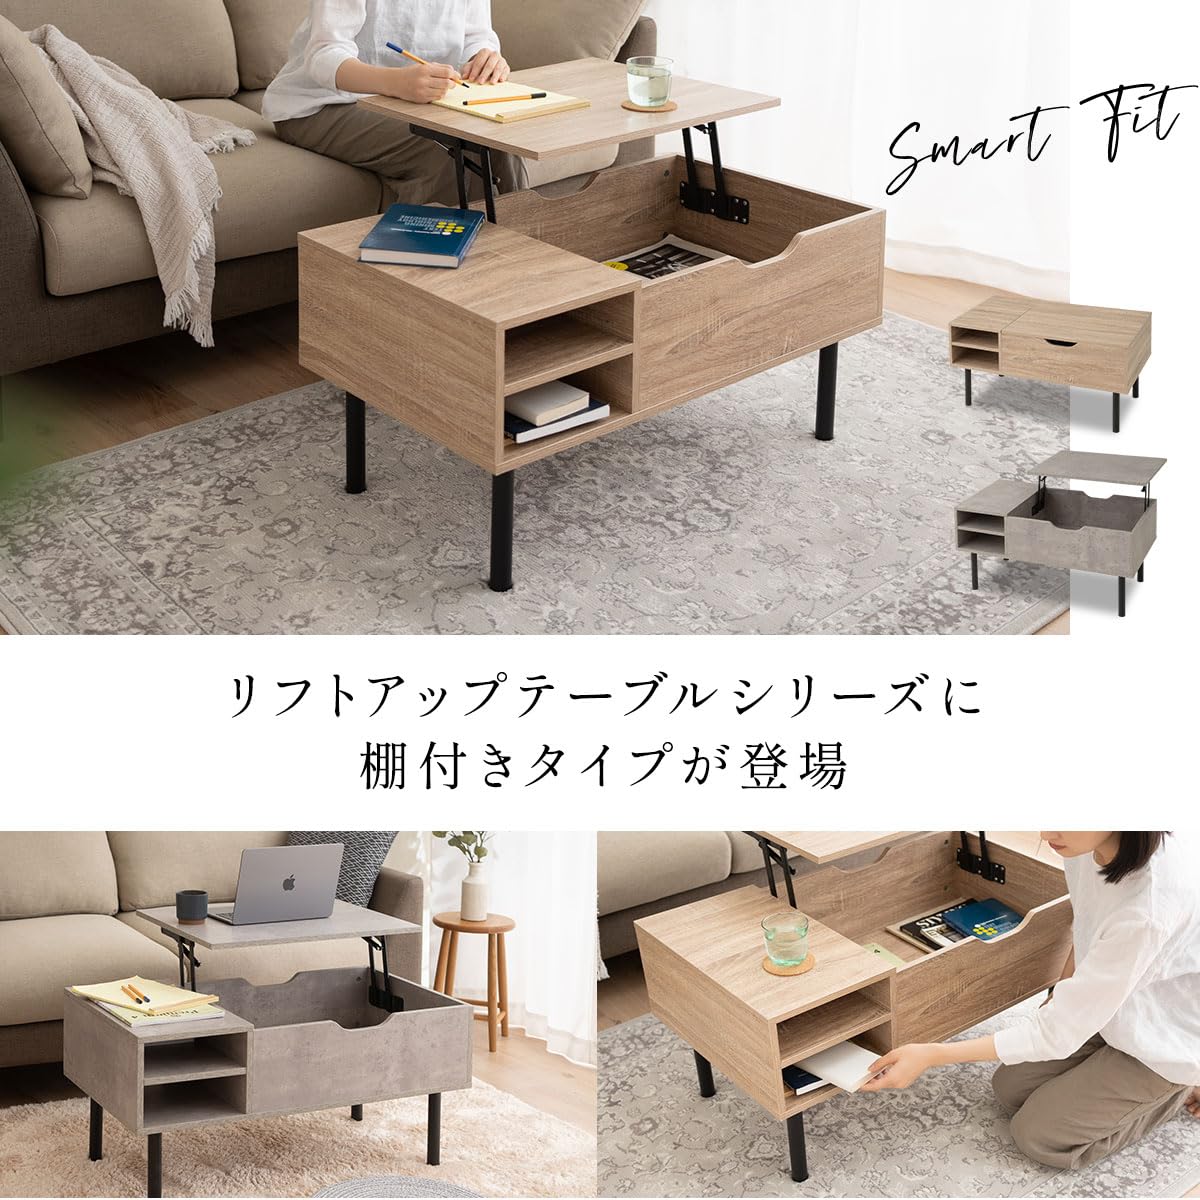
Image 7.1: Visual representation of table dimensions and load capacities.
8. Warranty and Support
Information regarding product warranty and customer support is not available in the provided product data. Please refer to the product packaging or the retailer's website for details on warranty coverage and how to contact customer service for assistance.