1. Introduction
This manual provides detailed instructions for the safe and effective use of your NEEWER S101-300W Studio Monolight Flash Light Kit. This kit is designed for professional and enthusiast photographers, offering powerful and consistent lighting for various applications including portrait, product, and studio photography. Please read this manual thoroughly before operating the equipment and retain it for future reference.
Package Contents
The NEEWER S101-300W Studio Monolight Flash Light Kit includes the following components:
- 2 x S101-300W Monolight (with modeling lamp)
- 2 x 200cm Light Stand
- 2 x Softbox
- 2 x Standard Reflector
- 1 x RT-16 Transmitter
- 2 x RT-16 Receiver
- 2 x Power Cord
- 1 x 5-in-1 Reflector
- 1 x Carry Bag (27.6in x 15.4in x 11.8in / 70cm x 39cm x 30cm)
- 1 x User Manual (this document)

2. Safety Instructions
To prevent damage to the product or injury to yourself or others, read all safety precautions completely before using this equipment.
- Electrical Safety: Always ensure the power supply matches the voltage requirements of the monolights. Do not operate with wet hands or in damp conditions. Disconnect power before cleaning or servicing.
- Overheating: The monolights feature an efficient heat dissipation system. However, avoid covering the ventilation openings. Allow adequate cooling time between prolonged full-power flashes.
- Flash Tube: The flash tube operates at high voltage and temperature. Do not touch the flash tube immediately after use. Allow it to cool down.
- Eye Protection: Do not look directly into the flash when it fires, as it can cause temporary vision impairment.
- Stability: Always ensure light stands are properly extended and stable, especially when mounting heavy accessories like softboxes. Use sandbags if necessary to prevent tipping.
- Children and Pets: Keep the equipment out of reach of children and pets to prevent accidents.
- Proposition 65 Warning: This product may contain chemicals known to the State of California to cause cancer and birth defects or other reproductive harm.
3. Setup Guide
3.1 Assembling the Light Stands
- Unfold the legs of the light stand to create a stable base.
- Extend the telescopic sections of the stand to the desired height, securing each section with the locking knobs. Ensure all knobs are tightened before mounting equipment.

3.2 Mounting the Monolight
- Attach the S101-300W monolight to the top stud of the light stand.
- Secure the monolight by tightening the mounting knob on the monolight's bracket.
- Adjust the tilt angle of the monolight using the bracket's adjustment knob. The monolight supports 180° tilt for flexible positioning.

3.3 Attaching Softboxes and Reflectors
The monolight features a standard Bowens mount, allowing for a wide range of light modifiers.
- To attach a softbox or standard reflector, align the accessory's mounting ring with the Bowens mount on the monolight.
- Twist the accessory clockwise until it locks securely into place.
- For softboxes, assemble the rods into the speedring and then attach the diffuser fabric.
- The monolight also includes an umbrella socket for securing photography umbrellas (not included).
3.4 Connecting Power
Connect the provided power cords to the monolights and then to a suitable power outlet.
4. Operating Instructions
4.1 Power On/Off
Press the power button located on the back panel of the monolight to turn it on or off.
4.2 Modeling Lamp Control
The 150W modeling lamp assists in previewing the light's effect. It has 9 brightness levels (L1-L9).
- Press the MODEL button to cycle through the modeling lamp modes (e.g., proportional, full, off).
- Use the UP/DOWN arrow buttons to adjust the brightness level from L1 to L9.

4.3 Flash Power Adjustment
Adjust the flash output power from 7.0 (1/8) to 10 (1/1) using the UP/DOWN arrow buttons.
- The flash duration ranges from 1/2000s to 1/800s.
- Recycling time is between 0.4-2.5 seconds, depending on the flash power setting.
4.4 S1/S2 Optical Slave Mode
The S101-300W monolight can function as a slave unit, triggered by another flash.
- Press the SLAVE button to activate optical slave mode.
- S1 Mode: For triggering by a manual master flash unit. The slave flash fires upon detecting the first flash from the master.
- S2 Mode: For triggering by a TTL master flash unit. The slave flash ignores the pre-flash from the master and fires on the main flash.

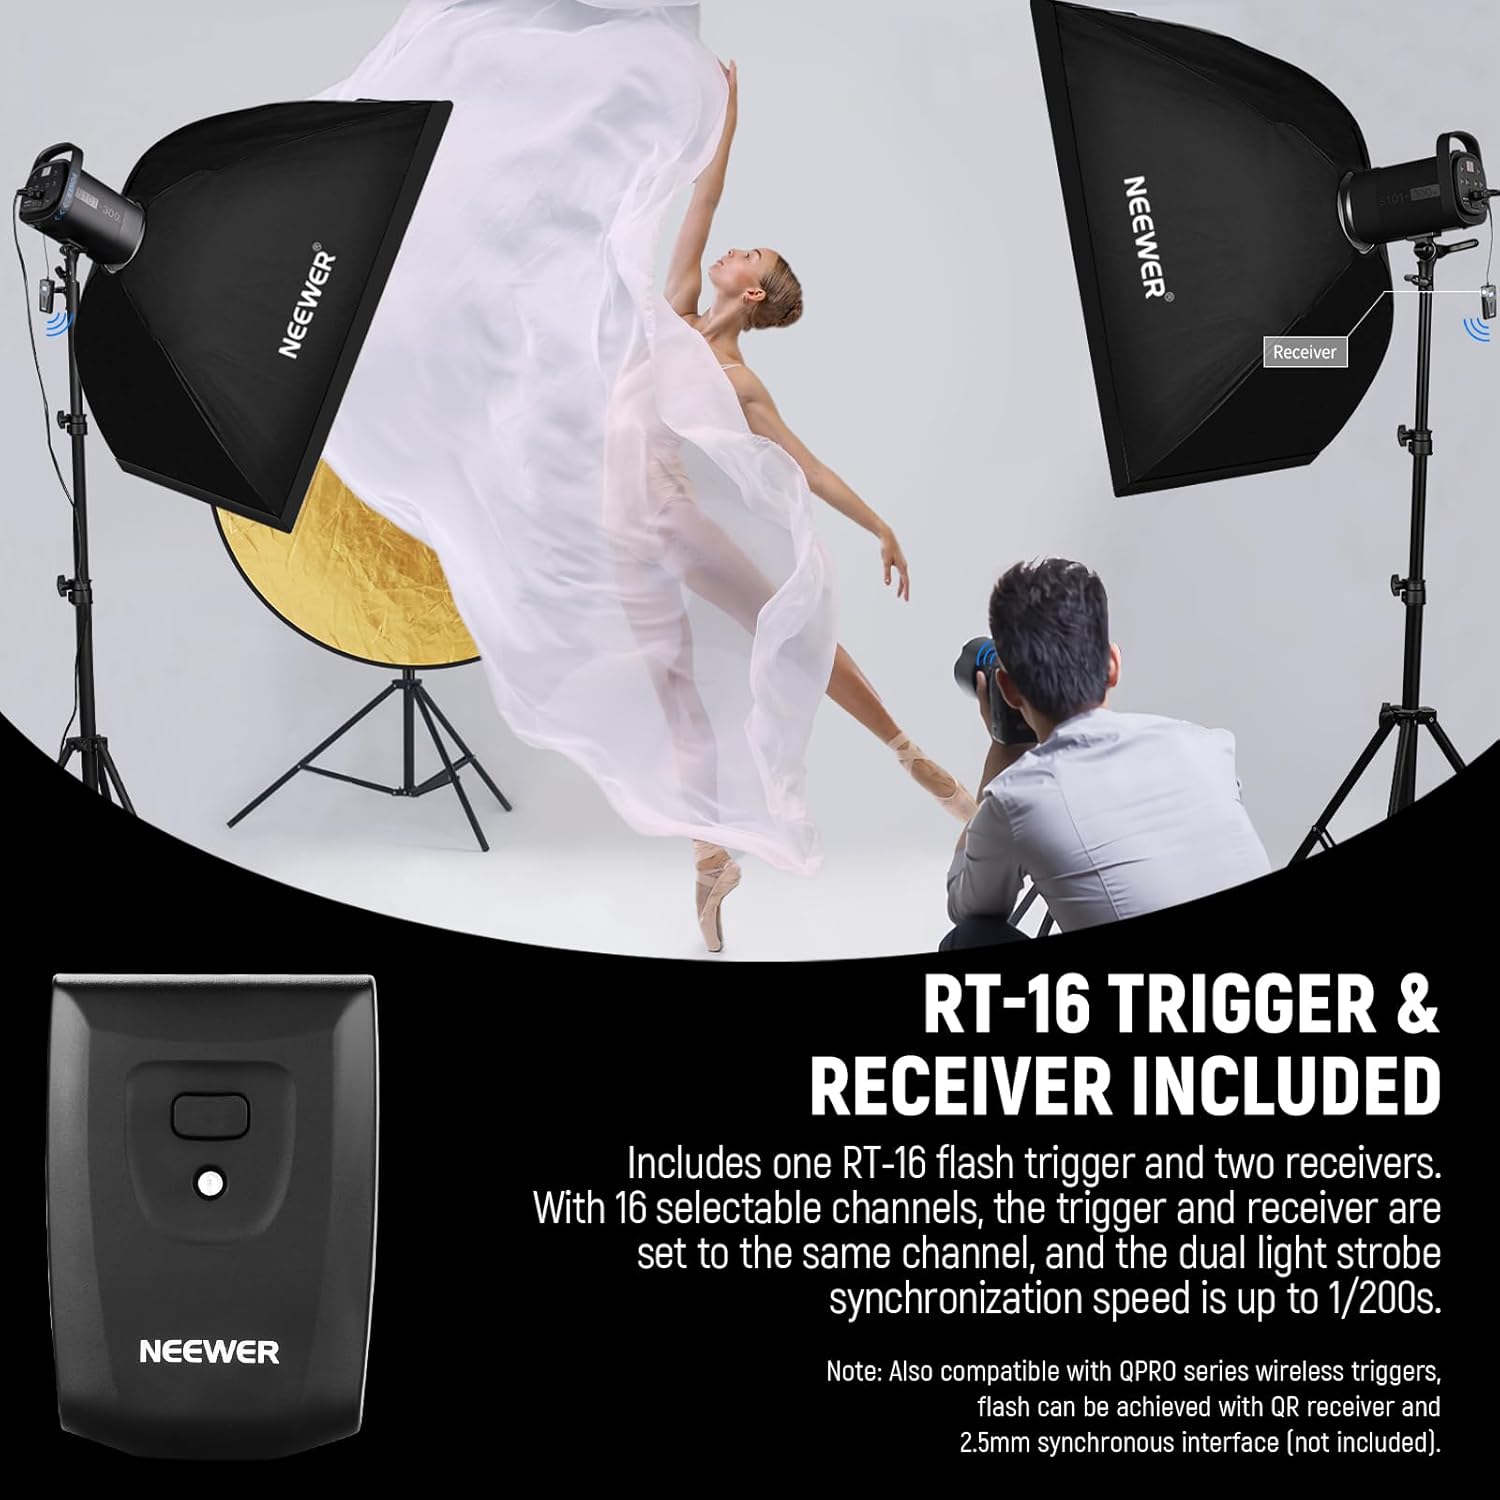
4.5 Using the RT-16 Trigger and Receivers
The included RT-16 trigger and receivers allow for wireless synchronization of the monolights.
- Attach an RT-16 receiver to the sync port on each monolight.
- Mount the RT-16 transmitter onto your camera's hot shoe.
- Ensure both the transmitter and all receivers are set to the same channel (1-16).
- The system supports a quick sync speed of up to 1/200s.
- The wireless range is approximately 99ft/30m outdoors and 66ft/20m indoors.
- The single contact hot shoe is compatible with Canon, Sony, Nikon, Fujifilm, Olympus, Panasonic, and Pentax cameras.

4.6 Memory Function
The monolight features a memory function that saves your last used settings, ensuring they are retained when the unit is powered off and on again.
5. Maintenance
5.1 Cleaning
Ensure the monolight is powered off and unplugged before cleaning. Use a soft, dry cloth to wipe the exterior. For stubborn dirt, a slightly damp cloth can be used, followed by a dry cloth. Do not use harsh chemicals or abrasive cleaners.
5.2 Storage
When not in use, store the kit in the provided carrying bag in a cool, dry place, away from direct sunlight and excessive humidity. Disassemble softboxes and stands for compact storage.
5.3 Heat Dissipation System
The S101-300W monolight is equipped with an efficient and silent heat dissipation system, featuring optimized vents and cooling fans. This system prevents overheating even after 300 consecutive full-power flashes, ensuring safe operation and extending the flash's lifespan. Keep the vents clear of obstructions.

6. Troubleshooting
| Problem | Possible Cause | Solution |
|---|---|---|
| Monolight does not power on. | Power cord not connected; power outlet faulty; unit malfunction. | Ensure power cord is securely connected. Test the power outlet with another device. If problem persists, contact support. |
| Flash does not fire. | Trigger/receiver not synchronized; flash power too low; camera settings incorrect; flash tube faulty. |
|
| RT-16 remote trigger not working at distance. | Interference; incorrect channel; battery low in trigger/receiver. |
|
| Monolight overheats or shuts down. | Blocked ventilation; excessive consecutive full-power flashes. | Ensure ventilation openings are clear. Allow the unit to cool down. Reduce the frequency of full-power flashes. |
| Inconsistent flash output. | Low power setting; unit not fully recycled; faulty flash tube. | Allow sufficient recycling time between flashes. Ensure power settings are appropriate. If problem persists, contact support. |
7. Specifications
| Model | S101-300W |
| Max Power | 300Ws (each monolight) |
| Color Temperature | 5600K (±200K) |
| Modeling Lamp | 150W, 9 brightness levels (L1-L9) |
| Flash Power Adjustment | 7.0-10 (1/8-1/1) |
| Flash Duration | 1/2000s - 1/800s |
| Recycling Time | 0.4s - 2.5s |
| Optical Slave Modes | S1, S2 |
| Wireless Trigger | RT-16 (16 channels) |
| Wireless Range | Outdoor: 99ft/30m; Indoor: 66ft/20m |
| Mount Type | Bowens Mount |
| Item Weight | 28.4 pounds (total kit) |
| Package Dimensions | 29.2 x 17.5 x 12.7 inches |
| Manufacturer | NEEWER |
8. Warranty and Support
For warranty information, technical support, or service inquiries, please refer to the official NEEWER website or contact their customer service directly.
You can visit the official NEEWER store for more information and support: NEEWER Store on Amazon.


