
1. Product Overview
This manual provides instructions for the installation and maintenance of PANMILED LED backlight strips designed for various Hisense 55-inch TV models. These strips are replacement parts intended to restore proper backlighting to compatible televisions.
- Product Name: LED Backlight Strip Set for Hisense 55'' TV (e.g., 55A6G, HD550Y1U62-T0L6, JL.D550A1330-003BS-M_V01).
- Dimensions: Each strip measures approximately 41.6 inches (R+L).
- Quantity: Each set includes 8 pieces (4R+4L).
- LED Specifications: Each LED bead operates at 3V. Each strip contains 10 LED beads (R+L).
- Installation Feature: Double-sided adhesive tape is pre-applied on the back for secure mounting.
Compatible LED Strip Models: 55R6G, 55A6G, 55R6095G5, 55R6070G, 55C350KU, HD550Y1U62-T0L6, JL.D550A1330-003BS-M_V01, ZD_SSC_D550_4X10_01_V2.20.
2. Important Pre-Installation Information
Before proceeding with installation, carefully review the following:
- Compatibility Check: Before ordering, compare the LED light strip shown in the product photos with your original TV's backlight strips. If uncertain, open the TV and visually compare the original strips with the product images provided.
- Documentation: Prior to removing the original LED light strips, take clear photographs of their arrangement and connections. This will serve as a reference during the installation of the new strips.
- Orientation: The new LED light strips must be installed in the exact same orientation and sequence as the original strips to ensure correct functionality.

Figure 2.1: Overview of PANMILED LED Backlight Strips.

Figure 2.2: Detail of LED strip markings (JL.D550A1330-003BS-M_V01).
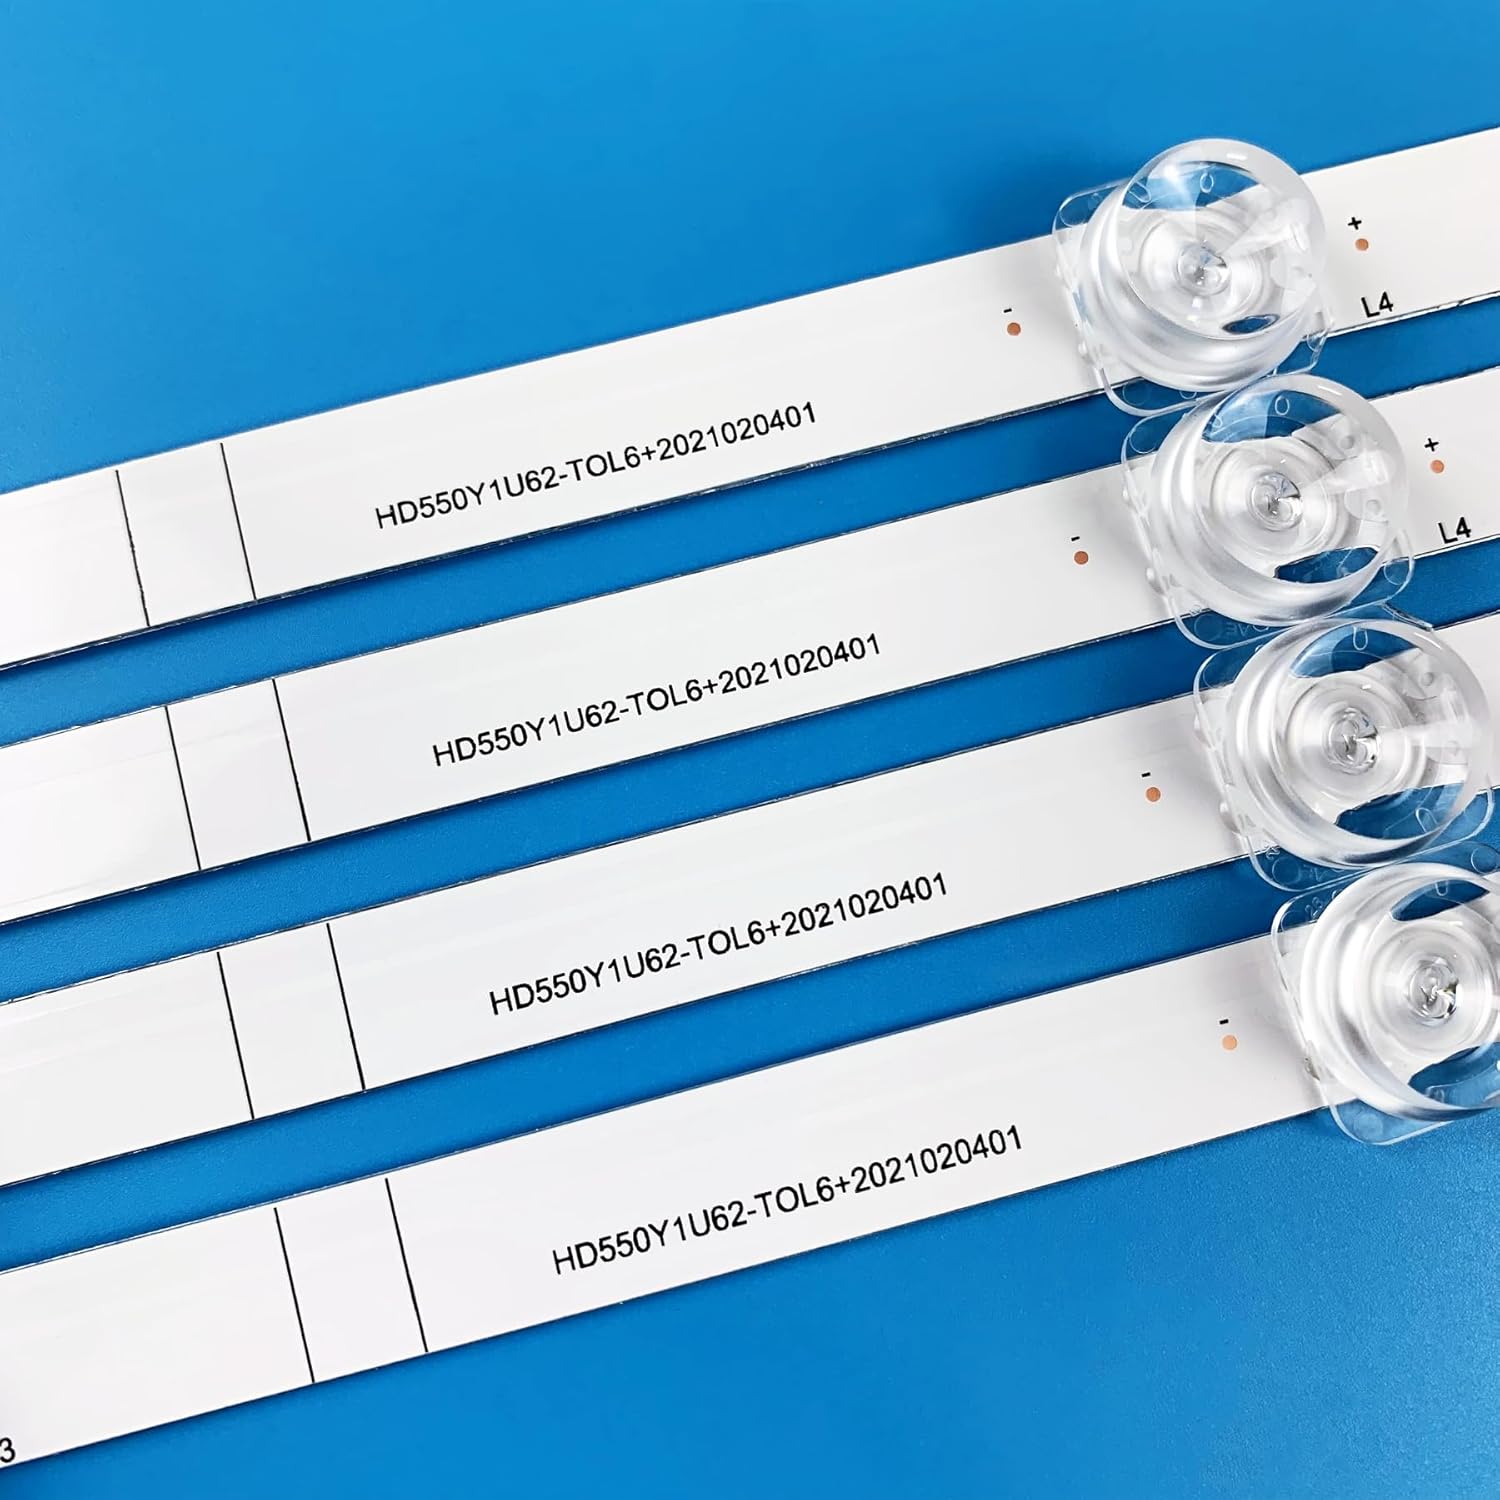
Figure 2.3: Detail of LED strip markings (HD550Y1U62-T0L6).
3. Setup and Installation
Replacing TV backlight strips requires careful handling and basic technical knowledge. If you are unsure about any step, consult a professional technician.
- Safety First: Disconnect the TV from the power outlet before beginning any disassembly.
- Disassembly: Carefully remove the TV's back panel, screen, and diffuser layers to access the existing LED backlight strips. Refer to your specific TV model's service manual for detailed disassembly instructions.
- Remove Old Strips: Gently detach the old LED strips. Note their exact placement and connections. The double-sided adhesive on the old strips may require careful prying.
- Clean Surface: Ensure the mounting surface for the new strips is clean and free of dust or residue.
- Install New Strips:
- Peel off the protective backing from the double-sided adhesive on the new PANMILED strips.
- Align each new strip precisely in the location of the old one, ensuring the "R" (Right) and "L" (Left) markings match the original configuration.
- Press firmly along the length of each strip to ensure proper adhesion.
- Connect Strips: Connect the individual strips using the provided connectors. Ensure a secure fit.

Figure 3.1: Detail of strip connectors and R/L markings.
Video 3.1: Demonstration of connecting two LED backlight strip segments. This video illustrates how the 'R' and 'L' marked sections of the strips connect to form a continuous unit.
- Reconnect Power: Reconnect the power cable to the TV's power supply board.
- Test Functionality: Before reassembling the screen and back panel, carefully power on the TV to verify that all new LED strips illuminate correctly and evenly.
- Reassembly: If the test is successful, carefully reassemble the diffuser layers, screen, and back panel in reverse order of disassembly.
4. Operating Instructions
These LED backlight strips are passive components that function as part of your television's display system. Once correctly installed, they operate automatically when the television is powered on. There are no user-adjustable settings or controls directly associated with the backlight strips themselves.
The brightness and intensity of the backlight are controlled by the TV's internal settings, which can typically be adjusted through the television's on-screen menu.
5. Maintenance
LED backlight strips generally require no routine maintenance after installation. To ensure longevity:
- Avoid Overheating: Ensure proper ventilation around your television to prevent excessive heat buildup, which can degrade LED performance over time.
- Gentle Handling: If the TV needs to be moved or serviced again, handle the internal components, especially the screen and backlight assembly, with extreme care to prevent damage.
- Cleaning: Do not attempt to clean the LED strips directly. Any internal cleaning should only be performed by a qualified technician.
6. Troubleshooting
If you encounter issues after installing the new LED backlight strips, consider the following:
| Problem | Possible Cause | Solution |
|---|---|---|
| No backlight / Dark screen |
|
|
| Uneven brightness / Bright spots |
|
|
| TV turns on then off (boot loop) |
|
|
For complex issues, it is recommended to seek assistance from a qualified television repair technician.
7. Specifications
| Feature | Detail |
|---|---|
| Brand | PANMILED |
| Model Number | HD550Y1U62-T0L6 |
| Compatible TV Models | Hisense 55'' TV (55A6G, 55R6G, 55R6095G5, 55R6070G, 55C350KU) |
| Strip Length | 41.6 inches (approx.) |
| Number of Strips per Set | 8 pieces (4R+4L) |
| LED Beads per Strip | 10 beads (R+L) |
| LED Bead Voltage | 3V |
| Material | Aluminum |
| Special Feature | Energy Efficient |
| Indoor/Outdoor Usage | Indoor |
8. Warranty and Support
Warranty: PANMILED provides a 90-day after-sales service guarantee for this product from the date of purchase.
Customer Support: If you have any questions regarding the product, installation, or require assistance, please contact PANMILED customer service. We aim to respond to inquiries within 24 hours.
For more information or to browse other products, visit the official PANMILED store on Amazon: PANMILED Store