
Introduction
This manual provides detailed instructions for the safe and effective use of your NAILGIRLS Professional Electric Nail Drill Machine, Model T17. Please read this manual thoroughly before operation and retain it for future reference. This device is designed for various nail care applications, including filing, shaping, and polishing natural, acrylic, and gel nails.

Image: The NAILGIRLS Professional Electric Nail Drill Machine T17 control unit and handpiece with various drill bits.
Safety Information
To ensure safe operation and prevent injury or damage, please adhere to the following safety guidelines:
- Always unplug the device when not in use.
- Keep the device away from water and other liquids.
- Use the device with appropriate protective eyewear to prevent eye injury from flying debris or dust.
- Do not touch the rotating bit or allow it to come into contact with your skin to avoid burns.
- Allow the device to cool down before storing it to prevent damage.
- Use the device with proper ventilation to avoid inhaling dust or fumes.
- Ensure the device is securely placed on a stable surface while in use.
- Always follow the manufacturer's instructions for use, handling, and storage.
- Inspect the device regularly for any signs of wear or damage and replace any worn or damaged parts immediately.
- This device is not suitable for children and should be kept out of their reach.
Package Contents
Your NAILGIRLS Professional Electric Nail Drill Machine package typically includes the following items:
- NAILGIRLS Professional Electric Nail Drill Machine (Control Unit)
- High-Speed Handpiece
- Assorted Nail Drill Bits (e.g., Safety Bit, Small Barrel, Mandrel+Sanding Band, Needle Bit, Conical Bit, Large Barrel, Felted Wool Bit, Barrel Bit, Coarse Disc Bit, Cone Bit, Umbrella Top Bit)
- Sanding Bands
- Power Adapter
- User Manual

Image: A variety of nail drill bits and sanding bands included with the kit, each designed for specific nail care tasks.
Product Features
The NAILGIRLS Professional Electric Nail Drill Machine T17 offers advanced features for efficient and comfortable nail care:
- High-Speed Performance: Adjustable speed from 0 to 35000 RPM for various applications.
- Smooth Operation: Engineered for low heat, low noise, and minimal vibration.
- Durable Construction: Handpiece crafted from durable aluminum for longevity and comfortable grip.
- User-Friendly Display: Smart LED display shows current speed and direction.
- Bi-Directional Rotation: Forward/Reverse (F/R) button allows for easy direction change, suitable for both right-handed and left-handed users.
- Secure Bit Changing: Twist-lock system ensures quick and stable drill bit installation and removal.
- Versatile Applications: Suitable for prepping nails, removing acrylic, gel, or dip powder nails, managing thick nails, manicures, pedicures, callus removal, and polishing.
- Compact Design: Lightweight and space-saving, ideal for both home and salon use.

Image: Diagram illustrating the key features of the nail drill handpiece, including low heat, low noise, low vibration, adjustable speed, LED display, and F/R direction.

Image: Visual representation of the nail drill's versatility, showing its use for various nail treatments like removing acrylics, gel polish, and performing manicures and pedicures.
Setup
Follow these steps to properly set up your nail drill machine:
- Connect the Handpiece: Plug the handpiece cable securely into the designated port on the control unit.
- Connect Power: Plug the power adapter into the control unit and then into a standard electrical outlet.
- Install a Drill Bit:
- Turn the handpiece collar to the left (counter-clockwise) until it unlocks.
- Remove any existing drill bit, if present.
- Insert the desired drill bit fully into the chuck of the handpiece.
- Turn the handpiece collar to the right (clockwise) until it locks, securing the bit in place.
- Ensure the drill bit is installed correctly and securely before turning on the device.

Image: A four-step visual guide demonstrating how to correctly install and secure a drill bit into the handpiece.
Operating Instructions
Once the device is set up, follow these instructions for operation:
- Power On: Toggle the ON/OFF switch on the control unit to the 'ON' position. The LED display will illuminate.
- Adjust Speed: Rotate the speed control knob to increase or decrease the rotational speed of the drill bit. The current RPM will be shown on the LED display.
- 0-15000 RPM: Recommended for gentle filing of natural nails, cuticle work, and removing dead skin.
- 15000-25000 RPM: Suitable for removing gel polish, dip powder, and acrylic nails.
- 25000-35000 RPM: High speed for professional nail art, shaping, and more intensive tasks.
- Change Rotation Direction: Press the F/R (Forward/Reverse) button to switch the rotation direction of the drill bit. This feature is useful for working on different hands or for left-handed users.
- Begin Operation: Gently apply the rotating drill bit to the nail surface, maintaining light pressure. Avoid excessive force to prevent damage to the nail or the device.
- Power Off: After use, toggle the ON/OFF switch to the 'OFF' position and unplug the device from the power outlet.

Image: A hand adjusting the speed control knob on the nail drill unit, with a clear view of the digital LED display showing the current speed setting.
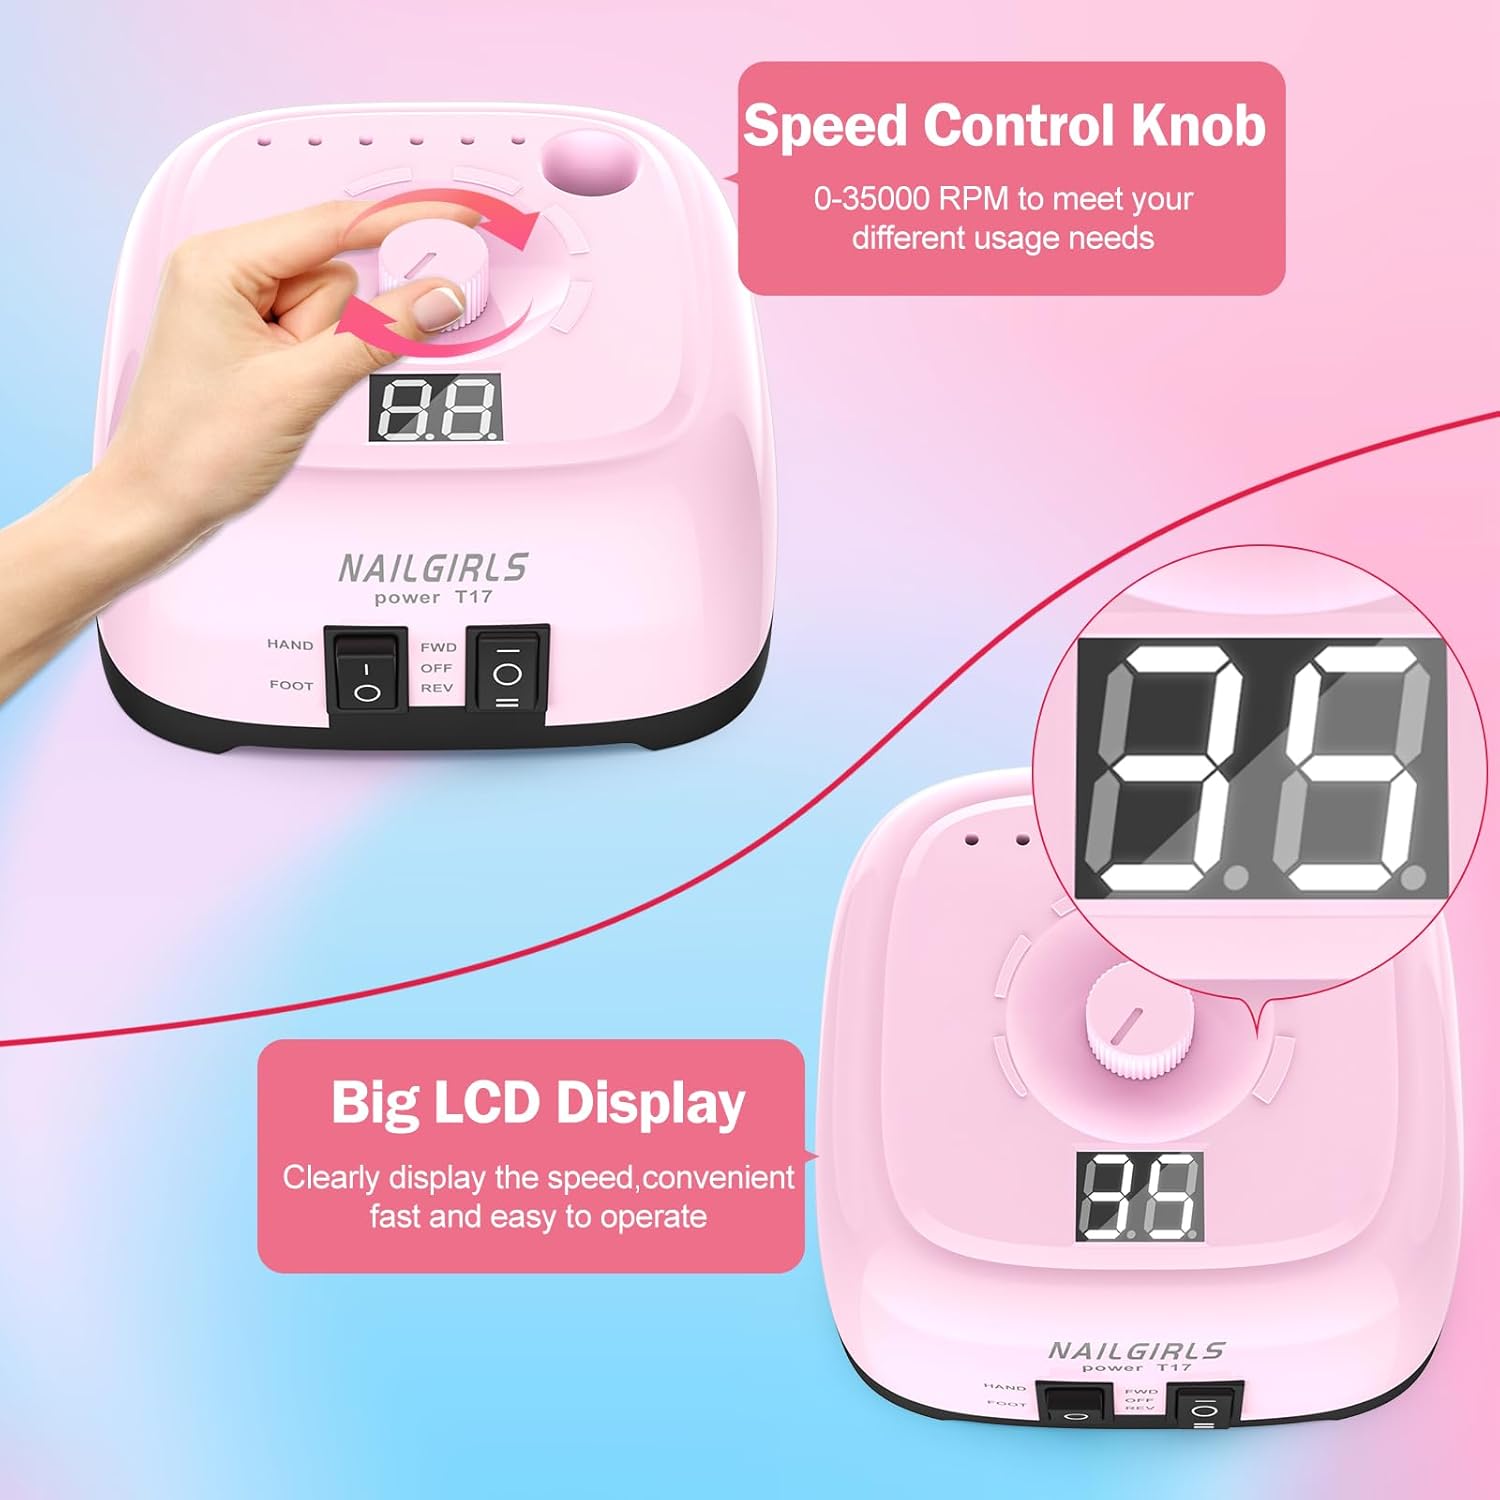
Image: Illustration showing the forward and reverse rotation options for the drill bit, with a hand pressing the F/R switch on the control unit.

Image: A nail technician using the electric nail drill, accompanied by a guide on recommended RPM ranges for tasks like natural nail filing, gel polish removal, and professional nail art.
Maintenance
Proper maintenance ensures the longevity and optimal performance of your nail drill machine:
- Cleaning: Always unplug the device before cleaning. Wipe the control unit and handpiece with a soft, dry cloth. Do not use abrasive cleaners or immerse any part of the device in water.
- Bit Cleaning: Clean drill bits after each use to remove dust and debris. Use a small brush or an ultrasonic cleaner if available.
- Cool Down: Allow the handpiece to cool down completely after use before storing it.
- Storage: Store the device and accessories in a clean, dry place away from direct sunlight, high temperatures, and moisture.
- Inspection: Regularly inspect the power cord, handpiece, and drill bits for any signs of wear, damage, or loose connections. Replace damaged components immediately to prevent malfunction or injury.
Troubleshooting
If you encounter any issues with your NAILGIRLS Electric Nail Drill Machine, refer to the following common troubleshooting tips:
- Device Not Turning On:
- Ensure the power adapter is securely connected to both the control unit and a functional electrical outlet.
- Verify that the ON/OFF switch is in the 'ON' position.
- Handpiece Not Rotating:
- Check if the drill bit is correctly installed and locked in the handpiece.
- Ensure the handpiece cable is securely connected to the control unit.
- Excessive Vibration or Noise:
- Confirm that the drill bit is inserted fully and locked securely. A loose or improperly inserted bit can cause vibration.
- Inspect the drill bit for any bends or damage; replace if necessary.
- Overheating:
- Ensure there is proper ventilation around the control unit.
- Avoid prolonged continuous use at maximum speed without short breaks.
- If overheating persists, discontinue use and contact customer support.
If these steps do not resolve the issue, please contact NAILGIRLS customer support for further assistance.
Specifications
| Feature | Specification |
|---|---|
| Model Number | T17 |
| Brand | NAILGIRLS |
| Maximum Rotational Speed | 35000 RPM |
| Input Power | 20 Watts |
| Power Source | Corded Electric |
| Handpiece Material | Aluminum |
| Package Dimensions | 8.19 x 7.09 x 3.11 inches |
| Product Weight | 2.14 Pounds |
| UPC | 788362516567 |
| ASIN | B0CPHVJ8DG |

Image: Diagram showing the physical dimensions of the NAILGIRLS T17 control unit and its handpiece.
Warranty and Support
NAILGIRLS is committed to customer satisfaction. For any questions, concerns, or support needs regarding your Professional Electric Nail Drill Machine, please contact our customer service team. We are available 24 hours a day to assist you. Please refer to your purchase documentation for specific warranty details and contact information.

