
uleway T180
Uleway T180 4G Senior Mobile Phone User Manual
Model: T180 | Brand: uleway
Introduction
The Uleway T180 is a 4G mobile phone specifically designed for seniors, featuring large buttons, a clear display, and an intuitive operating system. It supports 4G LTE, 3G WCDMA, and 2G GSM networks, ensuring wide compatibility with European carriers. This manual provides detailed instructions on how to set up, operate, maintain, and troubleshoot your Uleway T180 phone.

Image: Front and side view of the Uleway T180 phone, highlighting its large buttons and USB-C port.
1. Setup
1.1 Package Contents
Please ensure all items are present in the package:
- 1 x Uleway T180 4G Senior Mobile Phone
- 1 x 1000 mAh Battery
- 1 x USB Type-C Charging Cable
- 1 x Charging Cradle
- 1 x User Manual
1.2 SIM Card and Battery Installation
The Uleway T180 uses a Nano SIM card. Ensure the phone is powered off before installation.
- Remove the back cover of the phone by gently prying it open from the notch.
- Insert the Nano SIM card into the designated SIM card slot with the gold contacts facing down and the cut corner aligned correctly.
- Insert the 1000 mAh battery into the battery compartment, ensuring the contacts align with those in the phone.
- Replace the back cover, pressing firmly until it clicks into place.

Image: Multiple views of the Uleway T180 phone, showing the back cover and various ports, useful for locating the SIM and battery compartments.
1.3 Charging the Phone
Before first use, fully charge the phone. The Uleway T180 supports two charging methods:
- Using the Charging Cradle: Place the phone into the charging cradle, ensuring it sits securely. The charging indicator on the phone will illuminate.
- Using the USB Type-C Cable: Connect the USB Type-C cable to the phone's charging port and the other end to a compatible USB power adapter (not included) or a computer.
A full charge typically takes approximately 2-3 hours. The phone offers up to 240 minutes of talk time and 150-200 hours of standby time.

Image: Two Uleway T180 phones, one charging in its cradle and another showing the USB-C cable connection, illustrating convenient charging options.
2. Operating Instructions
2.1 Power On/Off
- To Power On: Press and hold the Power/End Call button (red button) until the screen lights up.
- To Power Off: Press and hold the Power/End Call button until the power off options appear, then select "Power off".
2.2 Making Calls
- Enter the phone number using the large numeric keypad.
- Press the Call button (green button) to initiate the call.
- To end a call, press the Power/End Call button (red button).

Image: A Uleway T180 phone displaying a large number on its screen, emphasizing the large fonts and high volume feature for easy readability and audibility.
2.3 Sending SMS Messages
- From the main menu, navigate to "Messages".
- Select "Write message" or "New message".
- Enter the recipient's number or select from contacts.
- Type your message using the keypad.
- Press the "Send" option.
2.4 SOS Emergency Button
The SOS button is located on the back of the phone and is designed for emergencies. You can set up to 5 SOS contact numbers.
- Setting SOS Numbers: Go to "Settings" > "SOS Settings" or "Emergency Settings". Add up to 5 contact numbers that will be called in sequence during an emergency. You can also customize the emergency text message.
- Using the SOS Function: In an emergency, press and hold the SOS button for 3 seconds. The phone will automatically dial the preset SOS numbers one by one until an answer is received. It will also send a pre-configured emergency text message to all SOS contacts.

Image: A close-up of the back of the Uleway T180 phone, highlighting the red SOS emergency button and illustrating its function to contact pre-set emergency contacts.
2.5 Speed Dial (Keys 2-9)
Assign frequently called numbers to speed dial keys (2-9) for quick access.
- Setting Speed Dial: Go to "Contacts" > "Options" > "Speed Dial". Select a number from 2 to 9 and assign a contact from your phonebook.
- Using Speed Dial: Press and hold the assigned number key (2-9) to automatically dial the corresponding contact.
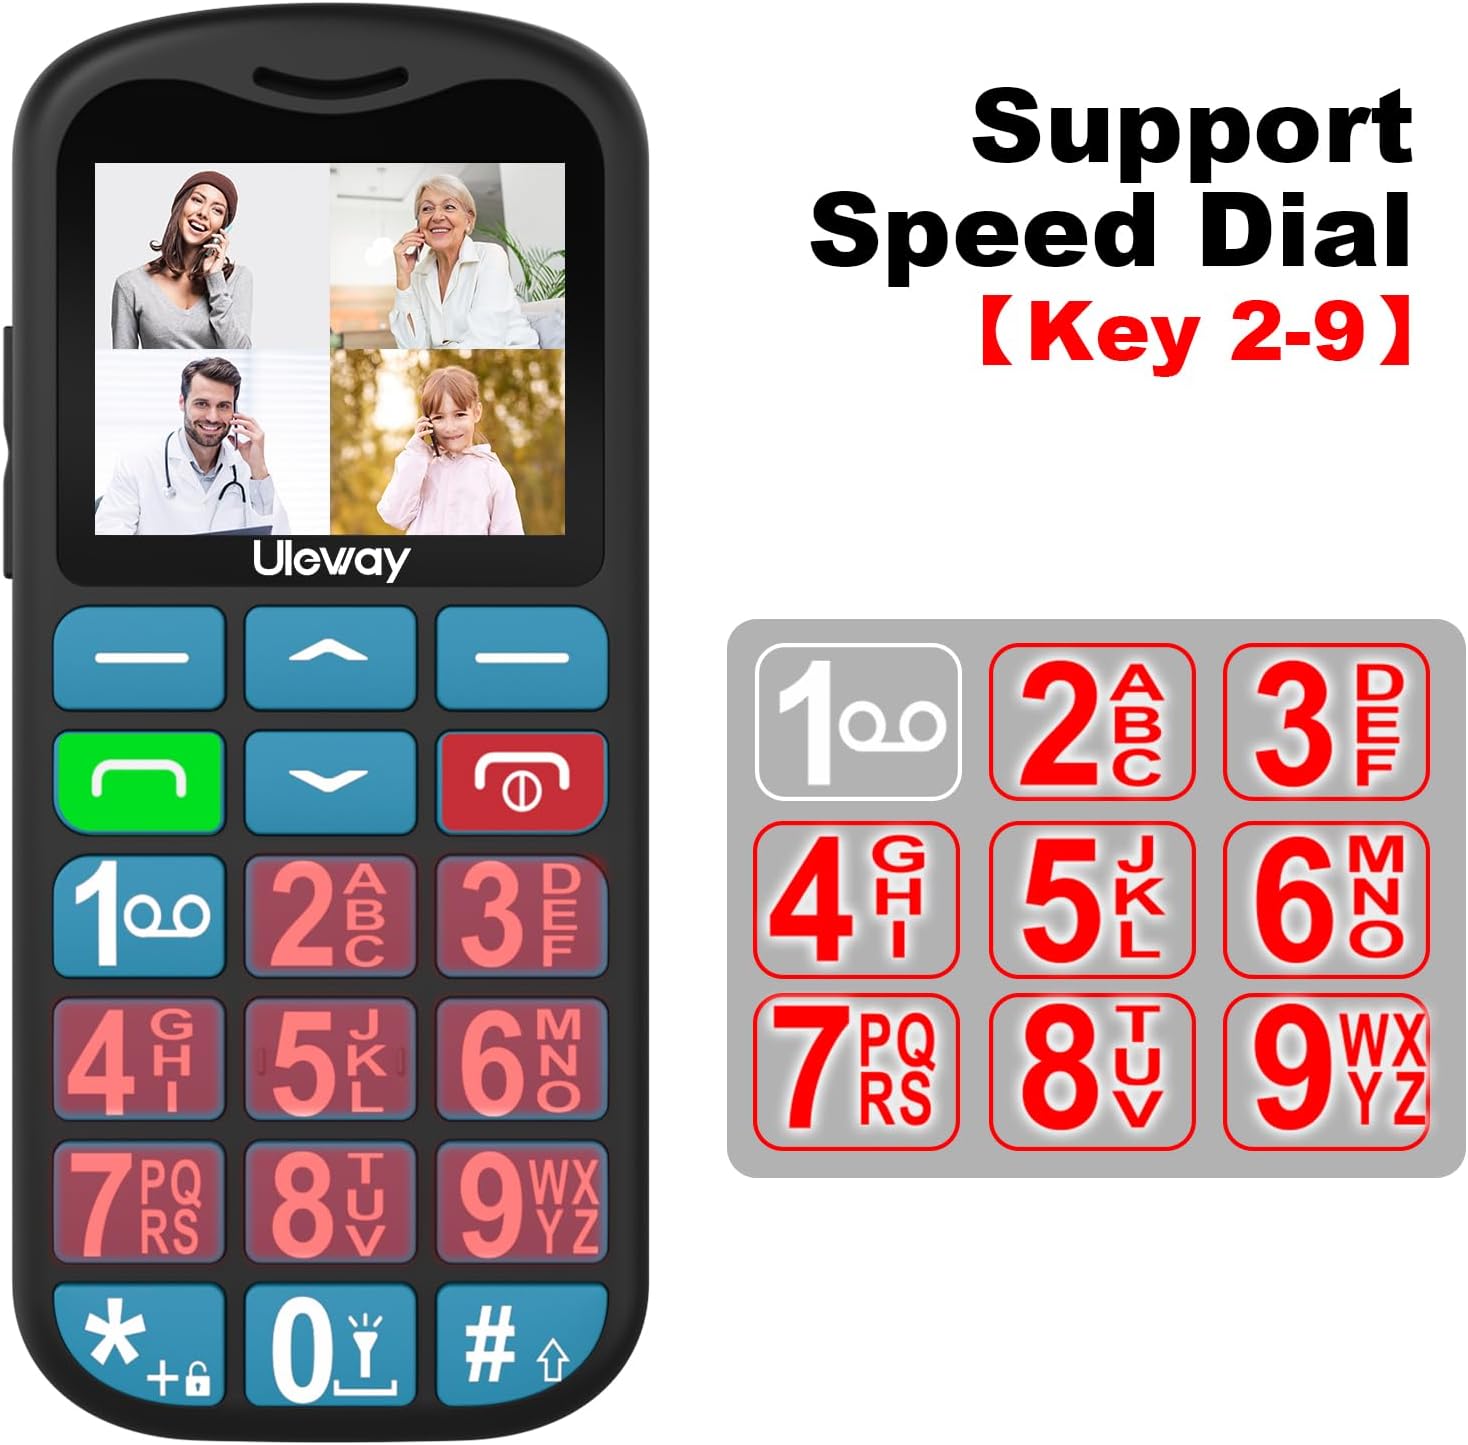
Image: The Uleway T180 phone next to an illustration of its keypad, highlighting the speed dial function for keys 2-9, allowing quick access to contacts.
2.6 Elder-Friendly Operating System Features
The T180 features a simplified operating system with large icons and fonts for ease of use.
- Menu Navigation: Use the navigation keys to scroll through menu options. The central button typically acts as "Select" or "OK".
- Pre-installed Applications: The phone includes essential functions such as Audio, Video, Bluetooth, FM Radio, Calculator, and Alarm. (Note: This model does not include a camera).
- Language Settings: To change the phone's language, navigate to "Settings" > "Language". Supported languages include English, French, German, Italian, Spanish, Dutch, and Portuguese.

Image: The Uleway T180 phone displaying its main menu with large, clear icons for Message, Profile, Call logs, Multimedia, Tools, Settings, Contacts, and Alarm, demonstrating its elder-friendly interface.
3. Maintenance
- Cleaning: Use a soft, dry cloth to clean the phone's screen and body. Avoid using liquid cleaners or abrasive materials.
- Storage: Store the phone in a cool, dry place away from direct sunlight and extreme temperatures.
- Battery Care: To prolong battery life, avoid fully discharging the battery frequently. Charge the phone regularly, even if not in use for extended periods.
- Water Resistance: The phone is not water-resistant. Avoid exposure to water or high humidity.
4. Troubleshooting
| Problem | Possible Cause | Solution |
|---|---|---|
| Phone does not power on. | Battery is low or not installed correctly. | Charge the phone for at least 30 minutes. Reinstall the battery. |
| Cannot make or receive calls. | No SIM card, SIM card not properly inserted, or no network signal. | Ensure SIM card is correctly inserted. Check network signal strength. Contact your mobile operator if issues persist. |
| SOS button not working. | SOS numbers not set up or incorrect. | Verify that SOS numbers are correctly configured in settings. Ensure there is network coverage. |
| Phone not charging. | Charging cable/cradle faulty, or port is dirty. | Check cable/cradle for damage. Clean the charging port gently. Try a different power source. |
| Poor call quality. | Weak network signal or interference. | Move to an area with better network coverage. Avoid using in areas with high electromagnetic interference. |
5. Specifications
| Feature | Detail |
|---|---|
| Brand | uleway |
| Model Name | T180 |
| Color | Blue |
| Screen Size | 1.8 Inches (QVGA, 240 x 320 resolution) |
| Memory | 48 MB RAM + 128 MB ROM (Expandable up to 16 GB via Micro SD) |
| Battery Capacity | 1000 mAh Lithium-ion |
| Standby Time | Up to 150-200 hours |
| Talk Time | Up to 240-300 minutes |
| Cellular Technology | 4G LTE (B2/B4/B5/B7/B12/B17), 3G WCDMA (850/1900 MHz), 2G GSM (850/1900 MHz) |
| SIM Card Type | Nano SIM (Single SIM slot) |
| Connectivity | USB Type-C, Bluetooth |
| Special Features | SOS Emergency Button, Speed Dial, Large Buttons, Large Fonts, High Volume, FM Radio, Flashlight |
| Supported Languages | English, French, German, Italian, Spanish, Dutch, Portuguese |
6. Warranty and Support
Uleway products are designed for reliability and performance. For warranty information and technical support, please refer to the warranty card included in your product package or visit the official uleway website. Keep your purchase receipt as proof of purchase for warranty claims.
If you encounter any issues not covered in this manual, please contact uleway customer support for assistance.
Related documentsT180

Ask a question about this manual
Ask about setup, troubleshooting, compatibility, parts, safety, or missing instructions. Manuals+ will review the question and use this page’s manual context to help answer it.