
Aqua-Scope RANWIE01
Aqua-Scope WiFi Rain Sensor Instruction Manual RANWIE01
Model: RANWIE01
1. Introduction
This manual provides comprehensive instructions for the installation, operation, and maintenance of your Aqua-Scope WiFi Rain Sensor. Please read this manual carefully before using the device to ensure proper functionality and longevity.
2. Product Overview
The Aqua-Scope WiFi Rain Sensor is designed to accurately measure rainfall at its location. It utilizes a tipping bucket mechanism to quantify precipitation in milliliters and transmits this data, along with temperature, at configurable intervals. The device supports communication via WiFi to the Aqua-Scope Cloud, MQTT, or a Smart Home Gateway.
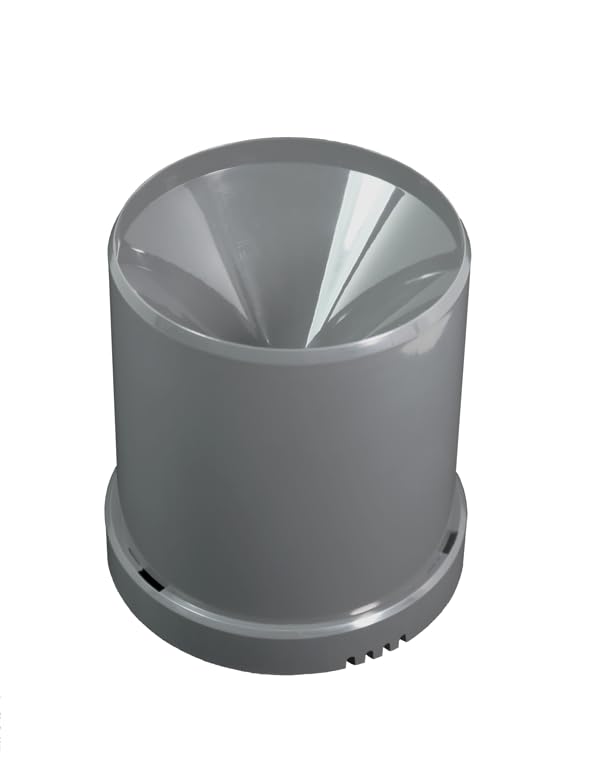
Figure 2.1: Aqua-Scope WiFi Rain Sensor main unit. This image shows the compact, cylindrical design of the rain sensor, ready for outdoor placement.
3. Features
- Accurate rainfall measurement at the sensor's location.
- Data transfer via WiFi for remote monitoring.
- Suitable for outdoor use with IP67 rating.
- Battery-operated for flexible placement.
- Integration with free Aqua-Scope app or MQTT/Smart Home Gateway.
- Measures temperature alongside rainfall.
- Configurable heavy rain alarm and measurement interval.
4. Package Contents
Please verify that all items are present in your package:
- Aqua-Scope WiFi Rain Sensor (Model RANWIE01)
- 2 x AAA Batteries (VARTA, pre-installed or included separately)
- Instruction Manual (this document)
5. Setup
5.1 Battery Installation
The device operates on two AAA batteries. Ensure they are correctly inserted for proper functionality.
- Locate the battery compartment on the underside of the sensor.
- Open the battery compartment cover.
- Insert the two AAA batteries, observing the correct polarity (+/-).
- Securely close the battery compartment cover.

Figure 5.1: Open battery compartment. This image displays the internal battery compartment designed for two AAA batteries, showing the spring contacts and polarity markings.
5.2 Mounting the Sensor
For accurate readings, place the sensor in an open area, away from obstructions like trees or buildings that could block rain. Ensure the sensor is level.
- Choose a suitable outdoor location that is exposed to direct rainfall.
- Place the sensor on a flat, stable surface or mount it using appropriate hardware (not included) through the mounting holes on the base.
- Verify the sensor is level using the integrated bubble level (if present) or a separate leveling tool.

Figure 5.2: Sensor base with tipping bucket mechanism. This image shows the sensor disassembled, revealing the internal tipping bucket mechanism and a small bubble level for accurate installation.

Figure 5.3: Sensor in an outdoor setting. This image depicts the rain sensor positioned outdoors, collecting rainfall, demonstrating its intended use.
5.3 WiFi Connection and App Setup
The sensor communicates via WiFi. You can connect it to the Aqua-Scope Cloud for app access, or integrate it with other systems via MQTT or JSON.
- Download the Aqua-Scope app from your device's app store (iOS/Android).
- Open the app and follow the on-screen instructions to create an account or log in.
- Within the app, select "Add Device" and follow the pairing process for the WiFi Rain Sensor. This typically involves putting the sensor into pairing mode (refer to app instructions for specific steps) and connecting it to your local WiFi network.
- Alternatively, for MQTT or Smart Home Gateway integration, refer to the Aqua-Scope developer documentation for specific API and configuration details.
Figure 5.4: Example of Aqua-Scope app interface. This image shows a screenshot of the Aqua-Scope application displaying rainfall data over 30 days, current status, temperature, and battery usage. (Note: Image not embedded as URL not available in product images, but described for context.)
6. Operating Instructions
6.1 Rainfall Measurement
The sensor continuously measures rainfall. Each tip of the internal bucket corresponds to a specific amount of precipitation (0.5 mm water column). The accumulated data is transmitted at regular intervals.
6.2 Data Transmission
Rainfall and temperature data are transmitted via WiFi every 15 minutes by default. This interval can be adjusted through the Aqua-Scope app or integrated system settings.
6.3 Heavy Rain Alarm
The sensor features a heavy rain alarm that activates when rainfall exceeds 15 liters per hour (L/h). The threshold for this alarm is configurable within the app or connected system.
6.4 Configuration
Through the Aqua-Scope app or your chosen Smart Home Gateway, you can configure various settings, including:
- Measurement interval (default 15 minutes)
- Heavy rain alarm threshold (default 15 L/h)
- WiFi network settings
7. Maintenance
7.1 Cleaning
Periodically inspect the sensor's funnel and tipping bucket mechanism for debris such as leaves, dirt, or insects. Gently clean with a soft cloth and water if necessary. Avoid using abrasive cleaners or high-pressure water, which could damage the sensor.
7.2 Battery Replacement
The sensor will report a low battery level via radio to your connected app or system. This notification allows you to replace the batteries before the device ceases operation. The included VARTA batteries typically provide approximately 2 years of operation.
- When a low battery warning is received, prepare two new AAA batteries.
- Follow the steps in Section 5.1 to open the battery compartment and replace the old batteries with new ones.
- Ensure the compartment is securely closed to maintain the IP67 rating.
8. Troubleshooting
- No Data Transmission:
- Check battery level. Replace if low.
- Verify WiFi connectivity. Ensure the sensor is within range of your WiFi router.
- Restart the sensor by temporarily removing and reinserting the batteries.
- Check app or gateway settings for correct configuration.
- Inaccurate Rainfall Readings:
- Ensure the sensor is level. Use the integrated bubble level or a separate tool.
- Check for obstructions above the sensor (trees, eaves, etc.) that might block rain.
- Clean the funnel and tipping bucket mechanism for any debris.
- Short Battery Life:
- Ensure you are using high-quality AAA batteries.
- Extreme temperatures can affect battery performance.
- Frequent WiFi disconnections and reconnections can increase power consumption.
9. Specifications
| Specification | Value |
|---|---|
| Model | RANWIE01 |
| Brand | Aqua-Scope |
| Rainfall Accuracy | 0.5 mm water column |
| Communication | WiFi, MQTT, JSON |
| Measurement Interval | Configurable (default 15 minutes) |
| Heavy Rain Threshold | Configurable (default >15 L/h) |
| Power Source | 2 x AAA Batteries (3 VDC) |
| Battery Life | Approx. 2 years (with VARTA batteries) |
| Ingress Protection | IP67 |
| Item Weight | 219 g |
| Manufacturer Reference | RANWIE01 |

Figure 9.1: Bottom view of the sensor. This image shows the underside of the sensor, including the product label with model number (RANWIE01) and other regulatory information, including the identifier 0600003C7BEB6682.
10. Warranty and Support
Aqua-Scope provides a warranty for its products in accordance with local regulations. For specific warranty terms, please refer to the documentation provided with your purchase or visit the official Aqua-Scope website.
Spare parts availability in the EU is guaranteed for 2 years from the date of first availability. Software updates are provided as needed, with no specified end date for guaranteed updates.
For technical support, troubleshooting assistance, or further inquiries, please contact Aqua-Scope customer service through their official website or the contact information provided in the product packaging.
Related documentsRANWIE01


Ask a question about this manual
Ask about setup, troubleshooting, compatibility, parts, safety, or missing instructions. Manuals+ will review the question and use this page’s manual context to help answer it.