
Important Safety Information
Always follow assembly instructions carefully. Do not exceed the maximum weight recommendation of 80 lbs. Ensure the table is properly assembled and stable before use.
This product is intended for indoor residential use only.
Package Contents
Before assembly, verify all components are present and undamaged. Refer to the included assembly guide for a detailed list and identification of numbered parts.
- Tabletop Panels (5 pieces, including one with charging station)
- Metal Frame Components
- Charging Station Unit (pre-installed in one tabletop panel)
- Assembly Hardware (screws, bolts, etc.)
- Adjustable Feet (4 pieces)
- Anti-Tip Kit
- Assembly Guide
- Installation Tool (Allen Key, Screwdriver)
Assembly Instructions
Recommended number of people for assembly: 1. Tools required: Allen Key, Screwdriver (included).
Step 1: Unpack and Identify Components
Carefully remove all parts from the packaging. Lay them out on a clean, soft surface to prevent scratches. Refer to the included assembly guide for numbered parts.
Step 2: Assemble the Metal Frame
Connect the metal frame components according to the diagrams in the assembly guide. Ensure all connections are secure but do not fully tighten screws until all parts are aligned.
Step 3: Attach Tabletop Panels
Place the five particleboard tabletop panels onto the assembled metal frame. The panel with the pre-installed charging station can be placed in any of the five positions.

Image: Illustration of how the five tabletop panels fit onto the metal frame. One panel contains the charging station.
Secure the tabletop panels to the frame using the provided screws.
Step 4: Install Adjustable Feet
Screw the four adjustable feet into the bottom of the table legs. These feet help stabilize the table on uneven surfaces.

Image: Detail of an adjustable foot, showing how it can be rotated to adjust table height and stability.
Step 5: Install Anti-Tip Kit
For added stability and safety, especially in households with children or pets, attach the anti-tip kit to the table and the wall as per the instructions in the assembly guide.
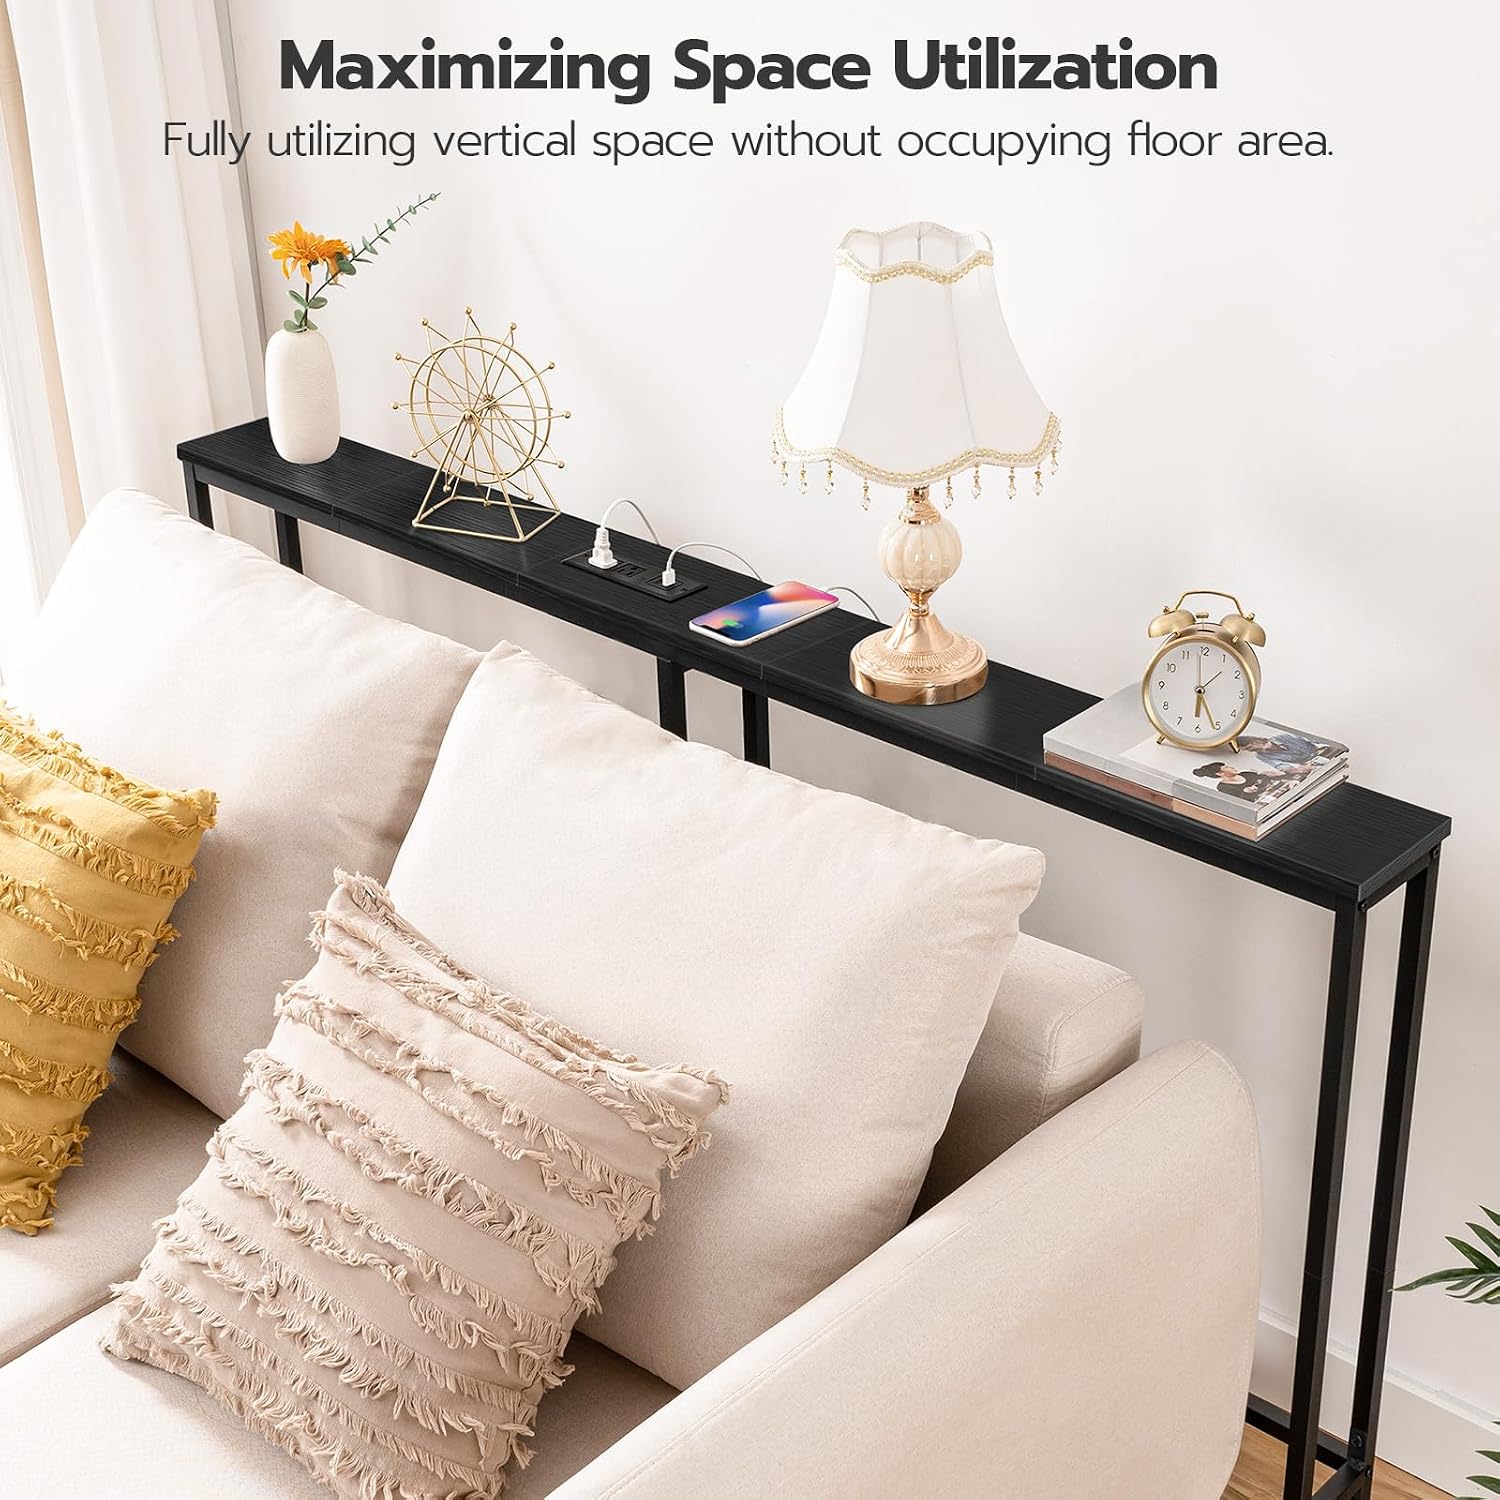
Image: Diagram illustrating the anti-tip device installation, connecting the table to the wall for enhanced safety.
Once all parts are assembled, tighten all screws firmly.
Operating Instructions
Using the Charging Station
The console table includes a built-in charging station with 2 AC outlets, 1 USB port, and 1 Type-C port. The power cord is 59 inches long.

Image: Detailed view of the charging station, highlighting the AC outlets, USB, and Type-C ports in use.
Plug the table's power cord into a standard wall outlet.
You can charge your electronic devices by plugging them into the available AC outlets or USB/Type-C ports.
Adjustable Charging Station Position
The tabletop panels are interchangeable, allowing you to position the charging station unit in any of the five available slots along the table's length. This provides flexibility to suit your setup.
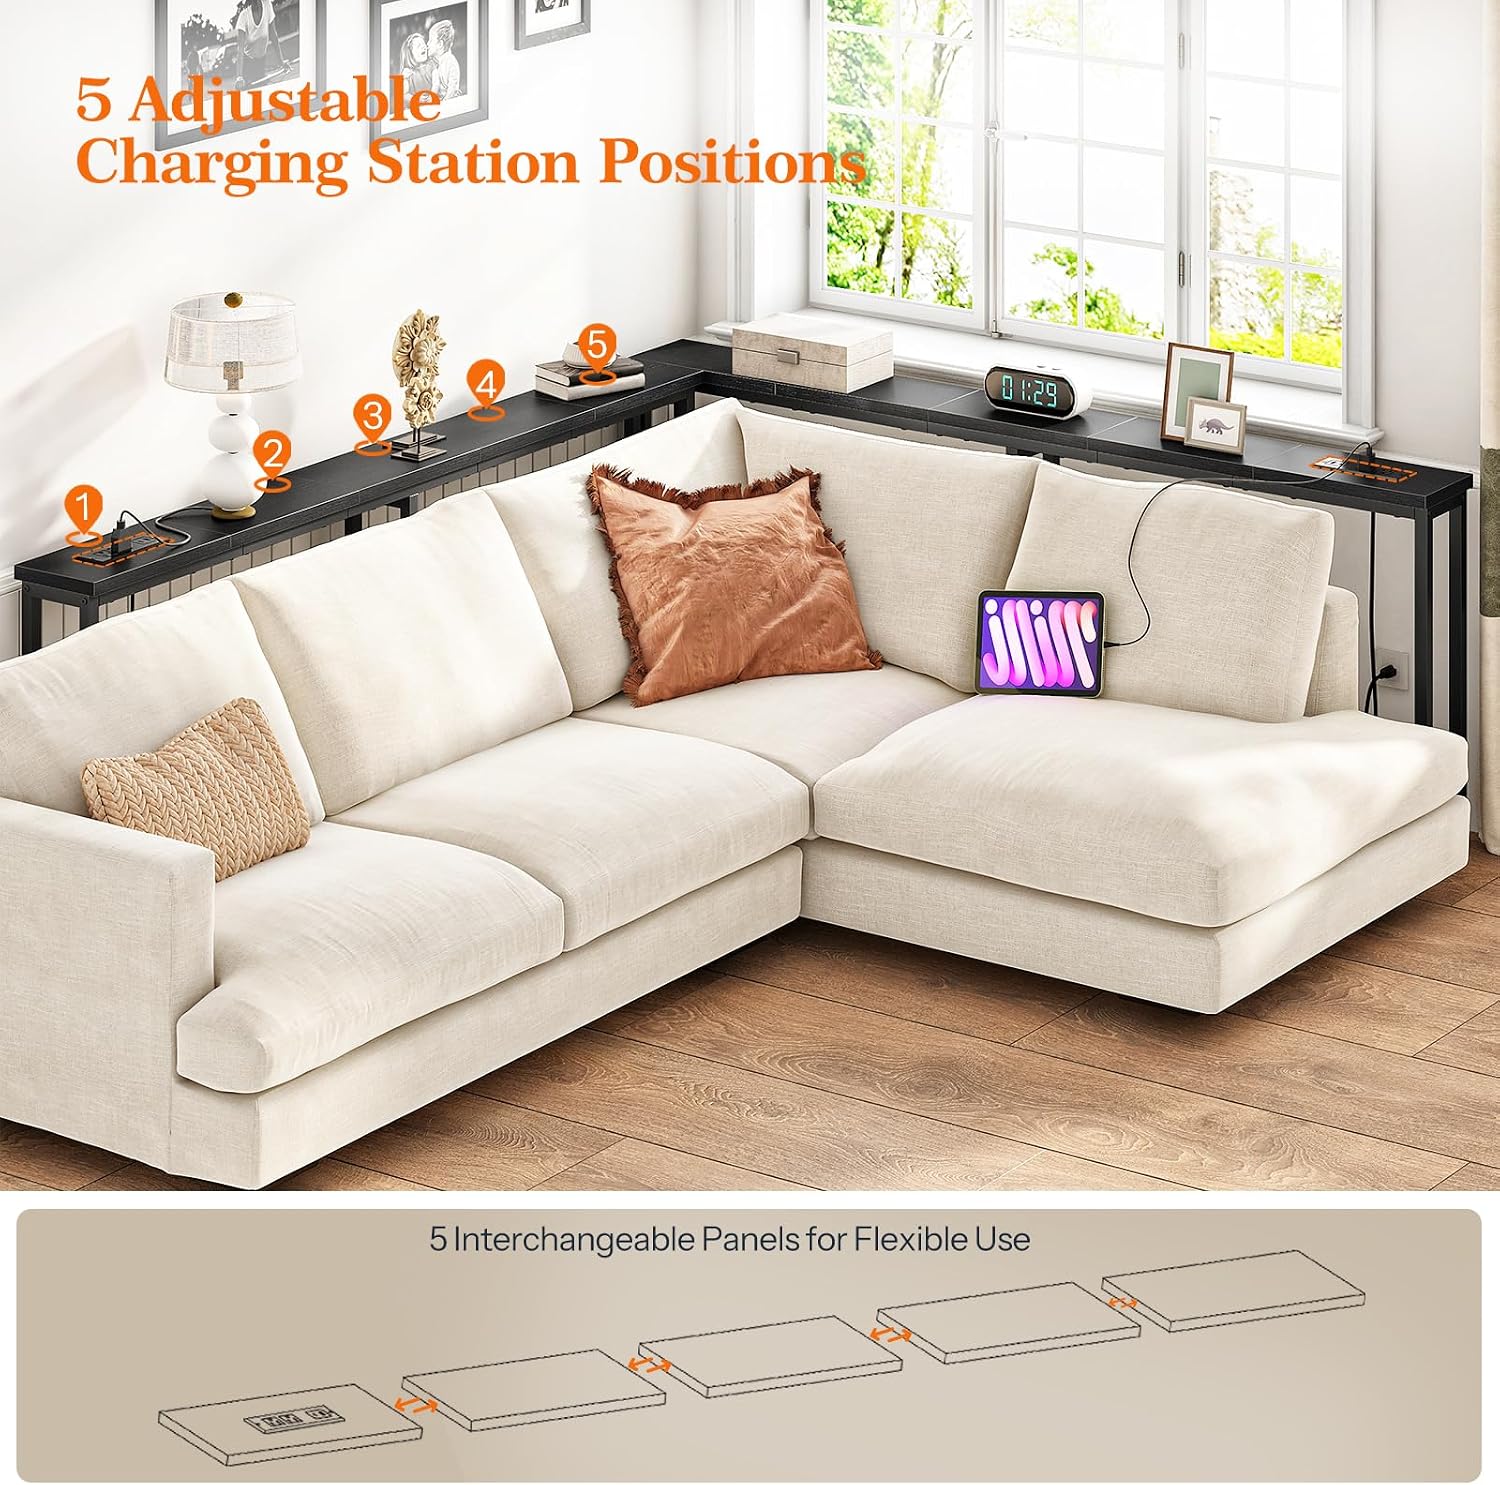
Image: The console table positioned behind a sofa, demonstrating the five adjustable positions for the charging station along the tabletop.
To change the position, carefully lift the charging station panel and swap it with another tabletop panel. Ensure the panel is securely seated before use.
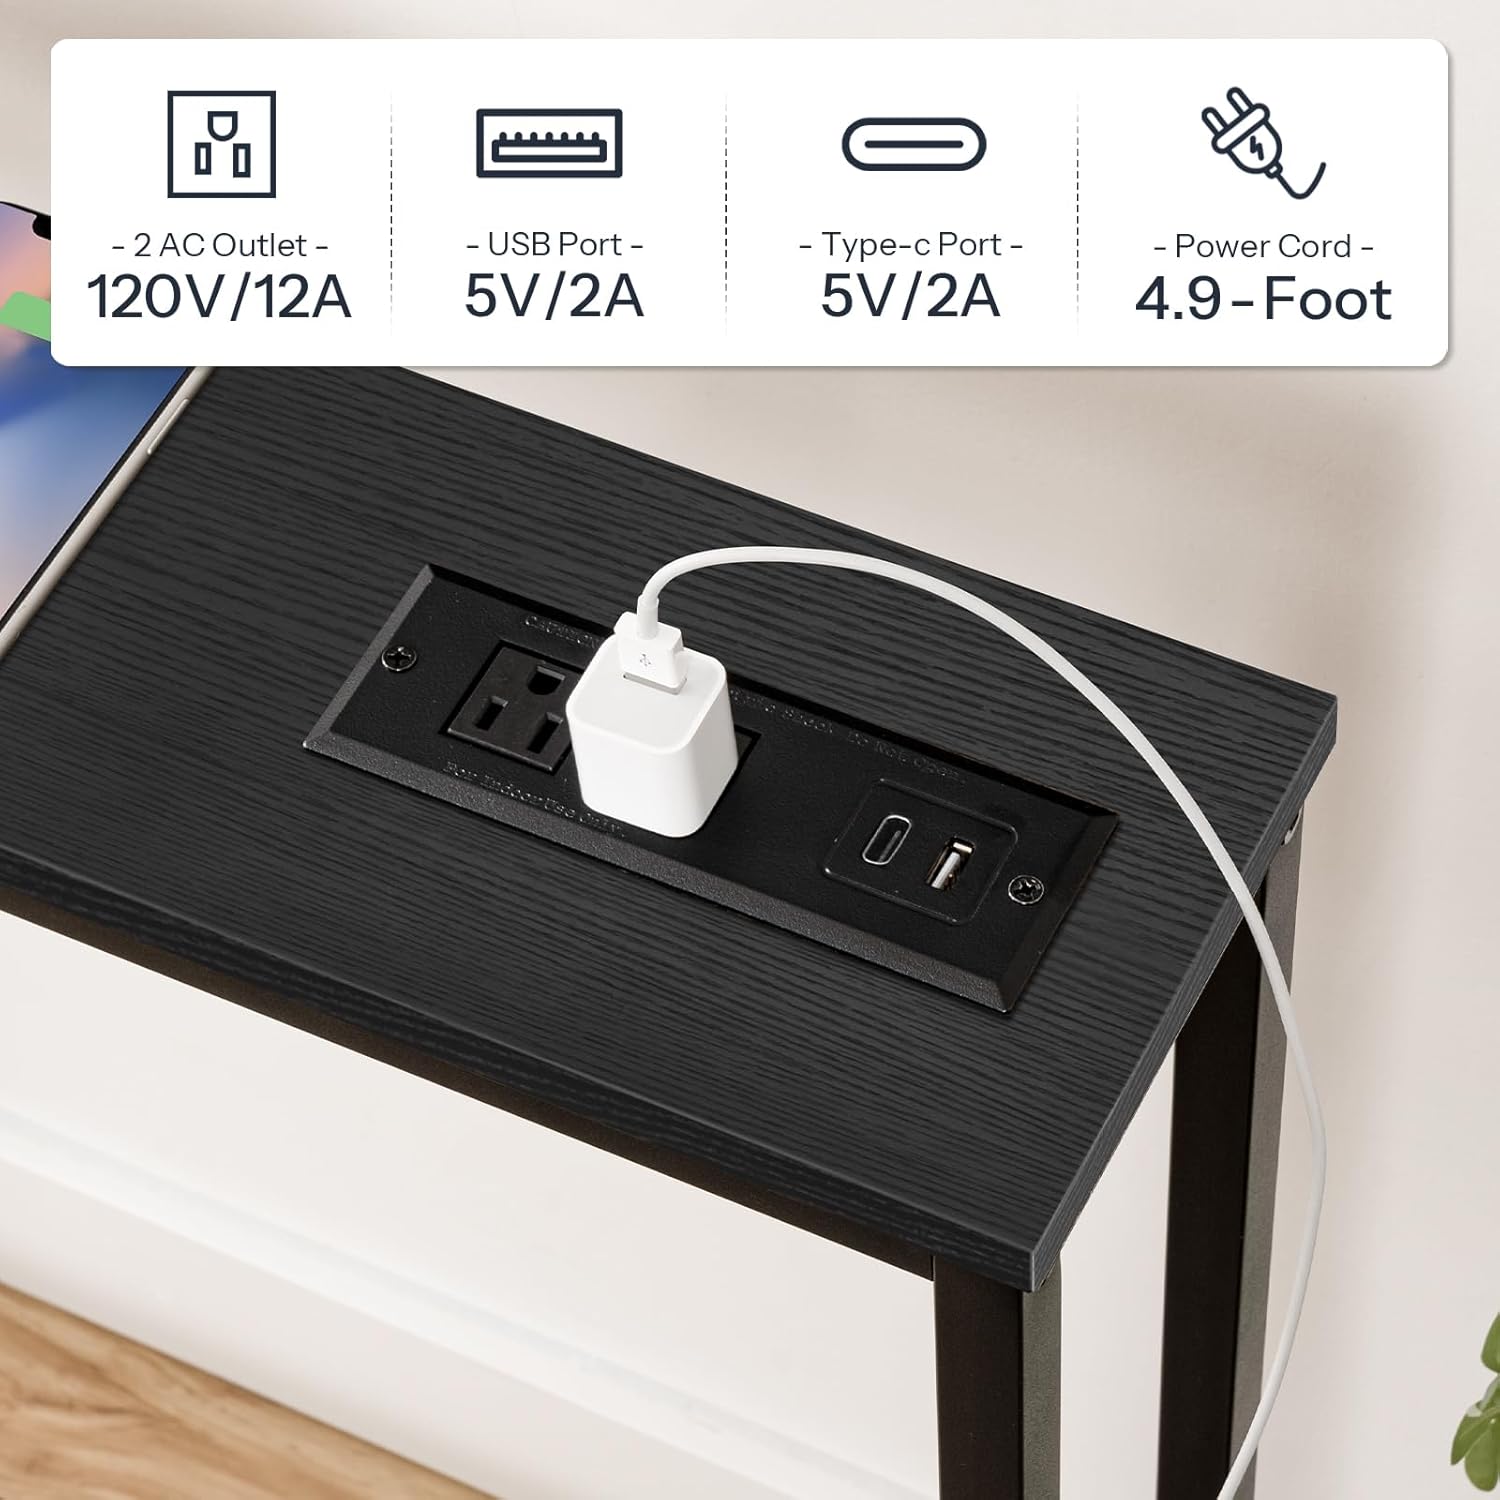
Image: Visual guide showing how the charging station can be installed either centrally or towards one end of the table.
Maintenance
Cleaning
Wipe the table surfaces with a dry cloth. Avoid using harsh chemicals or abrasive cleaners, which may damage the finish.
Stability Check
Periodically check all screws and connections to ensure they remain tight. Adjust the leveling feet as needed to maintain stability.
Troubleshooting
Table is Wobbly
- Ensure all assembly screws are fully tightened.
- Adjust the leveling feet on the bottom of each leg to compensate for uneven floors.
- Verify the anti-tip kit is correctly installed and secured to the wall.
Charging Station Not Working
- Check if the power cord is securely plugged into a functional wall outlet.
- Ensure the charging station unit is properly seated in its tabletop slot.
- Test the wall outlet with another device to confirm it has power.
Specifications
| Feature | Detail |
|---|---|
| Brand | HOOBRO |
| Model Number | BB165UXG01 |
| Product Dimensions | 5.9"D x 63"W x 31.5"H |
| Item Weight | 7 kg |
| Maximum Weight Recommendation | 80 pounds |
| Frame Material | Metal |
| Top Material | Engineered Wood (Particleboard) |
| Color | Black |
| Charging Station | 2 AC Outlets (120V/12A), 1 USB Port (5V/2A), 1 Type-C Port (5V/2A) |
| Power Cord Length | 59 inches (4.9 feet) |
| Special Features | Adjustable Feet, Anti-Tip Kit, Rotatable Charging Station Panel |
| Product Care Instructions | Wipe with Dry Cloth |
Warranty and Support
For warranty information or technical support, please refer to the contact details provided in your product packaging or visit the official HOOBRO website. Keep your purchase receipt for warranty claims.

