
SIXTOP B0CP8PN67P
SIXTOP Android 13 Car Stereo User Manual
For Hyundai Tucson 2015-2019 (Model B0CP8PN67P)
1. Introduction
This manual provides detailed instructions for the installation, operation, and maintenance of your SIXTOP Android 13 Car Stereo. This multimedia player is designed as an upgrade replacement radio for Hyundai Tucson models from 2015 to 2019, featuring a 9-inch touchscreen, Apple CarPlay, Android Auto, GPS, Bluetooth, and AHD camera support. Please read this manual thoroughly before use to ensure proper functionality and safety.
2. Package Contents
Verify that all items listed below are included in your package. If any items are missing or damaged, please contact customer support.

Image: The main car stereo unit with dimensions (440mm/17.3inch width, 225mm/8.8inch height, 90mm/3.5inch depth). Below it, a visual list of accessories including AHD Rear Camera, Screws, User Manual, Power Cord, Video Extension, GPS Antenna, Rear Camera Input Cable, RCA Cable, USB Cable, Microphone, Installation Tool, Power Cable, Adapter Antenna, and USB Adapter Cable.
- SIXTOP Android 13 Car Stereo Head Unit (9-inch)
- AHD Rear Camera
- Mounting Screws
- User Manual (this document)
- Power Cord
- Video Extension Cable
- GPS Antenna
- Rear Camera Input Cable
- RCA Cable
- USB Cables (Double USB interface)
- External Microphone
- Installation Tool
- Adapter Antenna
3. Setup and Installation
Professional installation is recommended. Ensure the vehicle's power is disconnected before beginning installation.
3.1. Pre-Installation Check
- Confirm compatibility with your Hyundai Tucson (2015-2019 model years).
- Verify all package contents are present.
- Inspect the car stereo unit and accessories for any visible damage.
3.2. Installation Steps
- Carefully remove the original car stereo unit and trim from your vehicle's dashboard. Refer to your vehicle's service manual for specific instructions.
- Connect the provided power cord, RCA cables, USB cables, GPS antenna, and rear camera input cable to the corresponding ports on the new SIXTOP car stereo.
- Install the AHD rear camera according to the camera's instructions, ensuring proper wiring to the car stereo's reversing input.
- Mount the new car stereo unit into the dashboard opening. Secure it using the provided screws.
- Reconnect the vehicle's power.
- Test all functions, including power on/off, audio, touchscreen response, Apple CarPlay/Android Auto, GPS, Bluetooth, and the rear camera display.

Image: A comparison showing the original car dashboard with an older stereo ("Before") and the same dashboard with the new 9-inch SIXTOP Android stereo installed ("After").
Important Tip: If the radio and frame match your car, but the power cord socket is not suitable (e.g., due to high vehicle configuration requiring a CANbus protocol box), you may need an upgraded power cord. Contact customer service with pictures of your original car's center console and car socket for assistance in finding a suitable power cord.
4. Operating Instructions
4.1. Apple CarPlay and Android Auto
This unit supports both wired and wireless Apple CarPlay and Android Auto, allowing seamless integration with your smartphone for navigation, music, calls, and messages.
- Wireless Connection: Ensure your phone's Wi-Fi and Bluetooth are enabled. Connect your phone via Bluetooth to the car stereo. Open the "ZLINK5" application on the stereo to automatically connect.
- Wired Connection: Connect your phone to the car stereo using a USB cable. Open the "ZLINK5" application.
- Once connected, you can use your phone's voice assistant for hands-free control.

Image: The top section displays the Apple CarPlay interface on the left and the Android Auto interface on the right, showing common app icons like Phone, Maps, Messages, Music. The bottom section illustrates wired (USB) and wireless (WiFi/Bluetooth) connection methods for both CarPlay and Android Auto.
4.2. Mirror Link Function
Mirror Link allows you to display your mobile phone's screen directly onto the car stereo. This is useful for viewing downloaded videos or other content from your phone.
- Open the "ZLINK5" application on the car stereo.
- Switch to the "Mirror Link" connection option within the app.
- Connect your phone via USB or Wi-Fi as prompted.

Image: The car stereo screen shows a mirrored display of a mobile phone, projecting a scenic image. Below, icons indicate that both USB and Wi-Fi/USB connections are supported for Mirror Link.
4.3. Steering Wheel Control (SWC)
Utilize your vehicle's original steering wheel buttons to control the car stereo, enhancing convenience and driving safety.
- Access the "Steering Learn" function in the stereo's settings menu.
- Follow the on-screen prompts to program each steering wheel button to its desired function (e.g., volume up/down, track skip, mode change).
4.4. Reversing Display and Backup Camera
The included waterproof night vision AHD camera provides a clear reversing image, automatically activating when the vehicle is shifted into reverse gear.
- Ensure the backup camera is correctly installed and wired to the stereo's AHD/CVBS reversing input.
- To adjust camera resolution, navigate to: Radio Settings > Factory Settings (Password: 8888) > Protocol Parameter Settings > Reversing Video Resolution Settings > AHD/25.

Image: The top section shows a car's steering wheel and a stereo screen displaying "Steering Learn" settings. The bottom section shows the car stereo displaying a clear, wide-angle night vision view from the backup camera, with icons indicating HD image, night vision, wide angle, and waterproof features.
4.5. Wi-Fi Connection and GPS Navigation
Connect to Wi-Fi to access online content and download applications. The unit also features built-in GPS navigation.
- Wi-Fi: Go to the stereo's settings, select Wi-Fi, and connect to an available network. Once connected, you can download apps, stream music, and watch videos (e.g., YouTube).
- GPS Navigation: The unit comes with built-in offline maps. For online maps or updates, connect to Wi-Fi and download navigation data or apps directly from the Play Store.
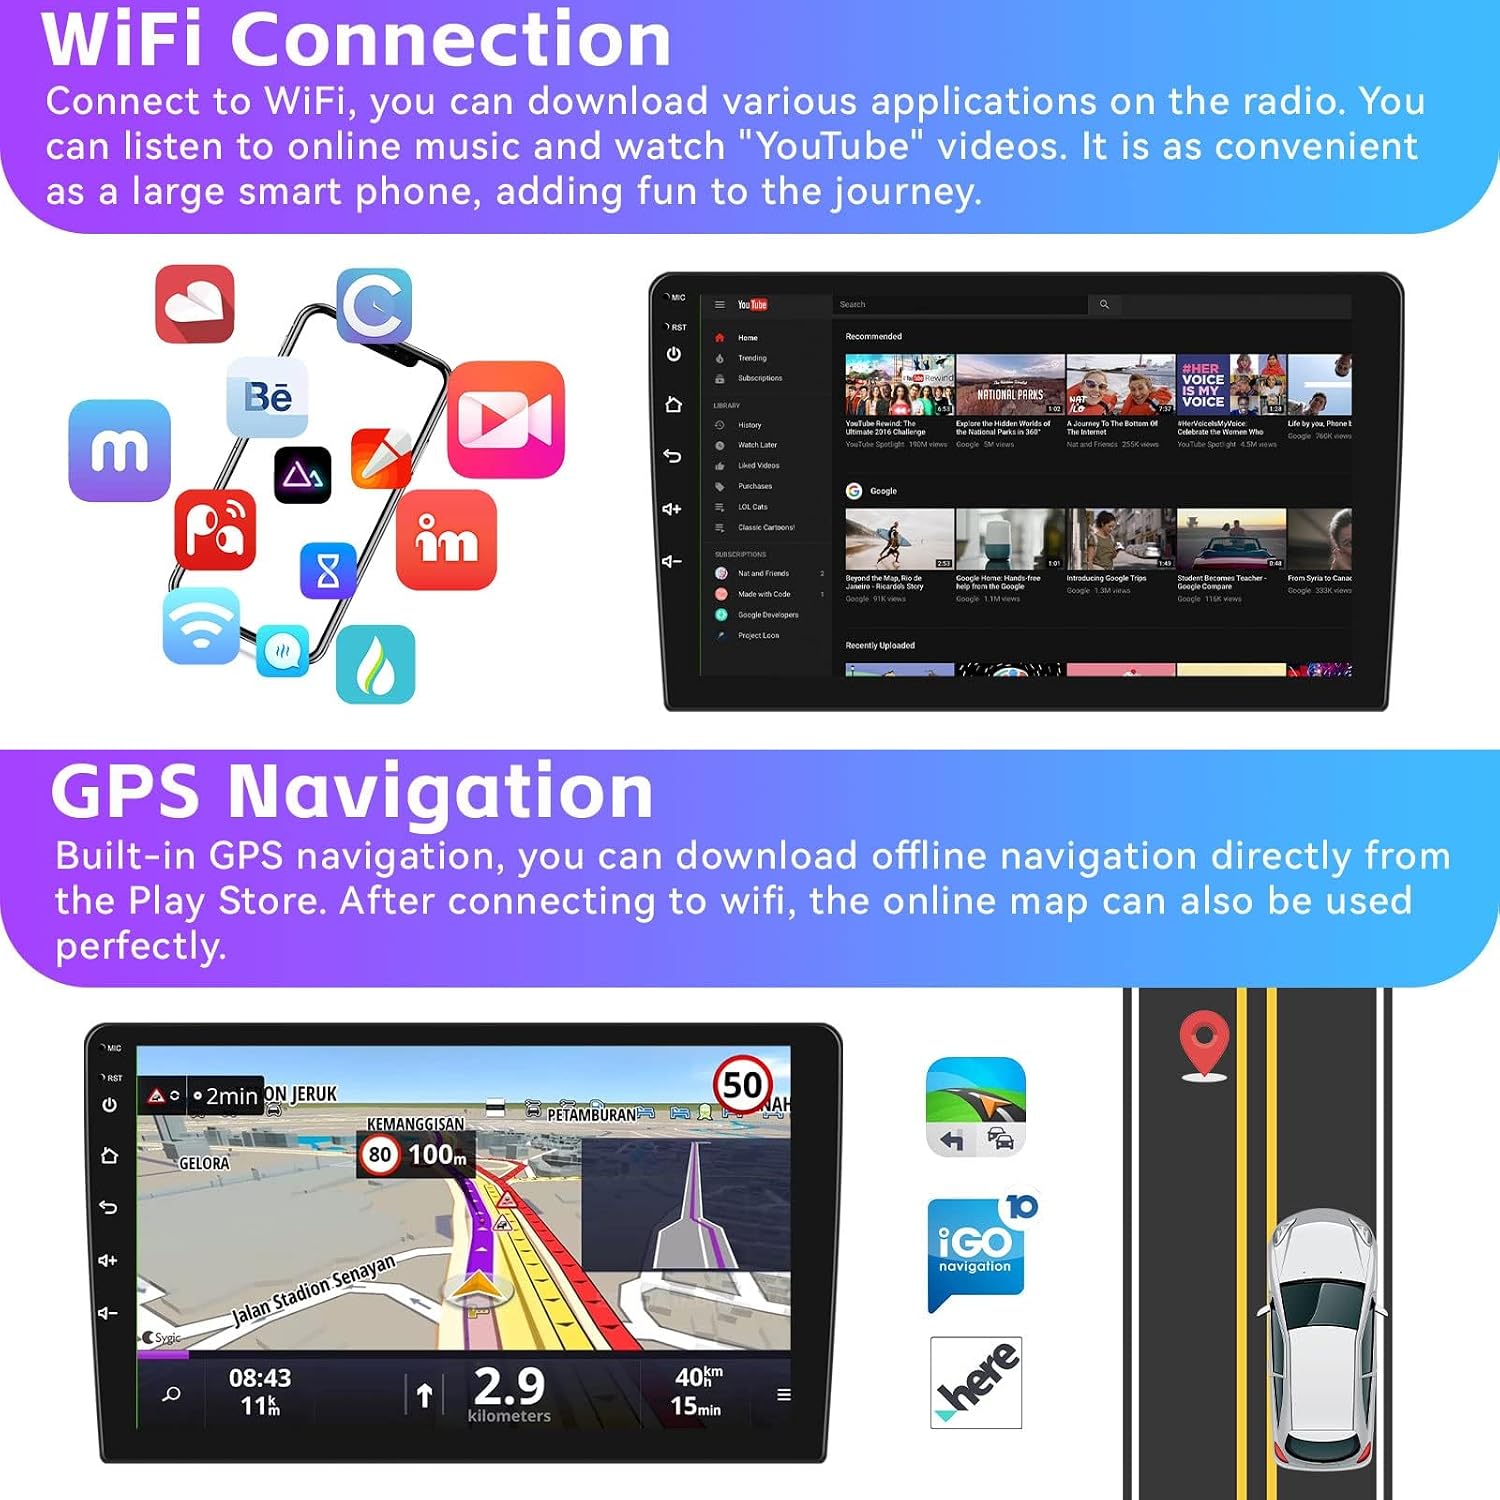
Image: The top section illustrates Wi-Fi connectivity, showing a smartphone with various app icons and the car stereo displaying a YouTube interface. The bottom section shows the car stereo running a GPS navigation map, with route details and map icons.
4.6. Split Screen Function
The split-screen feature allows you to run two applications simultaneously on the 9-inch display, such as navigation and music.
- Click the rectangle icon at the top of the screen to access recent applications.
- Select an application and drag it to either the left or right side of the screen.
- Choose another application for the remaining side. Both screens can be operated independently.
4.7. HiFi Sound Effect
Customize your audio experience with various sound effects and an equalizer to achieve optimal car audio quality.
- Access the sound settings or equalizer application on the stereo.
- Adjust presets (e.g., Custom, Classical, Jazz, Pop) or manually fine-tune the equalizer bands to your preference.

Image: The top section shows the car stereo in split-screen mode, displaying a map on one side and a music player on the other. The bottom section illustrates the HiFi sound effect settings, featuring an equalizer with adjustable frequency bands and preset options like Custom, Classical, Jazz, and Pop.
4.8. FM Radio
Enjoy local radio stations with the built-in FM tuner, supporting frequencies from 87.5 to 108 MHz and RDS (Radio Data System).
- Open the "Radio" application on the stereo.
- Use the scan function to find available stations or manually tune to a specific frequency.
- Save your favorite stations for quick access.
4.9. Bluetooth Connectivity
Connect your smartphone via Bluetooth for hands-free calling, contact synchronization, and wireless music streaming.
- Pairing: Enable Bluetooth on your phone and the car stereo. Search for available devices on your phone and select the stereo's name (e.g., "Car BT"). Enter the pairing code if prompted.
- Hands-Free Calls: Once paired, you can make and receive calls directly through the stereo. Your phonebook can be synchronized for easy access.
- Music Playback: Stream audio from your phone to the car stereo wirelessly.

Image: The top section displays the FM radio interface with frequency tuning and station presets. The bottom section shows three distinct Bluetooth interfaces: Bluetooth Call (dial pad), Bluetooth Settings (device name, auto answer), and Bluetooth Music (track information, playback controls).
5. Maintenance
Proper maintenance ensures the longevity and optimal performance of your car stereo.
- Cleaning: Use a soft, dry cloth to clean the touchscreen and exterior. For stubborn smudges, slightly dampen the cloth with water or a screen-safe cleaner. Avoid abrasive materials or harsh chemicals.
- Software Updates: Periodically check for software updates via Wi-Fi to ensure you have the latest features and bug fixes.
- Temperature: Avoid exposing the unit to extreme temperatures for extended periods.
- Connections: Ensure all cables and connections are secure and free from damage.
6. Troubleshooting
If you encounter issues, refer to the following common solutions. If the problem persists, contact customer support.
| Problem | Possible Cause / Solution |
|---|---|
| Unit does not power on. |
|
| No sound or distorted audio. |
|
| Touchscreen unresponsive. |
|
| Apple CarPlay / Android Auto not connecting. |
|
| GPS signal weak or inaccurate. |
|
| Rear camera image unclear or not displaying. |
|
7. Specifications
| Feature | Detail |
|---|---|
| System | Android 13 |
| Chipset | 8227L-DEMO |
| Screen Size | 9 inches |
| Memory (RAM+ROM) | 2GB RAM + 64GB ROM |
| Screen Resolution | 1024*600 |
| Radio Chip | MT6625 |
| Power Output | 4*45W |
| Operating Temperature | -20℃ to 75℃ |
| Steering Wheel Control | Supported |
| Power Amplifier Chip | TDA7388 |
| Radio Band | FM/RDS (87.5-108 MHz) |
| Video Output | Supported |
| Reversing Input | AHD/CVBS |
| External Microphone | Supported |
| Split Screen | Supported |
| Maps | Built-in offline maps (requires internet to download data) |
| Wi-Fi | Supported |
| USB Interface | Double USB |
| Audio Formats | APE/FLAC/WAV/MP3/WMA etc. |
| Video Formats | MKV/RMVB/AVI/MP4/MDV etc. |
| Picture Formats | PNG/JPEG/JPG/GIF/WBMP/BNP etc. |
| Factory Setting Password | 8888 |
| Supported Languages | Chinese, English, French, Italian, Korean, Japanese, Arabic, Spanish, Portuguese, Russian, Turkish, Vietnamese, Hebrew, Polish, German |
8. Warranty and Support
For warranty information, technical support, or any inquiries not covered in this manual, please contact your retailer or the manufacturer directly. Keep your purchase receipt as proof of purchase for warranty claims.
Related documentsB0CP8PN67P


Ask a question about this manual
Ask about setup, troubleshooting, compatibility, parts, safety, or missing instructions. Manuals+ will review the question and use this page’s manual context to help answer it.