
1. Product Overview
The JASIWAY Rattan Shoe Cabinet is designed for organized shoe storage in various home environments such as entryways, hallways, closets, and living rooms. It features adjustable shelves, an open storage area, and a spacious tabletop.
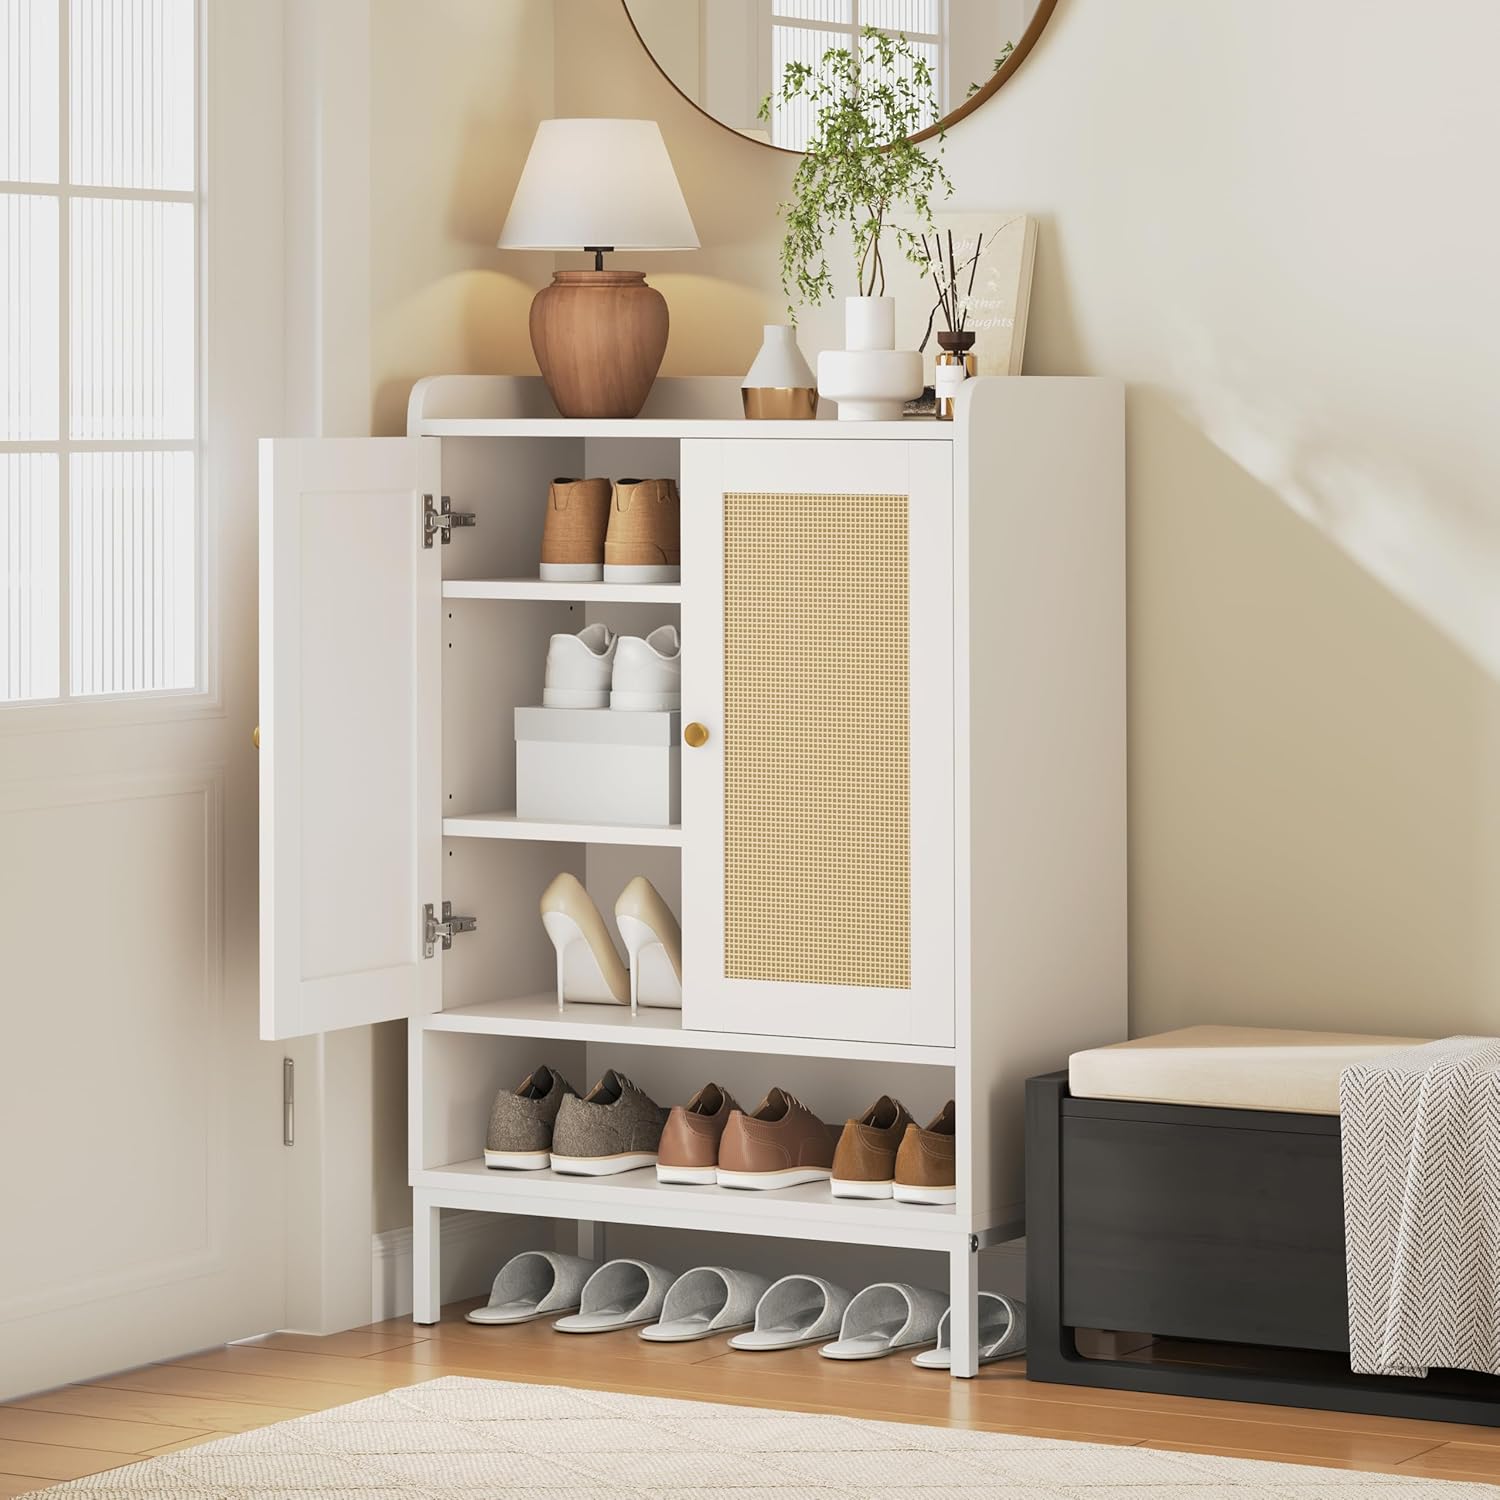
Figure 1.1: JASIWAY Rattan Shoe Cabinet in an entryway setting.
Key Features:
- Flexible Storage: Three hidden shelves and one open shelf, accommodating up to 20 pairs of shoes (depending on size). Adjustable shelves allow for various shoe types, including boots.
- Modern Design: Natural finish with rattan decor, metal legs, and golden knobs, adding a stylish touch to your home.
- Durable Construction: Made from particle board and metal legs, ensuring sturdiness and durability for long-term daily use.
- Spacious Tabletop: Features a baffle with a round corner design to prevent items from slipping, suitable for keys, glasses, wallets, and other small items.
- Elevated Base: 5.9-inch metal legs provide additional open storage space and allow for robot vacuum access underneath.
2. Specifications
| Feature | Detail |
|---|---|
| Brand | JASIWAY |
| Model Name | JASIWAY-XG-001 |
| Color | White |
| Product Dimensions (D x W x H) | 14.88" x 27.5" x 41.14" |
| Item Weight | 33 Pounds |
| Material | Particle Board, Metal Legs, Rattan |
| Number of Shelves | 4 (3 adjustable, 1 open) |
| Ground to Item Distance | 5.9 Inches |
| Assembly Required | Yes |
| Mounting Type | Floor Mount (Freestanding) |

Figure 2.1: Product dimensions and internal shelf measurements.
3. Setup and Assembly
The JASIWAY Rattan Shoe Cabinet is designed for straightforward assembly. All necessary parts are numbered for easy identification. Assembly typically takes approximately 15 minutes.
Before You Begin:
- Unpack all components and verify against the parts list provided in the packaging.
- Ensure you have adequate space for assembly.
- Gather any required tools (e.g., screwdriver), though often basic tools are included.
Assembly Steps:
- Follow the step-by-step instructions provided in the physical assembly manual included with your product.
- Attach the metal legs securely to the base of the cabinet.
- Assemble the main cabinet structure, ensuring all panels are correctly aligned and fastened.
- Install the adjustable shelves at your desired heights.
- Attach the doors, ensuring hinges are properly aligned for smooth operation.
- Install the golden knobs on the doors.
- Important: Secure the cabinet to the wall using the provided anti-tipping device to prevent accidental tipping, especially in households with children or pets.

Figure 3.1: Anti-tipping device installation for safety.
4. Operating Instructions
Shoe Storage:
- Adjustable Shelves: The internal shelves can be repositioned to accommodate different shoe heights, from slippers to high boots. Simply remove the shelf and reinsert it into the desired slots.
- Hidden Storage: Utilize the three enclosed shelves behind the doors for shoes you wish to keep out of sight.
- Open Shelf: The bottom open shelf is convenient for frequently used shoes or guest footwear.
- Underneath Area: The 5.9-inch clearance beneath the cabinet is suitable for storing additional flat shoes or for robot vacuum access.
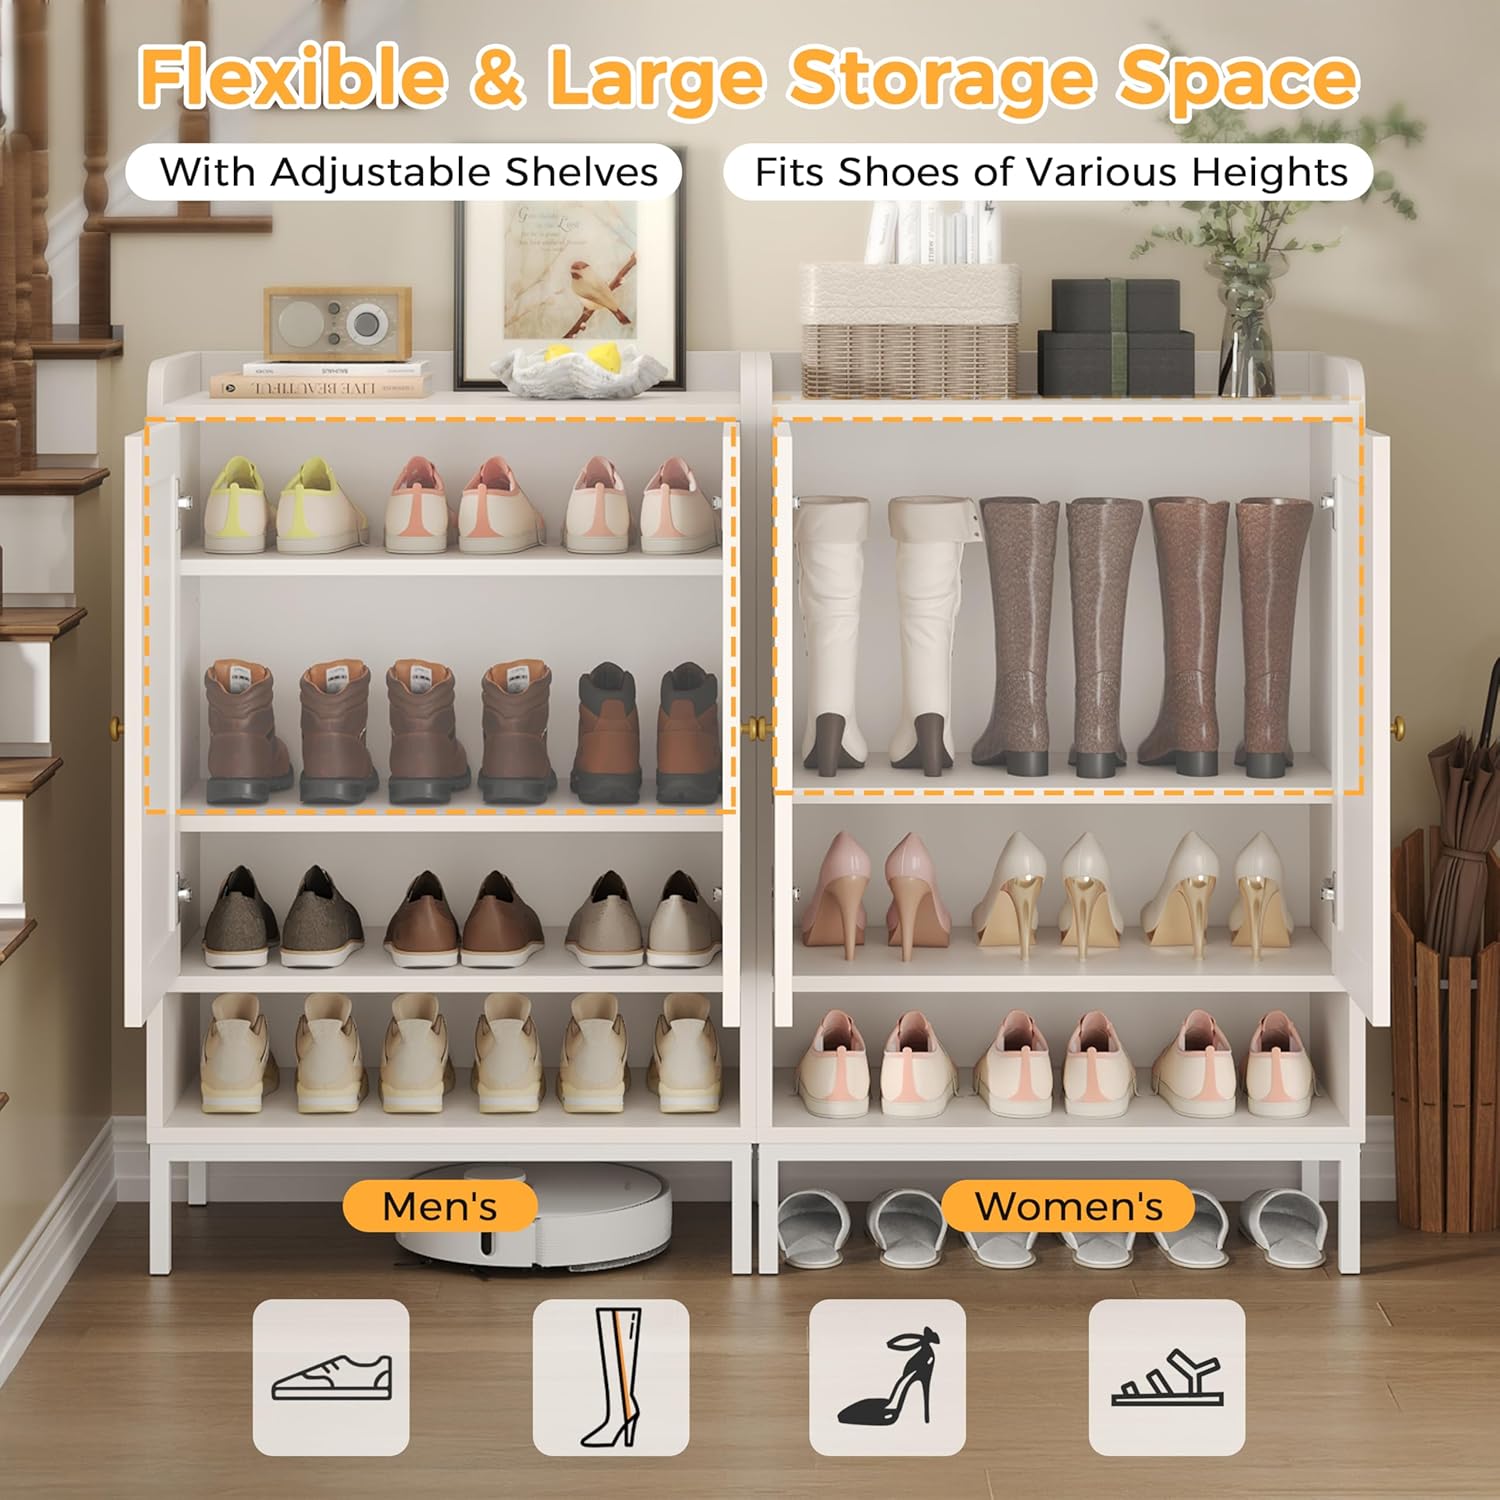
Figure 4.1: Flexible storage options with adjustable shelves.
Tabletop Use:
- The spacious tabletop is designed with a raised baffle and rounded corners to securely hold small items.
- Place items such as keys, wallets, glasses, decorative plants, or small bags on the tabletop for easy access.

Figure 4.2: Tabletop functionality for daily items.
5. Maintenance and Care
To ensure the longevity and appearance of your JASIWAY Rattan Shoe Cabinet, follow these maintenance guidelines:
- Cleaning: The cabinet's surface is sleek and impermeable, making it easy to clean. Wipe surfaces with a soft, damp cloth. Avoid abrasive cleaners or harsh chemicals that may damage the finish.
- Rattan Care: For the rattan decor, gently dust with a soft brush or cloth. Avoid excessive moisture.
- Spills: Promptly wipe up any spills to prevent staining or damage to the wood finish.
- Inspection: Periodically check all screws and fasteners to ensure they remain tight. Tighten if necessary.
- Placement: Avoid placing the cabinet in direct sunlight or near heat sources, as this can cause fading or warping. Maintain a stable room temperature and humidity.
6. Safety Information
Please adhere to the following safety precautions to prevent injury or damage to the product:
- Anti-Tipping Device: Always attach the shoe cabinet to the wall using the provided anti-tipping device. This is crucial for stability and to prevent the cabinet from falling over, especially in homes with children or pets.
- Weight Distribution: Distribute weight evenly across shelves. Avoid overloading any single shelf or the cabinet itself.
- Assembly: Always assemble the cabinet according to the provided instructions. Incorrect assembly can compromise stability.
- Children and Pets: Keep children and pets away from the cabinet during assembly. Do not allow children to climb on or play with the cabinet.
- Sharp Edges/Pinch Points: Use caution when adjusting shelves to avoid injury from sharp edges or pinch points.
- Moving the Cabinet: If you need to move the cabinet, empty it first and lift it carefully. Do not drag the cabinet, as this can damage the legs or structure.
7. Troubleshooting
This section addresses common issues you might encounter with your shoe cabinet.
Common Issues and Solutions:
- Cabinet Wobbles:
- Ensure all screws and fasteners are tightened securely.
- Verify the cabinet is placed on a level surface. Adjust floor glides if present.
- Confirm the anti-tipping device is properly installed and secured to the wall.
- Doors Do Not Close Properly:
- Check hinge alignment. Loosen and readjust hinges if necessary.
- Ensure no items inside the cabinet are obstructing the door's path.
- Verify the cabinet is assembled squarely.
- Shelves Are Not Level:
- Ensure shelf pins are fully inserted into corresponding holes on both sides.
- Remove and reinsert the shelf, ensuring it sits correctly on all supports.
- Missing Parts During Assembly:
- Carefully re-check all packaging materials.
- Contact JASIWAY customer support for assistance (see Section 8).
8. Warranty and Support
JASIWAY is committed to providing quality products. For any questions, concerns, or to report missing/damaged parts, please contact JASIWAY customer support.
Contact Information:
- Refer to the contact details provided in your product packaging or on the official JASIWAY website.
- When contacting support, please have your model number (JASIWAY-XG-001) and purchase information readily available.
Warranty:
Specific warranty details are typically included with your product documentation. Please review these documents for information regarding coverage, terms, and conditions.

