
1. Product Overview
The Meraki Cisco MS130-8X is a cloud-managed access switch designed for small to medium-sized businesses. It offers a powerful combination of 1 Gigabit Ethernet and 2.5 Gigabit Ethernet ports, Power over Ethernet Plus (PoE+) capabilities, and SFP+ uplinks, all managed centrally through the Meraki Dashboard. This switch provides reliable and high-performance connectivity for various network devices.
- Ports: 6x 1GbE (Gigabit Ethernet) ports, 2x 2.5GbE (Multi-Gigabit Ethernet) ports, 2x SFP+ (10 Gigabit Ethernet) uplinks.
- PoE+: 120W total PoE+ power budget across all PoE-capable ports.
- Management: Cloud-managed via Meraki Dashboard for centralized control and monitoring.
- Form Factor: Compact design suitable for various deployment environments.
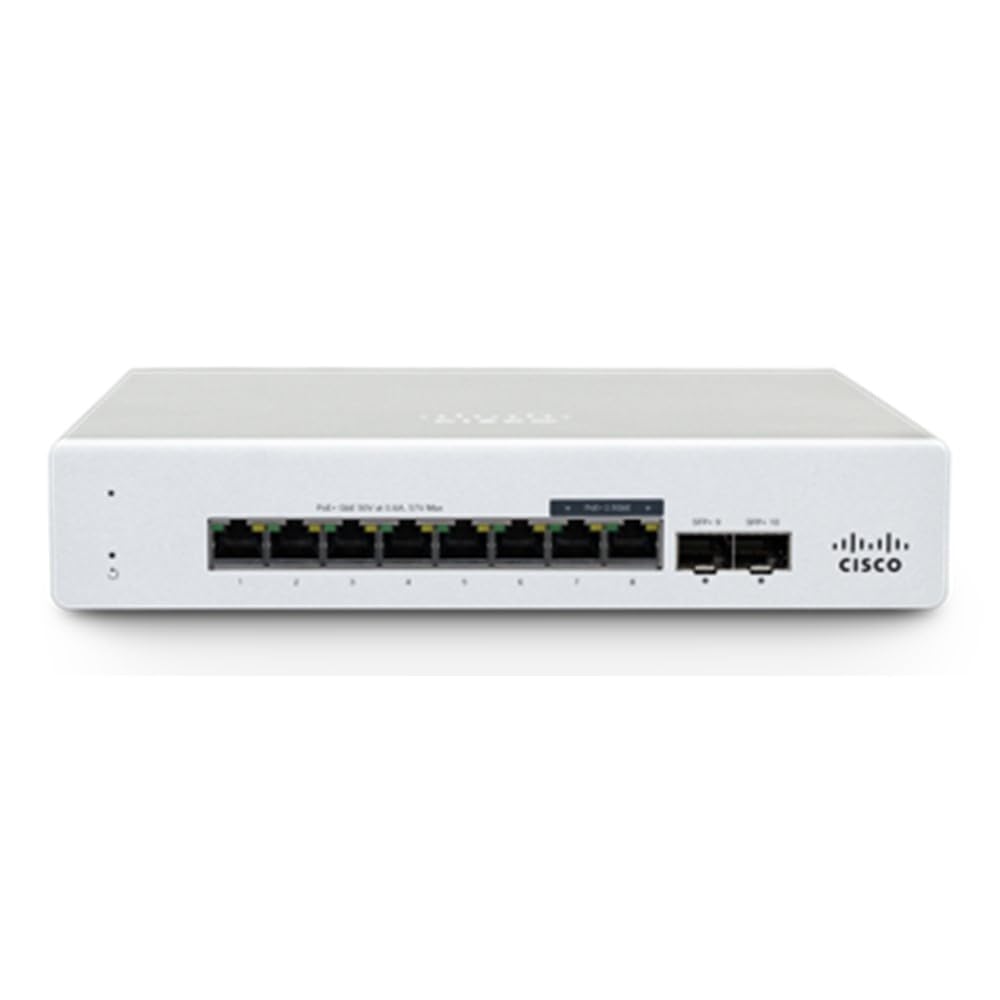
Figure 1: Front view of the Meraki Cisco MS130-8X Cloud Managed Switch. This image displays the front panel of the Meraki Cisco MS130-8X Cloud Managed Switch, showing its various Ethernet and SFP+ ports, along with LED indicators.
2. Setup Guide
2.1. Package Contents
Verify that your package contains the following items:
- Meraki MS130-8X Cloud Managed Switch
- Power Adapter/Cord
- Mounting Hardware (if applicable)
- Quick Start Guide
2.2. Physical Installation
- Choose a Location: Select a stable, dry, and well-ventilated location. Ensure adequate space for cable management and airflow. Avoid placing the switch near heat sources or in direct sunlight.
- Mounting (Optional): If rack-mounting or wall-mounting, use the provided hardware and follow the specific instructions in the Quick Start Guide for secure installation.
- Connect Power: Connect the power cord to the switch's power input and then to a suitable power outlet. The power LED should illuminate.
2.3. Network Connection
- Uplink Connection: Connect one of the SFP+ ports (or a 2.5GbE/1GbE port if SFP+ is not used) to your router or core network switch using an appropriate Ethernet or fiber cable. This port will provide internet access and connectivity to the Meraki cloud.
- Device Connections: Connect your network devices (computers, access points, IP cameras, etc.) to the remaining 1GbE and 2.5GbE Ethernet ports. For devices requiring power, ensure they are connected to PoE-enabled ports.
2.4. Initial Configuration (Meraki Dashboard)
The Meraki MS130-8X is managed entirely through the Meraki cloud dashboard. No local configuration is required.
- Create a Meraki Account: If you don't have one, visit dashboard.meraki.com and create a new account.
- Add the Device: Log in to your Meraki Dashboard. Navigate to Network-wide > Configure > Add devices. Enter the serial number of your MS130-8X switch (found on the device label) and follow the on-screen prompts to add it to your network.
- Automatic Configuration: Once added and connected to the internet, the switch will automatically download its configuration from the Meraki cloud. This process may take a few minutes.
3. Operating the Switch
3.1. Accessing the Meraki Dashboard
All operational aspects of the MS130-8X switch are managed via the Meraki Dashboard. Access it through a web browser at dashboard.meraki.com.
3.2. Basic Switch Management
- Port Configuration: From the Dashboard, navigate to Switch > Monitor > Switches, select your MS130-8X, then go to Ports. Here you can configure individual port settings such as VLANs, speed/duplex, and PoE status.
- VLANs: Create and assign VLANs to segment your network traffic.
- PoE Settings: Monitor PoE usage and configure PoE priorities for connected devices.
- Traffic Shaping: Apply quality of service (QoS) policies to prioritize critical network traffic.
3.3. Monitoring and Diagnostics
The Meraki Dashboard provides extensive monitoring and diagnostic tools:
- Network-wide Visibility: View the status of all your Meraki devices, including the MS130-8X.
- Event Log: Review system events, alerts, and configuration changes.
- Client List: See all devices connected to your network and their activity.
- Cable Testing: Perform remote cable tests to diagnose connectivity issues.
4. Maintenance
4.1. Firmware Updates
Meraki devices receive automatic firmware updates from the cloud. You can schedule maintenance windows for these updates via the Meraki Dashboard to minimize disruption.
4.2. Cleaning
To maintain optimal performance, periodically clean the exterior of the switch with a soft, dry cloth. Ensure the device is powered off before cleaning. Do not use liquid cleaners or aerosols.
4.3. Environmental Considerations
Ensure the switch operates within its specified environmental ranges for temperature and humidity. Proper ventilation is crucial to prevent overheating.
5. Troubleshooting
5.1. LED Indicators
The MS130-8X features various LED indicators to provide status information:
- Power LED:
- Solid Green: Device is powered on and operating normally.
- Flashing Green: Device is booting up or performing a firmware upgrade.
- Off: Device is powered off or experiencing a power issue.
- Port LEDs: (Typically located on each Ethernet port)
- Solid Green/Amber: Link established (color may indicate speed, e.g., Green for 1Gbps/2.5Gbps, Amber for 100Mbps).
- Flashing Green/Amber: Activity on the port.
- Off: No link or port is disabled.
5.2. Common Issues and Solutions
- No Power:
- Check power cord connection to the switch and the power outlet.
- Verify the power outlet is functional.
- Ensure the correct power adapter is used.
- No Network Connectivity:
- Check Ethernet cable connections to both the switch and the connected device.
- Verify port LEDs are indicating a link.
- Ensure the uplink port is connected to a functional router/network.
- Check Meraki Dashboard for port status and configuration errors.
- PoE Device Not Powering On:
- Confirm the device is PoE-compatible.
- Ensure the device is connected to a PoE-enabled port on the switch.
- Check the Meraki Dashboard for PoE status and power budget utilization.
- Verify the device is not drawing more power than the port or switch's total budget can supply.
5.3. Factory Reset
A factory reset will erase all local configurations and return the switch to its default settings. This action should only be performed if instructed by Meraki Support or as a last resort for troubleshooting.
- Locate the reset button (often recessed, requiring a paperclip).
- With the switch powered on, press and hold the reset button for at least 10-15 seconds until the Power LED changes behavior (e.g., starts flashing rapidly).
- Release the button. The switch will reboot and attempt to reconnect to the Meraki Dashboard to download its configuration.
6. Specifications
| Feature | Description |
|---|---|
| Model | MS130-8X |
| Brand | Meraki |
| Ports | 6x 1GbE, 2x 2.5GbE, 2x SFP+ |
| PoE+ Budget | 120 W |
| Switch Type | Cloud Managed |
| Interface Type | PoE, SFP |
| Compatible Devices | Desktop, Laptop, Printer, Camera |
| Manufacturer Part Number | MS130-8X-HW |
| UPC | 810087200039 |
7. Warranty and Support
7.1. Product Warranty
Meraki products typically come with a limited lifetime warranty. For detailed information regarding the warranty terms, conditions, and duration for your specific region and purchase, please refer to the official Meraki warranty policy available on the Cisco Meraki website or contact your authorized Meraki reseller.
7.2. Technical Support
For technical assistance, troubleshooting, or any questions regarding your Meraki MS130-8X switch, please utilize the following resources:
- Meraki Dashboard Help: The Meraki Dashboard includes extensive documentation, FAQs, and a direct link to open support cases.
- Meraki Documentation: Visit the official Cisco Meraki documentation website for comprehensive guides and articles.
- Contact Meraki Support: Access support contact information (phone, email, chat) through your Meraki Dashboard or the official Meraki website. Ensure you have your device serial number and network ID ready when contacting support.


