
TP-Link Archer VX1800v
TP-Link Archer VX1800v AX1800Mbps Dual-Band Wi-Fi 6 Gigabit VDSL/ADSL Modem Router User Manual
Model: Archer VX1800v
1. Introduction
This user manual provides comprehensive instructions for the installation, operation, and maintenance of your TP-Link Archer VX1800v AX1800Mbps Dual-Band Wi-Fi 6 Gigabit VDSL/ADSL Modem Router. Please read this manual carefully before using the device to ensure proper setup and optimal performance.
The Archer VX1800v is designed to deliver high-speed internet connectivity with advanced Wi-Fi 6 technology, supporting both VDSL/ADSL and Ethernet WAN connections. It features dual-band Wi-Fi, MU-MIMO, VoIP support, and easy management via the TP-Link Tether App.

Figure 1.1: TP-Link Archer VX1800v AX1800Mbps Dual-Band Wi-Fi 6 Gigabit VDSL/ADSL Modem Router and its retail packaging.
2. Safety Information
To ensure safe and proper operation of your device, please observe the following safety guidelines:
- Do not expose the device to water or moisture.
- Do not attempt to disassemble or repair the device yourself.
- Use only the power adapter provided with the device.
- Ensure proper ventilation around the device to prevent overheating.
- Keep the device away from heat sources and direct sunlight.
- Do not block any ventilation openings.
3. Product Overview
3.1 Package Contents
The package should contain the following items:
- TP-Link Archer VX1800v Modem Router
- Power Adapter
- Ethernet Cable
- DSL Cable
- Quick Installation Guide
3.2 Device Layout
Familiarize yourself with the ports and buttons on your Archer VX1800v router.
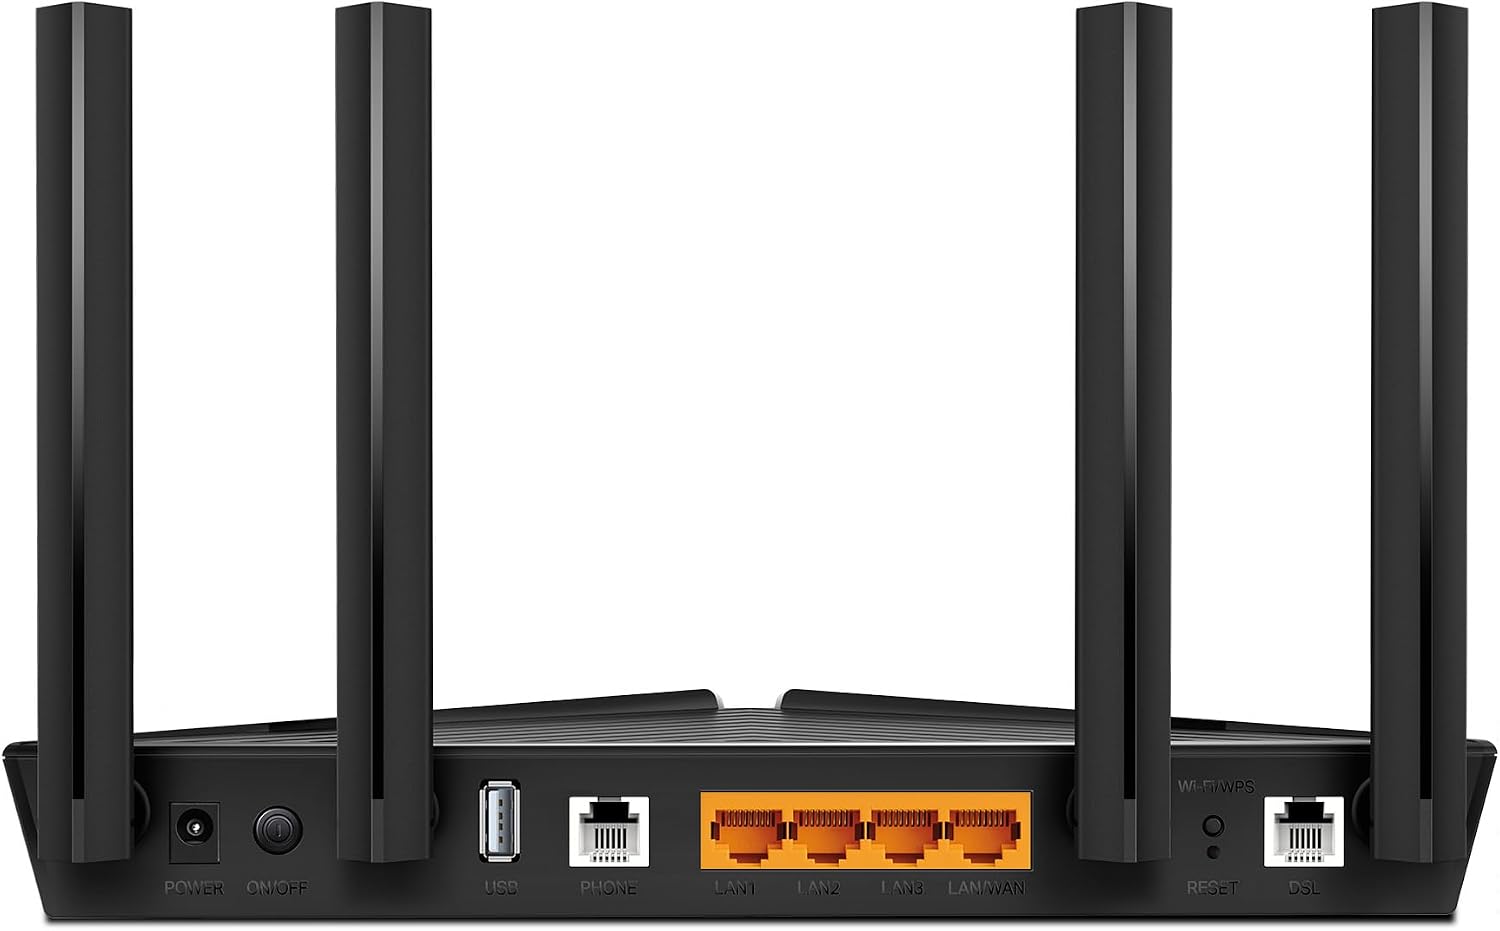
Figure 3.1: Rear panel of the Archer VX1800v, illustrating the Power, On/Off, USB, Phone, LAN/WAN, Reset, and DSL ports.
- Power Port: Connects to the provided power adapter.
- On/Off Button: Powers the device on or off.
- USB 2.0 Port: Used for connecting USB storage devices for file sharing or a 3G/4G USB modem for backup internet.
- Phone Port: Connects to an analog telephone for VoIP services.
- LAN/WAN Ports (Gigabit Ethernet): Four ports for connecting wired devices. The LAN4/WAN port can also function as a WAN port for fiber/cable connections.
- Reset Button: Press and hold for 5-8 seconds to restore factory default settings.
- DSL Port: Connects to your VDSL/ADSL line.
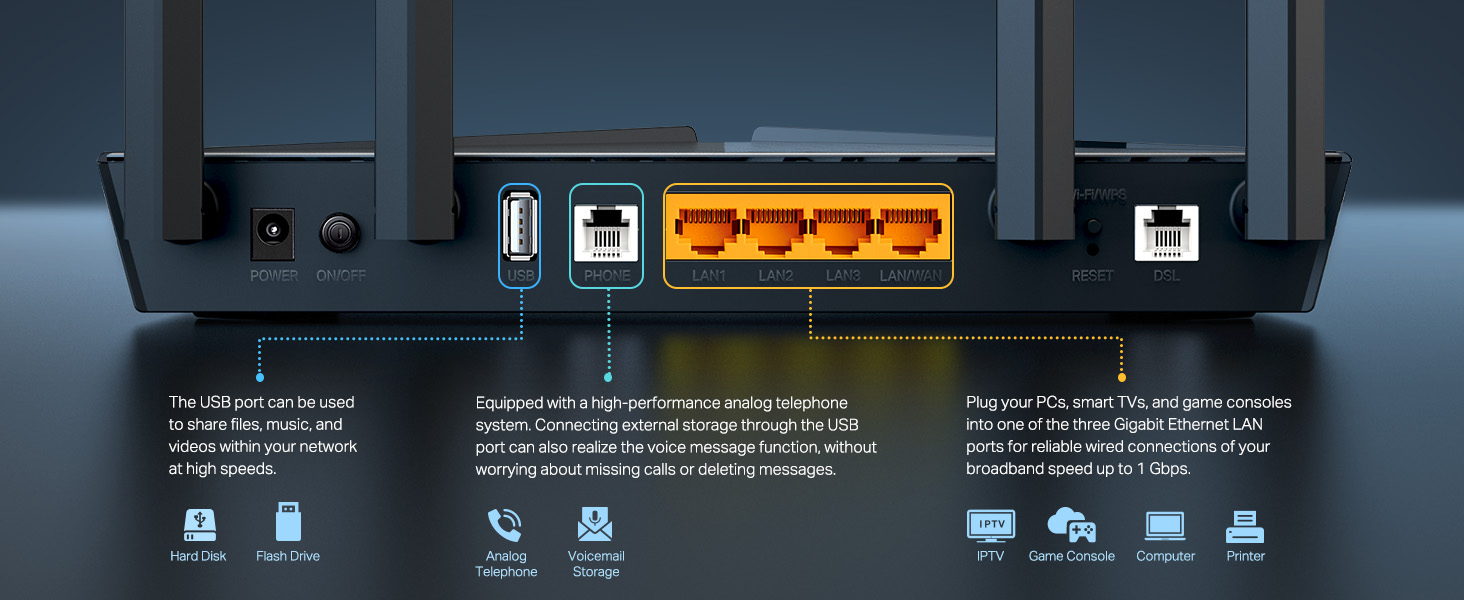
Figure 3.2: Detailed description of the USB, Phone, and LAN/WAN ports and their functionalities.
3.3 Key Features
The Archer VX1800v offers a range of features to enhance your network experience:
- Super VDSL: Supports VDSL2 Profile 35b for internet speeds up to 350Mbps.
- Next-Gen Wi-Fi 6: AX1800Mbps dual-band speeds (1201 Mbps on 5 GHz, 574 Mbps on 2.4 GHz).
- 2x2 MU-MIMO: Efficiently communicates with multiple devices simultaneously.
- VoIP Support: Multiple VoIP accounts and call features.
- Versatile Connectivity: Compatible with VDSL2/ADSL2+/ADSL2/ADSL standards, Fiber/Cable via Ethernet WAN, and 3G/4G via USB.
- TP-Link Tether App: Easy network management from mobile devices.
- Gigabit Ports: Four Gigabit Ethernet ports for fast wired connections.

Figure 3.3: Overview of key features including Wi-Fi 6, Super VDSL, EasyMesh, Telephony, Versatile Connectivity, Wired Connections, and Simple Setup.
4. Setup Guide
4.1 Hardware Connection
- Positioning: Place the router in a central location to ensure optimal Wi-Fi coverage throughout your home. Avoid placing it near large metal objects, direct sunlight, or strong electromagnetic sources.
- Connect DSL: Connect one end of the DSL cable to the DSL port on the router and the other end to your telephone wall jack (or splitter, if required by your ISP).
- Connect Power: Connect the provided power adapter to the router's Power port and plug the other end into a power outlet. Press the On/Off button to power on the router.
- Verify LEDs: Wait for the LED indicators on the front panel to stabilize. The Power, DSL, and Internet LEDs should turn solid green, indicating a successful connection.
- Optional: Ethernet WAN Connection: If using a fiber or cable modem, connect an Ethernet cable from your existing modem's LAN port to the LAN4/WAN port on the Archer VX1800v.
- Optional: Connect Wired Devices: Connect your computers, game consoles, or other wired devices to the LAN ports (LAN1, LAN2, LAN3) using Ethernet cables.
- Optional: Connect USB Devices: Insert a USB storage device into the USB port for network storage or a compatible 3G/4G USB modem for mobile broadband backup.
- Optional: Connect Phone: Connect an analog telephone to the Phone port for VoIP services.
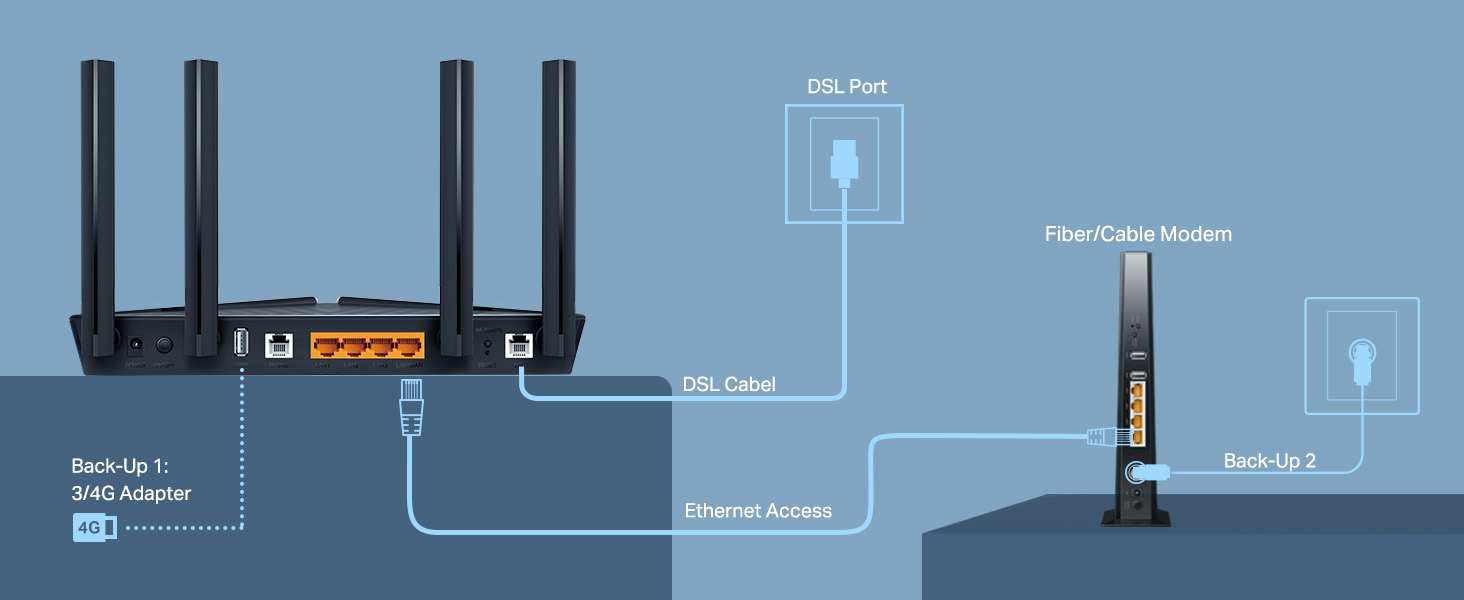
Figure 4.1: Connectivity diagram illustrating DSL, Ethernet WAN, and USB 3G/4G adapter connections.
4.2 Initial Configuration (Tether App)
The easiest way to set up your router is using the TP-Link Tether app.
- Download Tether App: Search for "TP-Link Tether" in the Apple App Store or Google Play Store and download the app.
- Connect to Wi-Fi: Connect your smartphone or tablet to the router's default Wi-Fi network (SSID and password are printed on the label on the bottom of the router).
- Launch Tether App: Open the Tether app and log in with your TP-Link ID. If you don't have one, create an account.
- Follow On-Screen Instructions: The app will guide you through the initial setup process, including setting up your internet connection (ISP details), Wi-Fi name (SSID), and password.
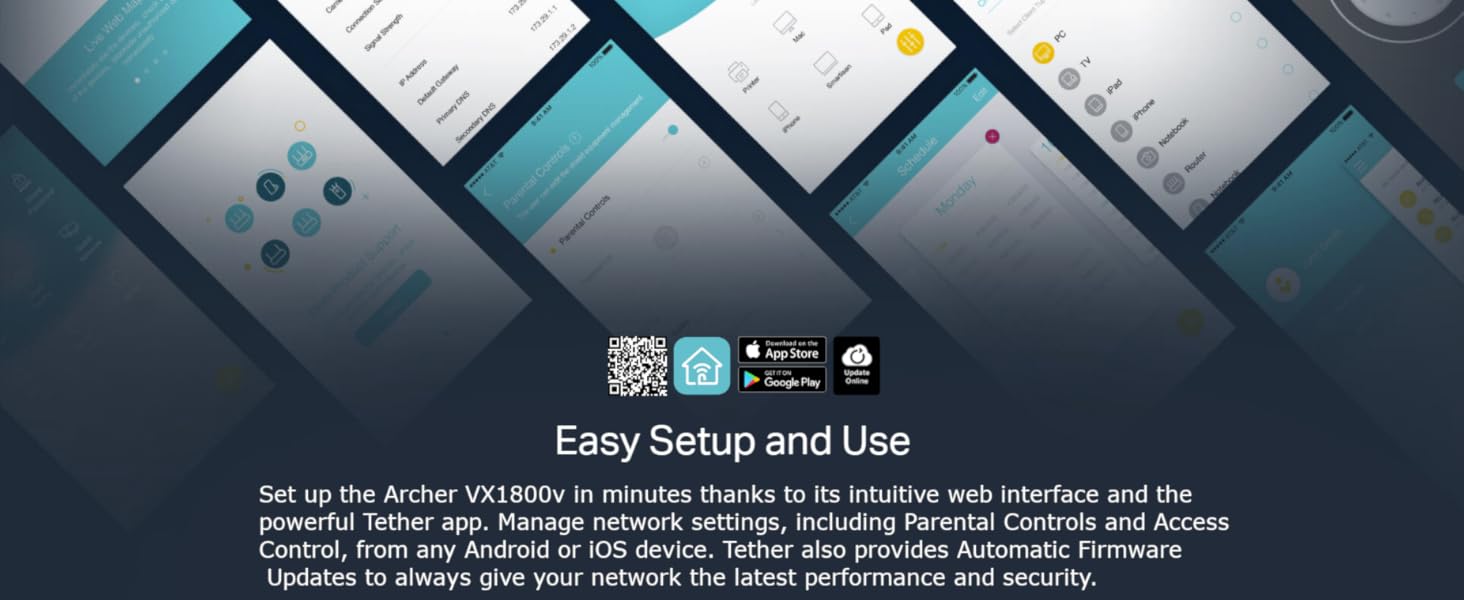
Figure 4.2: The TP-Link Tether app provides an intuitive interface for quick setup and management.
4.3 Initial Configuration (Web Browser)
Alternatively, you can configure the router using a web browser.
- Connect to Router: Connect your computer to the router via an Ethernet cable or by connecting to its default Wi-Fi network.
- Access Web Interface: Open a web browser and type
http://tplinkmodem.netorhttp://192.168.1.1into the address bar. - Login: Create a new password for future logins when prompted.
- Run Quick Setup: Follow the on-screen Quick Setup wizard to configure your internet connection and wireless settings.
5. Operating Instructions
5.1 Wi-Fi Connectivity
To connect devices to your Wi-Fi network:
- On your device (smartphone, laptop, tablet), open the Wi-Fi settings.
- Select your Wi-Fi network name (SSID) from the list.
- Enter the Wi-Fi password you set during setup.
- Your device should now be connected to the internet.
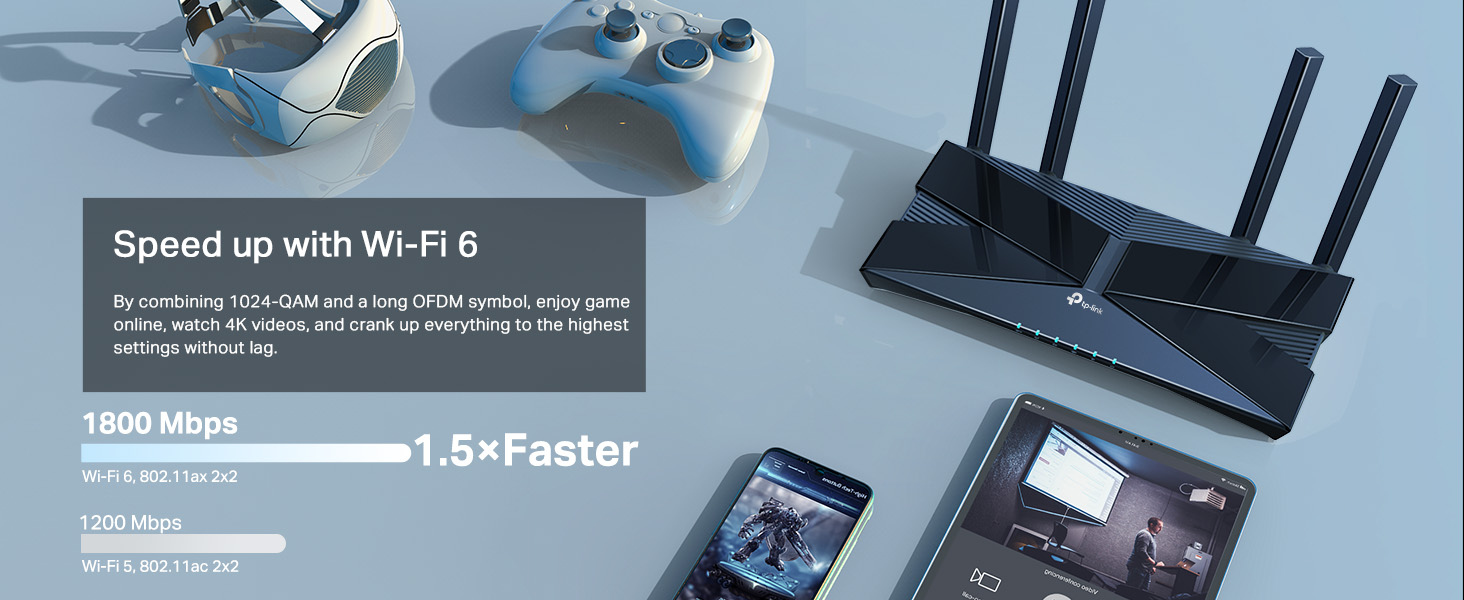
Figure 5.1: Wi-Fi 6 provides faster speeds for gaming, 4K video streaming, and other demanding applications.
5.2 Advanced Features
The Archer VX1800v offers several advanced features accessible via the Tether app or web interface:
- Parental Controls: Manage and monitor internet access for children's devices.
- Quality of Service (QoS): Prioritize network traffic for specific applications or devices (e.g., gaming, streaming).
- Guest Network: Create a separate Wi-Fi network for guests, keeping your main network secure.
- USB Sharing: Access files on connected USB storage devices from any device on your network.
- VoIP Settings: Configure your Voice over IP services.
- EasyMesh: Create a seamless whole-home mesh Wi-Fi system with compatible TP-Link EasyMesh devices.
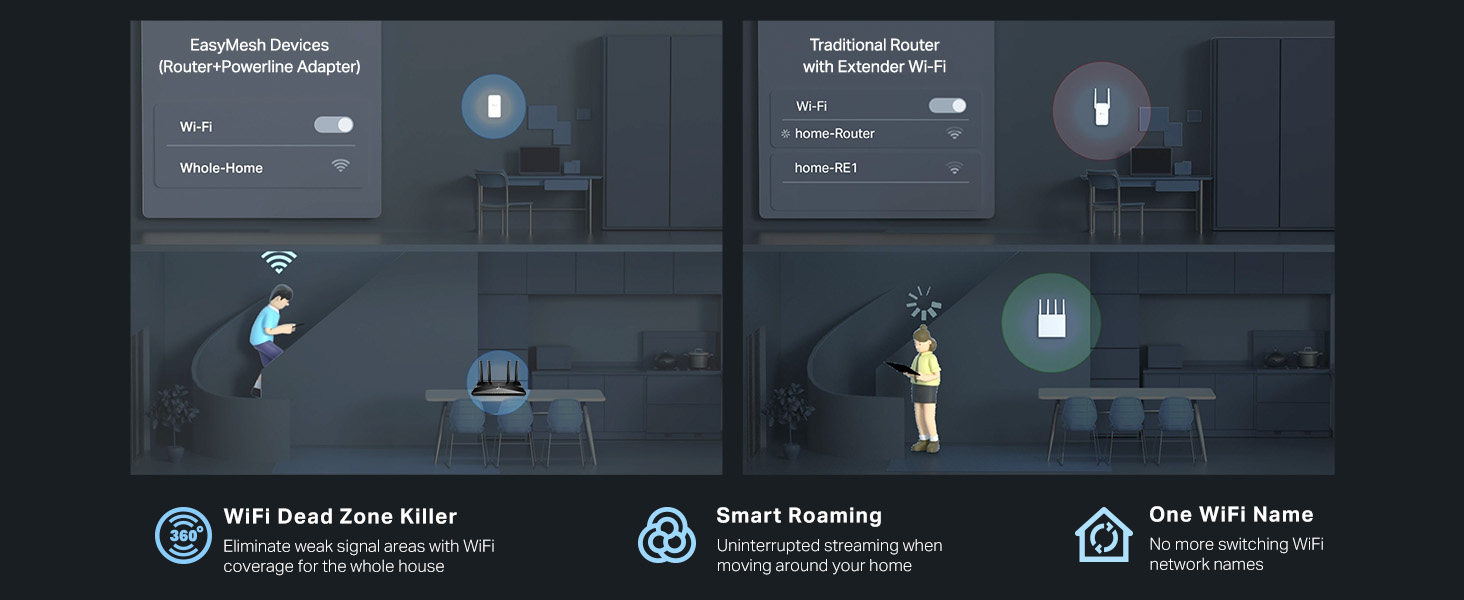
Figure 5.2: EasyMesh technology eliminates Wi-Fi dead zones and provides seamless roaming with a single Wi-Fi name.
6. Maintenance
Regular maintenance helps ensure the longevity and optimal performance of your router.
- Firmware Updates: Regularly check for and install firmware updates via the Tether app or web interface. Updates often include performance improvements, security patches, and new features.
- Cleaning: Gently wipe the router with a soft, dry cloth. Do not use liquid cleaners or aerosols.
- Ventilation: Ensure the router's ventilation holes are not blocked to prevent overheating.
- Rebooting: If you experience network issues, try rebooting the router by unplugging the power adapter for 10 seconds and then plugging it back in.
7. Troubleshooting
This section addresses common issues you might encounter.
7.1 No Internet Access
- Check Cables: Ensure all cables (DSL, Ethernet, Power) are securely connected.
- LED Status: Verify that the Power, DSL, and Internet LEDs are solid green. If not, check your ISP connection or contact your ISP.
- Router Reboot: Power cycle the router and your modem (if separate).
- ISP Settings: Confirm your ISP's connection settings (VPI/VCI, connection type, etc.) are correctly configured in the router's web interface.
7.2 Wi-Fi Signal Issues
- Router Placement: Move the router to a central location, away from obstructions and interference sources (e.g., cordless phones, microwaves).
- Interference: Change the Wi-Fi channel in the router settings to avoid interference from neighboring networks.
- Signal Strength: Consider using a Wi-Fi extender or a compatible EasyMesh device if you have large areas with weak signal.
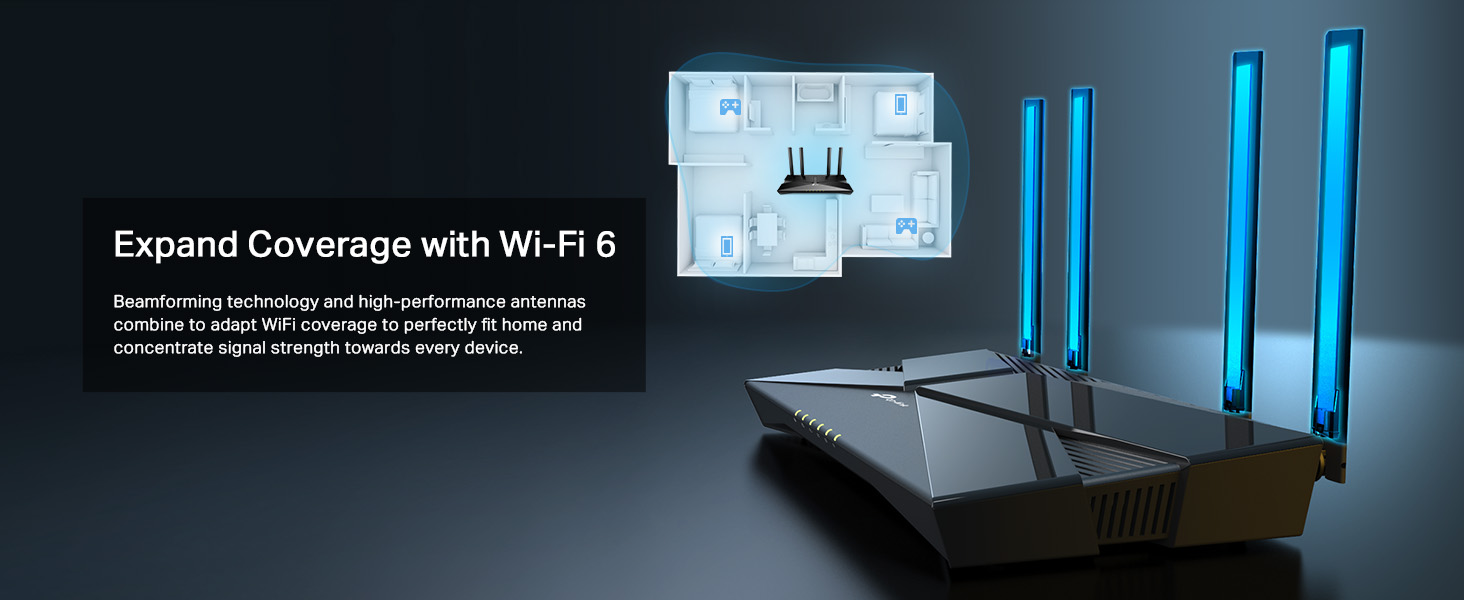
Figure 7.1: Beamforming technology helps expand Wi-Fi coverage and concentrate signal strength towards connected devices.
7.3 Forgotten Wi-Fi Password or Login Password
- Wi-Fi Password: The default Wi-Fi password is on the label at the bottom of the router. If you changed it, you can retrieve or change it via the Tether app or web interface.
- Login Password: If you forgot your router's login password, you will need to perform a factory reset. Press and hold the Reset button on the back of the router for 5-8 seconds until the LEDs flash. This will restore the router to its default settings, and you will need to reconfigure it.
8. Specifications
| Feature | Detail |
|---|---|
| Brand | TP-Link |
| Model Name | Archer VX1800v |
| Product Dimensions | 20.6 x 13.5 x 4.16 cm |
| Item Weight | 970 g |
| Wireless Type | 802.11ax (Wi-Fi 6) |
| Frequency Band Class | Dual-Band (2.4 GHz & 5 GHz) |
| Wi-Fi Speeds | 1201 Mbps (5 GHz), 574 Mbps (2.4 GHz) |
| VDSL Standard | VDSL2 Profile 35b (Super VDSL) |
| Ports | 4x Gigabit LAN/WAN, 1x USB 2.0, 1x Phone, 1x DSL |
| Antenna Type | Fixed |
| Operating System | RouterOS (TP-Link's custom OS) |
| Compatible Devices | Laptop, Personal Computer, Tablet, Smart Television |
9. Warranty and Support
TP-Link provides a limited warranty for this product. For detailed warranty information, please refer to the warranty card included in your product package or visit the official TP-Link website.
For technical support, firmware updates, and FAQs, please visit the TP-Link support page:
You can also contact TP-Link customer service directly for assistance.
Related documentsArcher VX1800v


Ask a question about this manual
Ask about setup, troubleshooting, compatibility, parts, safety, or missing instructions. Manuals+ will review the question and use this page’s manual context to help answer it.