
Introduction
Thank you for choosing the Dr.meter Rechargeable Paddle Board Pump. This portable electric air pump is designed for efficient inflation and deflation of various inflatable items, including paddle boards, kayaks, and air mattresses. Featuring a powerful 10000mAh battery, car adapter compatibility, LED light, and automatic shut-off, it provides convenience and reliability for your outdoor adventures. Please read this manual thoroughly before use to ensure proper operation and safety.
Safety Information
- Always fully charge the pump before initial use. The battery is partially charged from the factory for safety.
- Do not operate the pump in wet conditions or immerse it in water.
- Keep the pump away from children and pets.
- Ensure the correct nozzle is securely attached to prevent air leakage and ensure efficient inflation.
- Do not exceed the recommended pressure for your inflatable item. The pump features an auto-off function to prevent over-inflation.
- Avoid blocking the inflation/deflation ports during operation to prevent overheating.
- Store the pump in a cool, dry place when not in use.
- Do not attempt to disassemble or repair the pump yourself. Contact customer support for assistance.
Package Contents
Please check the package for the following items:
- Dr.meter Electric SUP Air Pump
- Flexible Air Hose
- 6 Different Nozzles
- Car Charger Cable
- USB Charging Cable
- Storage Bag
- User Manual (this document)

Image: Dr.meter Electric SUP Air Pump with its included flexible air hose, various nozzles, and charging cables.
Product Overview
Familiarize yourself with the components and features of your Dr.meter air pump:

Image: Detailed diagram illustrating the inflation inlet, LED lights, deflation outlet, flexible air hose, various air nozzles (1-6), fixed suckers, unit display, battery indicator, mode selection button, LED lighting switch/unit switch, pressure preset buttons (+/-), power switch, DC hole, USB interface, and Type-C interface.
- Digital Display: Shows current pressure (PSI/KPA), battery level, and selected mode.
- Control Buttons: Power, Mode (M), LED Light/Unit Switch, Pressure Adjustment (+/-).
- Inflation/Deflation Ports: Dedicated ports for inflating and deflating.
- LED Lights: Integrated lights for visibility in low-light conditions.
- Charging Ports: USB and Type-C ports for charging the pump and external devices.
- 10000mAh Battery: High-capacity rechargeable battery for cordless operation.
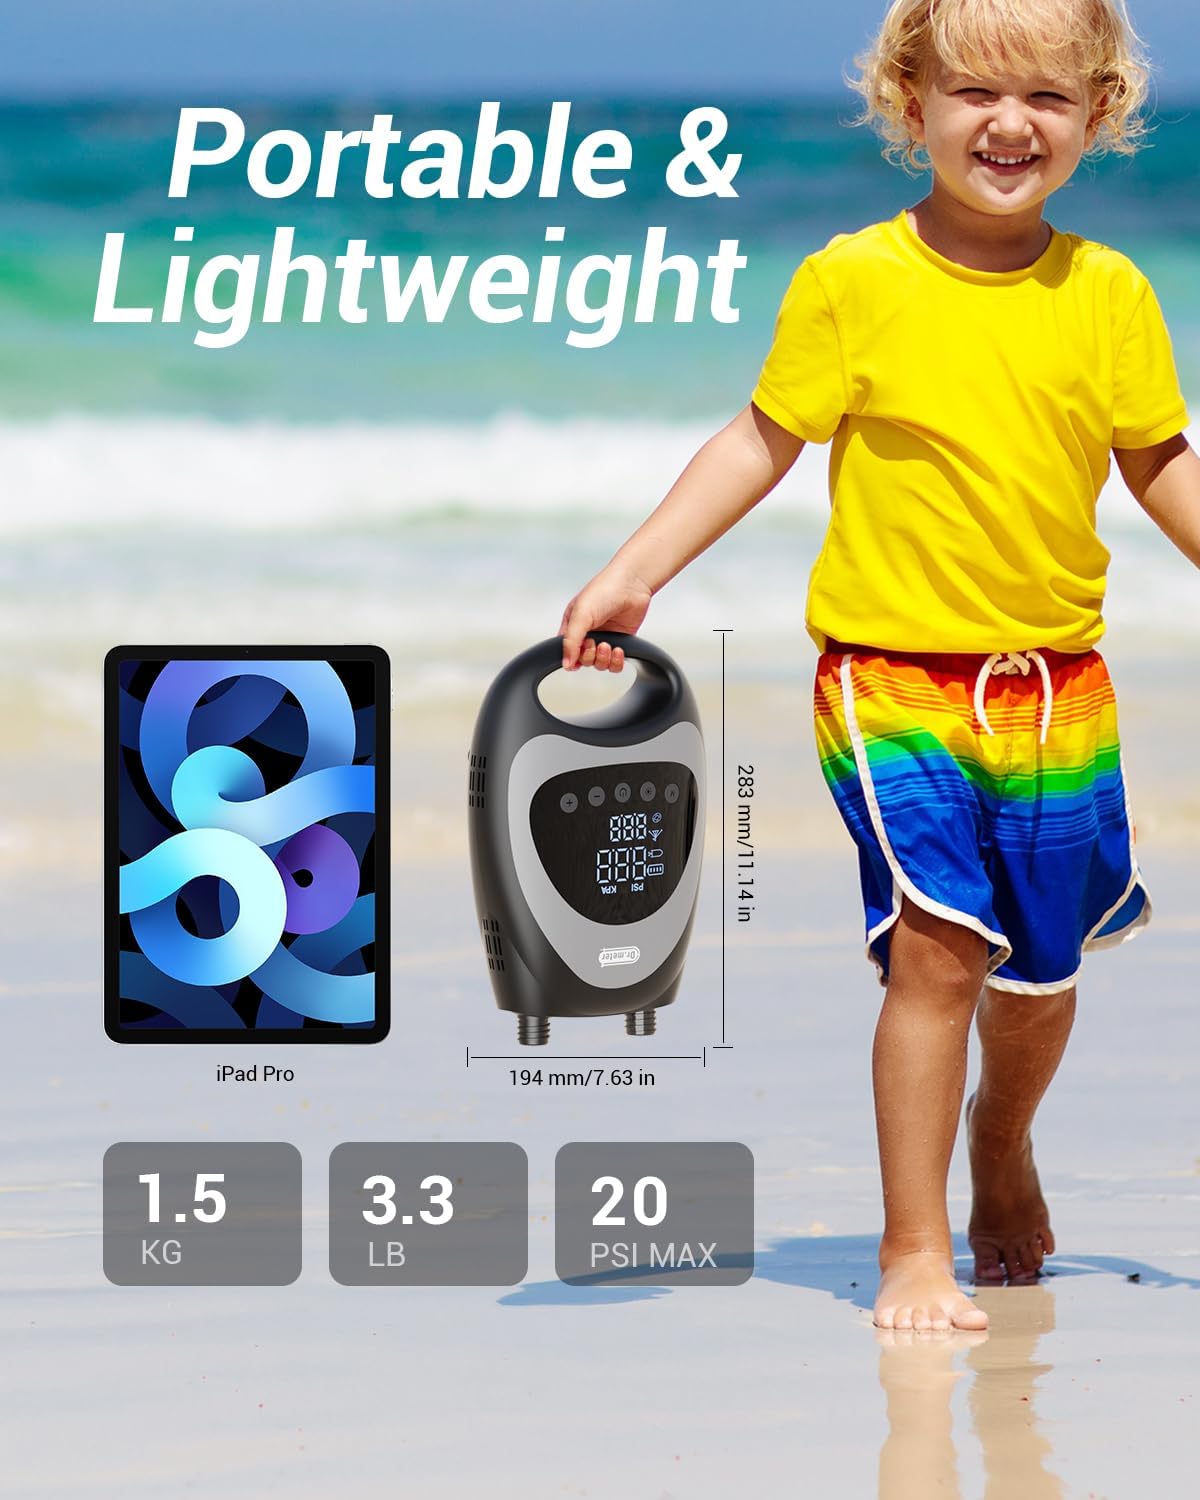
Image: The pump's compact size and lightweight design, shown next to an iPad Pro for scale, highlighting its portability.

Image: An internal view of the pump, emphasizing its 10000mAh large capacity battery, which provides approximately 25 minutes of continuous operation after a 120-minute charge.

Image: The pump connected via USB to a smartphone, illustrating its capability to function as a power bank.
Setup
Initial Charging
Before first use, ensure the pump is fully charged. The battery indicator lights will show the charging status.
- Connect the USB charging cable to the pump's Type-C port and a suitable USB power adapter (not included) or use the provided car charger cable with a 12V car outlet.
- A full charge takes approximately 130 minutes.
- Battery Indicator: 4 bars (80-100%), 3 bars (60-79%), 2 bars (30-59%), 1 bar (5-29%). If one light is flashing, charge promptly.

Image: Illustration of the two charging methods: cordless operation using the internal battery and corded operation via a 12V car plug.
Connecting the Air Hose and Nozzle
- Connect one end of the flexible air hose to the inflation port (marked with an arrow pointing out) on the pump by twisting it securely.
- Select the appropriate nozzle for your inflatable item from the 6 provided options.
- Attach the selected nozzle to the other end of the flexible air hose.
- Insert the nozzle firmly into the valve of your inflatable item.

Image: A visual guide to the six different nozzles included with the pump, demonstrating their compatibility with various inflatables such as paddle boards, inflatable beds, floating rows, yoga balls, inflatable sofas, and inflatable castles.
Operating Instructions
Inflation
- Ensure the air hose and correct nozzle are securely connected to both the pump and the inflatable item.
- Press and hold the power button for about 2 seconds to turn on the pump. The digital display will illuminate.
- Press the "M" (Mode) button to cycle through the available scene modes (Tent Mode, Surf Board Mode, Swimming Ring Mode, Custom Mode) or to select your desired pressure unit (PSI/KPA).
- Use the "+" and "-" buttons to set your desired target pressure. The pump has a memory function for the last set pressure.
- Press the power button again to start the inflation process. The pump will automatically stop once the preset pressure is reached.
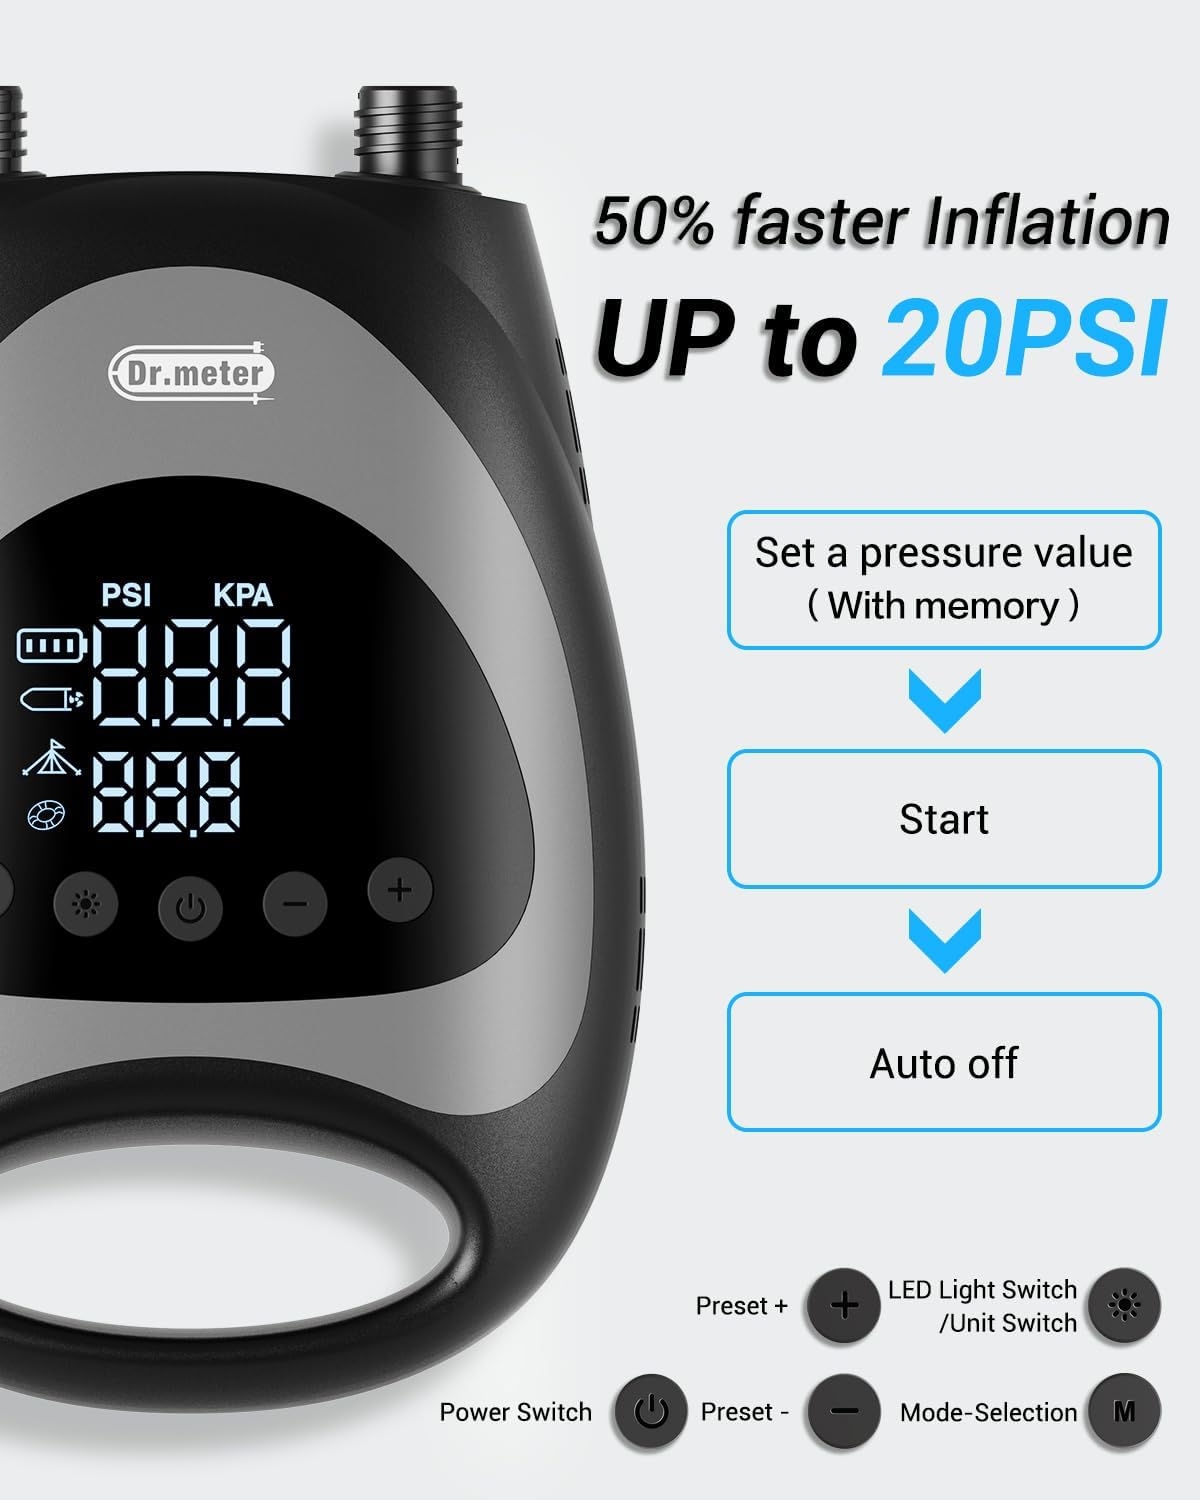
Image: The pump's LCD digital display showing the process of setting a pressure value, starting inflation, and the automatic shut-off feature once the target pressure is achieved.
For a visual guide on how to use the pump, please watch the official instruction video below:
Video: This video demonstrates the step-by-step process of setting up and using the Dr.meter 10000mAh rechargeable SUP air pump for inflation, including connecting the hose, selecting modes, setting pressure, and starting the pump.
Deflation
- Connect the air hose to the deflation port (marked with an arrow pointing in) on the pump.
- Attach the appropriate nozzle to the inflatable item's valve.
- Turn on the pump and press the power button to begin deflation. The pump will actively extract air, making packing easier.

Image: Side-by-side comparison showing the Dr.meter pump both inflating and deflating an inflatable boat, demonstrating its dual functionality.
Using as a Power Bank
The built-in 10000mAh lithium battery allows the pump to function as a power bank for your electronic devices.
- Open the rubber cover on the side of the pump to reveal the USB output port.
- Connect your device's charging cable to the USB output port on the pump.
- The pump will automatically begin charging your device.
LED Light Function
The pump is equipped with LED lights for convenience in dark environments.
- Press the LED light button (sun icon) to turn the lights on or off.
Maintenance
- Cleaning: Wipe the pump's exterior with a soft, damp cloth. Do not use harsh chemicals or abrasive cleaners.
- Storage: Store the pump and all accessories in the provided storage bag in a cool, dry place, away from direct sunlight and extreme temperatures.
- Battery Care: For optimal battery life, charge the pump at least once every three months if not used regularly.
Troubleshooting
| Problem | Possible Cause | Solution |
|---|---|---|
| Pump does not turn on. | Low battery; Power button not pressed correctly. | Charge the pump fully; Press and hold the power button for 2 seconds. |
| Pump inflates slowly or not at all. | Nozzle not securely attached; Incorrect nozzle used; Air hose kinked or blocked. | Ensure nozzle is tightly connected; Use the correct nozzle for the valve; Check and clear any obstructions in the hose. |
| Pump stops before reaching target pressure. | Preset pressure reached; Overheating. | This is normal, the auto-off feature is working; Allow the pump to cool down before resuming operation. |
| Battery drains quickly. | Battery not fully charged; Old battery. | Ensure full charge before use; Battery life naturally decreases over time. |
Specifications
| Feature | Detail |
|---|---|
| Brand | Dr.meter |
| Model | B0CP3PYNNR |
| Color | Black |
| Power Source | Battery Powered / 12V Car Adapter |
| Battery Capacity | 10000mAh Lithium Battery |
| Air Flow Capacity | 320 L/min |
| Maximum Pressure | 20 PSI |
| Operation Mode | Automatic |
| Item Dimensions (L x W x H) | 12.01 x 8.54 x 5.59 inches |
| Item Weight | 2.08 Kilograms (approx. 4.59 lbs) |
Warranty and Support
Dr.meter products are designed and manufactured to the highest quality standards. For warranty information, technical support, or any questions regarding your product, please refer to the warranty card included in your package or visit the official Dr.meter website. Please retain your proof of purchase for warranty claims.