1. Product Overview
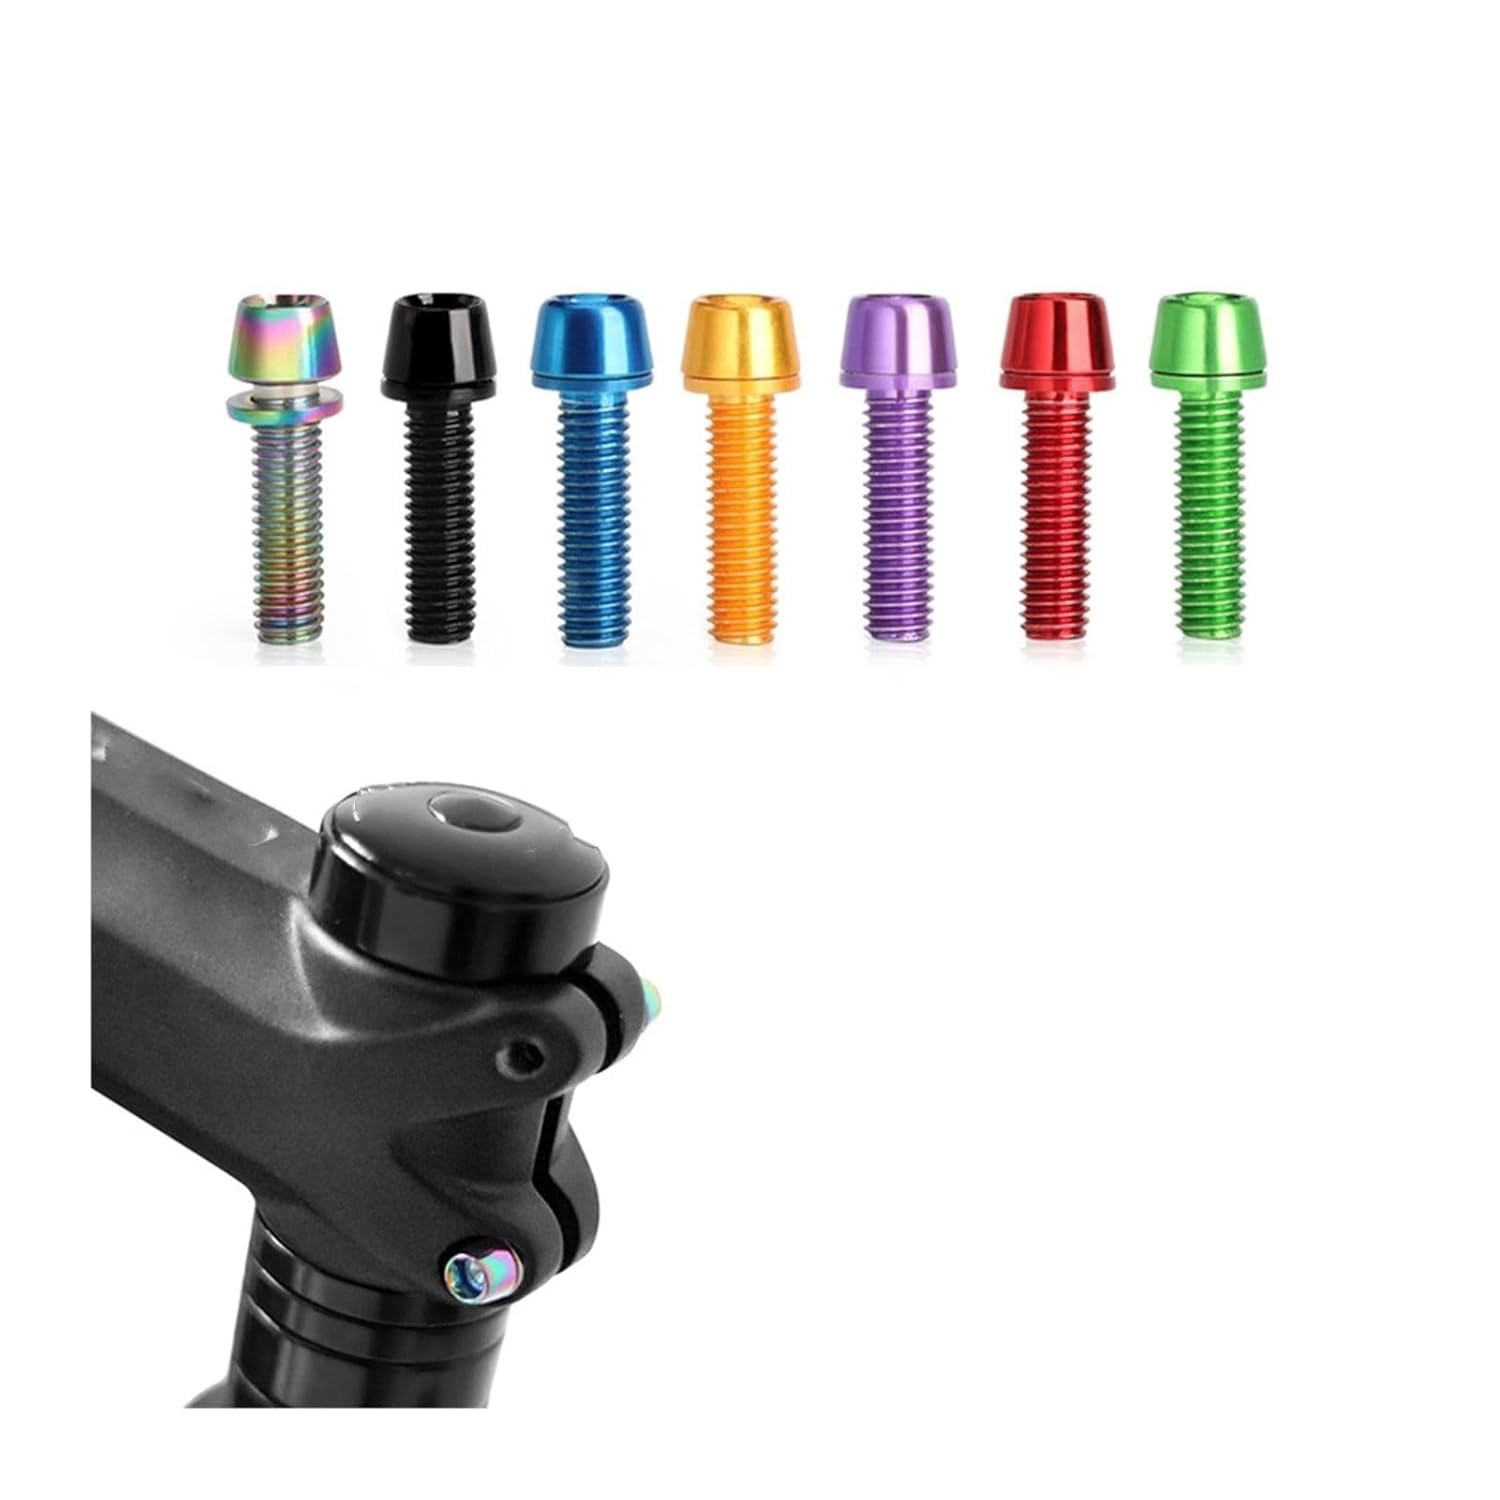
The IOFIT M5*18MM Bicycle Handlebar Stem Screws are designed for securing bicycle handlebar stems. Manufactured from durable stainless steel, these screws are available in various colors to complement your bicycle's aesthetics. This set includes six M5*18MM screws, suitable for most standard bicycle stem applications.

Image 1.1: A set of IOFIT M5*18MM bicycle handlebar stem screws in multiple colors, including a view of a screw properly installed on a bicycle stem, demonstrating their application.
2. Specifications
| Feature | Detail |
|---|---|
| Product Name | Colored Stem Screw |
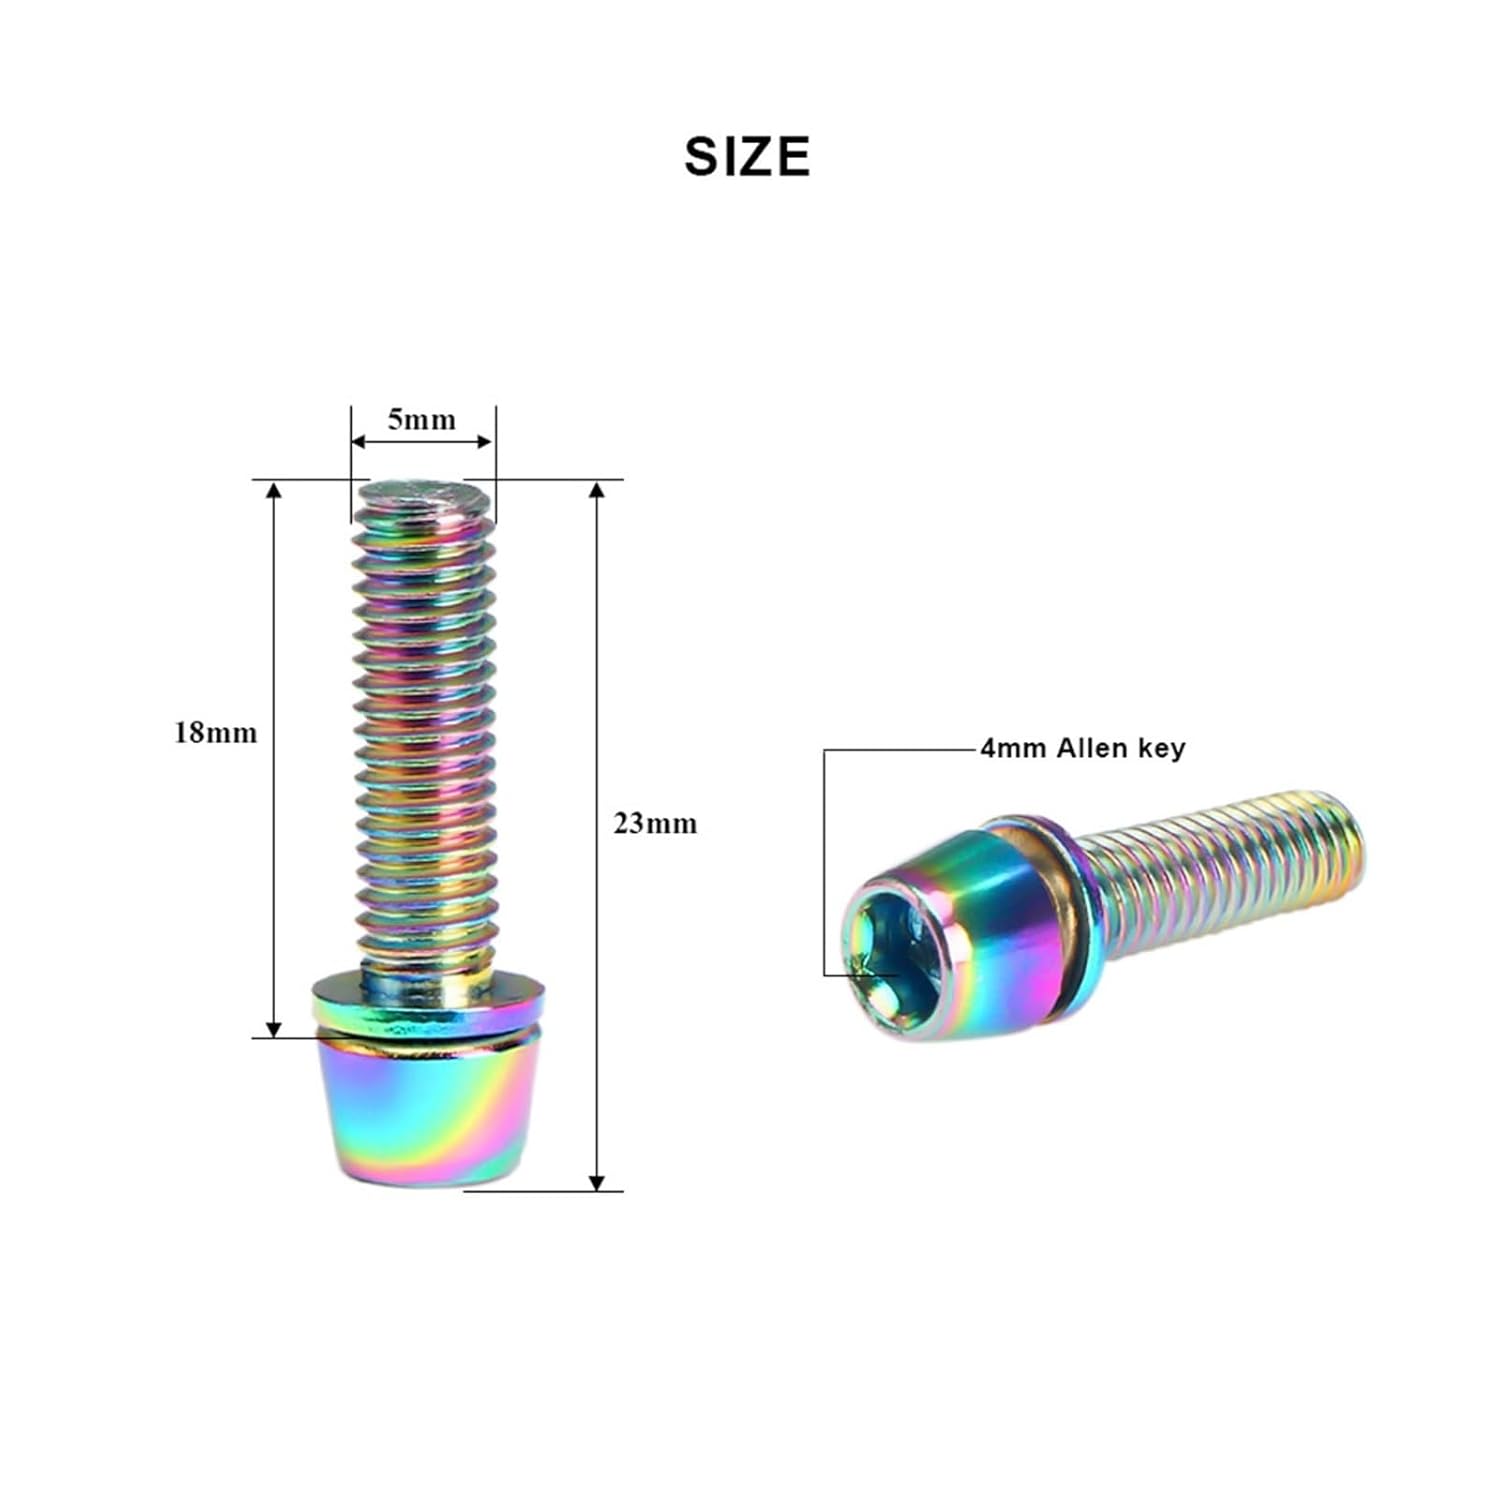
| Specification | M5*18MM |
| Material | Stainless Steel |
| Quantity per Set | 6 pieces |
| Required Tool | 4mm Allen key |
| Package Dimensions | 1.18 x 0.79 x 0.39 inches |
| Item Weight | 3.53 ounces (total for set) |

Image 2.1: Detailed diagram illustrating the dimensions of the M5*18MM screw, including its diameter, thread length, and the required 4mm Allen key for installation.
3. Installation Guide
Follow these steps to properly install the IOFIT M5*18MM handlebar stem screws:
- Preparation: Ensure your bicycle stem and handlebar are clean and free from debris. Identify the existing screws on your stem that need replacement.
- Tool Requirement: You will need a 4mm Allen key for installation.
- Removal (if replacing): Carefully loosen and remove the old screws from the handlebar stem using the appropriate tool. Keep track of any washers or spacers, though these screws typically do not require them.
- Placement: Insert the new IOFIT M5*18MM screws into the designated holes on your bicycle stem.
- Initial Tightening: Hand-tighten each screw until it is snug. Do not overtighten at this stage.
- Final Tightening Pattern: For handlebar stems, it is crucial to tighten screws in a cross-pattern (e.g., top-left, bottom-right, top-right, bottom-left) to ensure even pressure distribution. Tighten each screw incrementally, alternating between them, until the handlebar is securely clamped.
- Torque Specification: Refer to your bicycle stem manufacturer's recommendations for specific torque settings. Overtightening can damage components, while undertightening can lead to slippage. If no specific torque is provided, tighten until firm, ensuring the handlebar does not rotate when force is applied, but without excessive force.
- Final Check: After tightening, gently attempt to rotate the handlebar to confirm it is securely fixed and does not move.
Important: Always ensure the handlebar is centered and aligned correctly before final tightening.
4. Maintenance
Proper maintenance ensures the longevity and performance of your IOFIT M5*18MM screws:
- Regular Inspection: Periodically check the screws for any signs of loosening, corrosion, or damage. This is especially important after riding in wet or harsh conditions.
- Cleaning: Clean the screws with a damp cloth to remove dirt and grime. For stubborn dirt, a mild soap solution can be used, followed by thorough rinsing and drying.
- Lubrication (Optional): While stainless steel is corrosion-resistant, a thin layer of grease on the threads can prevent galling and make future removal easier. Avoid getting grease on the clamping surfaces of the stem or handlebar.
- Retightening: If any screws feel loose, retighten them to the manufacturer's recommended torque specifications using a 4mm Allen key.
5. Troubleshooting
- Screws feel loose after riding:
- Ensure screws were tightened to the correct torque.
- Check for any damage to the stem or handlebar that might prevent proper clamping.
- Verify that the screws are the correct length for your stem.
- Difficulty removing a screw:
- Ensure you are using the correct size (4mm) Allen key.
- Apply penetrating oil if the screw is seized due to corrosion. Allow time for the oil to work.
- If the head is stripped, specialized tools for stripped screws may be required.
6. Support Information
For further assistance or inquiries regarding your IOFIT M5*18MM Bicycle Handlebar Stem Screws, please refer to the retailer where the product was purchased or visit the official IOFIT support channels if available.
While these screws are designed for durability, proper installation and maintenance are key to their performance and your safety. Always consult a professional bicycle mechanic if you are unsure about any installation or maintenance procedures.


