
ATOMSTACK A10 Pro
ATOMSTACK A10 Pro Laser Engraver User Manual
Model: A10 Pro
1. Safety Information
WARNING: Laser engravers are powerful tools. Improper use can cause serious injury or damage. Always follow these safety guidelines:
- Always wear appropriate laser safety goggles when operating the machine.
- Never look directly at the laser beam.
- Ensure the work area is well-ventilated to dissipate smoke and fumes.
- Keep a fire extinguisher nearby.
- Do not leave the machine unattended during operation.
- Keep children and pets away from the operating machine.
- Operate on a stable, non-flammable surface.
- Do not engrave or cut reflective or transparent materials without proper preparation, as the laser can reflect unpredictably.
- Disconnect power before performing any maintenance or adjustments.
2. Product Overview
The ATOMSTACK A10 Pro is a high-power laser engraver and cutter designed for various materials. It features a 10W optical power laser module, fixed focus design, and robust aluminum alloy construction for precision and durability. This model includes an R3 Pro Rotary Roller for cylindrical object engraving and an Air Assist Set for improved cutting and engraving quality.
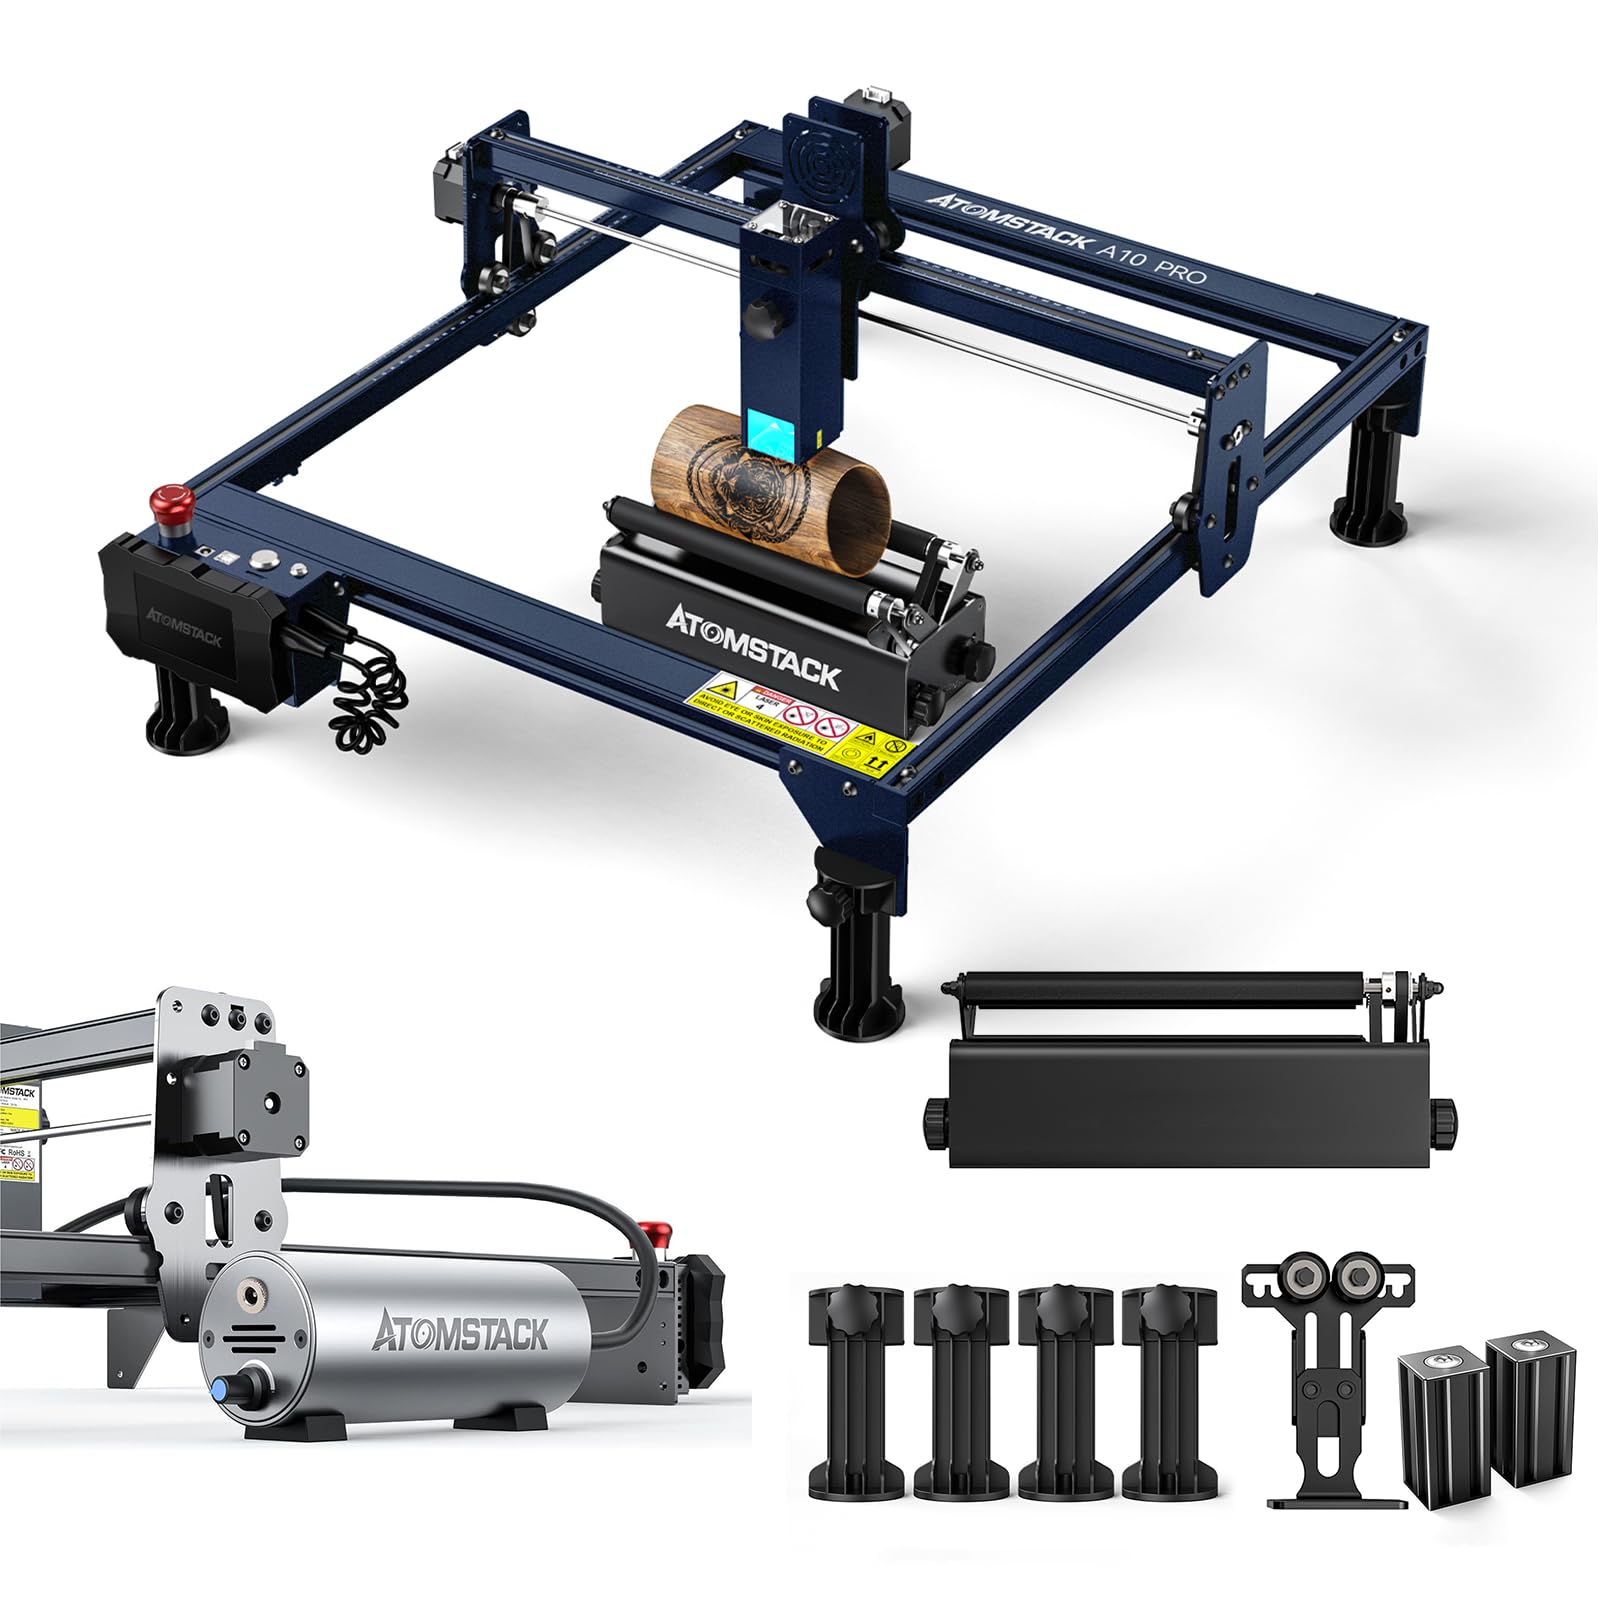
Figure 2.1: ATOMSTACK A10 Pro Laser Engraver main unit.
3. Specifications
| Feature | Detail |
|---|---|
| Engraving Area | 410 x 400 mm |
| Laser Output Optical Power | 10-11W |
| Engraving Accuracy | 0.01mm |
| Data Transmission Type | USB Connection |
| Focusing Type | Fixed Focus |
| Operating Software | Laser GRBL, LightBurn (Windows XP/7/8/10/11, Mac OS) |
| Electric Power | 50W |
| Laser Wavelength | 455 ± 5 nm |
| Net Weight | 4.3 kg |
| Package Dimensions | 59.5 x 39.7 x 35 cm |

Figure 3.1: Product parameters and dimensions of the ATOMSTACK A10 Pro.
4. Packing List
Verify all components are present upon unboxing:

Figure 4.1: Diagram of included components in the ATOMSTACK A10 Pro package.
- Support Beam
- Control Box
- Display Screen
- Laser Head
- Connecting Plate
- Foot Bracket (x3)
- Power Adapter
- Power Cable
- Y-axis Left Slide Rail
- Y-axis Right Slide Rail
- X-axis Rail
- Synchronous Belt
- Metal Mat Board
- Product Manual
- Fixed Focus Film
- Mounting Screws
- Wood Chips (x3)
- Acrylic Sheet (x3)
- HDMI Cable
- USB Card and Card Reader
- Toolkit
- Wire Tie
- Brush
- USB Cable
- Dust-free Cloth
- R3 Pro Rotary Roller (if included in package)
- Air Assist Set (if included in package)
5. Setup and Assembly
The ATOMSTACK A10 Pro is designed for quick assembly, typically completed within 10-20 minutes. Follow the detailed instructions provided in the included Product Manual for step-by-step assembly.
5.1 Basic Machine Assembly
Assemble the frame components (support beams, slide rails) according to the diagrams. Secure all connections with the provided mounting screws. Install the laser head onto the X-axis rail.
5.2 Connecting the Control Terminal
Connect the independent control terminal to the main unit. This terminal allows for offline engraving and touch operation.

Figure 5.1: Independent Control Terminal for offline operation.
5.3 R3 Pro Rotary Roller Setup (Optional)
If your package includes the R3 Pro Rotary Roller, refer to its specific manual for installation and calibration. This accessory is used for engraving cylindrical objects.

Figure 5.2: Examples of objects that can be engraved using the R3 Pro Rotary Roller.
5.4 Air Assist Set Installation (Optional)
Install the Air Assist Set to improve cutting and engraving performance by clearing smoke and debris from the laser path. Connect the air pump and nozzle as directed in the Air Assist manual.
6. Operation
6.1 Software Installation and Connection
Install the recommended software, Laser GRBL or LightBurn, on your computer. Connect the engraver to your computer via USB. Follow the software's instructions to establish a connection and configure the machine.
6.2 Material Preparation
Place the material to be engraved or cut on the metal mat board. Ensure it is flat and securely positioned within the engraving area. For fixed focus lasers, no manual focal adjustment is required.
6.3 Engraving and Cutting Process
- Design or load your desired pattern in the software.
- Adjust power and speed settings based on the material type and desired effect. Refer to material test guides for optimal settings.
- Ensure all safety precautions are in place, including wearing laser safety goggles.
- Initiate the engraving or cutting process from the software or the independent control terminal.
- Monitor the process closely. Use the emergency stop button if any issues arise.

Figure 6.1: Example of fine engraving achieved with the ATOMSTACK A10 Pro.
6.4 Supported Materials
The ATOMSTACK A10 Pro can engrave and cut a variety of materials, including:
- Wood (balsa, paulownia, etc.)
- Acrylic (black acrylic up to 15mm)
- Leather
- Paper
- Metal (engraving only, e.g., stainless steel, brass)
- Rubber
- Porcelain (engraving only)
- Foam cotton
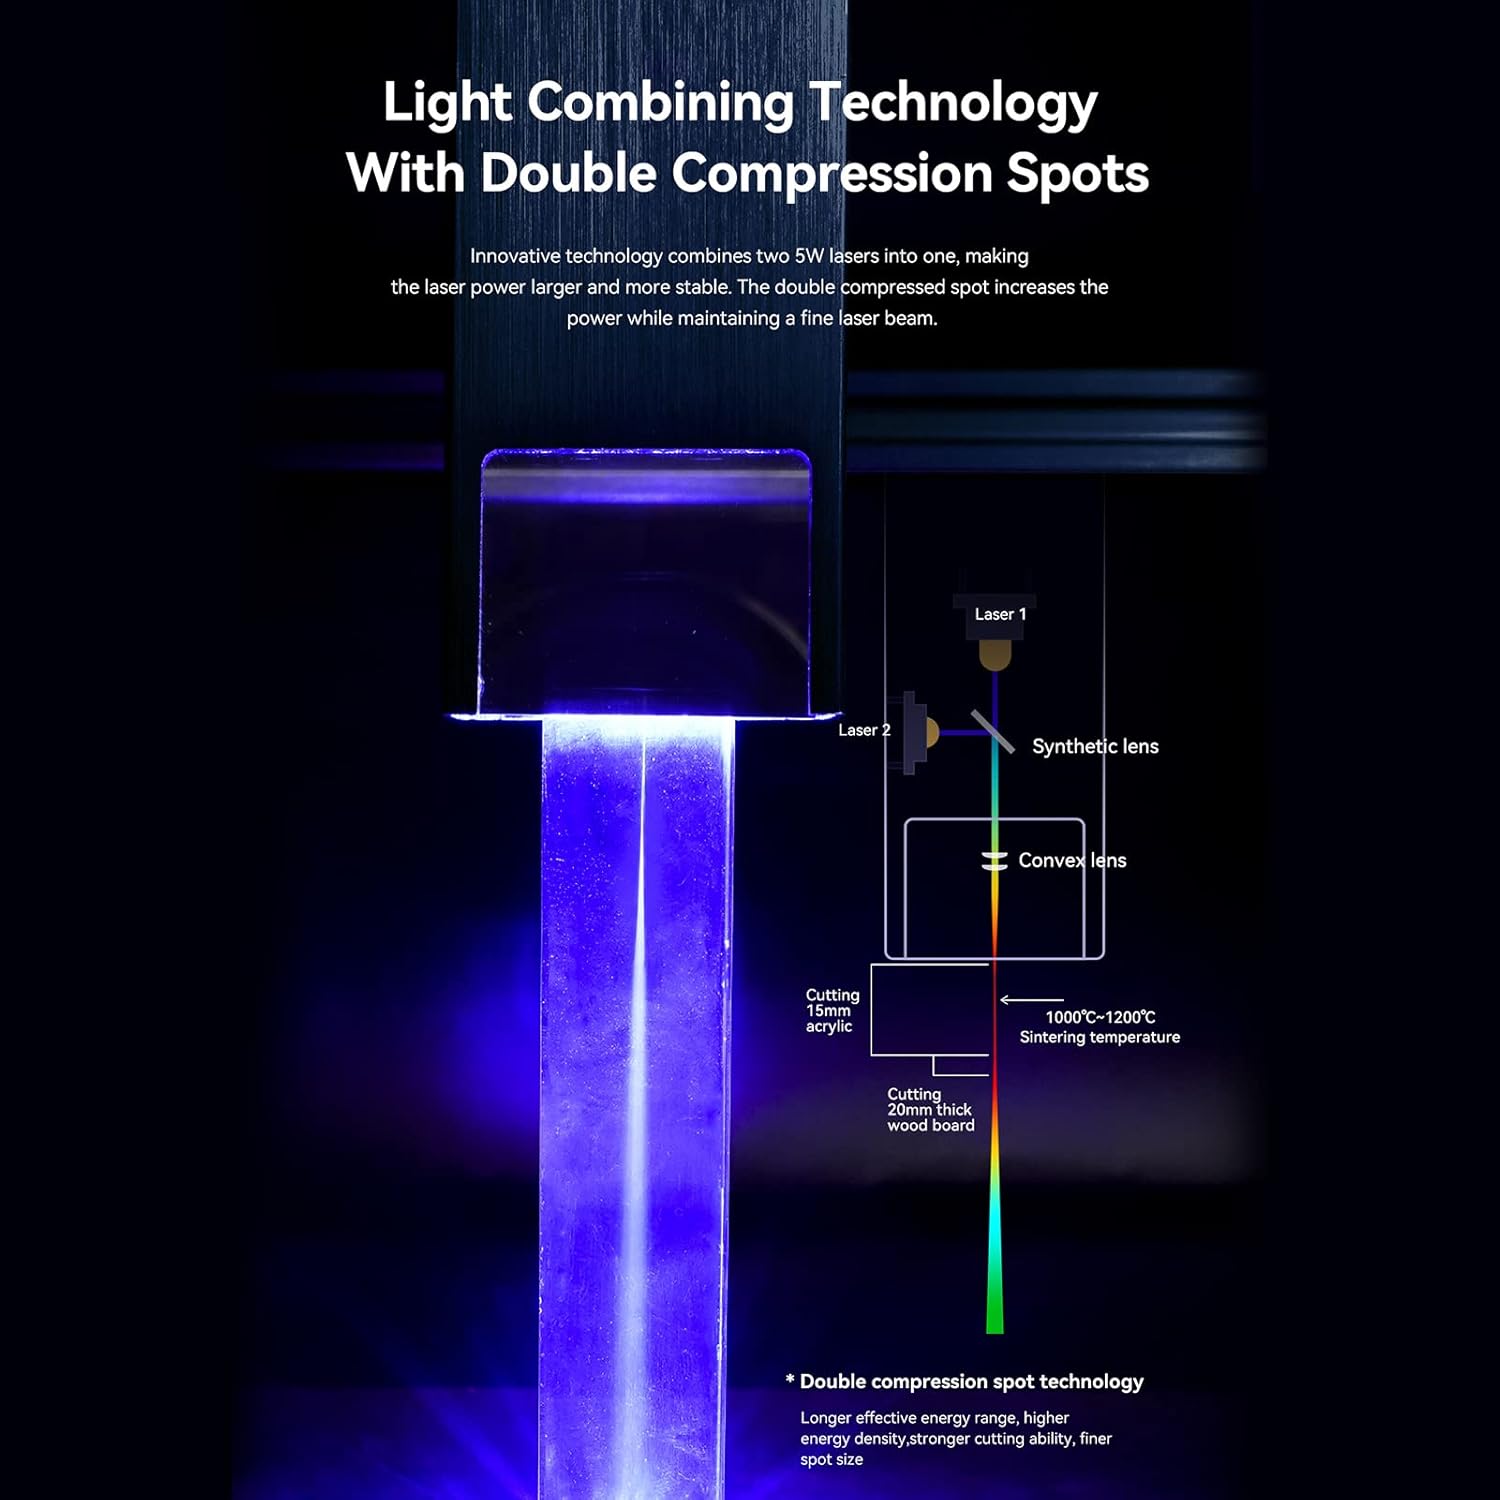
Figure 6.2: Examples of engraving on wood, leather, porcelain, rubber, paper, brass, stainless steel, foam cotton, and acrylic.
7. Maintenance
Regular maintenance ensures optimal performance and extends the lifespan of your laser engraver.
- Clean the Laser Lens: Periodically clean the laser lens with a soft, lint-free cloth and lens cleaning solution to maintain laser power and accuracy.
- Clear Debris: Remove any accumulated dust, smoke residue, or material debris from the machine's rails, belts, and work area.
- Lubricate Moving Parts: Apply a small amount of lubricant to the guide rails and bearings as needed to ensure smooth movement.
- Check Belts: Inspect synchronous belts for tension and wear. Adjust or replace if necessary.
- Ventilation: Ensure the air assist system (if installed) and the work area ventilation are clear and functioning effectively.
8. Troubleshooting
| Problem | Possible Cause | Solution |
|---|---|---|
| Laser not firing | Power not connected, emergency stop engaged, software error, laser module fault. | Check power connections, release emergency stop, restart software/machine, inspect laser module. |
| Poor engraving/cutting quality | Incorrect power/speed settings, dirty laser lens, material not flat, loose belts. | Adjust settings, clean laser lens, ensure material is flat, check and tighten belts. |
| Machine not connecting to computer | USB cable issue, driver not installed, incorrect port selected in software. | Try a different USB cable/port, install drivers, select correct COM port in software. |
| Unusual noises during operation | Loose components, debris on rails, motor issues. | Inspect for loose parts, clean rails, contact support if motor noise persists. |
9. Warranty and Support
For warranty information and technical support, please refer to the official ATOMSTACK website or contact your retailer. Keep your purchase receipt for warranty claims.
Manufacturer: ATOMSTACK
Part Number: G-A10 Pro+R3 Pro+Air
ASIN: B0CNYKG6M9
Related documentsA10 Pro


Ask a question about this manual
Ask about setup, troubleshooting, compatibility, parts, safety, or missing instructions. Manuals+ will review the question and use this page’s manual context to help answer it.