
1. Introduction
This manual provides detailed instructions for the assembly, operation, and maintenance of your Generic AY-49 Vlogging Kit. This kit is designed to enhance your mobile video recording experience with a dedicated microphone, an LED fill light, and a versatile tripod.
2. Product Overview and Components
The AY-49 Vlogging Kit includes the following components:
- Mini Tripod with adjustable head
- Smartphone Holder
- LED Video Light (AY-49)
- Microphone with wind muff
- 3.5mm Audio Cable
- Remote Control (for LED light, if applicable, or general remote)

Figure 2.1: The Generic AY-49 Vlogging Kit fully assembled and ready for use with a smartphone. It shows the microphone, LED light, and phone holder mounted on the mini tripod.
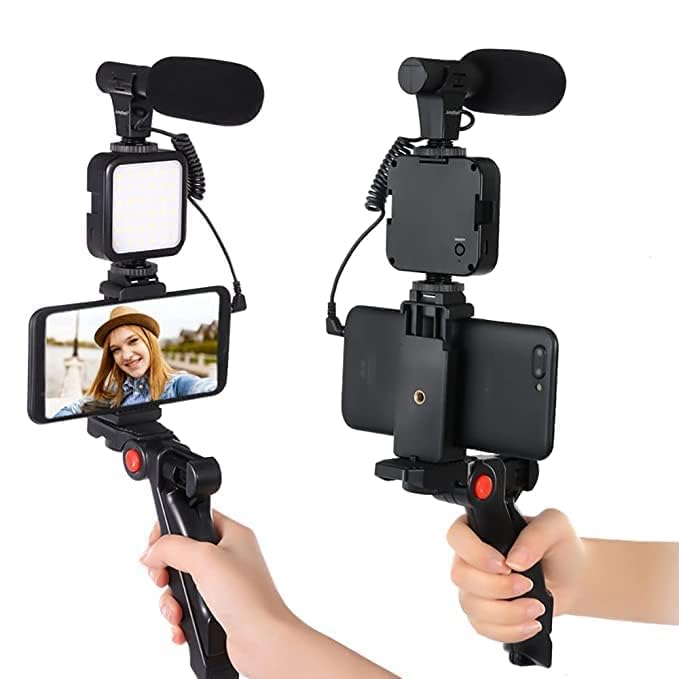
Figure 2.2: All individual components of the AY-49 Vlogging Kit laid out, including the mini tripod, smartphone holder, LED light, microphone, and cables.

Figure 2.3: Detailed view showing the dimensions of the LED light (66mm x 66mm x 78mm) and the 120-degree adjustment button for the tripod head.
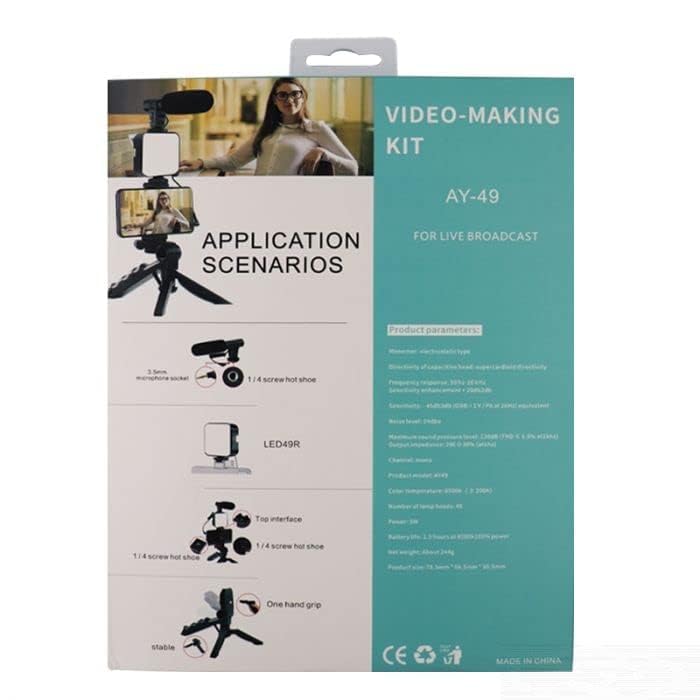
Figure 2.4: The product packaging illustrating various application scenarios for the vlogging kit and listing key product parameters for the microphone and LED light.
3. Setup Instructions
- Attach the Smartphone Holder to the Tripod: Screw the smartphone holder onto the 1/4-inch screw mount on the top of the mini tripod. Ensure it is securely tightened.
- Mount the LED Light: The LED light typically has a cold shoe mount. Slide it into the cold shoe adapter on top of the smartphone holder or the tripod's extension arm (if included).
- Mount the Microphone: The microphone also features a cold shoe mount. Slide it into the remaining cold shoe slot, usually located on top of the LED light or the smartphone holder.
- Insert Smartphone: Carefully place your smartphone into the spring-loaded clamp of the smartphone holder. Ensure it is centered and secure.
- Connect Microphone: Plug the 3.5mm audio cable from the microphone into your smartphone's 3.5mm audio jack. If your smartphone lacks a 3.5mm jack, an adapter (not included) may be required.
- Power On LED Light: Insert the required batteries (if applicable, usually AA or AAA, not specified in data) into the LED light and switch it on. Adjust brightness as needed.
Note: Some smartphones may require specific settings or third-party camera applications to properly recognize and utilize external microphones. Refer to your smartphone's manual for details.
4. Operating Instructions
4.1. Using the Tripod
- Stability: Extend the tripod legs fully on a flat, stable surface for optimal balance.
- Angle Adjustment: Use the adjustment button (refer to Figure 2.3) to tilt and swivel the tripod head, allowing for precise camera angles. The head supports up to 120 degrees of adjustment.
- Handheld Use: The tripod legs can be folded together to form a comfortable grip for handheld vlogging.
4.2. Using the Microphone
- Connection: Ensure the microphone is securely connected to your smartphone's audio input.
- Positioning: For best audio quality, position the microphone towards the sound source. The included wind muff helps reduce ambient noise in outdoor environments.
- Compatibility: The microphone is designed for devices with a 3.5mm microphone socket.
4.3. Using the LED Video Light
- Power: Turn on the LED light using its power switch.
- Brightness Adjustment: Adjust the brightness level using the controls on the light unit to achieve desired illumination.
- Color Temperature: The light has a fixed color temperature of 6000K (±200K), providing a cool white light.
5. Maintenance
- Cleaning: Use a soft, dry cloth to clean the surfaces of the tripod, microphone, and LED light. Avoid using harsh chemicals or abrasive materials.
- Storage: Store the kit in a cool, dry place away from direct sunlight and extreme temperatures.
- Battery Care (LED Light): If the LED light uses removable batteries, remove them during prolonged periods of non-use to prevent leakage.
- Handling: Handle all components with care to prevent damage, especially the microphone and LED light.
6. Troubleshooting
- No Audio from Microphone:
- Ensure the 3.5mm cable is fully inserted into both the microphone and the smartphone.
- Check your smartphone's audio input settings. Some phones require manual selection of an external microphone.
- Test the microphone with another device if possible to rule out a faulty unit.
- If using an adapter for smartphones without a 3.5mm jack, ensure the adapter is functional and compatible.
- LED Light Not Turning On:
- Verify that batteries are correctly inserted and have sufficient charge.
- Check the power switch on the LED light.
- Kit Instability:
- Ensure the tripod legs are fully extended and locked.
- Verify that all screw mounts (phone holder to tripod, accessories to holder) are securely tightened.
- Avoid placing the kit on uneven surfaces.
7. Specifications
| Model Name | AY-49 |
| Brand | Generic |
| Compatible Devices | Camera, Smartphones (with 3.5mm audio jack or adapter) |
| Special Feature | Compact design |
| Exposure Control | Automatic, Manual (for connected camera/smartphone) |
| Shutter Type | Rolling Shutter (refers to camera, not kit component) |
| LED Light Color Temperature | 6000K (±200K) |
| LED Light Power | 3W |
| LED Light Battery Life | 1.5 hours at 6500K, 100% power (with 2 AA batteries, not included) |
| Microphone Frequency Response | 50Hz-16kHz |
| Microphone Sensitivity | -45dB ±3dB (0dB=1V/Pa at 1kHz) |
| Microphone Output Impedance | 200Ω ±30% (at 1kHz) |
| Country of Origin | India |
Note: Specifications are subject to change without prior notice.
8. Warranty and Support
This product is manufactured by MADE IN INDIA. For specific warranty information or technical support, please refer to the retailer or manufacturer's official website. Keep your purchase receipt as proof of purchase.


