1. Introduction
The TheraGun Relief by Therabody is a lightweight, comfortable handheld percussion massage gun designed for everyday pain relief and muscle therapy. It provides a gentle level of percussive massage to help alleviate tension, stiffness, and discomfort in various body areas. This manual provides essential information for the safe and effective use of your device.

Image 1.1: TheraGun Relief device in Sand color, showcasing its ergonomic design.
2. Important Safety Information
Please read all safety warnings and instructions before using this product. Failure to follow these instructions may result in injury or device damage.
- Keep out of reach of children.
- Avoid contact with skin and eyes.
- Do not immerse the device in water or expose it to excessive moisture.
- Do not operate the device in areas where aerosol (spray) products are being used or where oxygen is being administered.
- Consult a physician before using this device if you have any medical conditions, are pregnant, or have a pacemaker.
- Do not use the device directly on the neck, head, or any bony areas. Avoid sensitive areas.
- Discontinue use immediately if you experience pain or discomfort.
- Use only the provided charging cable and attachments.
- Statements regarding this device have not been evaluated by the FDA and are not intended to diagnose, treat, cure, or prevent any disease or health condition.
3. What's Included
Your TheraGun Relief package includes the following components:
- TheraGun Relief Device
- Dampener Attachment
- Standard Ball Attachment
- Thumb Attachment
- USB-C Charging Cable
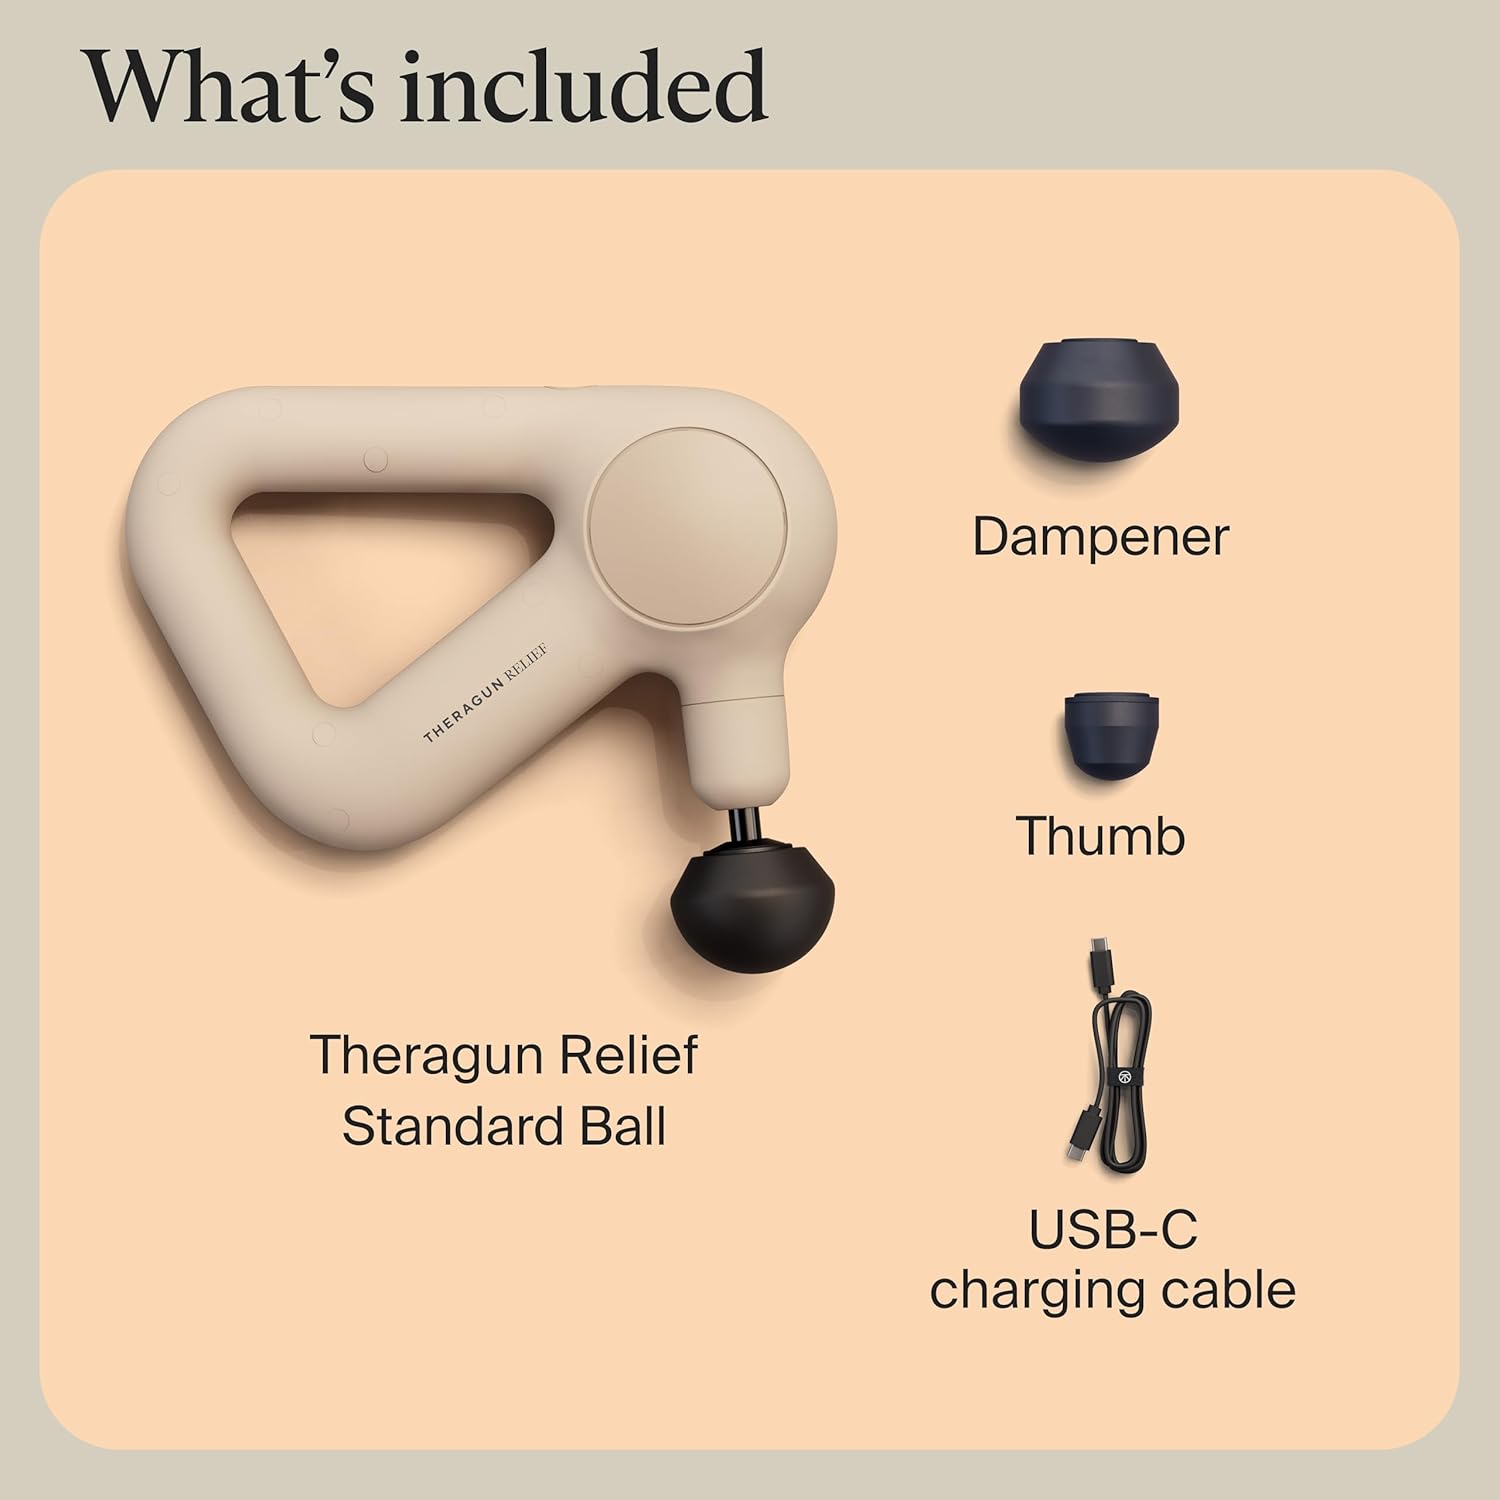
Image 3.1: All items included with the TheraGun Relief device.
4. Setup
4.1. Charging the Device
- Connect the USB-C charging cable to the charging port on the TheraGun Relief device.
- Plug the other end of the USB-C cable into a compatible USB power adapter (not included) or a USB port.
- The battery indicator lights on the device will illuminate to show the charging status. A full charge is indicated when all lights are solid.
- A full charge typically takes approximately 80 minutes.
4.2. Attaching the Percussion Head
- Ensure the device is powered off before attaching or removing any percussion heads.
- Align the desired attachment with the device's arm.
- Push the attachment firmly into the opening until it is securely seated.
- To remove, firmly pull the attachment straight out from the device.
5. Operating Instructions
5.1. Powering On/Off and Speed Control
- To power on the device, press and hold the power button located on the top of the device for 2 seconds. The device will start at the lowest speed.
- To cycle through the three available speeds, press the power button briefly. Each press will increase the speed.
- To power off the device, press and hold the power button for 2 seconds until the device stops.

Image 5.1: The single button control for power and speed adjustment.
5.2. Applying the Device
- Apply the device to the desired body part, allowing the percussion to work on the muscle. There is no need to apply excessive pressure.
- Move the device slowly across the muscle group, focusing on areas of tension or discomfort.
- The ergonomic design with a patented triangle handle allows for reaching various body parts, including the back, legs, shoulders, and arms.
- Do not use directly on the neck or over bony prominences.
- Typical session duration for a single area is 30-60 seconds.

Image 5.2: Demonstrating the device's ability to reach the back.
6. Percussion Attachments
The TheraGun Relief includes three scientifically-designed attachments, each suited for different applications:
- Dampener: Designed to reduce aches and pains in tender or sensitive areas.
- Standard Ball: Offers a full-body massage to reduce general tension and is suitable for most muscle groups.
- Thumb: Ideal for use on lower back muscles and trigger points to ease painful knots and provide targeted relief.

Image 6.1: Overview of the three included attachments and their uses.
7. Therabody App Integration
The TheraGun Relief model does not feature Bluetooth connectivity for integration with the Therabody app. For app-guided routines and personalized recommendations, please refer to other Theragun models that support this feature.

Image 7.1: Theragun comparison table highlighting features across different models.
8. Maintenance
8.1. Cleaning
- Always power off and unplug the device before cleaning.
- Wipe the device and attachments with a clean, damp cloth. For stubborn marks, a mild soap solution can be used, followed by wiping with a clean, damp cloth.
- Do not use abrasive cleaners, solvents, or harsh chemicals.
- Ensure the device is completely dry before storing or recharging.
8.2. Storage
- Store the device in a cool, dry place away from direct sunlight and extreme temperatures.
- Keep the device and its attachments in a safe place to prevent damage.
9. Troubleshooting
| Problem | Possible Cause | Solution |
|---|---|---|
| Device does not turn on | Low battery; Device not charged | Charge the device fully using the provided USB-C cable. |
| Device stops unexpectedly | Low battery; Overheating protection activated | Recharge the device. Allow the device to cool down if it feels warm to the touch. |
| Attachments do not fit securely | Attachment not fully inserted; Incorrect attachment | Ensure the attachment is pushed firmly into the device. Verify you are using one of the three compatible attachments. |
| Reduced percussion intensity | Low battery | Charge the device fully. |
10. Specifications
- Model Number: G4+Relief
- Brand: TheraGun
- Manufacturer: Theragun
- Product Dimensions: 4 x 8.5 x 10.1 inches
- Item Weight: 3.4 Pounds
- Power Source: Battery Powered
- Battery Type: 1 Lithium Ion battery (included)
- Material: Polycarbonate
- Speeds: 3
11. Warranty and Support
For detailed warranty information, product registration, and customer support, please visit the official Therabody website or contact their customer service directly. Keep your proof of purchase for warranty claims.
Official Therabody Website: www.therabody.com


