
Pro'sKit MT-1220
Pro'sKit MT-1220 Digital Multimeter
User Instruction Manual
1. Introduction
The Pro'sKit MT-1220 is a compact and versatile 3-1/2 digit digital multimeter designed for a wide range of electrical measurements. It features 1999 counts and is capable of measuring AC/DC Voltage, DC Current, Resistance, Diode, and includes functions such as Non-Contact Voltage (NCV) detection, Transistor hFE test, Continuity test, Data Hold, Backlight, and an LED light. Its robust design with overload protection and a shockproof case ensures durability and user safety, making it suitable for both household use and electronics maintenance.

Front view of the Pro'sKit MT-1220 Digital Multimeter.
2. Safety Information
Always adhere to safety precautions when using any electrical testing equipment. Failure to do so may result in electric shock, injury, or damage to the meter or equipment under test.
- Read and understand all instructions in this manual before operating the meter.
- Do not exceed the maximum input limits for any function.
- Inspect test leads for damaged insulation or exposed metal before use. Replace if damaged.
- Ensure the rotary switch is in the correct position for the desired measurement before connecting the test leads to the circuit.
- Use caution when working with voltages above 30V AC RMS, 42V peak, or 60V DC. These voltages pose a shock hazard.
- Disconnect power to the circuit and discharge all high-voltage capacitors before performing resistance, continuity, or diode tests.
- Do not operate the meter if it appears damaged or if the case is open.
- Replace the battery immediately when the low battery indicator appears to ensure accurate readings.
3. Product Features and Components
The MT-1220 is designed with user-friendly features and a clear layout for efficient operation.

Detailed diagram of the MT-1220 Digital Multimeter's components.
Key Components:
- LCD Screen: Displays measurement readings, units, and function indicators.
- NCV Indication: Visual indicator for Non-Contact Voltage detection.
- Data Hold Button: Freezes the current reading on the display.
- Test Lead Sockets: Input terminals for connecting test leads (VΩmA, COM, 10A).
- LED Light: Provides illumination for dimly lit work areas.
- NCV Detect Area: Sensor for Non-Contact Voltage detection.
- Transistor hFE Test Socket: For testing the gain of NPN/PNP transistors.
- Buzzer: Audible indicator for continuity and NCV detection.
- Backlight Button: Activates the display backlight for improved visibility in low light.
- Rotary Switch: Selects the desired measurement function and range.
Additional Features:
- Compact Size: Easy to handle and carry.
- Overload Protection: Protects the meter from damage due to excessive input.
- Shockproof Case: Enhances durability and protects against drops.
- Easy Placement: Designed for lean, hang, or flat positioning, with integrated test lead storage.

The MT-1220 features integrated test lead storage and flexible placement options.
4. Setup
4.1 Battery Installation
The MT-1220 requires three 1.5V AAA batteries (not included).
- Ensure the meter is turned OFF and disconnect all test leads.
- Locate the battery compartment cover on the back of the meter.
- Use a screwdriver to loosen the screw securing the battery cover.
- Remove the cover and insert three AAA batteries, observing the correct polarity (+/-) as indicated inside the compartment.
- Replace the battery cover and tighten the screw.
4.2 Connecting Test Leads
Always connect the black test lead to the COM (common) jack. Connect the red test lead to the appropriate input jack based on the measurement type.
- VΩmA Jack: For voltage, resistance, diode, continuity, and current measurements up to 200mA.
- 10A Jack: For current measurements between 200mA and 10A.
5. Operating Instructions
Turn the rotary switch to the desired function to begin measurements. The meter features auto/manual ranging.
5.1 DC Voltage (DCV) Measurement
- Set the rotary switch to the 'V=' position.
- Connect the black test lead to the COM jack and the red test lead to the VΩmA jack.
- Connect the test leads across the component or circuit to be measured, observing polarity.
- Read the voltage value on the LCD display.
5.2 AC Voltage (ACV) Measurement
- Set the rotary switch to the 'V~' position.
- Connect the black test lead to the COM jack and the red test lead to the VΩmA jack.
- Connect the test leads across the AC voltage source.
- Read the voltage value on the LCD display.
5.3 DC Current (DCA) Measurement
- Set the rotary switch to the 'A=' position (e.g., 2mA, 20mA, 200mA, 10A).
- For currents up to 200mA, connect the red test lead to the VΩmA jack. For currents up to 10A, connect the red test lead to the 10A jack. Always connect the black test lead to the COM jack.
- Open the circuit where current is to be measured and connect the meter in series with the circuit.
- Read the current value on the LCD display.
5.4 Resistance Measurement
- Set the rotary switch to the 'Ω' position.
- Connect the black test lead to the COM jack and the red test lead to the VΩmA jack.
- Ensure the circuit is de-energized before measuring resistance.
- Connect the test leads across the resistor or component.
- Read the resistance value on the LCD display.
5.5 Diode Test
- Set the rotary switch to the 'Diode' symbol position.
- Connect the black test lead to the COM jack and the red test lead to the VΩmA jack.
- Connect the red test lead to the anode and the black test lead to the cathode of the diode. The display will show the forward voltage drop.
- Reverse the leads. The display should show 'OL' (Overload) for a good diode.
5.6 Continuity Test
- Set the rotary switch to the 'Continuity' symbol position.
- Connect the black test lead to the COM jack and the red test lead to the VΩmA jack.
- Connect the test leads across the circuit or component.
- If the resistance is below approximately 50Ω, the buzzer will sound, indicating continuity.
5.7 Non-Contact Voltage (NCV) Detection
- Set the rotary switch to the 'NCV' position.
- Move the top part of the meter (NCV Detect Area) close to the AC voltage source (e.g., live wire, outlet).
- The meter will emit an audible beep and the NCV indicator light will illuminate when AC voltage is detected. The frequency of beeps and light flashes increases with stronger signals.
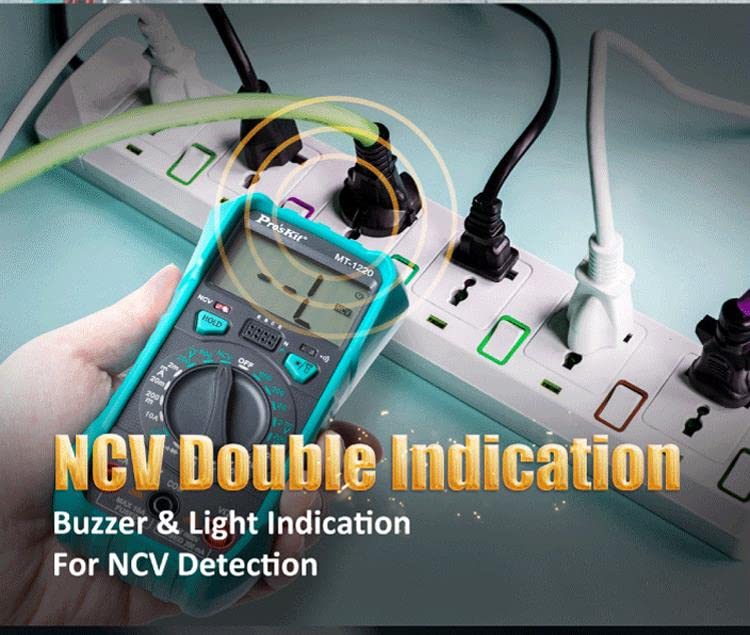
The MT-1220 features NCV detection with both buzzer and light indication.
5.8 Transistor hFE Test
- Set the rotary switch to the 'hFE' position.
- Identify if the transistor is NPN or PNP.
- Insert the transistor's emitter, base, and collector leads into the corresponding holes in the hFE test socket.
- Read the hFE (DC current gain) value on the display.
5.9 Data Hold Function
Press the 'HOLD' button to freeze the current reading on the display. Press it again to release the hold and resume live readings.
5.10 Backlight and LED Light
Press the 'Backlight/Light' button to turn on the display backlight for better visibility in dark environments. Press it again to turn on the integrated LED light. Press a third time to turn both off.

The MT-1220 features a backlight for clear readings in low light conditions.
6. Maintenance
6.1 Cleaning
Wipe the meter's case with a damp cloth and mild detergent. Do not use abrasives or solvents. Keep the display clean and dry.
6.2 Battery Replacement
When the low battery indicator appears on the display, replace the batteries as described in Section 4.1. Prompt battery replacement ensures accurate measurements.
6.3 Fuse Replacement
The 10A and mA input jacks are fused for protection. If the meter fails to measure current, the fuse may need replacement. Refer to the specifications for fuse type and rating. Fuse replacement should only be performed by qualified personnel.
7. Troubleshooting
- No display or faint display: Check battery installation and replace batteries if necessary.
- 'OL' (Overload) displayed: The input value exceeds the selected range or the meter's maximum capacity. Select a higher range or ensure the input is within limits.
- Incorrect readings: Ensure test leads are properly connected, the correct function/range is selected, and the battery is not low.
- No current measurement: Check the fuse for the current input jack.
8. Specifications
| Parameter | Value |
|---|---|
| Model No. | MT-1220 |
| Display | 3 1/2 Digits, 1999 Counts |
| DC Voltage (DCV) | 200mV / 2V / 20V / 200V (±0.5%+5d), 600V (±0.8%+5d) |
| AC Voltage (ACV) | 200V (±1.0%+10d), 600V (±1.2%+10d) |
| DC Current (DCA) | 2mA (±1.0%+5d), 20mA / 200mA (±1.2%+5d), 10A (±2.0%+10d) |
| Resistance | 200Ω / 2KΩ / 20KΩ / 200KΩ (±1.0%+5d), 2MΩ / 20MΩ (±1.5%+5d) |
| Functions | Data Hold, Diode Test, Transistor Test, NCV Detection, LED Light, LCD Backlight, Low Battery Indication, Buzzer |
| Power | 1.5V AAA x 3pcs (not included) |
| Dimensions (L x W x H) | 148 x 79 x 48mm (5.83 x 3.11 x 1.89 inches) |
| Weight | 210g (without battery) |
| Safety Rating | CAT II 600V |
9. Warranty and Support
Pro'sKit products are manufactured to high-quality standards. For warranty information, technical support, or service inquiries, please contact your local Pro'sKit distributor or visit the official Pro'sKit website.
You can find more information about Pro'sKit products and support at the Pro'sKit Store on Amazon.
Ask a question about this manual
Ask about setup, troubleshooting, compatibility, parts, safety, or missing instructions. Manuals+ will review the question and use this page’s manual context to help answer it.