1. Product Overview
The Dell PowerEdge R640 is a high-performance, rack-mountable 1U server designed for robust enterprise environments and data centers. This manual provides essential information for the setup, operation, maintenance, and troubleshooting of your PowerEdge R640 server.
Key Features:
- Dual Intel Xeon Gold 6138 Processors (40 cores total)
- 128GB DDR4 ECC Registered Memory
- 8x 2.5'' SAS / SATA Bays with 8.0TB total storage
- HBA330 Integrated HBA 12Gbps SAS Controller
- Dual 750W Platinum Power Supplies
- iDRAC9 Express + DRAC9 Enterprise License for remote management
- Dual-Port 10GB SFP+ and Dual-Port 1GB RJ-45 Networking

Figure 1: Front view of the Dell PowerEdge R640 server, showing the 8x 2.5-inch drive bays and control panel.
2. Setup Instructions
2.1 Unpacking the Server
Carefully unpack the server and its components. Ensure all items listed below are present. If any items are missing or damaged, contact your vendor immediately.
- Dell PowerEdge R640 Server unit
- Power cords
- 1U LCD Bezel + Key
- 1U Sliding Rails (Type A7)
- Documentation with FAQs and useful links

Figure 2: Server components as typically found in packaging, including the server unit, rails, and power cords.
2.2 Rack Installation
The PowerEdge R640 is designed for 1U rack mounting. Use the included 1U Sliding Rails (Type A7) to securely install the server into a standard server rack. Refer to the rail kit documentation for detailed installation steps.
- Attach the inner rails to the sides of the server chassis.
- Mount the outer rails to the rack posts.
- Slide the server into the rack, ensuring it locks into place.
- Secure the server to the rack using the provided screws or latches.
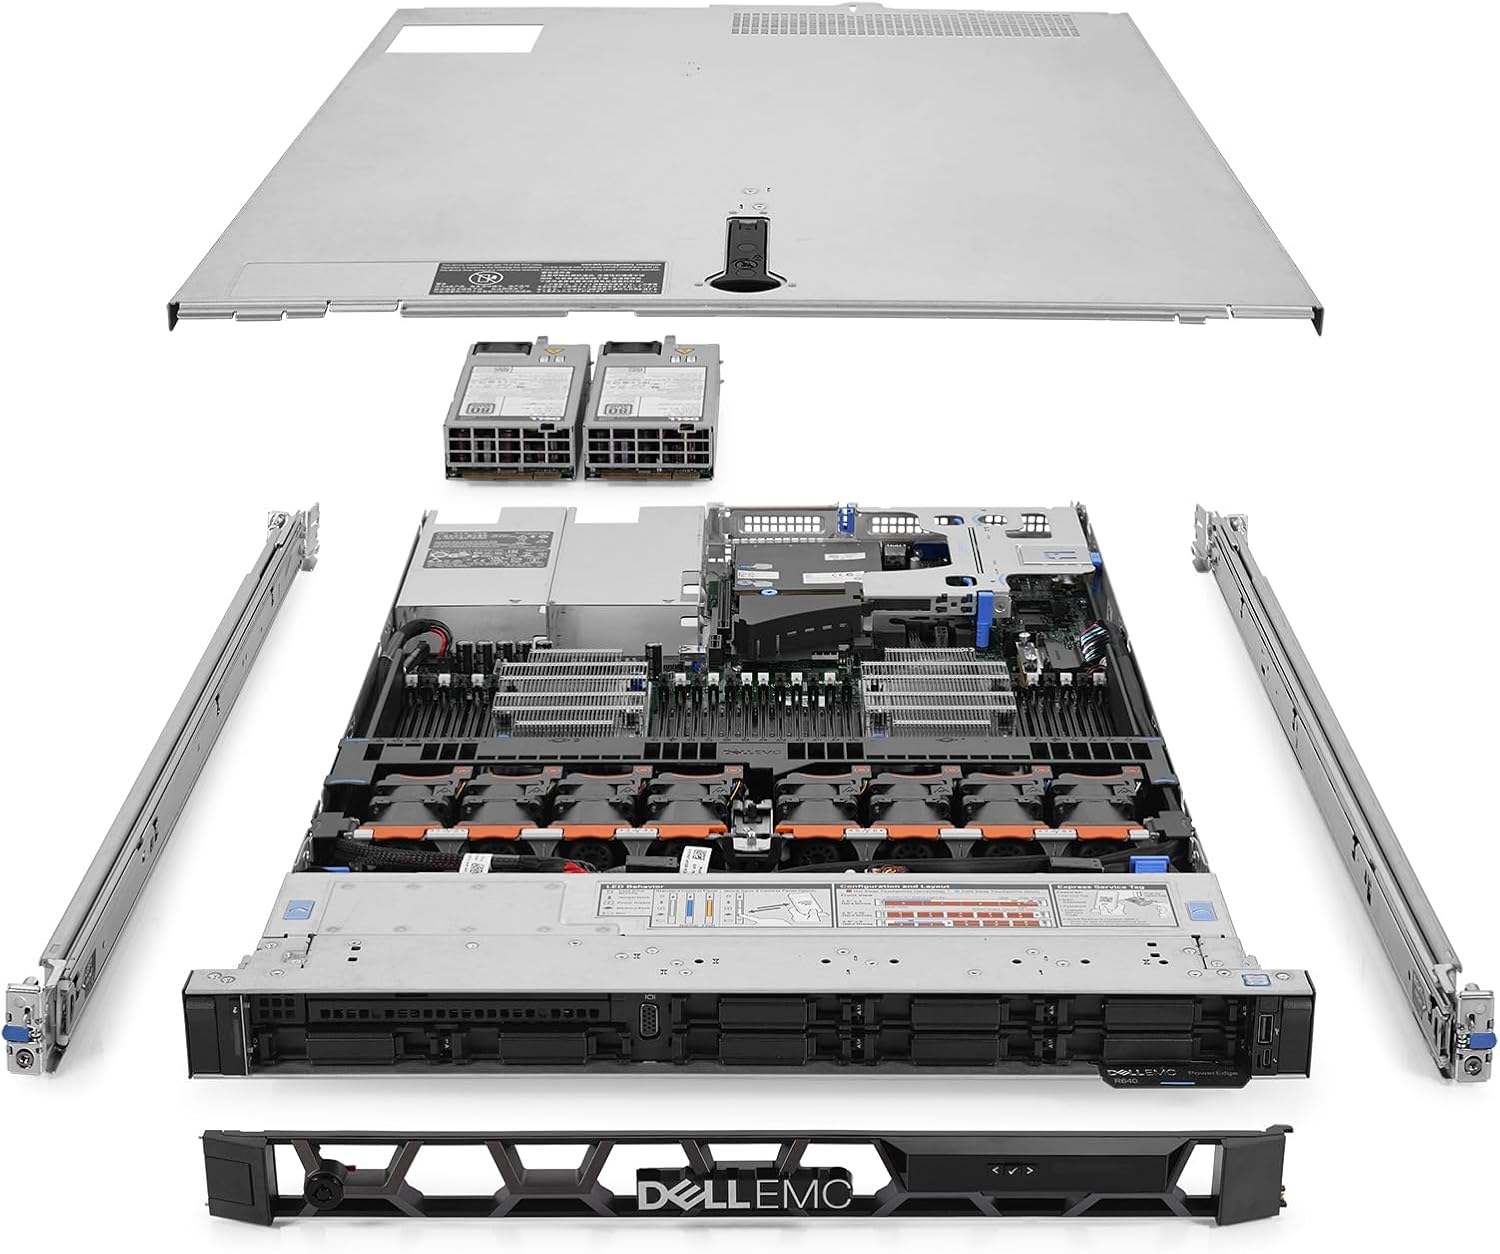
Figure 3: Exploded view of the Dell PowerEdge R640 server, showing the chassis, cover, power supplies, and rack rails.
2.3 Connecting Power and Network
- Connect the provided power cords to the server's dual 750W power supplies and then to a grounded power outlet or PDU.
- Connect network cables to the desired networking ports (Dual-Port 10GB SFP+ or Dual-Port 1GB RJ-45) on the rear of the server.
- For remote management, connect a network cable to the iDRAC dedicated port.

Figure 4: Rear view of the Dell PowerEdge R640 server, highlighting the power supply units, network ports, and iDRAC port.
2.4 Initial Power On
After connecting power and network, press the power button on the front panel to turn on the server. Observe the system status indicators for any initial errors.
3. Operating Instructions
3.1 Operating System Installation
This server is shipped without pre-installed software. You will need to install an operating system (OS) of your choice. Dell provides drivers and utilities on their support website. You can install the OS via:
- iDRAC Virtual Media: Use the iDRAC9 Enterprise interface to mount an ISO image remotely.
- USB Drive: Create a bootable USB drive with your OS installation media.
- Network Boot: Configure PXE boot if your network infrastructure supports it.
Note: If you encounter issues with pre-configured OS passwords from a previous setup, you may need to reset the OS or use recovery tools.
3.2 Storage Management
The server is equipped with an HBA330 Integrated HBA 12Gbps SAS Controller. This controller operates in HBA (Host Bus Adapter) mode, meaning it passes drives directly to the operating system without hardware RAID functionality. Software RAID solutions can be configured within your chosen operating system.
- Drive Installation: Drives are hot-swappable. To install or replace a drive, ensure the system is powered on, unlock the drive bay handle, insert the drive into the bay until it clicks, and then close the handle.
- Drive Configuration: Once the OS is installed, use the OS's disk management tools to partition, format, and configure the 8x 1TB SATA drives.
3.3 Remote Management (iDRAC9)
The integrated Dell Remote Access Controller 9 (iDRAC9) with Enterprise License allows for comprehensive remote management of the server, even when the main operating system is offline. Access iDRAC via a web browser using its assigned IP address.
- Initial Setup: Configure iDRAC network settings (IP address, subnet mask, gateway) through the server's BIOS/UEFI setup or via the dedicated iDRAC port.
- Features: iDRAC provides remote console access, power control, virtual media, system health monitoring, and logging.
4. Maintenance
Regular maintenance ensures optimal performance and longevity of your Dell PowerEdge R640 server.
4.1 General Care
- Environment: Operate the server in a clean, temperature-controlled environment with adequate airflow.
- Dust Removal: Periodically inspect and clean dust from air vents and internal components using compressed air. Ensure the server is powered off and unplugged before cleaning.
- Firmware Updates: Regularly check the Dell support website for the latest firmware updates for BIOS, iDRAC, and other components to ensure stability and security.
4.2 Component Replacement
Many components in the PowerEdge R640 are designed for easy replacement. Always refer to the Dell service manual for detailed instructions before attempting any component replacement.
- Hot-Swappable Drives: Hard drives can be replaced while the server is running.
- Power Supplies: The dual 750W power supplies are hot-swappable for redundancy and easy replacement.
- Memory Modules: Memory modules can be replaced, but the server must be powered off. Observe proper ESD precautions.
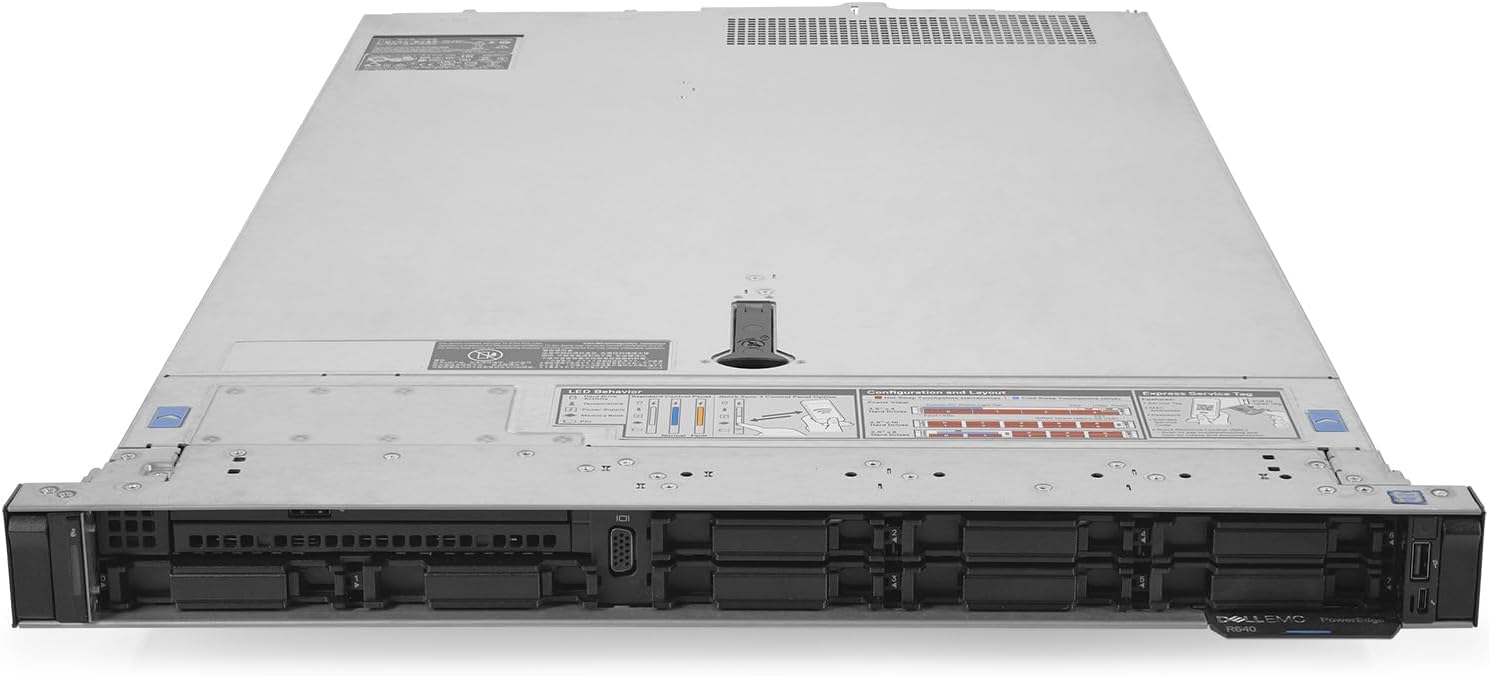
Figure 5: Top-down view of the Dell PowerEdge R640 server with the cover removed, showing internal components like CPUs, RAM, and cooling fans.
5. Troubleshooting
This section provides guidance for common issues you might encounter with your PowerEdge R640 server.
5.1 System Status Indicators
The front panel LCD bezel and internal LEDs provide visual cues about the server's status and potential issues. Consult the Dell PowerEdge R640 documentation for a complete list of LED behaviors and their meanings.
- Power LED: Indicates power status.
- System Health LED: Changes color (green, amber, red) to indicate overall system health.
- Drive LEDs: Indicate drive activity and status (e.g., failure, rebuild).
5.2 Common Issues and Solutions
- Server does not power on:
- Verify power cords are securely connected to both the server and the power source.
- Check power supply LEDs for status.
- Ensure the power button is functioning correctly.
- Operating System not booting:
- Check boot order in BIOS/UEFI settings.
- Verify hard drive status via iDRAC or front panel LEDs.
- Ensure the OS installation media is correctly configured if attempting a fresh install.
- Network connectivity issues:
- Check network cable connections.
- Verify network adapter status in the OS or iDRAC.
- Confirm network configuration (IP address, subnet mask, gateway).
For more advanced troubleshooting, consult the Dell PowerEdge R640 Owner's Manual or contact Dell support.
6. Specifications
| Component | Specification |
|---|---|
| Model | Dell PowerEdge R640 Rack-Mountable 1U Server |
| Processors | 2x Intel Xeon Gold 6138 (2.00Ghz, 20-Core each, 40 Cores Total) |
| Memory | 128GB PC4-21300 ECC Registered (2666Mhz) |
| Storage Bays | 8x 2.5'' SAS / SATA Bays |
| Hard Drives | 8x 1TB 7.2K SATA 6G 2.5'' HDDs (8.0TB Total) |
| RAID Controller | HBA330 Integrated HBA 12Gbps SAS Controller (Non-RAID) |
| Power Supplies | 2x Dell 750W Platinum AC 100V-240V PSUs |
| Remote Management | iDRAC9 Express + DRAC9 14 Gen Enterprise License |
| Networking | Dual-Port 10GB SFP+ + Dual-Port 1GB RJ-45, 1x Dual-Port 10GB RJ-45 NIC |
| Graphics Card | Integrated Video Card |
| Dimensions (Package) | 36.55 x 24.5 x 6.85 inches |
| Item Weight | 51.2 pounds |
7. Warranty and Support
7.1 Warranty Information
This Dell PowerEdge R640 server comes with a Standard 1-Year Warranty. For specific terms and conditions, please refer to the warranty documentation provided with your purchase or visit the Dell support website.
7.2 Technical Support
For technical assistance, troubleshooting, or service requests, please contact Dell Support. Have your server's service tag readily available when contacting support. The service tag is typically located on a pull-out label on the front of the server or accessible via iDRAC.
You can find support resources, drivers, and documentation on the official Dell support website: www.dell.com/support


