
Introduction
This manual provides detailed instructions for the installation, operation, and maintenance of your VANTRUE 10ft USB-C OBD Hardwire Power Cable. This cable is designed to provide continuous power to compatible USB-C dash cams for 24/7 parking surveillance, featuring low voltage protection and a real-time LED voltage display.
Package Contents
Please verify that all items are present in your package:
- VANTRUE 10ft USB-C OBD Hardwire Power Cable (Model: VP04-02)
- Adhesive Pad (for securing the control unit)
Product Overview
The VANTRUE VP04-02 OBD Hardwire Power Cable provides a reliable power source for your dash cam, enabling advanced features like 24/7 parking surveillance.
- 24/7 Parking Surveillance: Connects directly to your vehicle's battery for continuous power.
- Low Voltage Protection: Automatically cuts power to prevent draining your car battery. Adjustable voltage cut-off points.
- LED Digital Display Screen: Shows real-time battery voltage and selected cut-off voltage.
- USB-C Compatibility: Designed for dash cams with a USB-C power input.

Image: The VANTRUE 10ft USB-C OBD Hardwire Power Cable, showing the OBD connector, the control unit with LED screen, and the USB-C output.
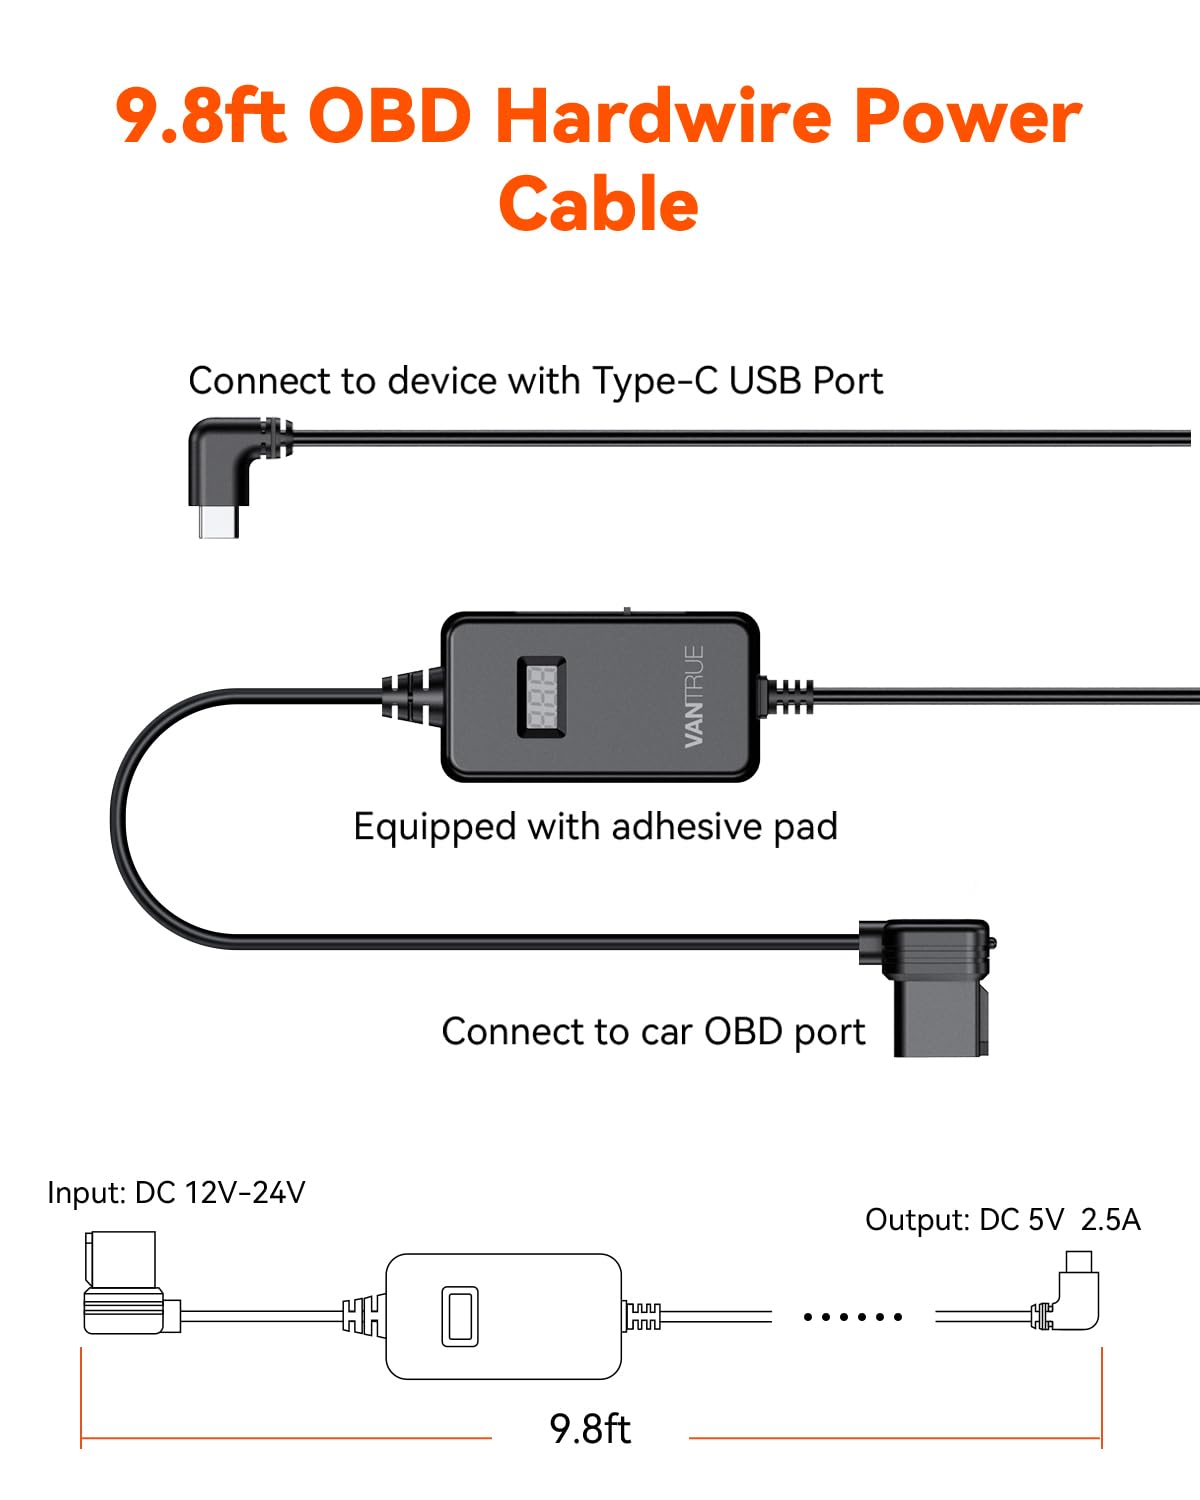
Image: A diagram illustrating the components of the 9.8ft OBD Hardwire Power Cable, including the USB-C connector, the control unit with an adhesive pad, and the OBD port connector. Input is DC 12V-24V, Output is DC 5V 2.5A.
Setup and Installation
Follow these steps to properly install your hardwire power cable:
- Locate the OBD II Port: Identify your vehicle's OBD II port, typically found under the dashboard on the driver's side.
- Connect the OBD Plug: Firmly insert the OBD plug of the hardwire cable into your vehicle's OBD II port.
- Route the Cable: Carefully route the 10ft USB-C cable along the vehicle's interior trim, ensuring it does not obstruct driving or vehicle controls. Use the included adhesive pad to secure the control unit if desired.
- Connect to Dash Cam: Plug the USB-C end of the cable into the USB-C power input of your compatible dash cam.
- Verify Power: Start your vehicle. The LED screen on the control unit should display the real-time battery voltage.

Image: An illustration demonstrating the routing of the hardwire cable from the OBD II port, along the vehicle's A-pillar and headliner, to a dash cam mounted near the rearview mirror.

Image: A series of three close-up images showing the location of an OBD port cover, the open port, and the hardwire cable's OBD plug inserted into the port.
Operation
LED Digital Display
The integrated LED screen displays critical information:
- Real-time Voltage: Shows your vehicle's current battery voltage.
- Set Voltage: Briefly displays the selected low voltage cut-off setting when adjusted.

Image: A close-up of the hardwire cable's control unit, highlighting the LED digital display showing a voltage reading (e.g., 13.6V) and the model number VP04-02 on the back.
Low Voltage Protection Settings
The cable features a 3-gear shifting mechanism to set the low voltage cut-off point. This prevents excessive battery drain when the vehicle is parked.
Available settings (for 12V systems): 11.6V / 12.0V / 12.4V.
Available settings (for 24V systems): 23.6V / 24.0V / 24.4V.
To adjust the setting, locate the small switch on the control unit and slide it to your desired voltage. The LED screen will briefly confirm the selected voltage.

Image: A graphic showing a battery icon with a lightning bolt, accompanied by text explaining that the system automatically shuts off power to the dash cam when battery voltage drops below the set threshold, preventing battery drain.
Parking Surveillance
Once installed and configured, the hardwire cable enables your dash cam's parking mode functionality, providing continuous surveillance even when your vehicle is off. The low voltage protection ensures your car battery remains sufficiently charged for starting.

Image: A graphic depicting a shield with "24 Hours" inside, overlaid on a car, symbolizing 24/7 parking surveillance.
Compatibility
This hardwire cable is compatible with VANTRUE dash cams and other dash cams that utilize a USB-C power input.
Compatible VANTRUE models include:
- E1 Pro
- N4
- N4S
- N4 Pro S
- N4 Pro
- N5
- N5S
- S1 Pro (Max)
- N2X
- E360
- E1 Lite
- E2

Image: A visual representation of several VANTRUE dash cam models (E1, E2, E3, S1 Pro, N2S, N4, N2 Pro, N4 Pro, N5) that are compatible with the USB-C hardwire cable.
Maintenance
- Regular Checks: Periodically check the cable and connections for any signs of wear or damage.
- Cleanliness: Keep the control unit and connectors free from dust and debris. Use a dry, soft cloth for cleaning.
- Avoid Extreme Conditions: Do not expose the cable to extreme temperatures or moisture beyond typical automotive environments.
Troubleshooting
- Dash cam not receiving power.
- Ensure the OBD plug is fully inserted into the vehicle's OBD II port.
- Verify the USB-C connector is securely plugged into the dash cam.
- Check the vehicle's battery voltage on the LED screen. If it's below the set cut-off voltage, the cable may have intentionally cut power to protect the battery.
- Confirm the vehicle's battery is not discharged.
- LED screen is off or not displaying voltage.
- Ensure the cable is properly connected to both the OBD port and the dash cam.
- If the vehicle's battery voltage is extremely low, the unit may not power on.
- Car battery drains quickly.
- Adjust the low voltage protection setting to a higher value (e.g., 12.4V for 12V systems) to ensure power is cut off sooner.
- Ensure your dash cam's parking mode settings are optimized to minimize power consumption (e.g., motion detection instead of continuous recording).
- Have your vehicle's battery checked by a professional.
Specifications
| Feature | Detail |
|---|---|
| Model Number | VP04-02 |
| Cable Length | 10ft (approximately 3 meters) |
| Input Voltage | DC 12V-24V |
| Output Voltage | DC 5V 2.5A |
| Connector Type | USB-C (Output), OBD II (Input) |
| Low Voltage Protection (12V) | 11.6V / 12.0V / 12.4V |
| Low Voltage Protection (24V) | 23.6V / 24.0V / 24.4V |
| Special Features | LED Digital Display, 3-Gear Shifting for Voltage Setting |
| Product Dimensions | 4.33 x 3.03 x 2.6 inches (Control Unit) |
Warranty and Support
VANTRUE products come with a standard manufacturer's warranty. For detailed warranty information, technical support, or assistance with your product, please visit the official VANTRUE website or contact their customer service. Keep your purchase receipt for warranty claims.

