
Carpuride W701
Carpuride W701 Portable Car Stereo User Manual
Model: W701
1. Introduction
This manual provides detailed instructions for the installation, operation, and maintenance of your Carpuride W701 Portable Car Stereo. The W701 is designed to enhance your driving experience by integrating features such as wireless Apple CarPlay, Android Auto, Bluetooth 5.0, Mirror Link, and GPS navigation capabilities through a 7-inch 1080P touch screen. Please read this manual thoroughly before using the device to ensure proper functionality and safety.
2. Safety Information
- Do not operate the device or view videos while driving. Distracted driving can lead to accidents.
- Ensure the device is securely mounted and does not obstruct your view of the road or interfere with vehicle controls.
- Avoid exposing the device to extreme temperatures, direct sunlight for prolonged periods, or excessive moisture.
- Disconnect power before cleaning or performing any maintenance.
- Only use the provided power adapter and cables. Using incompatible accessories may damage the device or vehicle.
- Professional installation is recommended for the rear camera wiring if you are unfamiliar with vehicle electrical systems.
3. Package Contents
Verify that all items listed below are present in your package:
- Carpuride W701 Portable Car Stereo Unit
- Car Charger (1.5m)
- User Manual
- Sticker Bracket
- Suction Cup Bracket
- 3.5mm Audio Cable (1.2m)
- Suction Cup Gasket
- Rear View Camera (0.5m cable)
- Camera Wire (6m)

4. Product Overview
The Carpuride W701 features a 7-inch IPS HD capacitive touch screen and various ports for connectivity and power.

Key Components:
- 7-inch IPS HD Capacitive Touch Screen: Main display for all functions.
- Power Button: Long press to turn on/off, short press to mute.
- External MIC Port (3.5mm Jack): For connecting an external microphone.
- SD Card Slot: For media playback.
- CAM In (2.5mm Jack): Input for the rear view camera.
- Audio Out (3.5mm Jack): For connecting to your car's AUX input.
- USB 5V 2.1A Port: For charging devices or connecting USB storage.
- DC 12V-24V 2.5A Input: Power input for the unit.
- 8Ω2W Speaker: Built-in speaker for audio output.
- Light-sensitive Sensor: Automatically adjusts screen brightness.
5. Setup and Installation
5.1 Mounting the Unit
The Carpuride W701 offers two mounting options: a suction cup bracket for windshield or dashboard, and a sticker bracket for dashboard mounting.
- Choose a Location: Select a position on your dashboard or windshield that does not obstruct your view, airbags, or vehicle controls.
- Attach Bracket to Unit: Securely attach your chosen bracket to the back of the Carpuride W701 unit.
- Mount to Vehicle:
- Suction Cup Bracket: Clean the mounting surface. Press the suction cup firmly against the surface and engage the lever to create a vacuum seal. The base supports 360° rotation for optimal viewing angle.
- Sticker Bracket: Clean and dry the dashboard surface. Peel off the protective film from the adhesive base and firmly press the bracket onto the dashboard for at least 30 seconds.
- Adjust Angle: Adjust the height and angle of the unit for optimal visibility and ergonomic access.

5.2 Power Connection
Connect the provided car charger to the DC 12V-24V input port on the unit and plug the other end into your vehicle's cigarette lighter socket.
5.3 Rear View Camera Installation (Optional)
The package includes an HD rear camera. Follow these steps for installation:
- Mount Camera: Install the rear camera at the back of your vehicle, typically near the license plate.
- Connect Video Cable: Connect the camera's video output to the "CAM In" (2.5mm) port on the Carpuride W701 unit using the provided camera wire.
- Connect Power: Connect the camera's power cable (red wire) to your vehicle's reversing lamp power supply (positive +) and the black wire to a ground (GND). This allows the camera to activate automatically when the vehicle is in reverse.

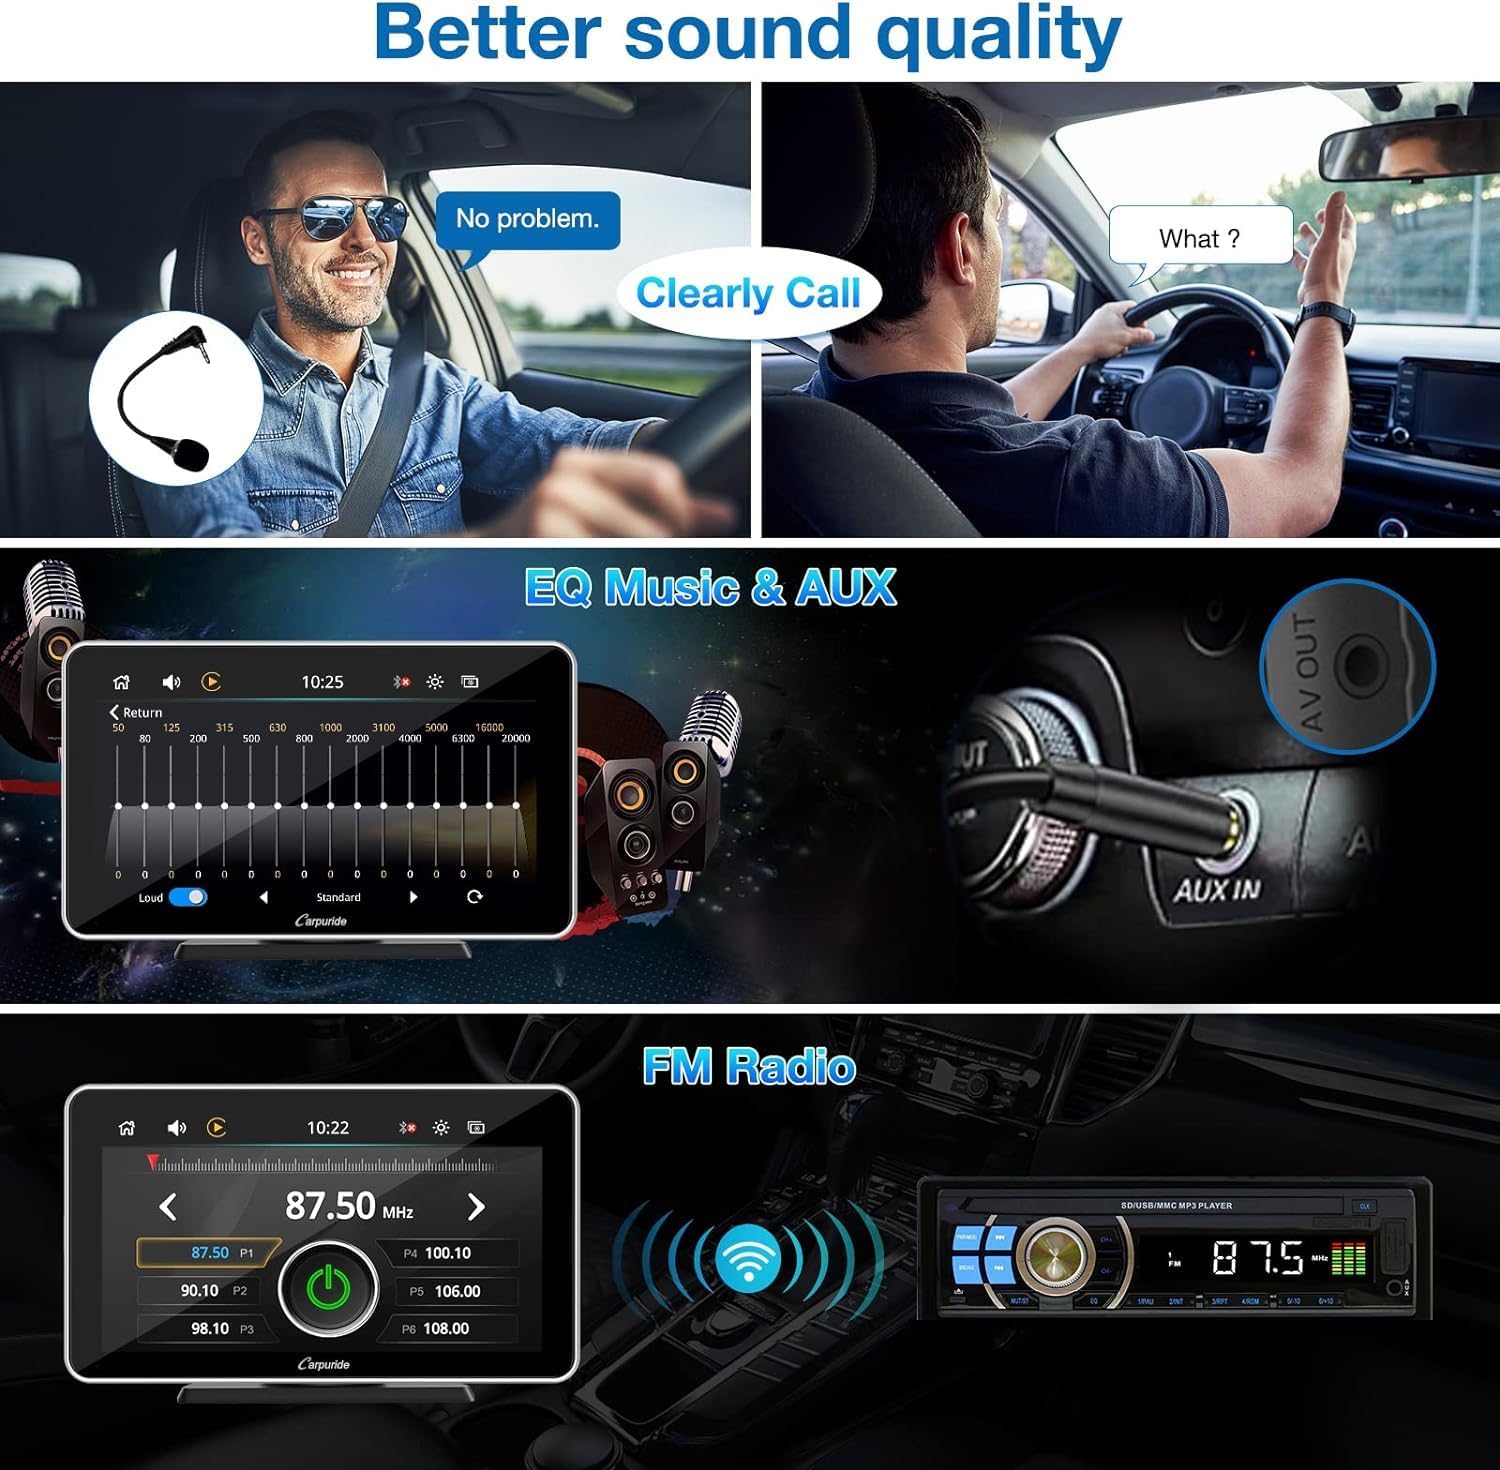
5.4 Audio Output Options
The Carpuride W701 can output audio through its built-in speaker, your car's AUX input, or via FM transmission.
- Built-in Speaker: The unit has an integrated 8Ω2W speaker for basic audio output.
- AUX Output: Connect the provided 3.5mm audio cable from the "Audio Out" port on the W701 to your car's AUX input jack. Select AUX as the audio source on your car stereo.
- FM Transmitter: The unit can transmit audio to your car's FM radio. Select an unused FM frequency on the W701 and tune your car's FM radio to the same frequency.
6. Operating Instructions
6.1 Power On/Off and Basic Operation
- Power On: The unit will power on automatically when connected to a power source and the vehicle ignition is on. Alternatively, long press the power button.
- Power Off: Long press the power button to turn off the unit.
- Mute: Short press the power button to mute/unmute audio.
- Touch Screen: Navigate the interface by tapping, swiping, and dragging on the capacitive touch screen.
6.2 Wireless Apple CarPlay / Android Auto
Connect your smartphone wirelessly to access CarPlay or Android Auto features.
- Ensure Bluetooth and Wi-Fi are enabled on your smartphone.
- On the Carpuride W701, select the "CarPlay" or "Android Auto" icon.
- Follow the on-screen prompts to pair your phone via Bluetooth. Once paired, the system will automatically establish a Wi-Fi connection for CarPlay/Android Auto.
- You can now access navigation, music, calls, messages, and voice assistants (Siri/Google Assistant) directly from the unit's screen.


6.3 Mirror Link (iOS/Android)
Mirror Link allows you to display your smartphone's screen directly onto the W701 unit.
- Wireless Mirror Link: Select the "Mirror Link" option on the unit and follow the instructions to connect your phone wirelessly.
- Wired Mirror Link: Connect your smartphone to the unit's USB port using a USB cable. Select the "Mirror Link" option and follow the prompts.
6.4 Bluetooth 5.0 Hands-Free Calling and Music
Connect your phone via Bluetooth for hands-free calls and audio streaming.
- On the W701, select the "Bluetooth" icon.
- Enable Bluetooth on your smartphone and search for available devices. Select "Carpuride W701" (or similar) to pair.
- Once connected, you can make/receive calls, access your phonebook, and stream music.
- The unit supports voice control for safer operation while driving.
- An external microphone can be connected to the 3.5mm MIC port for improved call clarity.

6.5 GPS Navigation
GPS navigation is accessed through Apple CarPlay or Android Auto, utilizing your smartphone's mapping applications (e.g., Apple Maps, Google Maps, Waze).
- Ensure your phone is connected via CarPlay or Android Auto.
- Select your preferred navigation app from the unit's screen.
- Input your destination and follow the on-screen directions and voice prompts.
6.6 Light Sensor Adjustment
The unit features a light sensor to automatically adjust screen brightness. You can also manually adjust it.
- Access the settings menu on the unit.
- Locate the display or brightness settings.
- Choose between automatic brightness adjustment (via light sensor) or manual control.
7. Maintenance
- Cleaning the Screen: Use a soft, lint-free cloth to gently wipe the screen. For stubborn smudges, slightly dampen the cloth with water or a screen-cleaning solution. Avoid harsh chemicals or abrasive materials.
- Cleaning the Unit: Wipe the exterior of the unit with a soft, dry cloth.
- Cable Management: Ensure all cables are neatly routed and secured to prevent interference with driving or damage.
- Storage: If storing the unit for an extended period, disconnect it from power and store it in a cool, dry place.
8. Troubleshooting
| Problem | Possible Cause | Solution |
|---|---|---|
| Unit does not power on. | No power from car charger; loose connection; vehicle's cigarette lighter socket is faulty. | Check car charger connection. Ensure vehicle ignition is on. Test cigarette lighter with another device. |
| No sound from unit or car speakers. | Volume too low; incorrect audio output selected; AUX cable not connected properly; FM frequency interference. | Increase volume. Verify AUX cable connection and car stereo input. Adjust FM frequency to an unused channel. Check unit's internal speaker setting. |
| CarPlay/Android Auto not connecting. | Bluetooth/Wi-Fi off on phone; phone not paired; software glitch. | Ensure Bluetooth and Wi-Fi are active on your phone. Re-pair the phone. Restart both the unit and your phone. |
| Rear camera image not displayed. | Camera power not connected; video cable loose; vehicle not in reverse. | Check camera power wiring to reversing lamp. Ensure video cable is securely connected. Shift vehicle into reverse. |
| Screen is laggy or unresponsive. | Temporary software issue; excessive background processes. | Restart the unit. Ensure no excessive applications are running on your connected smartphone. |
| Unit falls off dashboard/windshield. | Suction cup not properly sealed; surface not clean; adhesive worn. | Clean mounting surface thoroughly. Reapply suction cup firmly, ensuring the lever is fully engaged. Consider using the sticker bracket for a more permanent solution. |
9. Specifications
| Model Number | W701S+CAM |
| Screen Size | 7 inch |
| Display Resolution | 1024x600 (HD) |
| Connectivity Technology | Auxiliary, Bluetooth 5.0, Wi-Fi (for CarPlay/Android Auto) |
| Controller Type | Android, iOS (Touchscreen, Voice Control) |
| Special Features | Wireless Apple CarPlay, Wireless Android Auto, GPS Navigation, Touchscreen, Voice Control, Mirror Link, Rear Camera Support |
| Compatible Devices | Smartphones (iOS and Android) |
| Connector Type | 3.5mm Jack (Audio Out, External Mic), USB, 2.5mm Jack (CAM In) |
| Audio Output Mode | Stereo |
| Power Input | DC 12V-24V 2.5A |
| Item Weight | 2.23 pounds (approx.) |
| Dimensions (Package) | 8.78 x 5.67 x 4.09 inches (approx.) |
| Manufacturer | Carpuride |
10. Warranty and Support
For warranty information, technical support, or service inquiries, please refer to the contact information provided with your purchase documentation or visit the official Carpuride website. Please retain your proof of purchase for warranty claims.
Related documentsW701


Ask a question about this manual
Ask about setup, troubleshooting, compatibility, parts, safety, or missing instructions. Manuals+ will review the question and use this page’s manual context to help answer it.