
1. Introduction
Thank you for choosing the moonka Frameo 11-inch Smart WiFi Digital Photo Frame. This device allows you to easily share and display your cherished photos and videos with friends and family from anywhere in the world using the Frameo app. This manual provides detailed instructions for setting up, operating, and maintaining your digital photo frame to ensure optimal performance and enjoyment.

Image: The moonka Frameo 11-inch Smart WiFi Digital Photo Frame, showcasing its sleek design.
2. Product Overview
Key Features:
- Secure Photo & Video Sharing: Share photos and short videos (up to 15 seconds) privately via dual-band WiFi (2.4/5GHz) using the Frameo app.
- 11-inch Full HD IPS Touch Screen: Enjoy clear visuals from any angle with a 1920x1280 resolution IPS touch screen. Supports JPG/JPEG/BMP/PNG image formats and MP4 video format.
- 64GB Internal Storage: Store a large number of memories directly on the device. Storage is expandable via USB drive or SD card.
- Versatile Functions: Features automatic photo rotation, display of captions, weather, and time. Includes multi-functional custom settings, playback order, image zoom, hide/show images, adjustable brightness, and sleep mode.
- Easy Setup & Use: User-friendly interface designed for all ages, with intuitive touch screen operation.
Components:
The Frameo digital photo frame includes the following ports for connectivity and media input:
- DC Power Input
- USB Port
- SD Card Slot
- Earphone Jack

Image: Rear view of the Frameo digital photo frame, highlighting the various input ports.
3. Setup Instructions
Follow these steps to set up your Frameo digital photo frame:
- Power On: Connect the power adapter to the DC input port on the frame and plug it into a power outlet. The frame will automatically power on.
- Download Frameo App: Download the free Frameo app on your smartphone. Search for "Frameo" on Google Play Store (for Android) or the App Store (for iOS).
- Connect to WiFi: On the photo frame, follow the on-screen instructions to connect to your dual-band WiFi network (2.4GHz or 5GHz).
- Create Profile & Add Frame: Open the Frameo app on your smartphone. Create a user profile and then add your photo frame by entering the unique code displayed on the frame's screen. This code is valid for 12 hours.
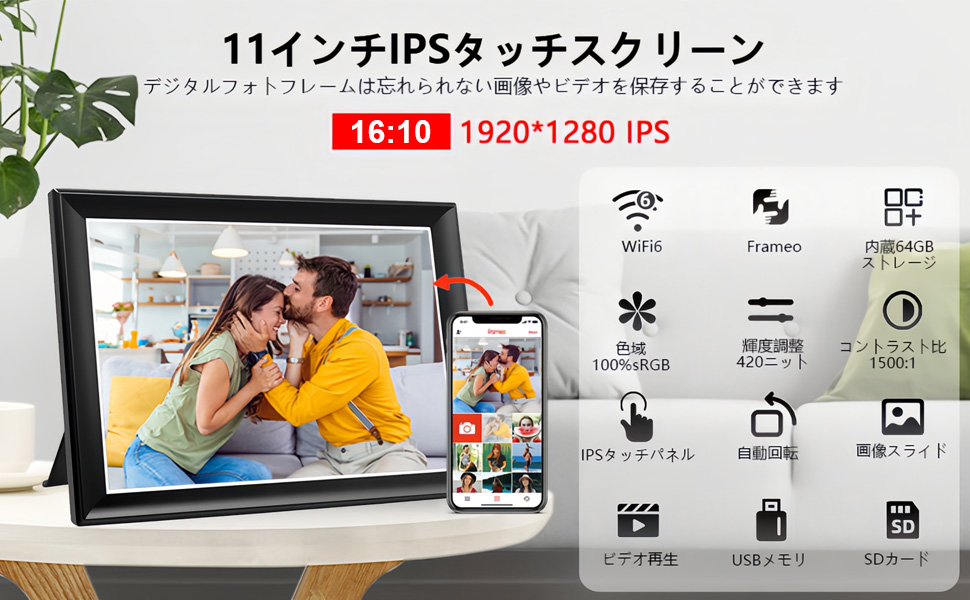
Image: Visual guide for downloading the Frameo app and connecting your photo frame.
4. Operating Instructions
4.1 Sending Photos to Your Frame
Use the Frameo app to send photos directly to your digital photo frame:
- Select Photos: In the Frameo app's gallery, select the photos you wish to share. You can press and hold a photo for multi-select, or use the multi-select button to choose up to 10 photos at once.
- Choose Receivers: After selecting photos, tap 'Next'. From the list, choose the Frameo frames you want to send the photos to. You can send to multiple frames simultaneously.
- Add Captions: Write a short caption for your photos. You can add the same caption for all selected photos or write individual captions by tapping on each thumbnail.
- Adjust Important Part: Use your finger to pan and zoom each photo to ensure the most important part is visible within the circular preview. This ensures optimal display regardless of the frame's orientation.
- Send Photos: Tap 'Send photos'. The photos will appear on the frame shortly after.

Image: Detailed steps for sending photos using the Frameo app.
4.2 Sending Videos to Your Frame
You can also send short videos (3-15 seconds) to your frame:
- Select Video: In the Frameo app's gallery, select the video you wish to share. The length of each video clip is displayed on its thumbnail.
- Choose Receivers: After selecting the video, tap 'Next'. Choose the Frameo frames you want to send the video to.
- Add Caption: Write a short caption or comment for your video.
- Adjust Video Length: Pan through your video by dragging along the timeline or move the handles to adjust the length to fit within 3 to 15 seconds. You can also remove audio by tapping the speaker icon.
- Send Video: Tap 'Send video'. The video will appear on the frame shortly after, depending on your internet speed.

Image: Detailed steps for sending videos using the Frameo app.
4.3 General Functions
- Automatic Rotation: The frame automatically adjusts photo orientation.
- Display Options: Show captions, current weather, and time.
- Custom Settings: Adjust playback order, image zoom, hide/show specific images, and display captions.
- Brightness & Sleep Mode: Adjust screen brightness and set a sleep mode schedule for energy saving.
Video: A short preview demonstrating the Frameo app's photo and video sharing capabilities and the digital photo frame in action.
5. Maintenance
To ensure the longevity and optimal performance of your Frameo digital photo frame, follow these maintenance guidelines:
- Cleaning: Gently wipe the screen with a soft, lint-free cloth. For stubborn smudges, slightly dampen the cloth with water or a screen-safe cleaner. Avoid harsh chemicals.
- Software Updates: Regularly check for and install software updates through the Frameo app or the frame's settings menu. Updates often include performance improvements and new features.
- Placement: Place the frame on a stable surface, away from direct sunlight, excessive heat, and moisture. Ensure adequate ventilation around the device.
- Power Management: Utilize the sleep mode feature to automatically turn off the screen during specified hours, conserving energy and extending screen life.
6. Troubleshooting
If you encounter any issues with your Frameo digital photo frame, refer to the following common troubleshooting steps:
| Problem | Solution |
|---|---|
| Frame not powering on | Ensure the power adapter is securely connected to both the frame and a working power outlet. Try a different outlet. |
| Cannot connect to WiFi | Check your WiFi password. Ensure the frame is within range of your router. Restart your router and the photo frame. Verify your network is 2.4GHz or 5GHz compatible. |
| Photos/Videos not appearing on frame | Confirm the frame is connected to WiFi. Check the Frameo app to ensure photos/videos were successfully sent. Verify the frame ID in the app matches your physical frame. Ensure the video length is between 3-15 seconds. |
| Screen is unresponsive | Restart the frame by unplugging it and plugging it back in. Ensure the screen is clean and free of debris. |
| Images appear distorted or cropped | Adjust the "important part" setting for each photo in the Frameo app before sending. The frame automatically adjusts for orientation. |
7. Specifications
| Feature | Detail |
|---|---|
| Brand | moonka |
| Model Number | ZN-DP1101 |
| Screen Size | 11 inches |
| Resolution | 1920x1280 (2K) |
| Display Type | FHD IPS LCD Touch Screen |
| Aspect Ratio | 16:10 |
| Internal Storage | 64 GB |
| Connectivity | Wi-Fi (2.4/5GHz) |
| Power Source | Corded Electric |
| Compatible Devices | Smartphones (via Frameo app) |
| Supported Media | JPG/JPEG/BMP/PNG (images), MP4 (videos) |
8. Warranty and Support
8.1 Warranty Information
This product comes with a 1-year warranty from the date of delivery.
- For malfunctions occurring within 2 weeks of delivery, return shipping costs for repair are covered by the seller.
- For malfunctions occurring after 2 weeks but within the 1-year warranty period, repairs are free, but return shipping costs are borne by the customer.
- The warranty does not cover malfunctions caused by factors other than product quality issues, such as water damage, drops, or improper use.
8.2 Customer Support
For further assistance, technical support, or warranty claims, please contact moonka customer service through the platform where you purchased the product or refer to the contact information provided in your product packaging.