
1. Introduction
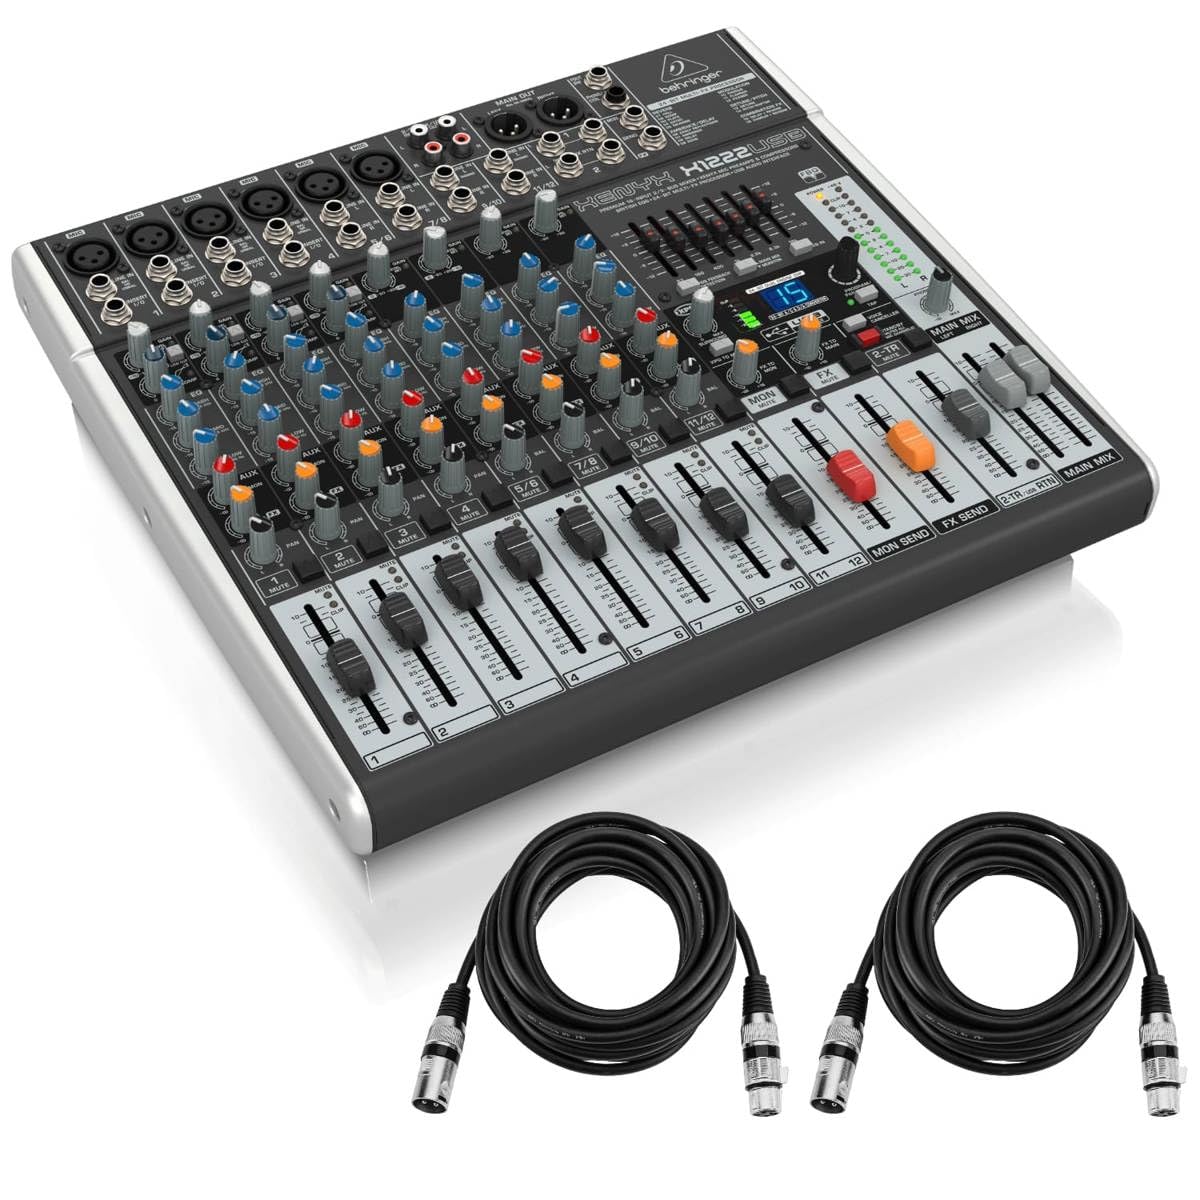
The Behringer XENYX X1222USB is a premium 12-input, 2/2-bus mixer designed for professional audio applications. It features XENYX mic preamps, one-knob compressors, British-style EQs, and a 24-bit multi-FX processor. An integrated USB audio interface allows for direct connection to a computer for recording and playback. This manual provides essential information for setting up, operating, and maintaining your mixer.
2. Setup
2.1 Unpacking and Initial Inspection
Carefully unpack your XENYX X1222USB mixer and ensure all components are present and undamaged. Retain the packaging for future transport or storage.
2.2 Power Connection
Connect the provided power cable to the mixer's power input on the rear panel and then to a suitable AC power outlet. Ensure the power switch is in the 'OFF' position before connecting.

2.3 Connecting Microphones and Line-Level Devices
The mixer features four XENYX mic preamps with XLR inputs for microphones and 1/4-inch TRS inputs for line-level devices. Stereo line inputs (5/6, 7/8, 9/10, 11/12) are also available for connecting stereo sources.


2.4 USB Audio Interface Connection
Connect the mixer to your computer using a USB cable. This enables bi-directional audio transfer for recording and playback with your digital audio workstation (DAW).
2.5 Output Connections
Use the main XLR outputs to connect to your main PA system or studio monitors. The Alt 3-4 outputs and Control Room outputs provide additional routing flexibility for monitoring or sub-mixes.
2.6 Phantom Power
Activate the +48V PHANTOM power switch on the rear panel if you are using condenser microphones that require external power. Ensure microphones are connected before activating phantom power to prevent damage.
3. Operation
3.1 Channel Controls
Each mono channel features a GAIN control for input level adjustment, a LOW CUT button to filter out unwanted low frequencies (75 Hz, 18 dB/Oct), a one-knob COMPRESSOR for dynamic control, and a 3-band British-style EQ (HIGH, MID, LOW) for tone shaping. AUX 1 and AUX 2 controls allow sending signals to external effects or monitor mixes. The PAN knob adjusts the stereo position, and the LEVEL fader controls the channel's output volume.

3.2 Main Mix and Subgroups
The main mix is controlled by the MAIN MIX faders (Left/Right). Channels can be routed to the main mix or to the ALT 3-4 subgroup using the MUTE/ALT 3-4 buttons. The ALT 3-4 faders control the volume of the subgroup output.
3.3 FX Processor
The built-in 24-bit dual engine FX processor offers 16 editable presets including reverb, chorus, flanger, delay, and pitch shifter. Use the PROGRAM/PARAMETER knob to select and adjust effects. The FX SEND controls on each channel determine how much of that channel's signal is sent to the effects processor.
3.4 Monitoring
Connect headphones to the PHONES output for personal monitoring. The PHONES/CTRL ROOM knob adjusts the volume for both the headphone and control room outputs. The 2-TR/USB TO MAIN button routes the 2-track/USB input to the main mix, while the 2-TR/USB TO CTRL ROOM button routes it to the control room/headphones only.
4. Maintenance
To ensure the longevity and optimal performance of your Behringer XENYX X1222USB mixer, follow these maintenance guidelines:
- Cleaning: Use a soft, dry cloth to clean the exterior of the mixer. Avoid abrasive cleaners or solvents that could damage the finish or controls.
- Dust Protection: Keep the mixer covered when not in use to prevent dust accumulation, which can affect faders and knobs.
- Environmental Conditions: Operate and store the mixer in a cool, dry environment away from direct sunlight, excessive heat, moisture, and vibrations.
- Cable Management: Ensure all cables are properly routed and secured to prevent strain on connectors and accidental disconnections.
5. Troubleshooting
If you encounter issues with your Behringer XENYX X1222USB mixer, consider the following common troubleshooting steps:
- No Power: Check the power cable connection, the power switch on the rear panel, and the power outlet. Ensure the correct fuse is installed if applicable.
- No Sound Output: Verify all input and output cables are securely connected. Check channel LEVEL faders, MAIN MIX faders, and PHONES/CTRL ROOM knob levels. Ensure MUTE buttons are not engaged.
- Distorted Sound: Reduce input GAIN levels to prevent clipping (indicated by red CLIP LEDs). Check for proper impedance matching between devices.
- No USB Audio: Ensure the USB cable is properly connected to both the mixer and your computer. Verify that the mixer is selected as the audio input/output device in your computer's sound settings and DAW.
- Phantom Power Issues: Confirm the +48V PHANTOM switch is engaged for condenser microphones. Ensure the microphone is compatible with phantom power.
If problems persist, consult the full user manual or contact Behringer customer support.
6. Specifications
| Feature | Detail |
|---|---|
| Item Weight | 13.91 pounds |
| Product Dimensions | 18.02 x 15.07 x 5.09 inches |
| Power Source | Corded Electric |
| Input Channels | 12 (6 mono, 4 stereo) |
| Mic Preamps | 4 XENYX Mic Preamps |
| EQ | 3-band British EQs per channel, 7-band graphic EQ on main/monitor |
| Compressors | 4 one-knob compressors |
| FX Processor | 24-bit dual engine with 16 presets |
| USB Interface | Integrated USB audio interface |
7. Warranty & Support
For detailed warranty information and technical support, please refer to the official Behringer website or contact your local distributor. Keep your purchase receipt as proof of purchase for warranty claims.


