
1. Introduction
This manual provides essential information for the safe and efficient operation of your LNEX KSL2440 40A PWM Solar Charge Controller. Please read these instructions carefully before installation and use to ensure optimal performance and longevity of your solar power system components.
2. Safety Instructions
- Ensure all wiring is correctly polarized. Incorrect polarity can damage the controller and connected devices.
- Connect the battery to the charge controller first, then connect the solar panel. Disconnect in the reverse order.
- Install the controller in a well-ventilated area, away from flammable gases.
- Use appropriate wire gauges for your system's current to prevent overheating.
- This device is designed for 12V/24V systems. Do not connect it to higher voltage systems.
- The controller is IP65 waterproof, suitable for outdoor use and exposure to water spray, rain, or condensation. However, avoid submerging the unit.
3. Product Overview
The LNEX KSL2440 is a 40A PWM solar charge controller designed to efficiently manage power from your solar panels to various battery types. It features a backlit LCD, temperature sensor port, and multiple protection mechanisms.
Key Features:
- IP65 Waterproof Design: Suitable for outdoor environments, resistant to water spray, rain, and condensation.
- 6-Stage PWM Charging: Includes Diagnose, Soft Start, Bulk, Absorption, Float, and Equalization stages to optimize battery life and system performance. Automatic equalization every 28 days for calcium/EFB batteries.
- Visual Solar Monitor: Backlit LCD display and LED indicators show real-time solar current, battery voltage, and working status. Features auto-memory function.
- 12V/24V Auto-Detection: Automatically identifies system voltage.
- Multi-Battery Compatibility: Supports LiFePO4, LTO, GEL, AGM, Lead-Acid, Calcium, and EFB batteries. Includes 'Wake Up Technology' for deep-discharged lithium batteries.
- Comprehensive Safety Protections: Built-in protection against over-temperature, over-voltage, over-current, over-charging, over-discharging, overload, and short circuit.
- Remote Temperature Sensor Port: Allows for accurate temperature compensation during charging (sensor not included, sold separately).

Figure 1: Front view of the LNEX KSL2440 40A PWM Solar Charge Controller, showing the LCD display and control buttons.

Figure 2: The controller's IP65 waterproof design, highlighting its resistance to dampness and condensation.
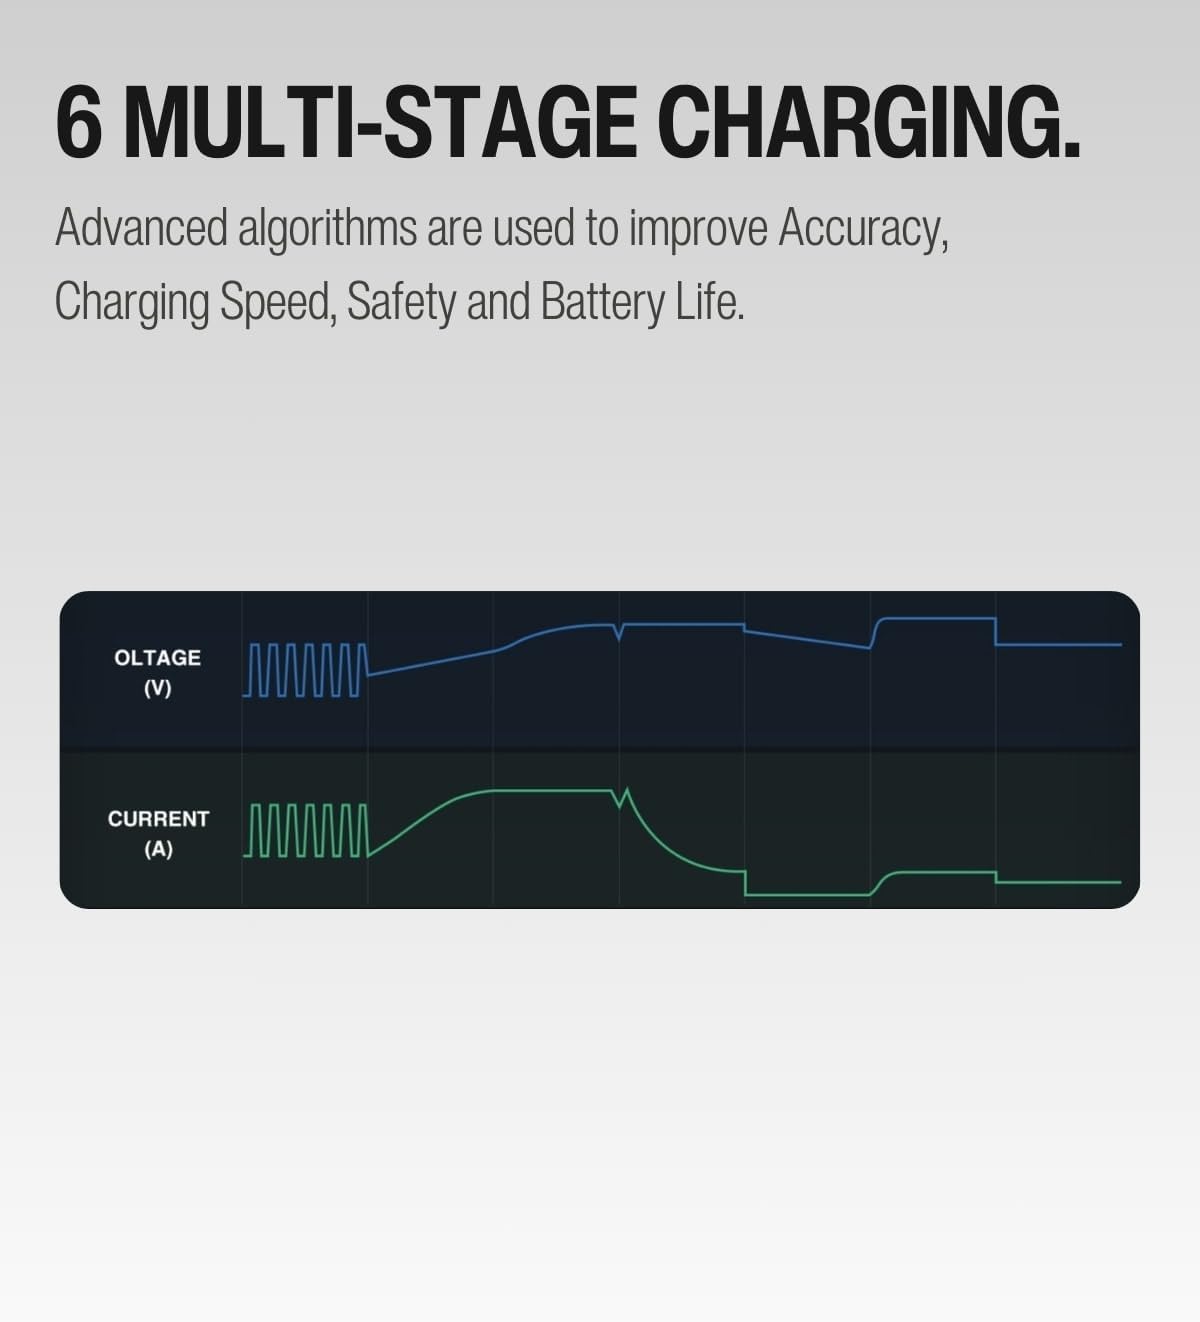
Figure 3: Illustration of the 6-stage PWM charging algorithm, showing voltage and current curves for improved battery life.

Figure 4: Visual representation of the six integrated safety protections safeguarding the system and batteries.

Figure 5: Dimensions of the compact LNEX KSL2440 controller, measuring 140mm (5.5in) x 115mm (4.5in) x 35mm (1.4in).

Figure 6: Additional features including a crisp backlit LCD, temperature sensor port, flame retardant materials, and a heavy-duty design.
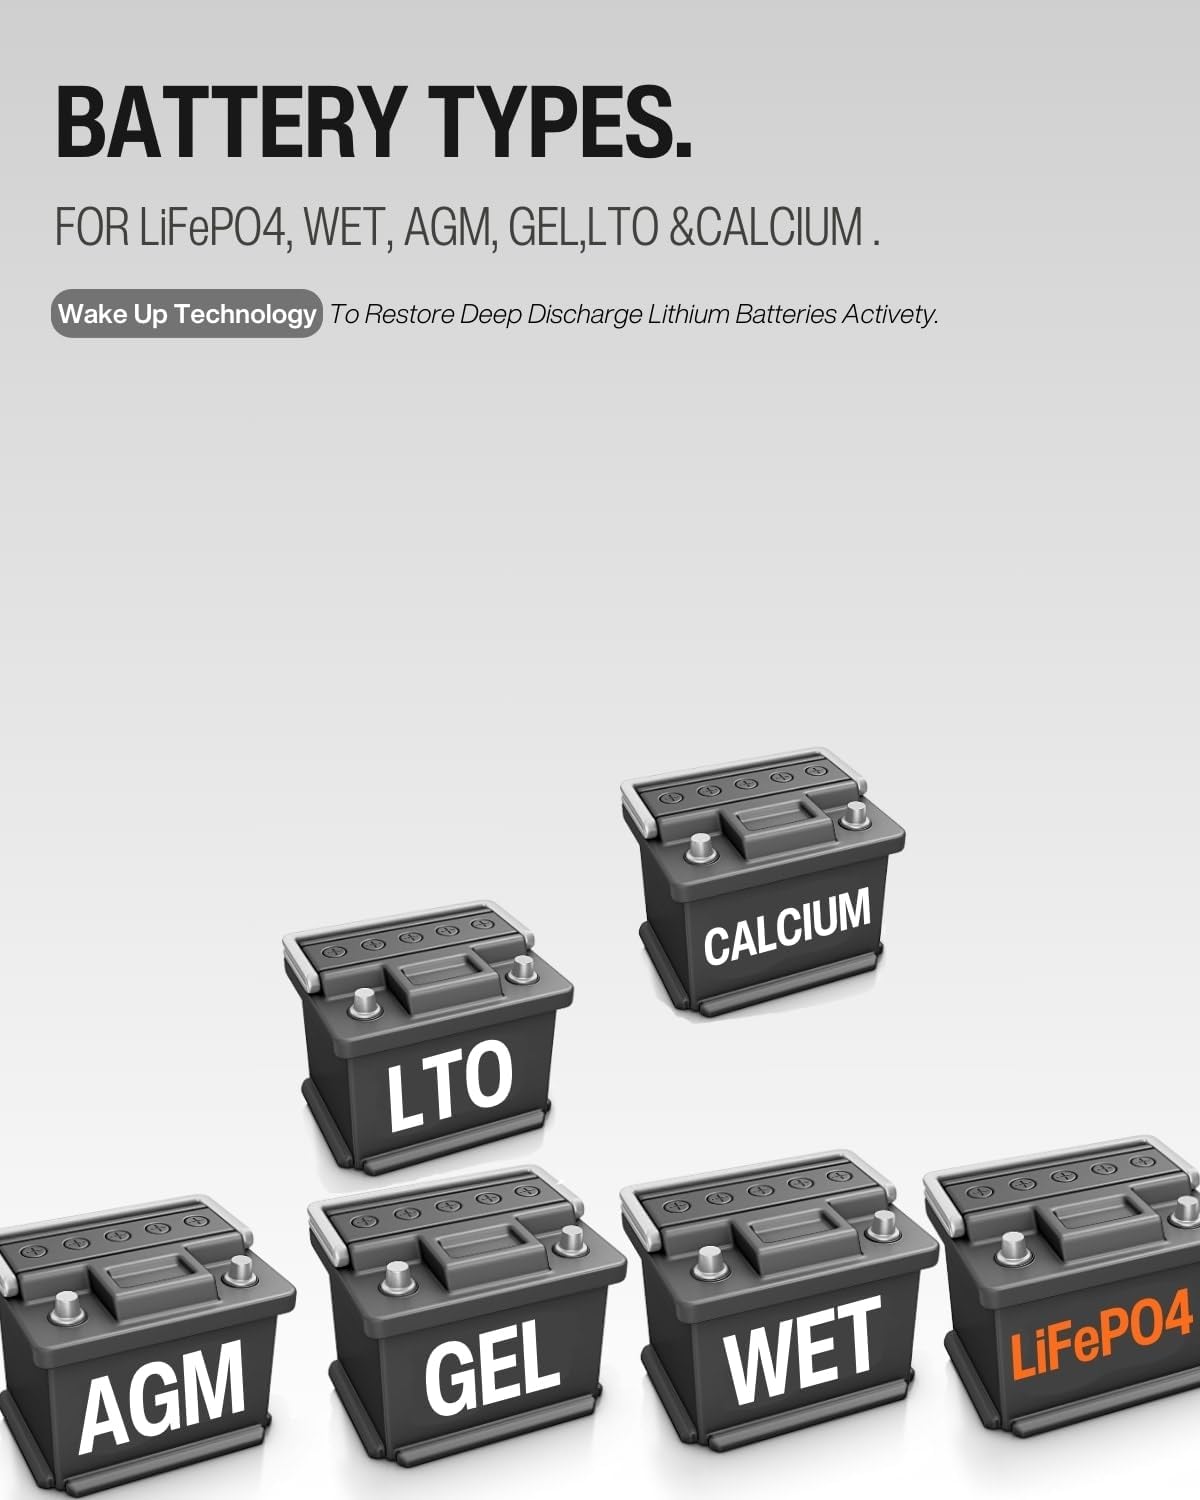
Figure 7: The controller's compatibility with multiple battery chemistries, including LiFePO4, LTO, AGM, GEL, WET (Flooded), and Calcium.
4. Setup and Installation
4.1 Wiring Order
- Connect the battery to the charge controller first. Ensure correct polarity (positive to positive, negative to negative). The controller will automatically detect 12V or 24V system voltage.
- Connect the solar panel to the charge controller. Ensure correct polarity.
- If using a remote temperature sensor (sold separately), connect it to the designated port.
Important: Always connect the battery first and disconnect the solar panel first when disassembling the system.
4.2 Battery Type Selection
The controller supports various battery types. To select the correct battery type:
- Press the 'TYPE' button on the controller.
- Cycle through the available battery types (LiFePO4, LTO, GEL, AGM, Lead-Acid, Calcium, EFB) until your battery type is displayed.
- The controller will save the selection automatically.
5. Operating Instructions
5.1 LCD Display and Indicators
The backlit LCD displays real-time system information. LED indicators provide quick status updates.
- Battery Voltage: Shows the current voltage of the connected battery.
- Solar Current: Displays the current being generated by the solar panels.
- Battery Charge Status: Indicated by a graphical battery icon and percentage.
- System Status: Various icons may indicate charging, discharging, or fault conditions.
5.2 Button Functions
- 'TYPE' Button: Short press to cycle through battery types for selection.
- 'AMP/VOLT' Button: Short press to cycle through different display parameters (e.g., current, voltage). Hold for 3 seconds to enter advanced settings or reset certain parameters (refer to specific on-screen prompts).
6. Maintenance
- Regularly inspect all wiring connections to ensure they are secure and free from corrosion.
- Keep the controller's exterior clean. Wipe with a dry cloth to remove dust and debris.
- Ensure the area around the controller is clear to allow for proper heat dissipation.
- Check battery terminals for corrosion and clean if necessary.
7. Troubleshooting
- No Display/No Power: Check battery connections and ensure the battery has sufficient voltage. Verify solar panel connections.
- Battery Not Charging: Confirm solar panel is receiving sunlight. Check all wiring for loose connections or incorrect polarity. Ensure the correct battery type is selected.
- Over-Voltage/Over-Current Alarm: The controller's protection features will activate. Check system load and solar input. Reduce load or solar panel capacity if consistently triggering alarms.
- Error Codes: Refer to the specific error code displayed on the LCD (if any) and consult the manufacturer's support for detailed solutions.
- Inaccurate Readings: Ensure the temperature sensor (if used) is properly connected and positioned. Verify battery health.
8. Specifications
| Specification | Value |
|---|---|
| Brand | LNEX |
| Model Number | KSL2440 |
| Current Rating | 40A |
| System Voltage | 12V/24V Auto-detect |
| Charging Technology | PWM (6-stage) |
| Waterproof Rating | IP65 |
| Display Type | Backlit LCD |
| Supported Battery Types | LiFePO4, LTO, GEL, AGM, Lead-Acid, Calcium, EFB |
| Product Dimensions | 6.5 x 5.31 x 1.77 inches (16.5 x 13.5 x 4.5 cm) |
| Item Weight | 12.6 ounces (0.36 kg) |
| Manufacturer | LNEX |
| UPC | 749965098911 |
9. Warranty and Support
For warranty information, technical support, or service inquiries, please contact LNEX customer service through the retailer where the product was purchased or visit the official LNEX website. Keep your purchase receipt as proof of purchase.