1. Introduction
This manual provides detailed instructions for the safe and effective operation of your Fanttik T8 APEX Jump Starter and X9 Pro Portable Tire Inflator. Please read this manual thoroughly before using the product and retain it for future reference.
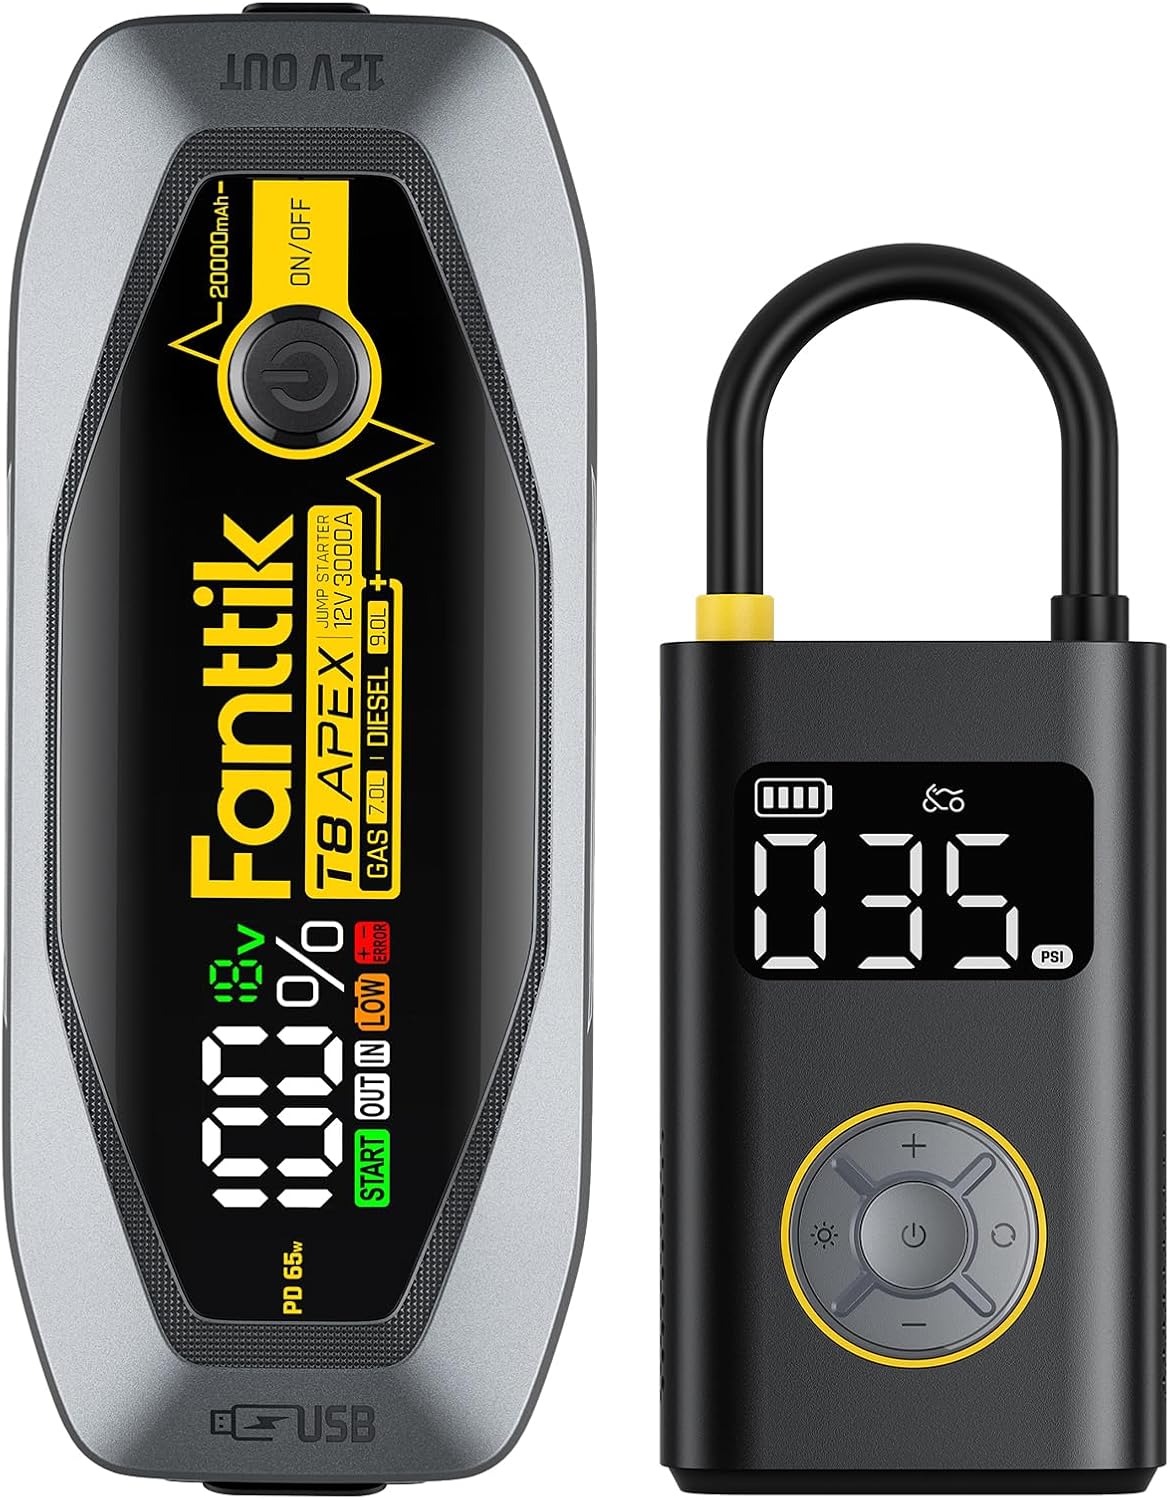
Figure 1: Fanttik T8 APEX Jump Starter (left) and X9 Pro Portable Tire Inflator (right).
This image displays both the Fanttik T8 APEX Jump Starter and the X9 Pro Portable Tire Inflator side-by-side. The jump starter is a grey and black rectangular device with a digital display showing "100%" charge and "12V" output, along with "START OUT IN LOW" indicators. The tire inflator is a black device with a yellow handle, featuring a digital display showing "035 PSI" and control buttons below it.
2. Safety Information
Always observe the following safety precautions to prevent injury or damage to the device.
- Read all instructions before use.
- Do not operate the device if it has been dropped or damaged.
- Keep out of reach of children.
- Do not expose to rain or extreme temperatures.
- Ensure proper ventilation during use and charging.
- Avoid short-circuiting the output terminals.
- Use only the provided accessories and cables.
- For jump starting, connect the clamps correctly: red to positive (+), black to negative (-).
- Disconnect the jump starter within 30 seconds after the vehicle starts.
- Do not use the tire inflator for prolonged periods without cooling breaks.

Figure 2: Internal view highlighting safety features of the Fanttik T8 APEX Jump Starter.
This image shows an exploded view of the Fanttik T8 APEX Jump Starter, emphasizing its internal circuitry and safety components. Text overlays indicate "Spark-Proof," "Reverse Polarity Protection," and "IP65 Water-Resistant," illustrating the device's robust safety design.
3. Package Contents
Verify that all items are present in your package:
- Fanttik T8 APEX Jump Starter
- Fanttik X9 Pro Portable Tire Inflator
- Smart Jumper Cables
- USB-C Charging Cable
- Various Nozzle Adapters for Inflator
- Storage Case
- User Manual (this document)
4. Product Overview
4.1 Fanttik T8 APEX Jump Starter
The T8 APEX is a powerful portable jump starter designed for vehicles with up to 8.5L gasoline and 6.0L diesel engines. It also functions as a power bank.
- Power Button: Turns the device on/off.
- Smart Display: Shows battery voltage, charge level, and operational status.
- Jump Start Port (12V OUT): Connects to smart jumper cables.
- USB-C Input/Output (PD 65W): For charging the device and charging external devices.
- USB-A Output: For charging external devices.

Figure 3: Fanttik T8 APEX Jump Starter's Smart Detection Display.
This image highlights the digital display of the Fanttik T8 APEX Jump Starter, showing "100%" battery charge and "12V" output. Indicators for "START," "OUT," "IN," and "LOW" are visible, providing real-time status updates to the user. The device is shown outdoors with a car in the background.
4.2 Fanttik X9 Pro Portable Tire Inflator
The X9 Pro is a compact, portable tire inflator with a maximum pressure of 150 PSI, suitable for various tires and inflatables.
- Digital Display: Shows current pressure, target pressure, and battery level.
- Power/Start Button: Turns on/off and starts/stops inflation.
- Pressure Adjustment Buttons (+/-): Increases or decreases target pressure.
- Unit Button: Switches between PSI, BAR, KPA.
- Mode Button: Selects preset inflation modes (car, motorcycle, bicycle, ball).
- LED Light: Provides illumination.
- Air Hose Port: Connects the air hose.
- USB-C Charging Port: For charging the inflator.

Figure 4: Fanttik X9 Pro Portable Tire Inflator with integrated nozzle storage.
This image shows a close-up of the Fanttik X9 Pro Portable Tire Inflator, highlighting its internal storage compartment for nozzle adapters. An illustration to the right demonstrates how the needle valve and other adapters are stored within the device, emphasizing its compact and organized design.
5. Setup
5.1 Initial Charging
Before first use, fully charge both the T8 APEX Jump Starter and the X9 Pro Tire Inflator.
- Connect the provided USB-C charging cable to the USB-C port on each device.
- Connect the other end of the cable to a suitable USB power adapter (not included).
- The display on each device will indicate charging status. Charge until the display shows 100%.

Figure 5: Charging the Fanttik T8 APEX Jump Starter.
This image illustrates the Fanttik T8 APEX Jump Starter being charged via its USB-C port. The display shows "100%" charge, and a table indicates recharge times based on charger rating: 5W (14h), 10W (7h), and 65W (1.5h), highlighting the rapid charging capability with a 65W PD charger.
6. Operating Instructions
6.1 Using the T8 APEX Jump Starter
Ensure your vehicle's battery voltage is below 12V and the jump starter is at least 50% charged.
- Turn off your vehicle's ignition and all accessories.
- Insert the smart jumper cable plug into the 12V OUT port of the T8 APEX.
- Connect the red (+) clamp to the positive terminal of your vehicle's battery.
- Connect the black (-) clamp to the negative terminal of your vehicle's battery.
- Observe the smart jumper cable indicator light. A solid green light indicates a safe connection. If it's red or flashing, check connections.
- Start your vehicle.
- Once the vehicle starts, immediately disconnect the black (-) clamp, then the red (+) clamp, and finally remove the jumper cable from the T8 APEX.

Figure 6: Fanttik T8 APEX Jump Starter in use, connected to a car battery.
This image shows the Fanttik T8 APEX Jump Starter connected to a car battery under the hood of a vehicle. The smart jumper cables are clearly visible, with the red clamp on the positive terminal and the black clamp on the negative terminal. The jump starter's display is illuminated, indicating its operational status. Text overlays highlight its capabilities: "12V Vehicle," "2000 AMPS," "50 Starts," "8.5L Gas," and "7.0L Diesel."
6.2 Using the X9 Pro Portable Tire Inflator
The X9 Pro can inflate tires for cars, motorcycles, bicycles, and various sports balls.
- Connect the air hose to the inflator's air port.
- Attach the appropriate nozzle adapter to the air hose and then to the item you wish to inflate.
- Press the Power button to turn on the inflator. The display will show the current pressure.
- Press the Mode button to select the desired preset (car, motorcycle, bicycle, ball) or manually set the target pressure using the +/- buttons.
- Press the Power/Start button again to begin inflation.
- The inflator will automatically stop once the target pressure is reached.
- Disconnect the air hose from the item and the inflator.
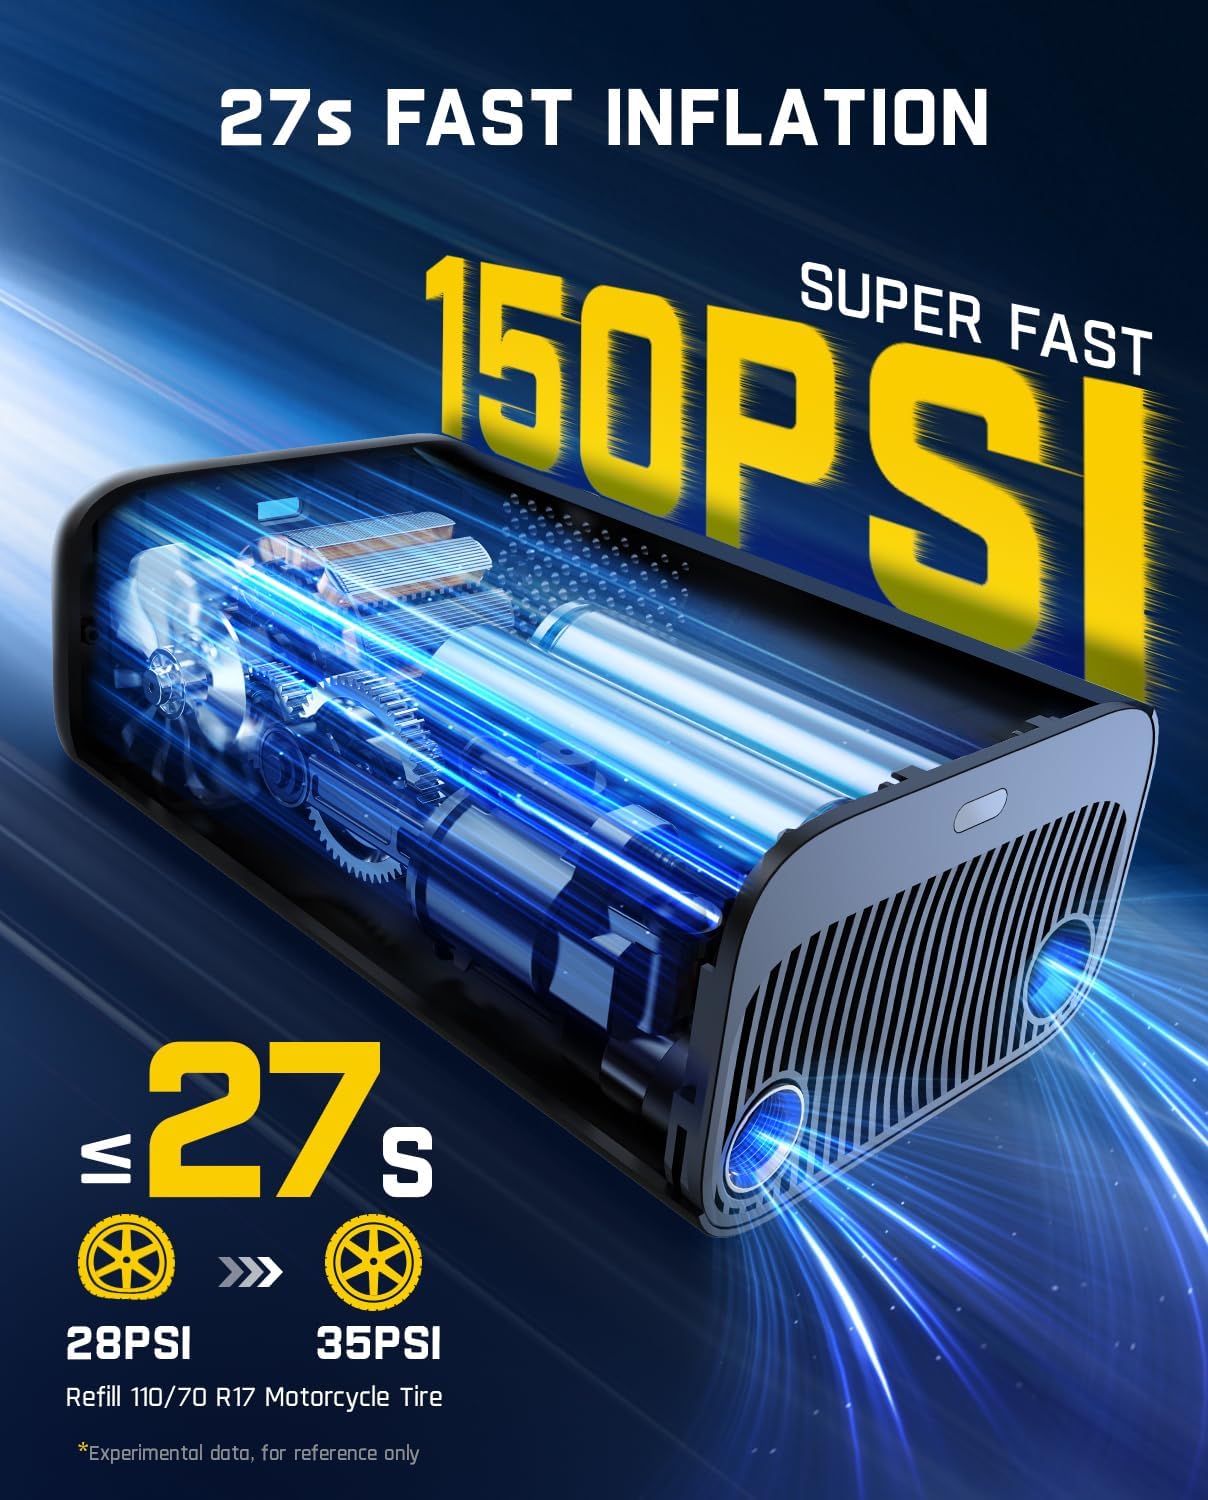
Figure 7: Fanttik X9 Pro Portable Tire Inflator demonstrating fast inflation.
This image visually represents the fast inflation capability of the Fanttik X9 Pro Portable Tire Inflator. It shows an internal mechanism with air flowing, and text indicates "27s Fast Inflation" and "150PSI Super Fast." A graphic suggests refilling a 110/70 R17 Motorcycle Tire from 28 PSI to 35 PSI in under 27 seconds.

Figure 8: Fanttik X9 Pro Portable Tire Inflator with Auto Shut-Off feature.
This image shows the Fanttik X9 Pro Portable Tire Inflator placed next to a motorcycle tire, with a person in the background. The prominent text "AUTO SHUT-OFF" and "Free Your Hand" highlights the automatic stop function once the preset pressure is reached, allowing for hands-free operation.
6.3 Using as a Power Bank
Both the T8 APEX and X9 Pro can charge other electronic devices.
- Connect your device's charging cable to the USB-A or USB-C output port on the T8 APEX, or the USB-C port on the X9 Pro.
- The device will automatically begin charging.
- Monitor the battery level on the jump starter/inflator to ensure sufficient charge remains for its primary functions.
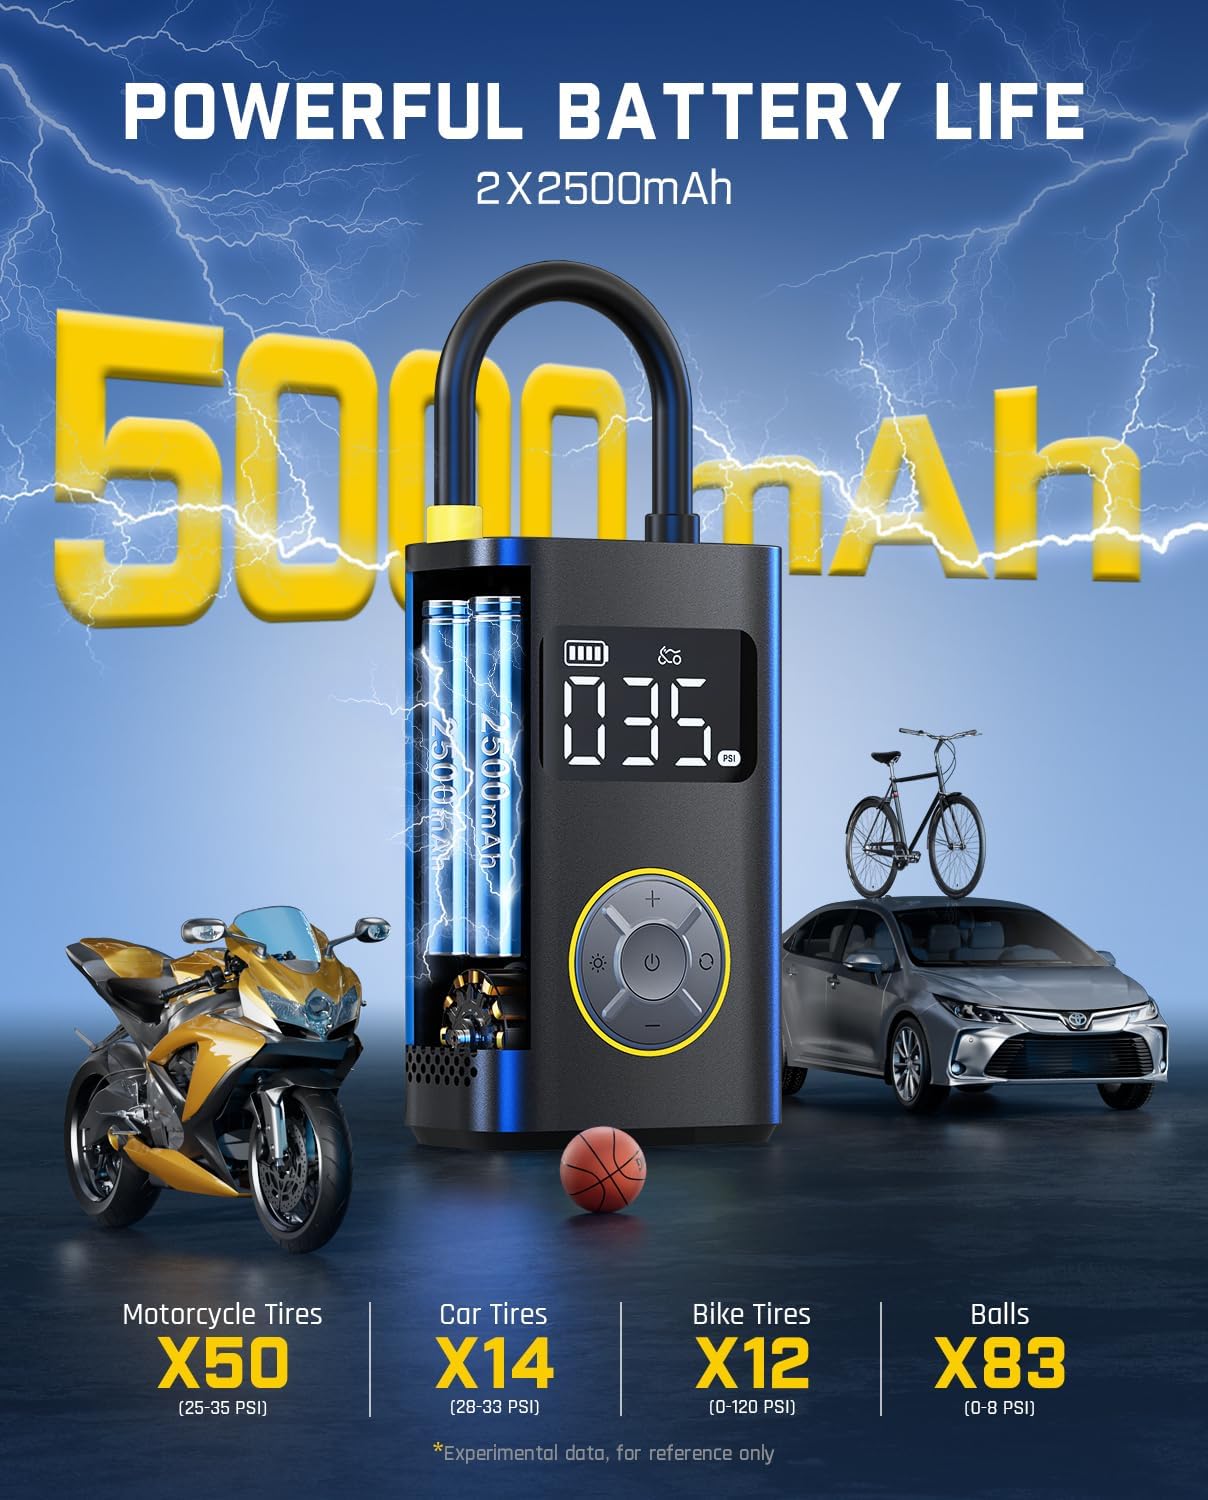
Figure 9: Fanttik X9 Pro Portable Tire Inflator battery capacity and usage examples.
This image showcases the "Powerful Battery Life" of the Fanttik X9 Pro Portable Tire Inflator, indicating a 5000mAh capacity (2x2500mAh cells). It provides examples of inflation capacity: Motorcycle Tires (X50, 25-35 PSI), Car Tires (X14, 28-33 PSI), Bike Tires (X12), and Balls (X83, 0-8 PSI), demonstrating its versatility and endurance.
7. Maintenance
- Cleaning: Wipe the devices with a soft, dry cloth. Do not use harsh chemicals or abrasive cleaners.
- Storage: Store both devices in a cool, dry place, away from direct sunlight and extreme temperatures.
- Charging: For optimal battery life, fully charge the devices every 3-6 months if not in regular use.
- Battery Care: Do not attempt to disassemble or replace the internal battery.
8. Troubleshooting
| Problem | Possible Cause | Solution |
|---|---|---|
| Jump Starter not turning on. | Battery is depleted. | Charge the jump starter fully. |
| Vehicle not starting after jump start attempt. | Incorrect clamp connection; Vehicle battery severely damaged; Jump starter low on charge. | Check clamp connections (red to +, black to -). Ensure jump starter is fully charged. If issues persist, consult a mechanic. |
| Tire Inflator not inflating. | Air hose not securely connected; Nozzle adapter blocked; Battery depleted. | Ensure all connections are tight. Check nozzle for obstructions. Charge the inflator fully. |
| Inaccurate pressure reading on inflator. | Loose connection; Sensor calibration needed. | Ensure the air hose is securely attached. If persistent, contact customer support. |
9. Specifications
| Feature | Fanttik T8 APEX Jump Starter | Fanttik X9 Pro Portable Tire Inflator |
|---|---|---|
| Peak Current | 2000 Amps | N/A |
| Engine Compatibility | Up to 8.5L Gas, 6.0L Diesel | N/A |
| USB-C Input/Output | PD 65W | Yes |
| Max Inflation Pressure | N/A | 150 PSI |
| Battery Capacity | 20000mAh (estimated from image) | 5000mAh (2x2500mAh) |
| Safety Features | Spark-Proof, Reverse Polarity Protection, IP65 Water-Resistant | Auto Shut-Off |
10. Warranty and Support
Fanttik products come with a manufacturer's warranty. Please refer to the warranty card included in your package for specific terms and conditions.
For technical support, troubleshooting assistance, or warranty claims, please contact Fanttik customer service through their official website or the retailer where the product was purchased.
You can visit the official Fanttik store on Amazon for more information: Fanttik Amazon Store


