
Important Safeguards
When using electrical appliances, basic safety precautions should always be followed, including the following:
- Read all instructions before operating the coffee maker.
- Do not touch hot surfaces. Use handles or knobs.
- To protect against fire, electric shock, and injury to persons, do not immerse cord, plugs, or coffee maker in water or other liquid.
- Close supervision is necessary when any appliance is used by or near children.
- Unplug from outlet when not in use and before cleaning. Allow to cool before putting on or taking off parts, and before cleaning the appliance.
- Do not operate any appliance with a damaged cord or plug, or after the appliance malfunctions or has been damaged in any manner. Contact customer support for examination, repair, or adjustment.
- The use of accessory attachments not recommended by the appliance manufacturer may result in fire, electric shock, or injury to persons.
- Do not use outdoors.
- Do not let cord hang over edge of table or counter, or touch hot surfaces.
- Do not place on or near a hot gas or electric burner, or in a heated oven.
- Always attach plug to appliance first, then plug cord into the wall outlet. To disconnect, turn any control to "off", then remove plug from wall outlet.
- Do not use appliance for other than intended use.
- The carafe is designed for use with this appliance. It must never be used on a range top.
- Do not place a hot carafe on a cold or wet surface.
- Do not use a cracked carafe or a carafe having a loose or weakened handle.
- Do not clean carafe with cleansers, steel wool pads, or other abrasive materials.
- This appliance has a grounded plug. Please ensure the wall outlet in your home is properly grounded.
- Boil-dry protection is included for safety.
Product Overview
Familiarize yourself with the components of your Swan SCM8B Coffee Maker before first use.
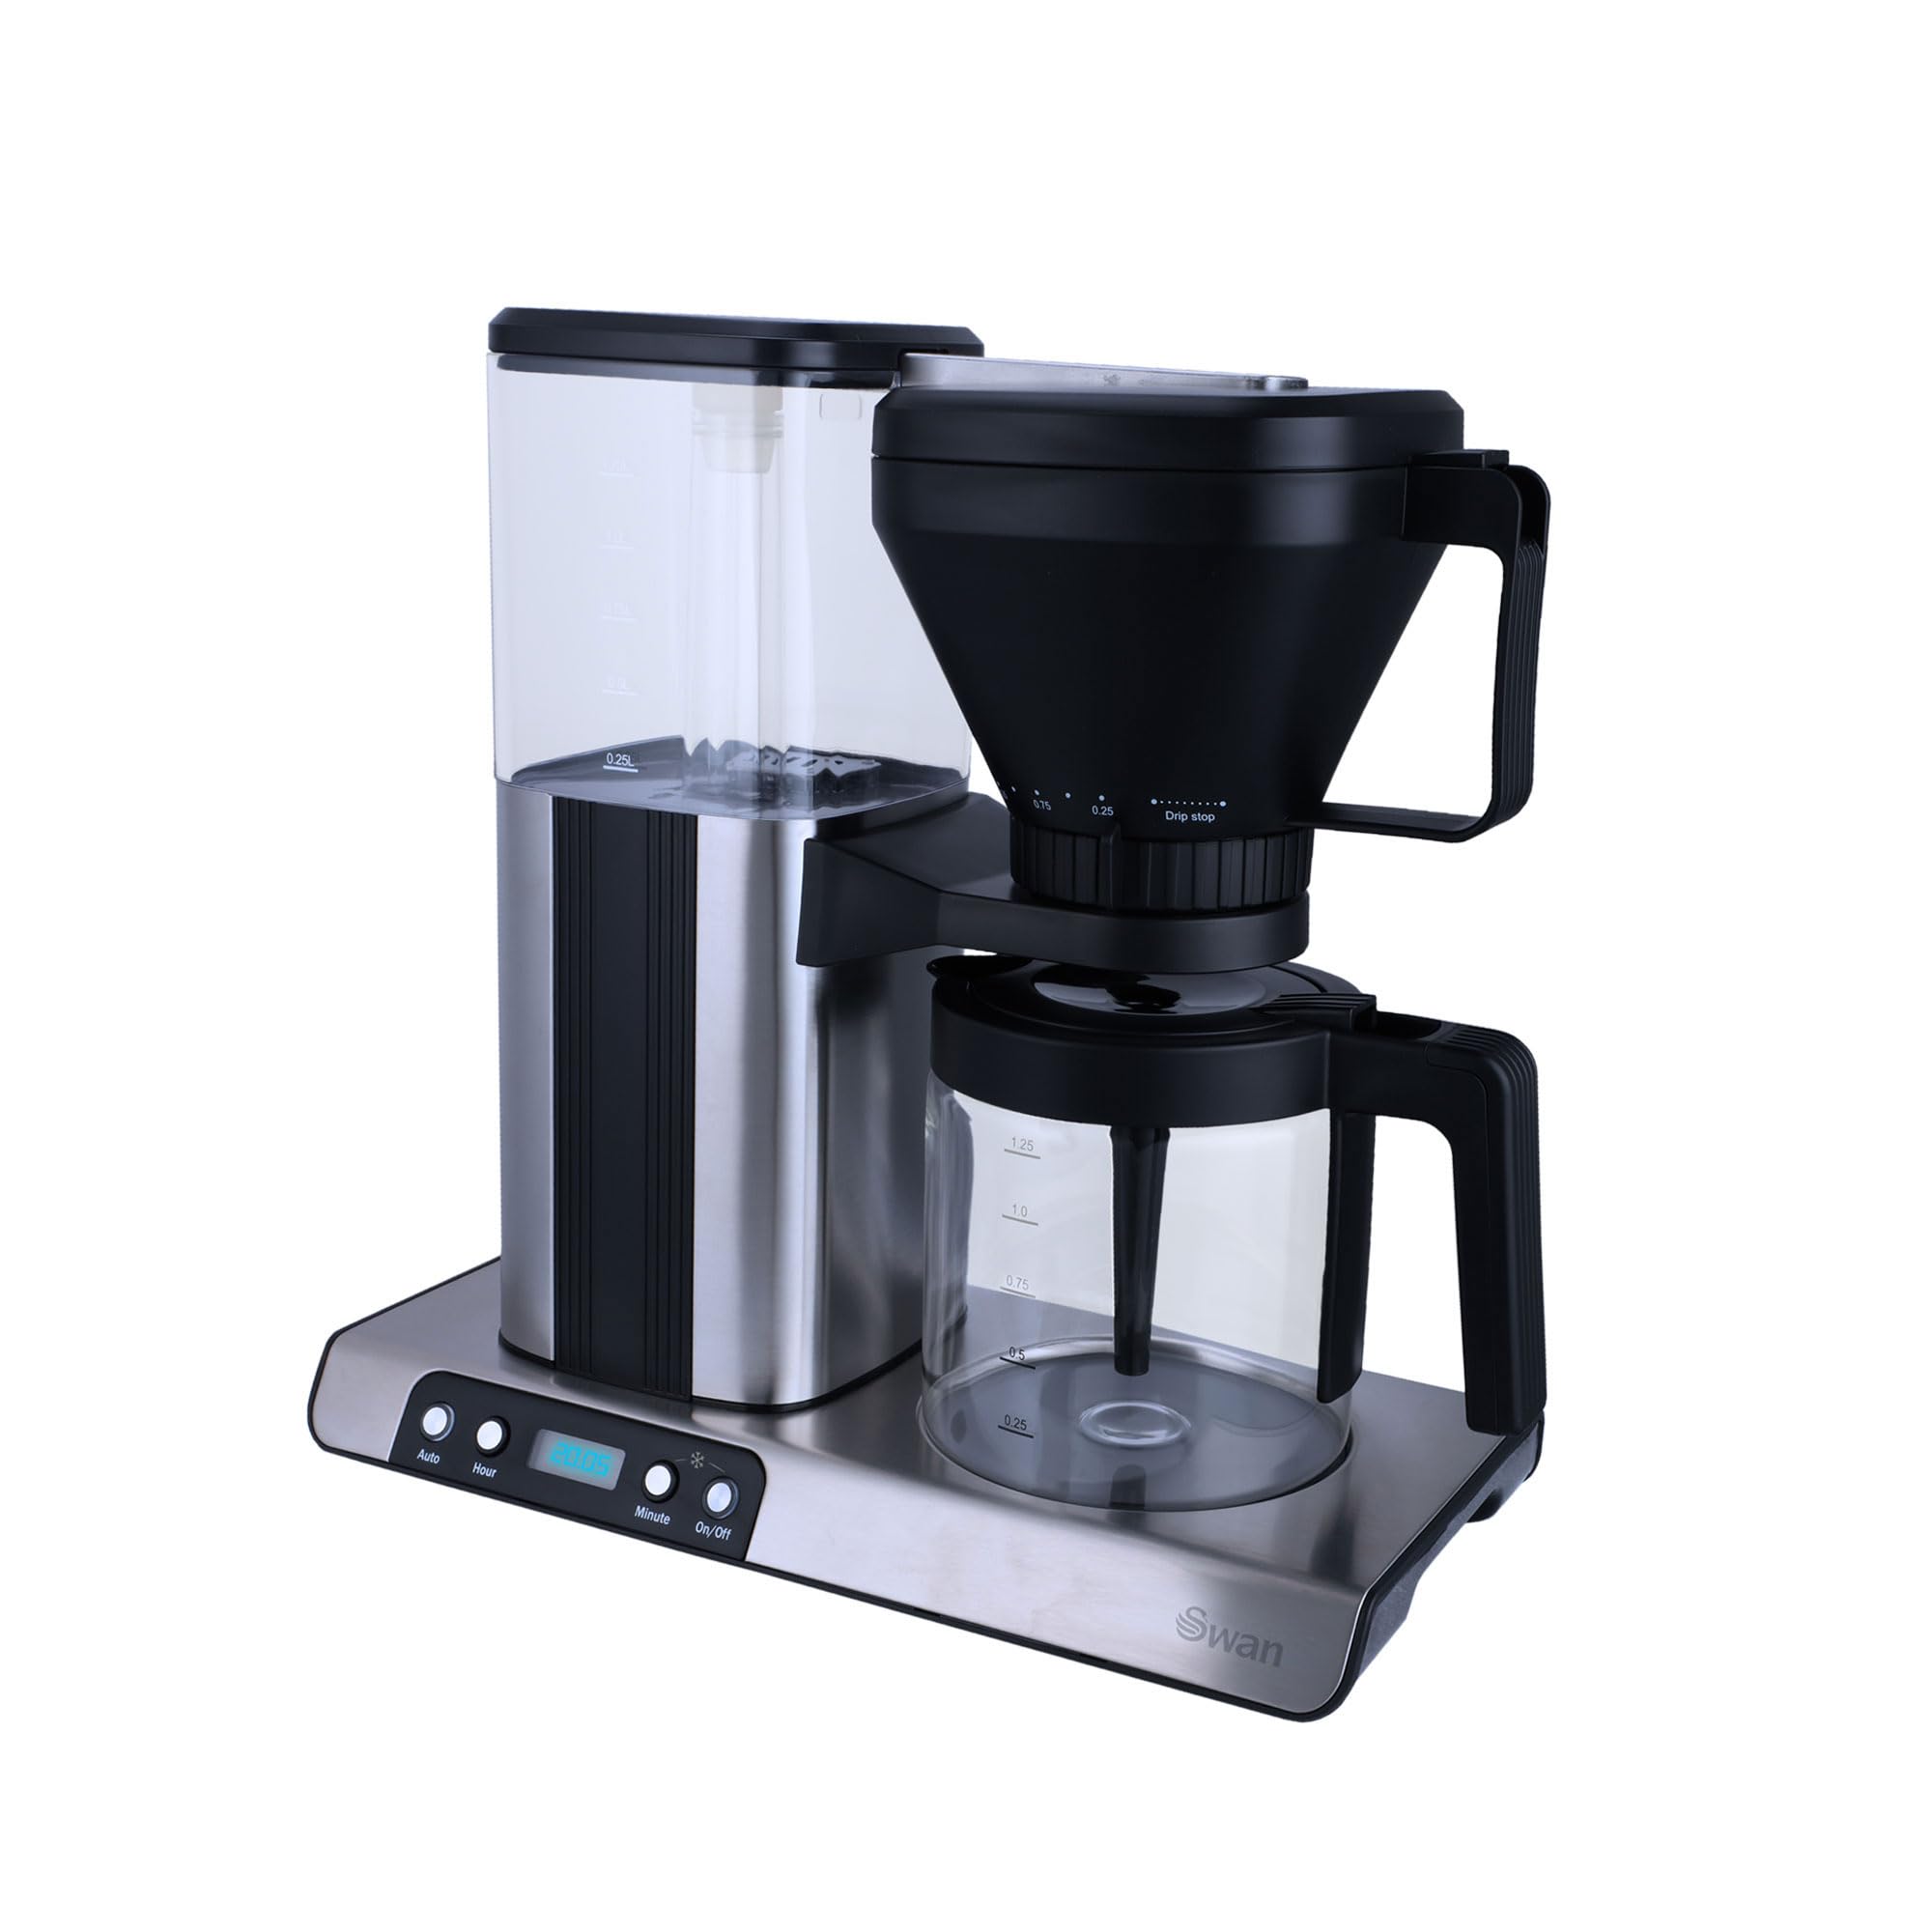
Image: The Swan SCM8B coffee maker, showing the water tank, filter funnel, glass carafe, and control panel.
- Water Tank (1.25L capacity)
- Water Level Indicator
- Upwards Removable Funnel with Strength Adjustment
- Filter Basket (reusable)
- Glass Carafe (high-temperature, dishwasher safe)
- Heating Plate
- Digital Control Panel with LCD Display
- On/Off Power Indicator Light
- Power Cord and Plug

Image: A detailed view of the coffee maker's base, highlighting the digital control panel and the Swan logo.
Setup
- Unpacking: Carefully remove all packaging materials and components. Retain packaging for future transport or storage.
- Initial Cleaning: Before first use, wash the glass carafe, funnel, and reusable filter basket in warm, soapy water. Rinse thoroughly and dry. Wipe the exterior of the coffee maker with a damp cloth.
- First Brew Cycle (Cleaning):
- Fill the water tank with clean water up to the MAX level (1.25L).
- Place the empty funnel and filter basket into position.
- Place the empty glass carafe on the heating plate.
- Plug the coffee maker into a grounded electrical outlet.
- Press the On/Off button to start a brewing cycle without coffee grounds.
- Allow the cycle to complete, then discard the water from the carafe. This cleans the internal system.
Operating Instructions
Brewing Drip Coffee
- Fill Water Tank: Open the water tank lid and fill with fresh, cold water up to the desired level, indicated by the water level indicator. Do not exceed the MAX line (1.25L).
- Add Coffee Grounds: Place the reusable filter basket into the funnel. Add the desired amount of ground coffee into the filter. A general guideline is one tablespoon of coffee per cup (150ml). Adjust according to personal preference.
- Adjust Coffee Strength: Use the strength adjustment function on the funnel to select your preferred coffee strength. Rotate the ring to the desired setting.
- Position Carafe: Ensure the glass carafe is correctly placed on the heating plate.
- Start Brewing: Plug in the appliance. Press the On/Off button. The indicator light will illuminate, and the brewing process will begin.
- Anti-Drip Function: The 30-second anti-drip function allows you to temporarily remove the carafe during brewing to pour a cup. Replace the carafe within 30 seconds to prevent overflow.
- Keep Warm: After brewing, the coffee maker will automatically switch to a 40-minute keep warm function. The heating plate will keep the coffee warm. After 40 minutes, the appliance will automatically shut off for safety.
Brewing Ice Coffee (Cold Brew Style)
This feature allows for a concentrated brew suitable for ice coffee. Follow the drip coffee steps with specific adjustments:
- Prepare Water and Coffee: Fill the water tank with the desired amount of cold water. Use a higher ratio of coffee grounds than for hot drip coffee to create a concentrate.
- Add Ice to Carafe: Fill the glass carafe with ice cubes before starting the brew cycle. This will rapidly cool the hot concentrate as it drips.
- Brew: Start the brewing process as you would for drip coffee. The hot water will extract the coffee, which will then drip onto the ice, creating an instant cold brew.
- Serve: Once brewing is complete, remove the carafe and serve over additional ice if desired.
Setting the 24-Hour Timer
The digital control panel allows you to program the coffee maker to start brewing at a specific time.
- Prepare Coffee Maker: Follow steps 1-3 for brewing drip coffee (fill water, add grounds, adjust strength).
- Set Current Time: Press the "Hour" button to set the current hour. Press the "Minute" button to set the current minute. The LCD display will show the time.
- Set Programmed Time: Press the "Auto" button. The display will flash. Use the "Hour" and "Minute" buttons to set the desired start time for brewing.
- Activate Timer: Press the "Auto" button again to confirm the programmed time. The "Auto" indicator light will illuminate, indicating the timer is active.
- The coffee maker will automatically start brewing at the set time.
Cleaning and Maintenance
Regular cleaning ensures optimal performance and extends the life of your coffee maker.
- Always Unplug: Before cleaning, always unplug the coffee maker from the power outlet and allow it to cool completely.
- Carafe, Funnel, Filter: Remove the glass carafe, funnel, and reusable filter basket. Wash them in warm, soapy water. The glass carafe is dishwasher safe. Rinse thoroughly and dry.
- Exterior: Wipe the exterior surfaces of the coffee maker with a soft, damp cloth. Do not use abrasive cleaners or scouring pads. Never immerse the main unit in water or any other liquid.
- Heating Plate: Wipe the heating plate with a damp cloth. Do not use abrasive materials that could scratch the surface.
- Descaling: Mineral deposits from water can build up over time and affect performance. Descale your coffee maker every 2-4 weeks, depending on water hardness and usage.
- Fill the water tank with a mixture of white vinegar and water (1:2 ratio).
- Place the empty carafe on the heating plate.
- Run a full brew cycle.
- After the cycle, let the solution sit in the carafe for 15 minutes, then discard.
- Run 2-3 cycles with clean water to rinse thoroughly and remove any vinegar taste.
Troubleshooting
| Problem | Possible Cause | Solution |
|---|---|---|
| Coffee does not brew. |
|
|
| Coffee tastes weak. |
|
|
| Coffee overflows from filter. |
|
|
| Coffee is not hot enough. |
|
|
Specifications
| Model Number | SCM8B |
| Brand | Swan |
| Wattage | 1100W |
| Capacity | 1.25 Litres (up to 10 cups) |
| Dimensions (D x W x H) | 28D x 34W x 28H centimetres |
| Material | Stainless Steel |
| Special Features | 24-hour Timer, 30-second Anti-drip, Strength Adjustment, 40-minute Keep Warm, Auto-shutoff, Boil-dry Protection |
| Included Components | 1 x Swan SCM8B 1100W Host Drip Coffee and Cold Brew Coffee Maker |
Warranty and Support
This Swan SCM8B Host Drip and Cold Brew Coffee Maker comes with a standard manufacturer's warranty. Please refer to the warranty card included in your product packaging for specific terms and conditions, including the warranty period and coverage details.
For technical support, troubleshooting assistance beyond this manual, or to inquire about replacement parts, please contact Swan customer service. Contact information can typically be found on the manufacturer's website or on the product packaging.
Please have your model number (SCM8B) and proof of purchase ready when contacting support.