1. Introduction
This manual provides detailed instructions for the installation, operation, and maintenance of your ASHATA H110 MATX Motherboard. Please read this manual thoroughly before installing or using the product to ensure proper functionality and to prevent damage.

Figure 1.1: Overview of the ASHATA H110 MATX Motherboard. This image displays the full layout of the motherboard, highlighting key components such as the CPU socket, RAM slots, PCIe slot, and various ports.
Key Features:
- CPU Support: LGA 1151 socket for 6th, 7th, 8th, and 9th Generation Intel Processors.
- Memory: Dual-channel DDR4 SO DIMM slots, supporting up to 64GB RAM.
- Expansion Slots: 1x PCIe 3.0 X16 slot, 1x M.2 slot (supports NGFF and NVME protocols, up to 32GB/s).
- Storage: SATA 3.0 interfaces for high-speed storage devices.
- Connectivity: HD Multimedia Interface, VGA, USB 3.0, USB 2.0, LAN, and Audio ports.
- Durability: All solid-state capacitance design for stable performance and extended lifespan.
2. Setup and Installation
Before beginning installation, ensure your system is powered off and disconnected from the power source. Handle the motherboard by its edges to avoid static discharge.
2.1 Motherboard Layout
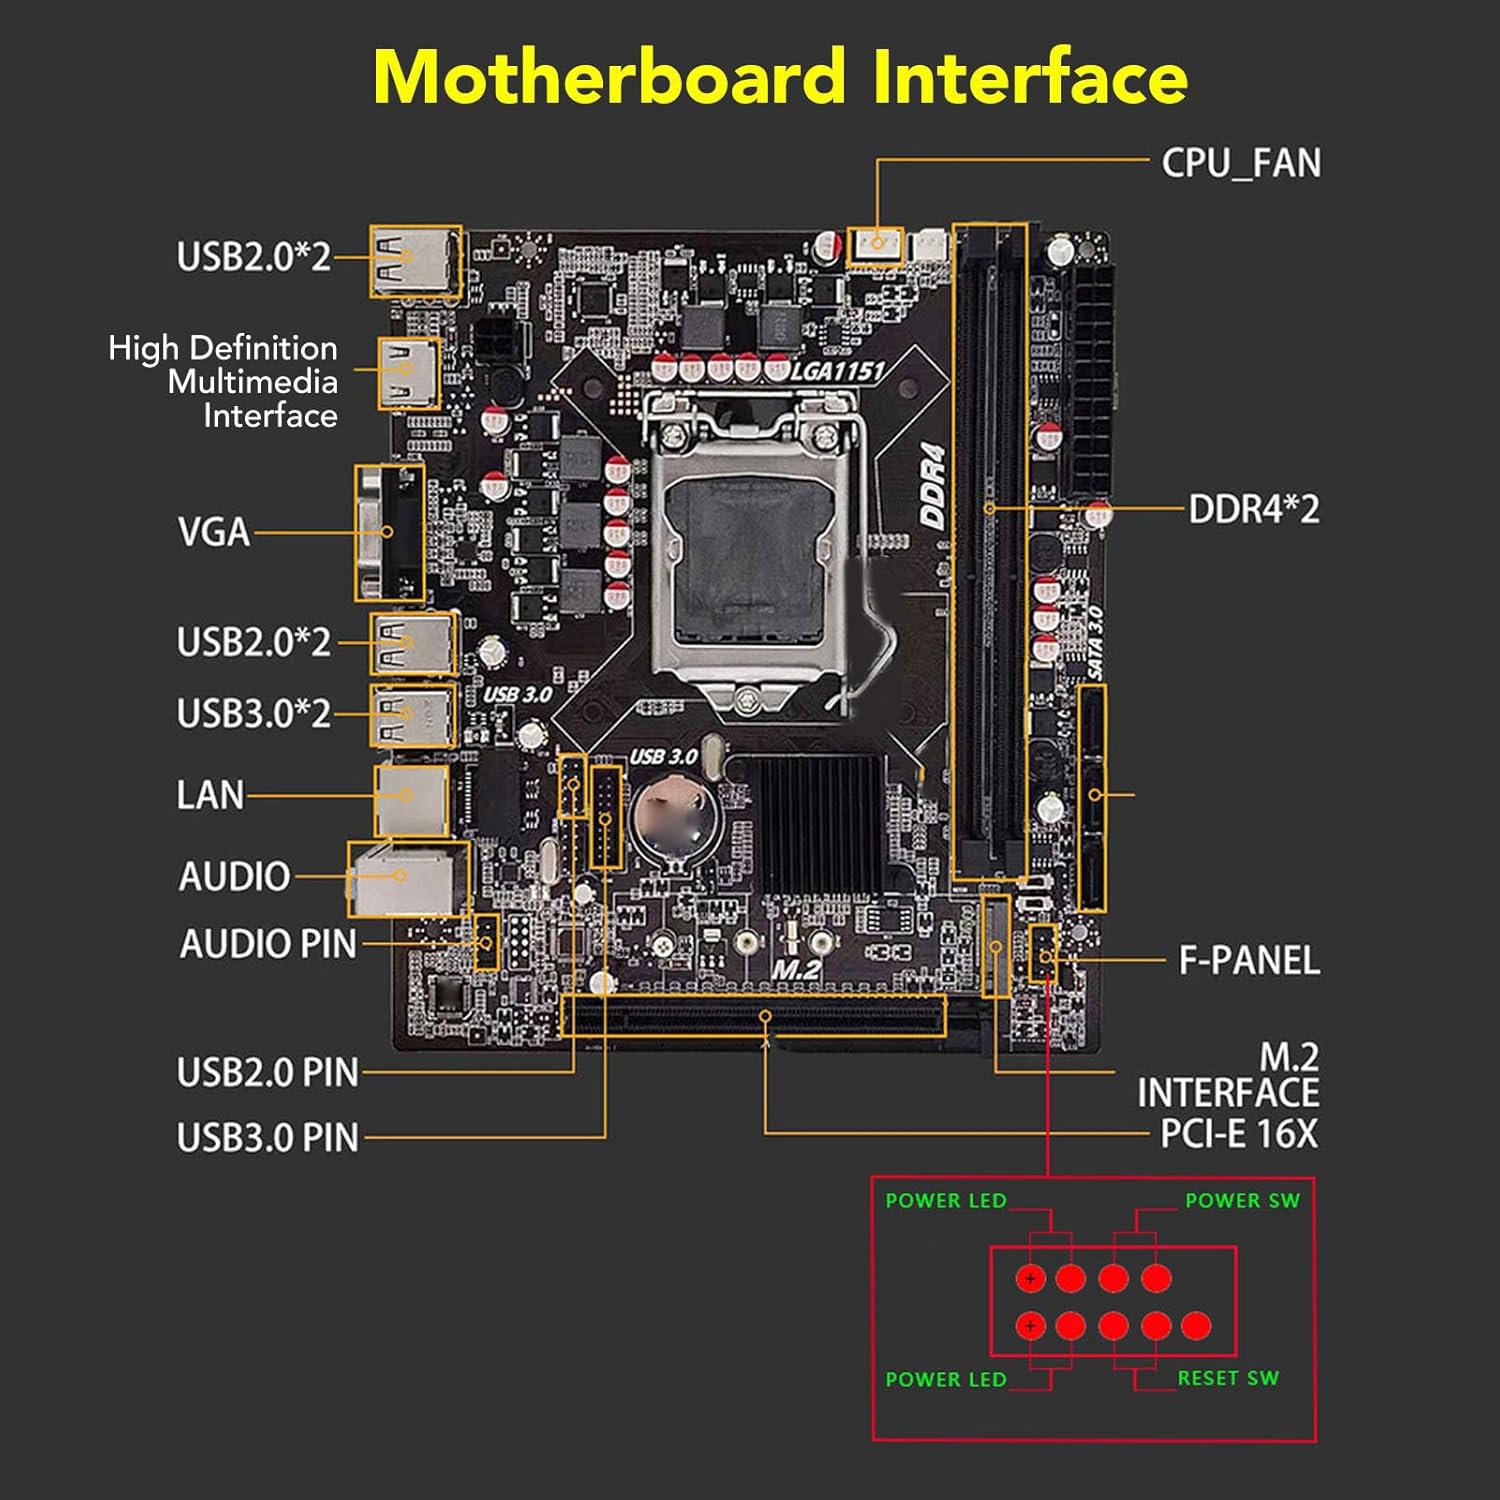
Figure 2.1: Detailed diagram of the ASHATA H110 Motherboard interfaces. This image labels all major ports and connectors, including CPU_FAN, DDR4 slots, USB ports, LAN, Audio, VGA, HD Multimedia Interface, M.2 interface, PCIe-E 16X, SATA 3.0, and front panel connectors.
2.2 CPU Installation
Follow these steps carefully to install the CPU into the LGA 1151 socket:

Figure 2.2: Step-by-step visual guide for CPU installation. This multi-panel image illustrates pressing down the wire buckle, lifting it, aligning the CPU with the bayonets, gently placing it, and securing it by lowering the wire buckle.
- Open Socket: Press down the wire buckle on the CPU socket and gently lift it upward. Do not remove the black protective cover before installing the CPU.
- Align CPU: Observe the three bayonets (alignment notches) in the CPU socket and on the CPU itself (often marked with a small triangle or dot). Align the left side of the CPU with the corresponding bayonet on the socket.
- Place CPU: Carefully place the CPU into the socket without applying force. It should sit flush.
- Secure CPU: Lower the wire buckle back down. The black protective cover will automatically eject as the buckle is secured. Ensure the CPU is firmly seated.
2.3 RAM (DDR4 SO DIMM) Installation
- Locate the DDR4 SO DIMM slots on the motherboard.
- Open the clips at both ends of the memory slot.
- Align the notch on the memory module with the key in the slot.
- Insert the memory module firmly into the slot until the clips snap into place.
2.4 M.2 SSD Installation
- Locate the M.2 slot on the motherboard.
- Remove the screw and stand-off from the M.2 slot.
- Insert the M.2 SSD into the slot at a 30-degree angle.
- Gently push the SSD down and secure it with the screw.
2.5 Connecting Peripherals
- Power Connectors: Connect the 24-pin ATX power connector and the 4-pin CPU power connector from your power supply to the motherboard.
- SATA Devices: Connect SATA data cables from your storage drives (HDDs/SSDs) to the SATA 3.0 ports on the motherboard.
- Front Panel Connectors: Connect the power switch, reset switch, power LED, and HDD LED cables from your computer case to the corresponding pins on the motherboard's front panel header (refer to Figure 2.1).
- USB Ports: Connect USB 2.0 and USB 3.0 headers from your case to the motherboard's internal USB pin headers.
- Audio: Connect the front panel audio cable to the audio header.
- Video Output: Connect your monitor to the HD Multimedia Interface or VGA port on the motherboard's rear I/O panel.
3. Operating Instructions
After successful installation, you can proceed with operating your system.
3.1 Initial Boot-up and BIOS Setup
- Ensure all components are correctly installed and connected.
- Connect your monitor, keyboard, and mouse.
- Power on your computer.
- During the boot process, press the designated key (usually DEL, F2, or F10) to enter the BIOS/UEFI setup utility.
- In the BIOS, you can configure boot order, system time, and other hardware settings. Save changes and exit to continue booting.
3.2 Operating System Installation
Once the BIOS is configured, you can install your preferred operating system (e.g., Windows, Linux) from a bootable USB drive or DVD. Follow the on-screen instructions provided by your operating system installer.
4. Maintenance
Proper maintenance can extend the lifespan and ensure optimal performance of your motherboard.
- Keep Clean: Regularly clean dust from inside your computer case using compressed air. Dust accumulation can lead to overheating.
- Ventilation: Ensure adequate airflow within your computer case. Keep vents clear and unobstructed.
- Firmware Updates: Periodically check the ASHATA official website for BIOS/UEFI updates. Updating firmware can improve compatibility and stability.
- Cable Management: Organize internal cables to improve airflow and prevent interference.
- Environmental Conditions: Operate the motherboard in a stable environment, avoiding extreme temperatures and humidity.
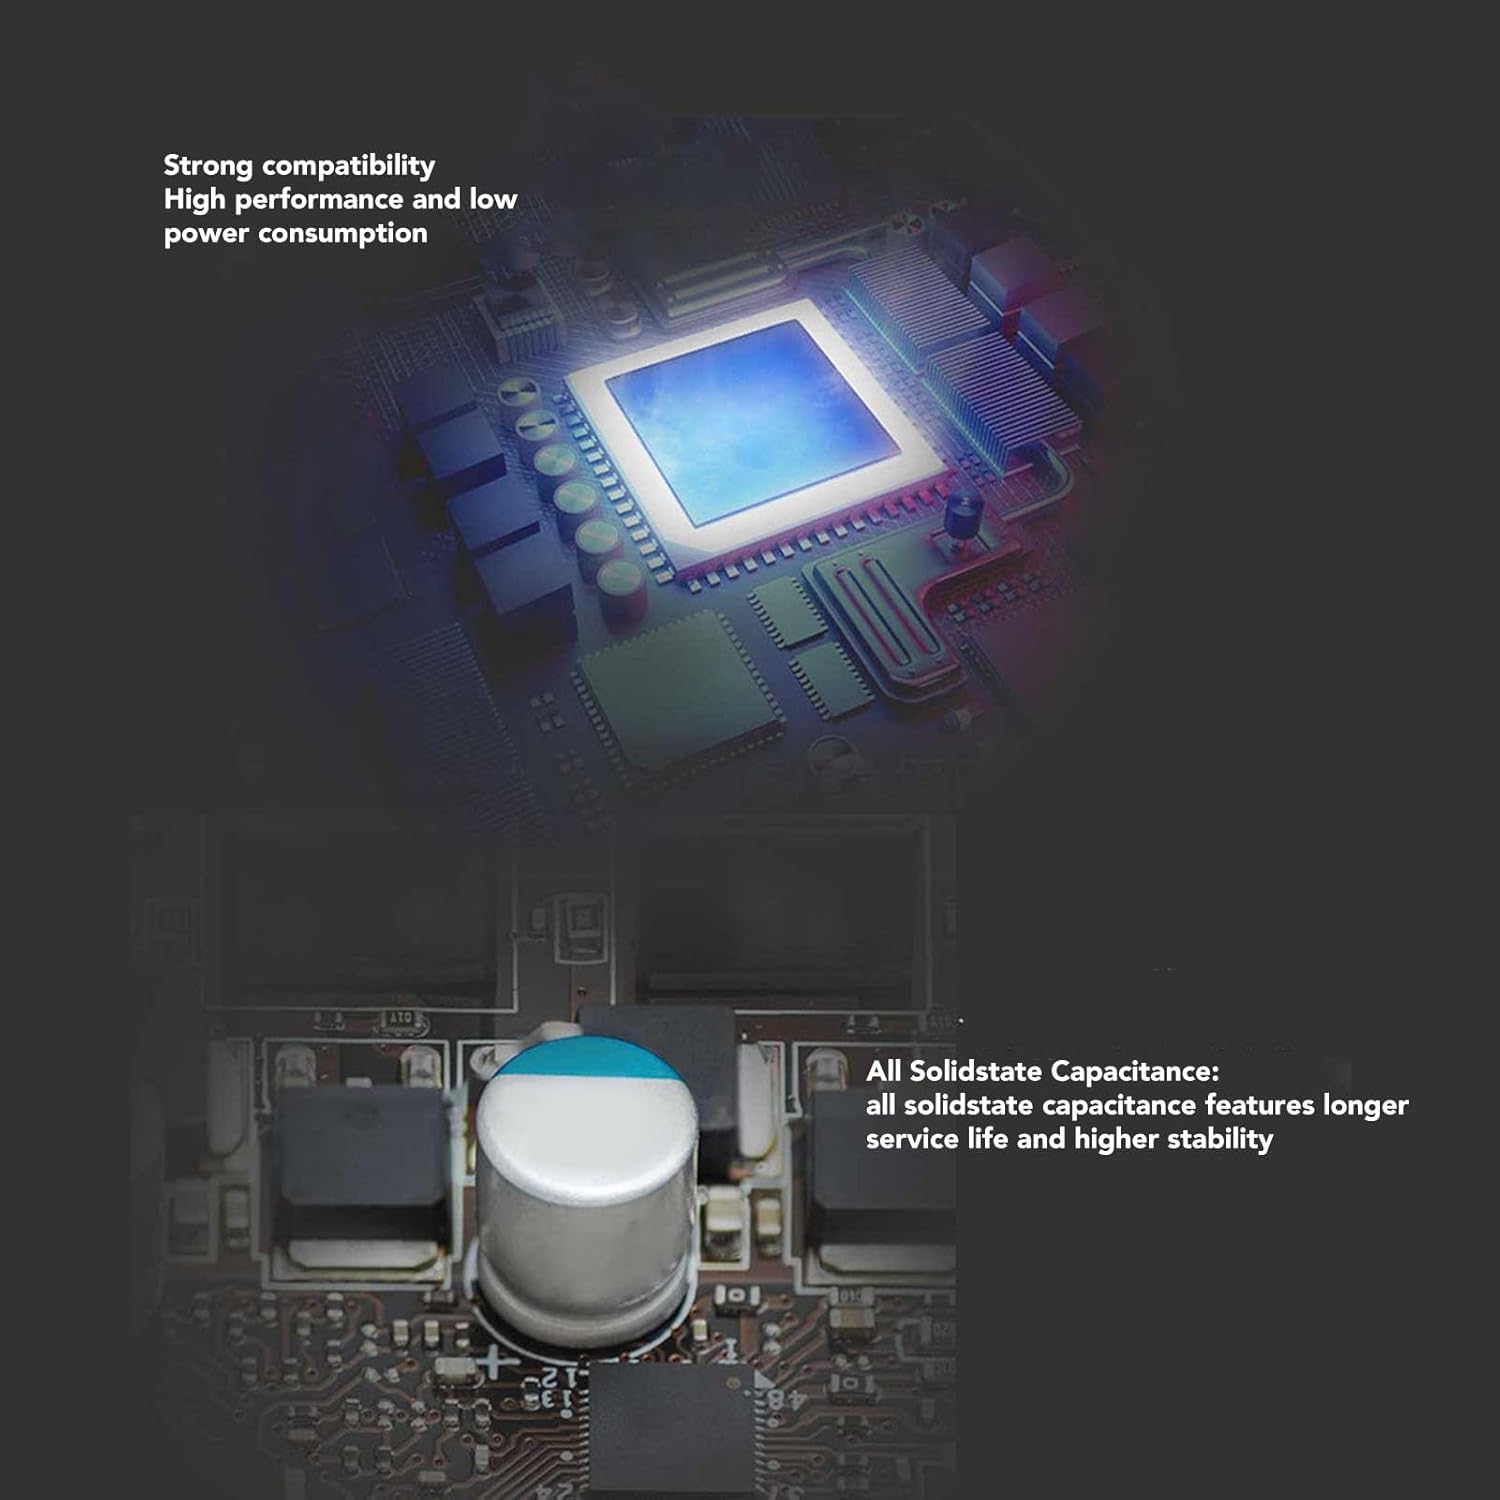
Figure 4.1: Close-up view of the all solid-state capacitors on the ASHATA H110 Motherboard. These components contribute to the motherboard's stability and longevity.
5. Troubleshooting
This section addresses common issues you might encounter.
5.1 No Power / No Display
- Check Power Connections: Ensure the 24-pin ATX and 4-pin CPU power connectors are securely plugged into the motherboard.
- Power Supply: Verify that your power supply unit (PSU) is functioning correctly and provides sufficient wattage for all components.
- Monitor Connection: Confirm the monitor is properly connected to the motherboard's video output and is powered on.
- RAM: Reseat the DDR4 memory modules. Try booting with only one module installed.
- CPU: Ensure the CPU is correctly seated in its socket and the CPU cooler is properly installed.
5.2 System Instability / Crashes
- Overheating: Check CPU and system temperatures. Ensure CPU cooler is properly installed and case fans are working.
- RAM Issues: Run a memory diagnostic tool to check for faulty RAM modules.
- Driver Updates: Ensure all system drivers (chipset, graphics, etc.) are up to date.
- BIOS Settings: Reset BIOS to default settings if you recently made changes.
5.3 M.2 SSD Not Detected
- Reseat SSD: Ensure the M.2 SSD is fully seated in its slot and secured.
- BIOS Settings: Check BIOS settings to ensure the M.2 slot is enabled and configured correctly (e.g., NVME mode if applicable).
- Compatibility: Verify that your M.2 SSD is compatible with the motherboard's M.2 slot (NGFF/NVME protocol support).
6. Specifications
Detailed technical specifications for the ASHATA H110 MATX Motherboard.
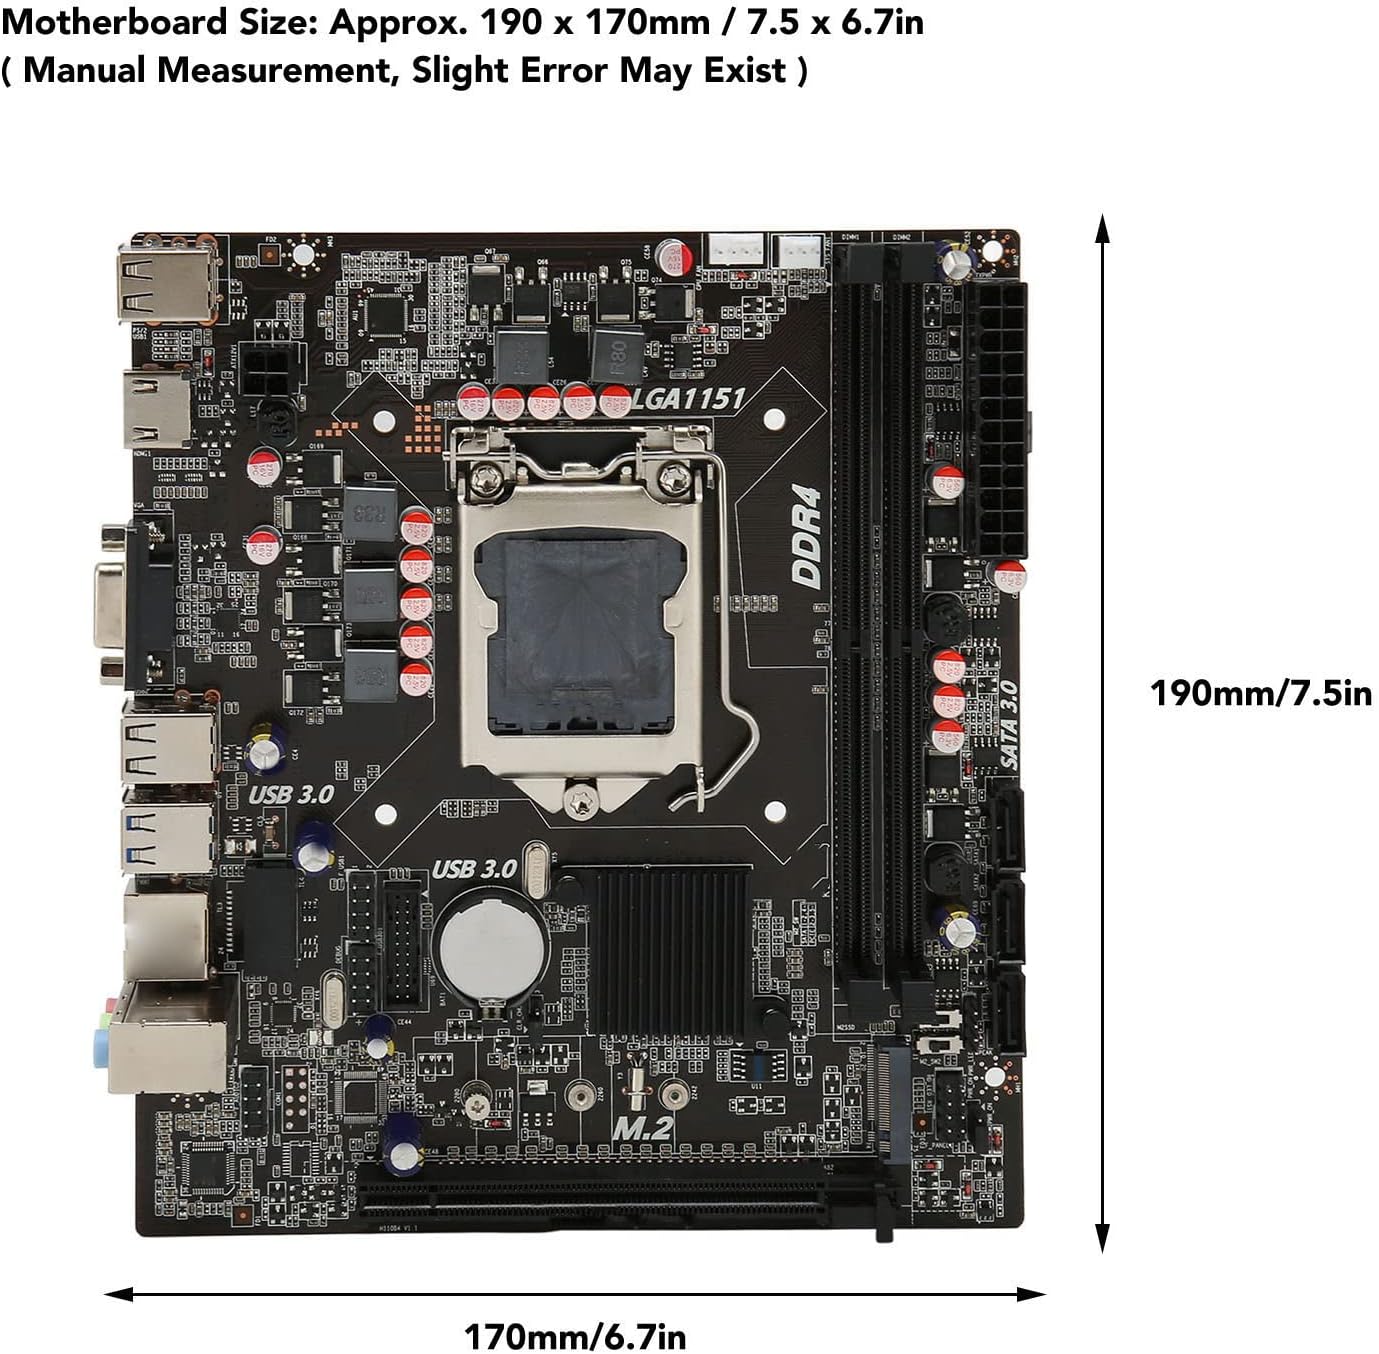
Figure 6.1: Physical dimensions of the ASHATA H110 MATX Motherboard, approximately 190 x 170mm (7.5 x 6.7 inches).
| Feature | Specification |
|---|---|
| Brand | ASHATA |
| Model Name | ASHATAyhda2grp4b |
| CPU Socket | LGA 1151 |
| Compatible Processors | LGA 1151 (6th/7th/8th/9th Gen) |
| Chipset Type | Intel H110 |
| RAM Memory Technology | DDR4 SO DIMM |
| Memory Clock Speed | 2133 MHz (Max) |
| Memory Storage Capacity | Up to 64 GB |
| PCIe Slot | 1x PCIe 3.0 X16 |
| M.2 Slot | 1x M.2 (NGFF/NVME protocol, 32GB/s) |
| SATA Interface | SATA 3.0 |
| Video Output | HD Multimedia Interface, VGA |
| USB Ports | USB 3.0, USB 2.0 |
| LAN | Yes |
| Audio | Yes |
| Form Factor | MATX |
| Product Dimensions | 7.48 x 7.5 x 6.69 inches (190 x 170mm) |
| Item Weight | 1.32 pounds |
| Platform | Linux (Compatible with Windows) |
7. Warranty and Support
7.1 Warranty Information
ASHATA products are typically covered by a limited warranty against defects in materials and workmanship. The specific duration and terms of the warranty may vary by region and retailer. Please retain your proof of purchase for warranty claims. For detailed warranty information, refer to the documentation included with your product or visit the official ASHATA website.
7.2 Technical Support
If you encounter any issues that cannot be resolved using this manual, please contact ASHATA customer support. You can typically find support contact information on the official ASHATA website or through your product retailer.
- Online Resources: Check the ASHATA website for FAQs, driver downloads, and additional support documents.
- Contact Support: Use the contact methods provided by ASHATA for direct assistance.


