
1. Introduction
This manual provides essential information for the proper installation, operation, and maintenance of your DD Audio LE-508.1 Subwoofer Enclosure. Please read this manual thoroughly before using the product to ensure optimal performance and longevity.
The LE-508.1 is a high-energy subwoofer enclosure designed to deliver powerful and clear bass. It features a single 8-inch driver within a durable enclosure, engineered for acoustic loading and protection.
2. Key Features
- Durable Construction: Features ¾” MDF construction with double layer front baffles and internal bracing for enhanced durability and sound integrity.
- Optimized Port Tuning: High flow 35Hz port tuning designed for deep and impactful bass reproduction.
- Speaker Protection: Equipped with full hex cut custom metal grills to protect the subwoofer from physical damage.
- High-Performance Driver: Loaded with a single 500 Series 8-inch driver featuring a 2.5-inch voice coil and 100 oz magnet for robust power handling.
- Easy Connectivity: Includes chrome-plated push terminals for secure and reliable audio connections.
- Acoustic Design: The large DD tuned rectangular port is side-fired to provide optimal acoustic loading across the entire power band.
3. Product Overview

Figure 3.1: Front view of the LE-508.1 subwoofer enclosure, showcasing the protective metal grill and the DD Audio branding.

Figure 3.2: Angled view of the LE-508.1, highlighting the chrome-plated push terminals for audio input connections on the side panel.
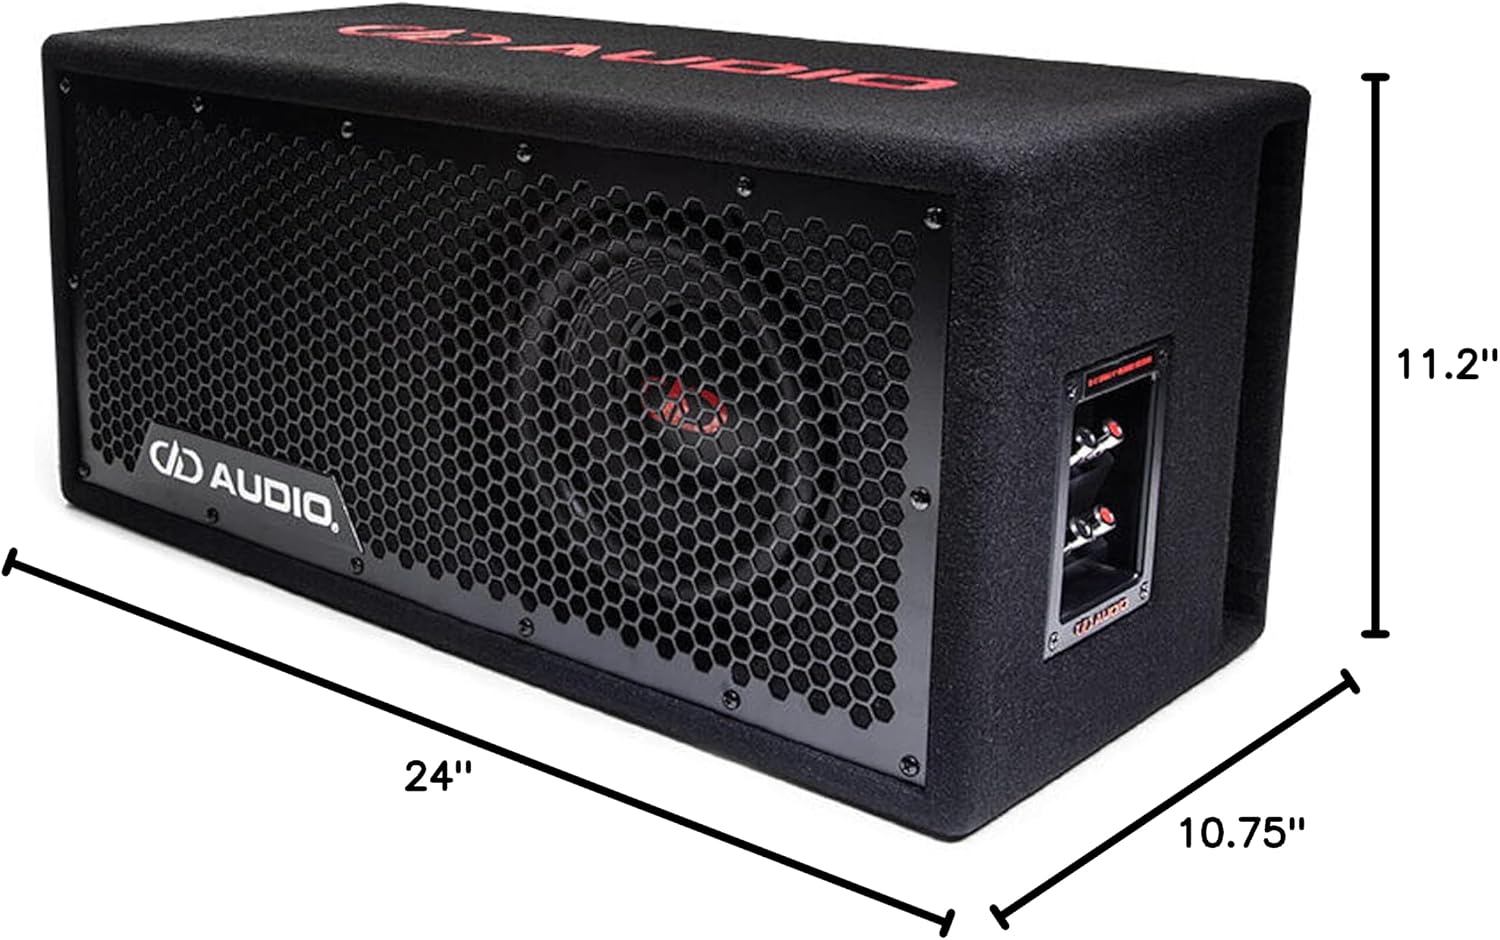
Figure 3.3: The LE-508.1 enclosure with its overall dimensions indicated: 24 inches (width), 10.75 inches (depth), and 11.2 inches (height).

Figure 3.4: Top-down schematic diagram of the LE-508.1, showing the single 8-inch speaker placement and the overall enclosure dimensions.
4. Setup and Installation
Proper installation is crucial for the performance and safety of your subwoofer. It is recommended that installation be performed by a qualified professional.
4.1 Placement
- Choose a stable, flat surface for placement. Ensure the enclosure is securely positioned to prevent movement during vehicle operation.
- Avoid placing the subwoofer in direct sunlight or near heat sources.
- Consider the acoustics of your vehicle. Experiment with different placements (e.g., trunk, behind seats) to find the optimal sound.
4.2 Wiring Connections
The LE-508.1 features chrome-plated push terminals for speaker wire connections. Ensure correct polarity (+ to + and - to -) when connecting to your amplifier.
- Power Connection: Connect the amplifier's positive (+) terminal to the vehicle's battery (via a fuse holder) and the negative (-) terminal to a solid chassis ground point.
- Remote Turn-On: Connect the amplifier's remote turn-on terminal to your head unit's remote output.
- RCA Audio Input: Connect RCA cables from your head unit's subwoofer output to the amplifier's RCA input.
- Speaker Output to Subwoofer: Connect the amplifier's speaker output terminals to the LE-508.1's push terminals. Ensure the wire gauge is appropriate for the power output of your amplifier.
Important: Always disconnect the vehicle's battery before making any electrical connections. Refer to your amplifier's manual for specific wiring diagrams and safety precautions.
5. Operating Instructions
Once installed, follow these general guidelines for operating your subwoofer system:
- Initial Power-Up: After all connections are made, reconnect the vehicle's battery. Turn on your head unit and amplifier.
- Gain Setting: Adjust the gain control on your amplifier carefully. Start with the gain at minimum and slowly increase it until the desired volume is achieved without distortion. Over-gaining can damage the subwoofer.
- Crossover Settings: Set the low-pass filter (LPF) on your amplifier or head unit to filter out frequencies above the subwoofer's optimal range (typically 80-120 Hz). This ensures the subwoofer only plays bass frequencies.
- Phase Control: If your amplifier has a phase switch (0°/180°), experiment with both settings to find the one that provides the most cohesive bass response with your main speakers.
- Break-in Period: Allow a break-in period of approximately 20-30 hours of normal listening before playing the subwoofer at maximum output. This allows the suspension components to loosen up and perform optimally.
6. Maintenance and Care
To ensure the longevity and optimal performance of your LE-508.1 subwoofer enclosure, follow these maintenance guidelines:
- Cleaning: Use a soft, dry cloth to wipe down the enclosure. For stubborn dirt, a slightly damp cloth can be used, but ensure no moisture enters the speaker cone or terminals. Do not use harsh chemicals or abrasive cleaners.
- Protection: The metal grill provides protection, but avoid placing heavy objects on the enclosure or exposing it to sharp impacts.
- Environmental Conditions: While designed for vehicle use, avoid prolonged exposure to extreme temperatures or excessive moisture. The product is not waterproof.
- Connection Check: Periodically check all wiring connections to ensure they are secure and free from corrosion. Loose connections can lead to poor performance or damage.
7. Troubleshooting
If you experience issues with your LE-508.1 subwoofer, refer to the following common problems and solutions:
| Problem | Possible Cause | Solution |
|---|---|---|
| No Sound from Subwoofer |
|
|
| Distorted or Weak Bass |
|
|
| Subwoofer Overheating |
|
|
If the problem persists after attempting these solutions, contact DD Audio customer support or a qualified car audio technician.
8. Specifications
| Feature | Specification |
|---|---|
| Model Name | LE-508.1 |
| Speaker Size | 8 inches |
| Watts RMS | 500W |
| Watts Peak | 1000W |
| Impedance | D1 |
| Voice Coil Diameter (VCD) | 2.5 inches |
| Magnet Weight | 100 oz |
| Enclosure Dimensions (H x W x D) | 10.75" H x 24" W x 11.2" D |
| Item Weight | 41 Pounds |
| Recommended Uses | For Surround Sound Systems |
| Connectivity Technology | RCA |
| Mounting Type | Tabletop Mount (referring to the enclosure's base) |
9. Warranty and Support
DD Audio products are manufactured to high-quality standards. For specific warranty terms and conditions, please refer to the warranty information provided with your purchase or visit the official DD Audio website. Keep your proof of purchase for warranty claims.
For technical support, troubleshooting assistance beyond this manual, or service inquiries, please contact DD Audio customer support directly. Contact information can typically be found on the manufacturer's website or product packaging.