1. Introduction
Thank you for choosing the WEST TUNE Paper Towel Holder Wall Mount with Shelf. This manual provides essential information for the proper installation, operation, and maintenance of your new product. Please read these instructions carefully before use and retain them for future reference.
2. Product Features
- Versatile Design: Modern minimalist style suitable for various decor, ideal for kitchens, bathrooms, and living spaces.
- Durable Construction: Crafted from high-quality stainless steel with a matte black coating, ensuring waterproof, dustproof, moisture-proof, rustproof, and corrosion-resistant properties.
- Single-Hand Operability: Features an upgraded ratchet design that provides resistance, allowing for easy, one-handed tearing of paper towels.
- Integrated Shelf: A multifunctional shelf increases storage space for kitchen or bathroom essentials. The matte surface is stain-resistant and easy to clean. An anti-falling upper lip prevents items from sliding off.
- Dual Installation Options: Can be installed using either self-adhesive pads or screws, accommodating different wall types.

Figure 1: Paper Towel Holder with Damping Effect

Figure 2: Single-Hand Operable Ratchet Design
3. Package Contents
Please verify that all components are present before beginning installation:
- 1 x WEST TUNE Paper Towel Holder with Shelf
- 1 x Set of Self-Adhesive Pads (pre-applied or separate)
- 1 x Set of Screws and Wall Anchors for drilled installation

Figure 3: Product Components and Installation Options
4. Specifications
| Attribute | Specification |
|---|---|
| Material | Stainless Steel |
| Color | Matte Black |
| Mounting Type | Wall Mount (Adhesive or Drilled) |
| Product Dimensions | 3.9"L x 12.2"W |
| Item Weight | 1.68 pounds |
| Applicable Inner Diameter (Paper Roll) | 1.3" - 2.2" |
| Applicable External Diameter (Paper Roll) | 1.38" - 4.25" |
5. Safety Information
- Ensure the installation surface is clean, dry, and structurally sound before mounting.
- When drilling, use appropriate safety gear, including eye protection. Verify there are no hidden electrical wires or plumbing pipes behind the wall.
- Do not overload the shelf beyond its intended capacity to prevent damage or injury.
- Keep small parts and tools out of reach of children.
6. Setup (Installation)
Choose the appropriate installation method based on your wall surface.
6.1. Self-Adhesive Installation (for Smooth Surfaces)
This method is suitable for smooth surfaces such as marble, metal, wood, and glass.
- Clean and dry the desired installation area thoroughly.
- Peel off the protective film from the back of the adhesive pads on the paper towel holder.
- Press the holder firmly against the wall for at least 30 seconds to ensure good adhesion.
- Important: Wait 24 hours before hanging any items or placing a paper towel roll to allow the adhesive to fully cure.

Figure 4: Self-Adhesive Backing
6.2. Drilled Installation (for Rough or Uneven Surfaces)
This method is recommended for rough surfaces, paint walls, powder walls, or wallpaper.
- Mark the desired drilling points on the wall using the holder as a template.
- Drill holes at the marked positions. Insert the wall anchors into the drilled holes.
- Align the holder with the holes and secure it to the wall using the provided screws.

Figure 5: Drilled Installation Components
Video 1: Step-by-step demonstration of the paper towel holder installation process.

Figure 6: Recommended Surfaces for Each Installation Method
7. Operating Instructions
7.1. Loading a Paper Towel Roll
Slide a standard-sized paper towel roll onto the holder rod. Ensure the roll is centered and spins freely. The internal damping mechanism will provide slight resistance.
7.2. Tearing Paper Towels
Pull the desired amount of paper towel downwards. The ratchet design creates tension, allowing you to tear off a single sheet with one hand without the entire roll unraveling.
7.3. Using the Integrated Shelf
The top shelf can be used to store small items such as spices, cleaning supplies, diffusers, or decorative plants. The raised lip helps prevent items from falling.

Figure 7: Paper Towel Holder with Items on Shelf
8. Maintenance
To maintain the appearance and functionality of your paper towel holder:
- Clean regularly with a soft, damp cloth.
- Avoid using abrasive cleaners or harsh chemicals, as these can damage the matte black finish.
- The stainless steel construction is designed to be waterproof and rust-resistant, making it suitable for damp environments.
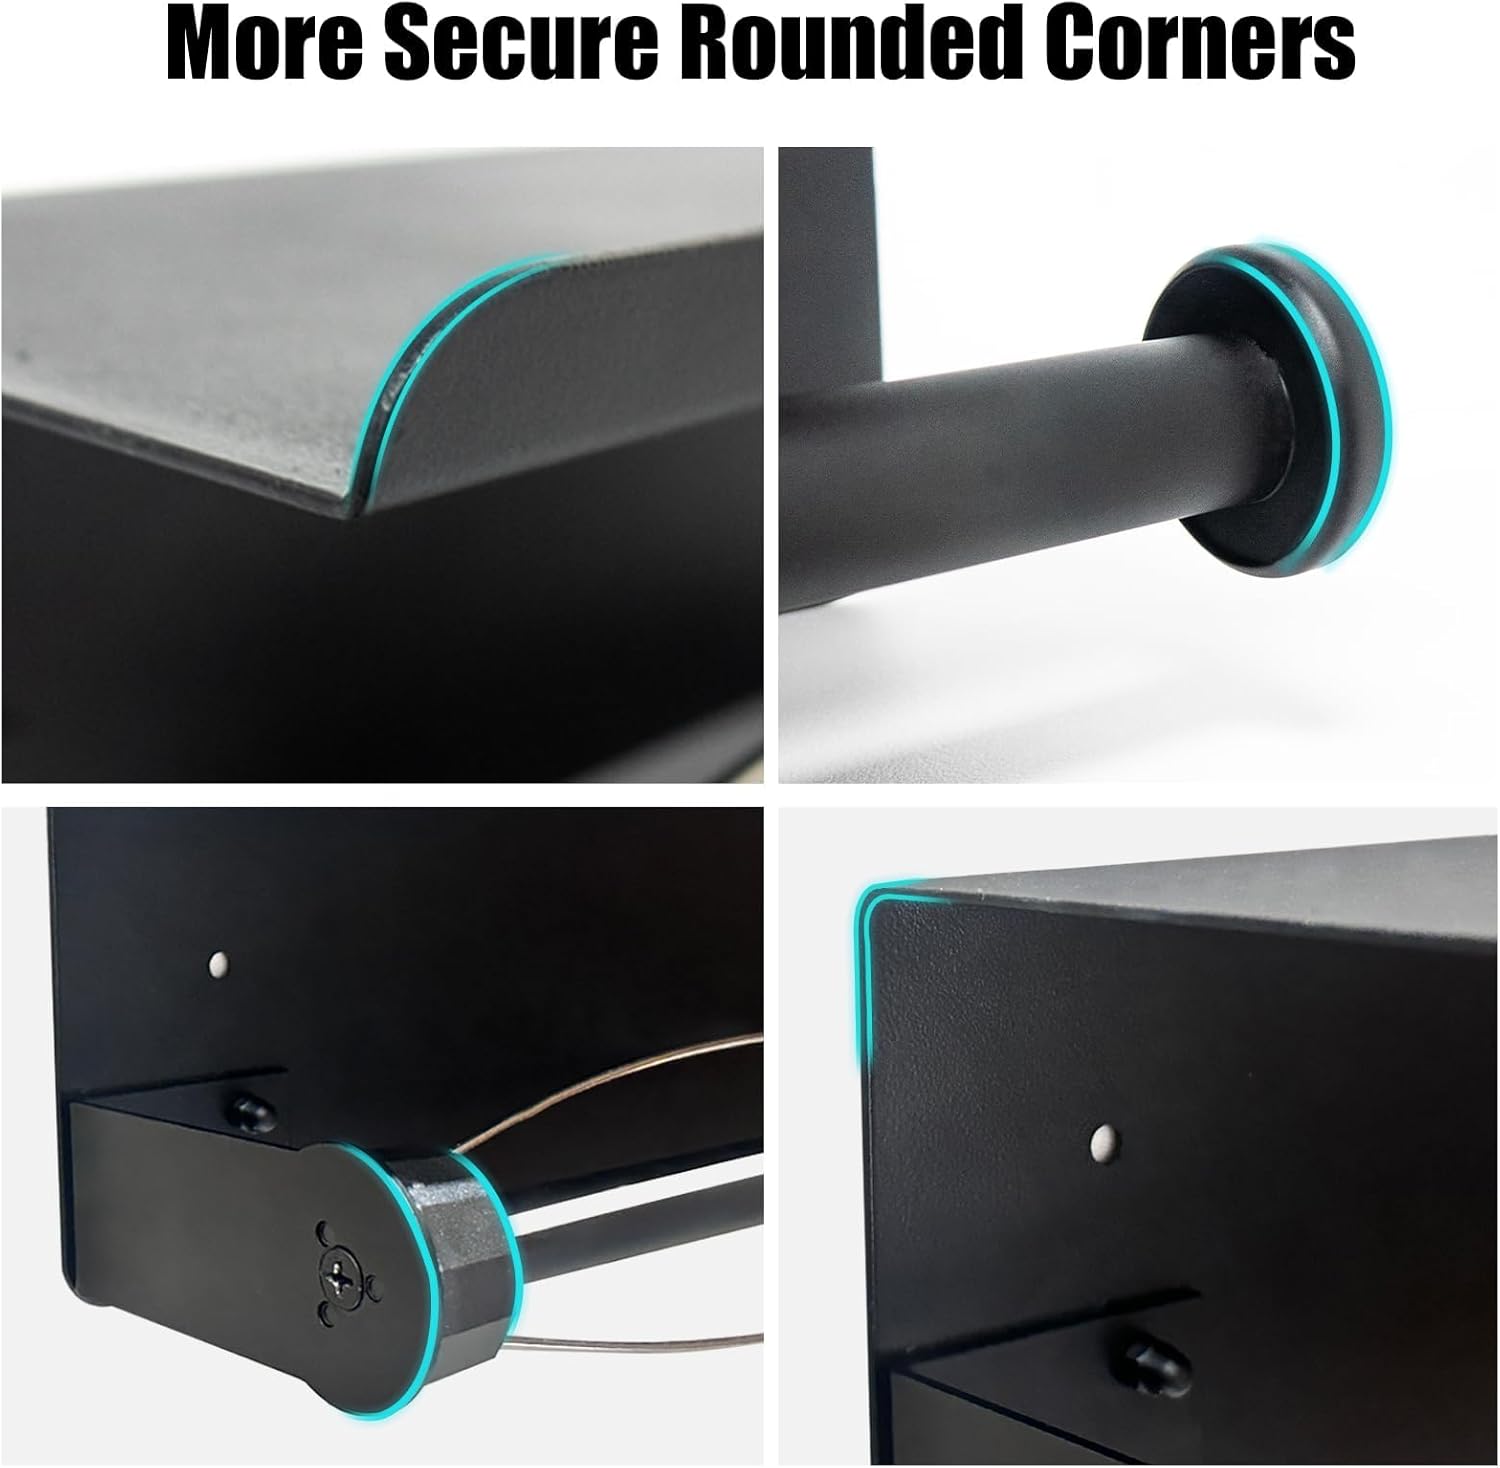
Figure 8: Waterproof Feature
9. Troubleshooting
- Issue: Paper towel roll does not fit or rotate freely.
Solution: Ensure your paper towel roll's inner diameter is between 1.3" and 2.2" and its external diameter is between 1.38" and 4.25". Rolls exceeding these dimensions may not fit or function correctly. - Issue: Holder is not securely attached to the wall (adhesive method).
Solution: Ensure the surface was thoroughly cleaned and dried before application. Allow the adhesive to cure for a full 24 hours before placing any weight on the holder. For heavy loads or if the adhesive fails, consider using the drilled installation method. - Issue: Holder is not securely attached to the wall (drilled method).
Solution: Verify that the screws are tightened properly and that the wall anchors are correctly installed in suitable wall material. - Issue: Paper towel tears unevenly or with difficulty.
Solution: Check if the paper towel roll is properly seated on the rod and not obstructed. The damping mechanism should provide consistent tension.
10. Warranty and Support
WEST TUNE is committed to providing high-quality products. If you have any questions, concerns, or dissatisfaction with your product, please contact our customer service team. We aim to provide a satisfactory solution within 24 hours of your inquiry.


