
1. Introduction
Thank you for choosing the Tesvor S7PRO AES Robot Vacuum Cleaner. This advanced, fully automatic robot vacuum is designed to intelligently and reliably clean your home, featuring a self-cleaning station for ultimate convenience. Its modern AES technology ensures complete self-cleaning in just 10 seconds at its cleaning station, which also serves as its charging base.
This manual provides detailed instructions on how to set up, operate, and maintain your Tesvor S7PRO AES to ensure optimal performance and longevity.
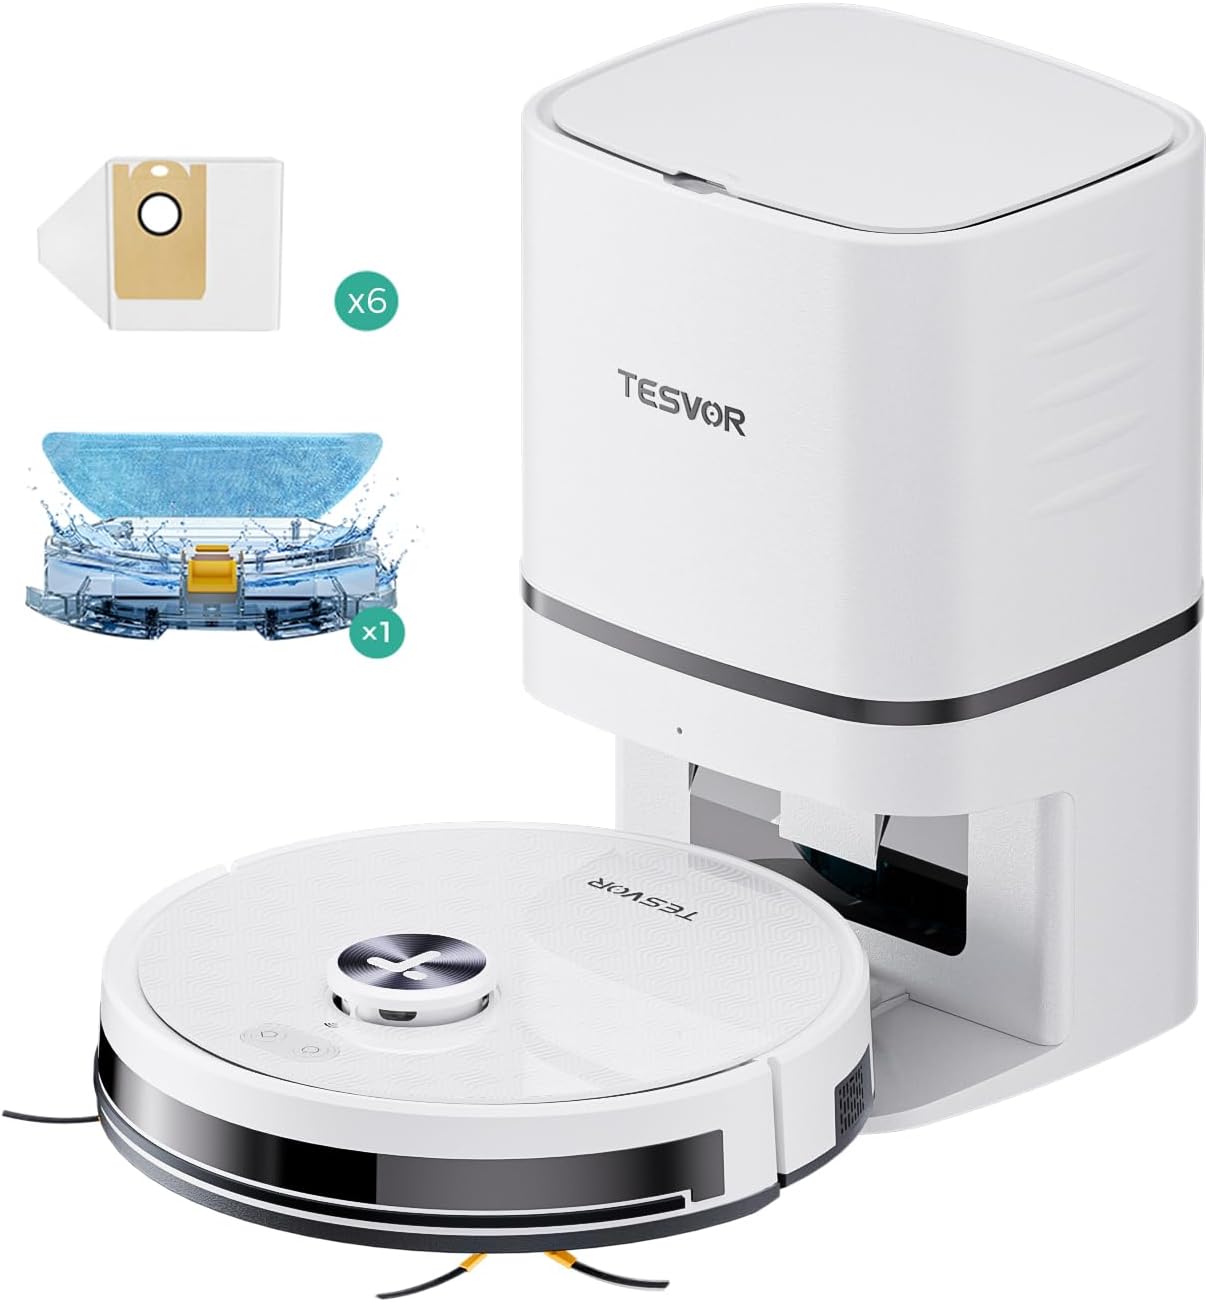
Figure 1.1: The Tesvor S7PRO AES Robot Vacuum Cleaner with its automatic dust emptying and charging station, along with included accessories like dust bags and a mopping pad.
2. Setup
2.1 Unpacking and Components
Carefully remove all components from the packaging. Please refer to the diagram below to ensure all parts are present.

Figure 2.1: Original scope of delivery including the S7 Pro robot vacuum, suction station, power cable, side brushes, dust bags, mopping pads, water tank, special dust box, and remote control.
2.2 Charging Station Placement
Place the charging station on a hard, level surface against a wall. Ensure there is at least 1 meter (3.3 feet) of clear space to the front and 0.5 meters (1.6 feet) to each side of the station to allow the robot to dock easily. Connect the power cable to the charging station and plug it into a power outlet.

Figure 2.2: The intelligent two-in-one suction station handles both automatic dust disposal and charging for the robot vacuum.
2.3 Initial Charging
Place the robot vacuum onto the charging station. Ensure the charging contacts on the robot align with those on the station. The robot will begin charging automatically. For first-time use, it is recommended to fully charge the robot before its initial cleaning cycle.
2.4 App Download and Connection
Download the "Tesvor" app from your smartphone's app store (iOS or Android). Follow the in-app instructions to connect your robot vacuum to your home Wi-Fi network. This will enable advanced features such as cleaning scheduling, map management, and remote control.
3. Operating Instructions
3.1 Starting and Stopping Cleaning
- Start Cleaning: Press the power button on the robot or use the "Start Cleaning" option in the Tesvor app. The robot will begin its cleaning cycle.
- Pause/Resume: Press the power button once during cleaning to pause. Press again to resume.
- Return to Station: Press and hold the power button for a few seconds, or use the "Return to Dock" option in the app, to send the robot back to its charging station.
3.2 Cleaning Modes
The Tesvor S7PRO AES offers versatile cleaning options:
- Vacuuming: The robot uses its powerful 6000 Pa suction to clean floors. It automatically adjusts suction power based on floor type (e.g., carpets).
- Mopping: Replace the dust box with the water tank and mopping pad. The robot will then mop the floor. You can adjust the water flow level via the app.
- Vacuuming & Mopping (Two-in-One): The robot can perform both functions simultaneously when the water tank and mopping pad are attached.

Figure 3.1: The Tesvor S7PRO AES demonstrates its impressive 6000 Pa suction power, effectively removing household debris from hard floors.

Figure 3.2: To enable mopping, simply replace the special dust box with the water tank. The suction station is only for dust collection.
3.3 Using the Tesvor App
The Tesvor app provides comprehensive control and customization options:
- Mapping: The robot uses Laser-LiDAR navigation to precisely map your rooms, creating a dynamic map within the app.
- Cleaning Schedule: Set specific cleaning times and days for different rooms or areas.
- No-Go Zones/Virtual Walls: Define areas the robot should avoid (e.g., pet bowls, delicate furniture).
- Cleaning Modes & Suction Power: Select various cleaning modes and adjust suction power or water flow.
- Real-time Monitoring: View the robot's cleaning path and status in real-time.

Figure 3.3: The Tesvor app records all cleaning paths and creates a map of your home, allowing for convenient viewing and management of cleaning zones.
3.4 Voice Control Integration
After integrating your robot vacuum into your network via the app, you can control it using voice commands through Amazon Alexa or Google Home.
- Example Commands:
- "Alexa, turn on the vacuum cleaner."
- "Hey Google, tell [robot name] to go home."
4. Maintenance
Regular maintenance ensures your Tesvor S7PRO AES operates efficiently and extends its lifespan.
4.1 Dustbin Emptying and Dust Bag Replacement
The robot automatically empties its internal dustbin into the self-emptying station's dust bag.
- Dust Bag Replacement: The dust bag in the self-emptying station should be replaced when full. A dust bag allows for at least 30 days of use. The app may notify you when it's time to replace it.
- How to Replace: Open the lid of the self-emptying station, carefully remove the full dust bag, and insert a new one. Close the lid securely.

Figure 4.1: The self-emptying station uses a disposable dust bag. Ensure you have spare dust bags ready for replacement.
4.2 Water Tank and Mopping Pad Cleaning
- Water Tank: After each mopping session, empty any remaining water from the tank and rinse it thoroughly with clean water. Allow it to air dry.
- Mopping Pad: Remove the mopping pad after each use and wash it. It can be hand-washed or machine-washed (check care instructions on the pad). Allow it to dry completely before reattaching.
4.3 Brush Cleaning
- Main Brush: Periodically remove the main brush and clean any tangled hair or debris. Use the cleaning tool provided to cut and remove hair.
- Side Brushes: Check the side brushes regularly for wear or entanglement. Remove any hair or debris. Replace worn brushes as needed (spare brushes are included).
4.4 Sensor Cleaning
Wipe all sensors (cliff sensors, wall sensors, charging contacts) on the robot and charging station with a clean, dry cloth. This ensures accurate navigation and charging.
5. Troubleshooting
If you encounter issues with your Tesvor S7PRO AES, please refer to the common problems and solutions below.
| Problem | Possible Cause | Solution |
|---|---|---|
| Robot does not start or respond. | Low battery; power switch off; robot stuck. | Charge the robot; ensure power switch is ON; clear any obstructions. |
| Poor suction performance. | Full dustbin/dust bag; clogged filter; tangled main brush. | Empty dustbin/replace dust bag; clean or replace filter; clean main brush. |
| Robot cannot return to charging station. | Charging station obstructed; robot too far; dirty charging contacts. | Clear area around station; manually place robot near station; clean charging contacts. |
| App connection issues. | Incorrect Wi-Fi password; router too far; 5GHz Wi-Fi network. | Re-enter password; move robot closer to router; ensure 2.4GHz Wi-Fi is used. |
| Robot gets stuck frequently. | Loose cables, small objects, or high thresholds. | Clear obstacles; use virtual walls/no-go zones in the app. |
5.1 Resetting the Device
If the robot is unresponsive or exhibiting unusual behavior, a soft reset can often resolve the issue. Locate the reset button (usually a small pinhole) on the robot and press it with a paperclip for a few seconds. Refer to the app or product diagram for the exact location.
6. Specifications
| Feature | Detail |
|---|---|
| Model Name | Tesvor S7 Pro AES |
| Brand | Tesvor |
| Product Dimensions | 33 x 33 x 10 cm (Robot); 8 Kilograms (Total Weight) |
| Suction Power | Up to 6000 Pa (self-regulating) |
| Battery Capacity | 5200 mAh |
| Runtime | Up to 180 minutes (3 hours) |
| Navigation Type | Laser-LiDAR Navigation with SLAM algorithm |
| Dust Collection | Automatic self-emptying station |
| Mopping Function | Yes, with adjustable water flow |
| Noise Level | 75 dB |
| Connectivity | Wi-Fi (App Control), Compatible with Alexa, Google Home |
7. Warranty and Support
7.1 Product Warranty
Your Tesvor S7PRO AES Robot Vacuum Cleaner is covered by a manufacturer's warranty. Please refer to the warranty card included in your product packaging for specific terms and conditions, including the warranty period and coverage details. Keep your proof of purchase for warranty claims.
7.2 Customer Support
For technical assistance, troubleshooting beyond this manual, or warranty inquiries, please contact Tesvor customer support.
- Online Support: Visit the official Tesvor website for FAQs, support articles, and contact information.
- Email Support: Refer to your product packaging or the Tesvor website for the customer service email address.
When contacting support, please have your product model number (S7PRO AES) and purchase information ready.


