1. Introduction
The THRONMAX Space C2 Wireless AIR 2.4 Microphone Kit provides exceptional audio capture through its signature Series IV 2.4GHz digital wireless transmission. This manual will guide you through the setup, operation, and maintenance of your new wireless microphone system.
2. Package Contents
Upon opening your THRONMAX Space C2 kit, you should find the following items:
- 2 x THRONMAX Space C2 Wireless Microphones (Transmitters)
- 1 x THRONMAX Space C2 Wireless Receiver
- 2 x Furry Windshields (Dead Cats)
- 1 x USB Type-C Charging Cable
- 1 x 3.5mm TRS to TRS Cable (for cameras)
- 1 x 3.5mm TRS to TRRS Cable (for smartphones)
- 1 x USB Type-C to 3.5mm TRRS Adapter (for smartphones with USB-C)
- 1 x Lightning to 3.5mm TRRS Adapter (for iPhones)
- 1 x Carrying Case
- User Manual (this document)
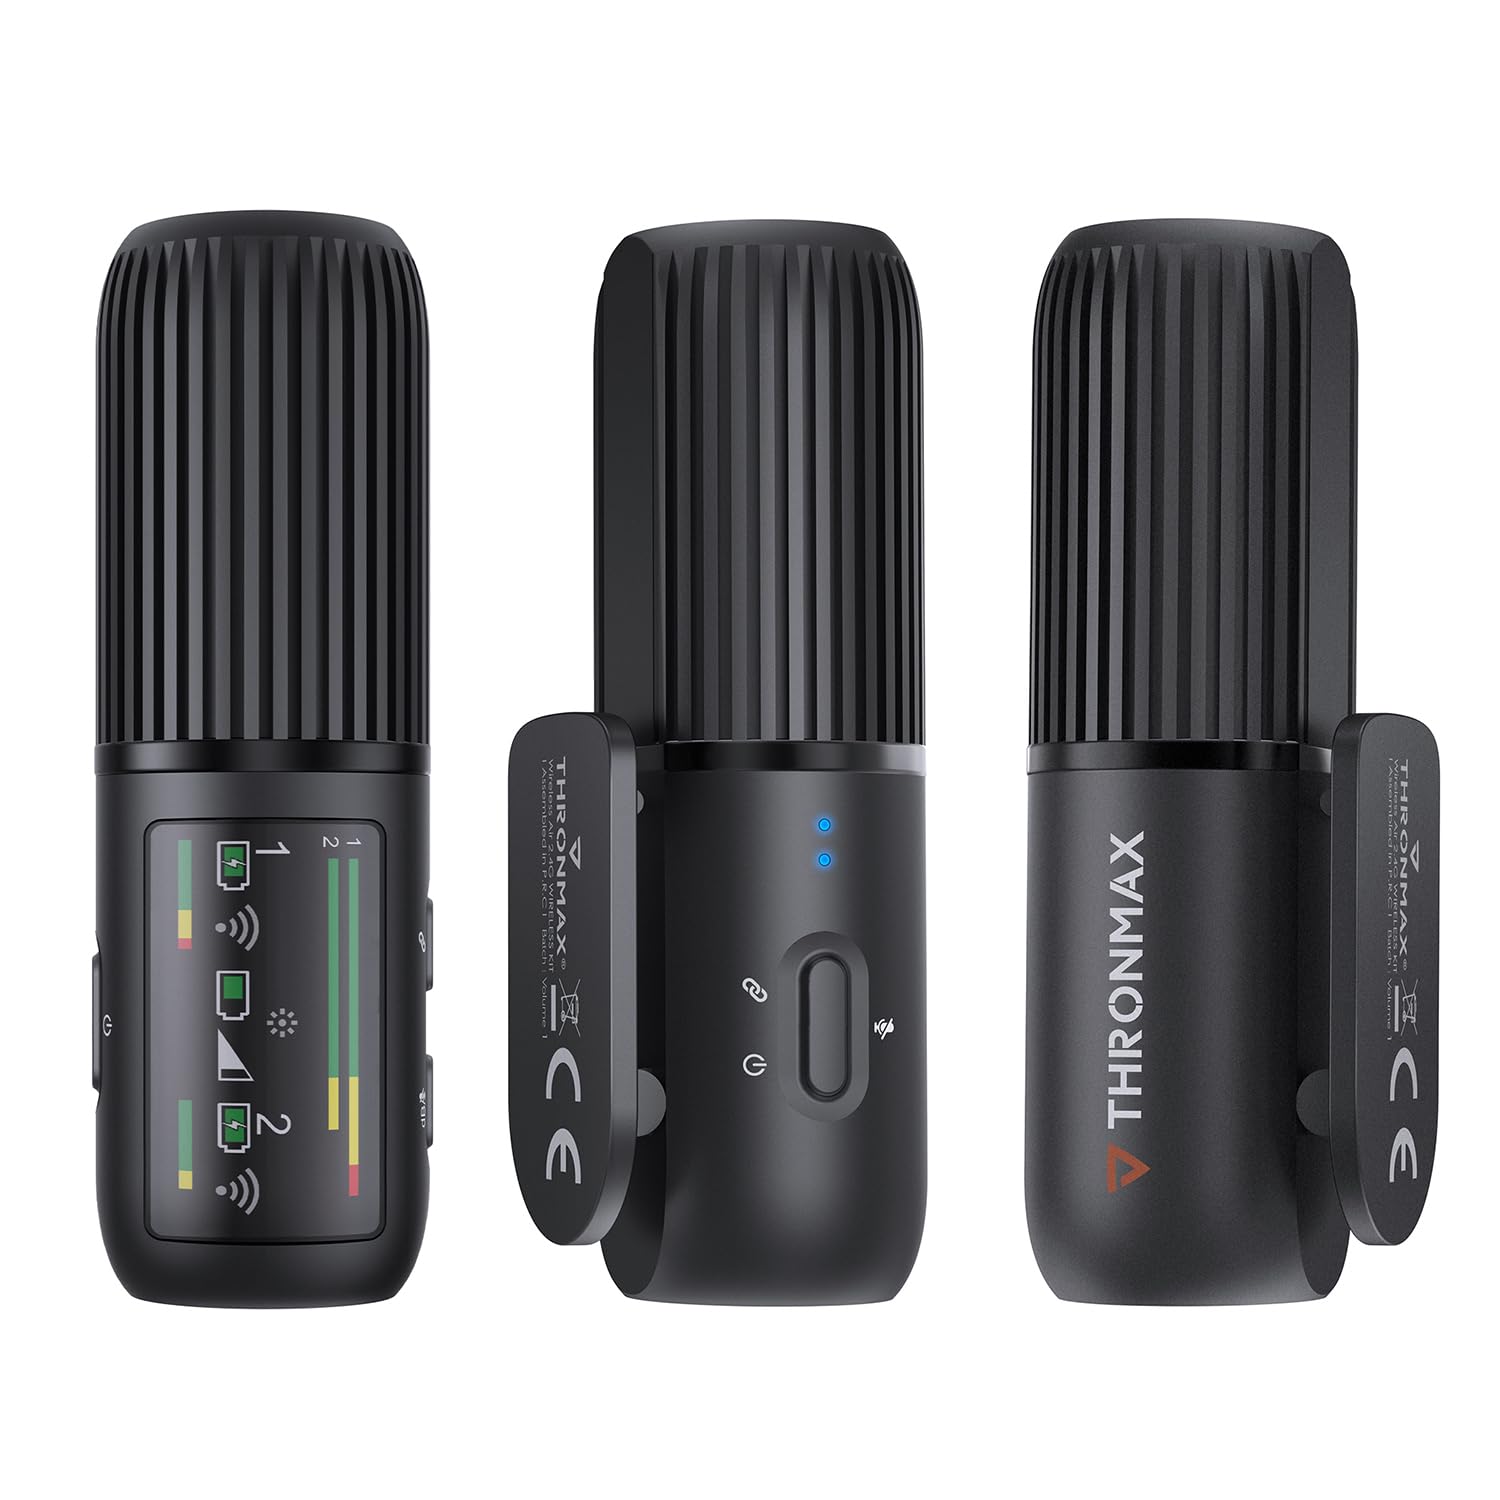
3. Product Overview
The THRONMAX Space C2 system consists of two compact wireless transmitters (microphones) and one receiver. All units share a similar cylindrical design, making them discreet and easy to handle.
3.1. Transmitters (Microphones)
- Microphone Grille: Located at the top for audio input.
- Power/Mute Button: Controls power and mutes the microphone.
- Status Indicator Lights: Provide visual feedback on power and connection status.
- USB Type-C Port: For charging and direct connection to devices.
- 3.5mm Headphone Jack: For real-time audio monitoring.
- Integrated Clip: For attaching to clothing.

3.2. Receiver
- OLED Display: Shows battery levels, audio levels (dB), connection status for both transmitters, and gain settings.
- Control Buttons: For power, pairing, and adjusting gain levels.
- USB Type-C Port: For charging and output to devices.
- 3.5mm Output Jack: Connects to cameras or smartphones.
- Integrated Cold Shoe Mount: For attaching to camera hot shoes or other accessories.
4. Setup
The THRONMAX Space C2 system is designed for quick and easy setup, offering plug-and-play functionality with most compatible devices.
- Charge Units: Ensure both transmitters and the receiver are fully charged using the provided USB Type-C cable.
- Power On: Press and hold the power button on each transmitter and the receiver until the status indicators light up.
- Pairing: The units should automatically pair. If not, refer to the "Troubleshooting" section for manual pairing instructions. The receiver's OLED display will show connection status for each transmitter.
- Connect Receiver to Recording Device:
- For Cameras (e.g., DSLR, Mirrorless): Mount the receiver onto your camera's hot shoe using its integrated mount. Connect the receiver's 3.5mm output to your camera's microphone input using the 3.5mm TRS to TRS cable.
- For Smartphones (TRRS input): Connect the receiver's 3.5mm output to your smartphone's 3.5mm jack using the 3.5mm TRS to TRRS cable.
- For Smartphones (USB-C input): Connect the receiver's USB Type-C port to your smartphone's USB-C port using the USB Type-C to 3.5mm TRRS adapter (if needed, or direct USB-C to USB-C cable if supported by your phone for audio input).
- For iPhones (Lightning input): Connect the receiver's 3.5mm output to the Lightning to 3.5mm TRRS adapter, then plug the adapter into your iPhone.
- Attach Transmitters: Clip the transmitters onto your clothing, ensuring the microphone grille is facing towards your mouth for optimal sound capture.
5. Operating Instructions
5.1. Power On/Off
- To Power On: Press and hold the power button on each unit for approximately 2 seconds.
- To Power Off: Press and hold the power button on each unit for approximately 3 seconds.
5.2. Mute Function
- To Mute Transmitter: Briefly press the power button on the transmitter. The status indicator will change to indicate mute status.
- To Unmute Transmitter: Briefly press the power button again.
5.3. Gain Control (Receiver)
Use the control buttons on the receiver to adjust the audio gain (dB levels) for each microphone independently. Monitor the OLED display to ensure optimal audio levels without clipping.
5.4. Audio Monitoring
Plug headphones into the 3.5mm headphone jack on the receiver or either transmitter to monitor audio in real-time. This allows you to check sound quality and levels during recording.
6. Audio Features
- 2.4GHz Digital Wireless Transmission: Provides a stable and reliable connection for clear audio.
- Omnidirectional Pickup Pattern: Captures sound equally from all directions, ideal for lavalier use.
- Dual Mono Recording: Each microphone records to a separate mono track (left and right channels), allowing for individual level adjustments in post-production. This is distinct from a stereo recording where both microphones are mixed into a single stereo track.
- Frequency Response: 50Hz to 20kHz, ensuring a wide range of sound capture.
7. Battery Life & Charging
- Battery Type: 3 Lithium Ion batteries are required and included (one in each transmitter, one in the receiver).
- Operating Time: Each unit provides up to 8 hours of continuous operation on a full charge.
- Charging: Use the provided USB Type-C cable to charge the units. The status indicators on the transmitters and the OLED display on the receiver will show charging progress and battery status.
- Extended Use: If using only one microphone, you can swap to the second fully charged microphone to extend recording time without interruption.
8. Compatibility
The THRONMAX Space C2 is highly versatile and compatible with a wide range of devices:
- Cameras (DSLR, Mirrorless, Video Cameras)
- Laptops and PCs
- Smartphones (iPhone, Android devices like Samsung Galaxy, Google Pixel)
The kit includes various adapter cables (USB Type-C, Lightning, 3.5mm TRS/TRRS) to ensure broad compatibility.
9. Maintenance
- Cleaning: Use a soft, dry cloth to clean the units. Avoid using harsh chemicals or abrasive materials.
- Storage: Store the microphone kit in its provided carrying case when not in use to protect it from dust, moisture, and physical damage.
- Battery Care: For long-term storage, ensure batteries are charged to approximately 50% to prolong their lifespan. Avoid fully discharging or overcharging for extended periods.
- Furry Windshields: Gently clean the furry windshields as needed. Replace if they become worn or damaged to maintain optimal wind noise reduction.
10. Troubleshooting
- No Audio/Poor Audio Quality:
- Ensure all units (transmitters and receiver) are powered on and paired.
- Check battery levels on all units.
- Verify cable connections between the receiver and your recording device are secure and correct for your device type (TRS for cameras, TRRS for smartphones).
- Adjust gain levels on the receiver to an appropriate range (monitor the dB levels on the OLED display).
- Ensure transmitters are clipped correctly, with the microphone grille facing the sound source.
- Test with headphones to monitor the audio directly from the receiver or transmitters.
- Units Not Pairing:
- Power cycle all units (turn off, then turn back on).
- Ensure units are within the effective operating range (typically several feet for optimal performance).
- Check for potential 2.4GHz interference from other wireless devices.
- Buttons Not Responding (Mushy Buttons):
- This may indicate a manufacturing defect. If buttons do not spring back after pressing, contact THRONMAX customer support for assistance.
11. Specifications
| Feature | Detail |
|---|---|
| Brand | THRONMAX |
| Model Number | SPACE C2 |
| Connectivity Technology | Wireless (2.4GHz Digital Transmission) |
| Connector Type | USB Type-C, 3.5mm Jack |
| Polar Pattern | Unidirectional (Omnidirectional for lavalier use) |
| Frequency Response | 50Hz - 20kHz |
| Number of Channels | 1 (supports dual mono recording from 2 transmitters) |
| Battery Type | Lithium Ion (3 included) |
| Battery Life | Up to 8 hours per unit |
| Item Weight | 77 Grams (2.72 ounces) |
| Package Dimensions | 6.3 x 3.94 x 2.36 inches |
| Color | Black |
| Manufacturer | THRONMAX LLC |
12. Warranty & Support
For warranty information, technical support, or service inquiries, please refer to the official THRONMAX website or contact their customer service directly. Specific warranty terms may vary by region and retailer.
Visit the official THRONMAX Store: THRONMAX Store on Amazon


