
1. Product Overview
The ROXX Front Bumper is designed to enhance the front-end protection and functionality of your Ford Bronco. Featuring a robust construction and modular design, it integrates essential off-road capabilities such as a winch plate, D-ring mounts, and provisions for auxiliary lighting.

2. Compatibility
This front bumper is specifically designed for:
- Ford Bronco 2021-2024 (2-Door and 4-Door models)
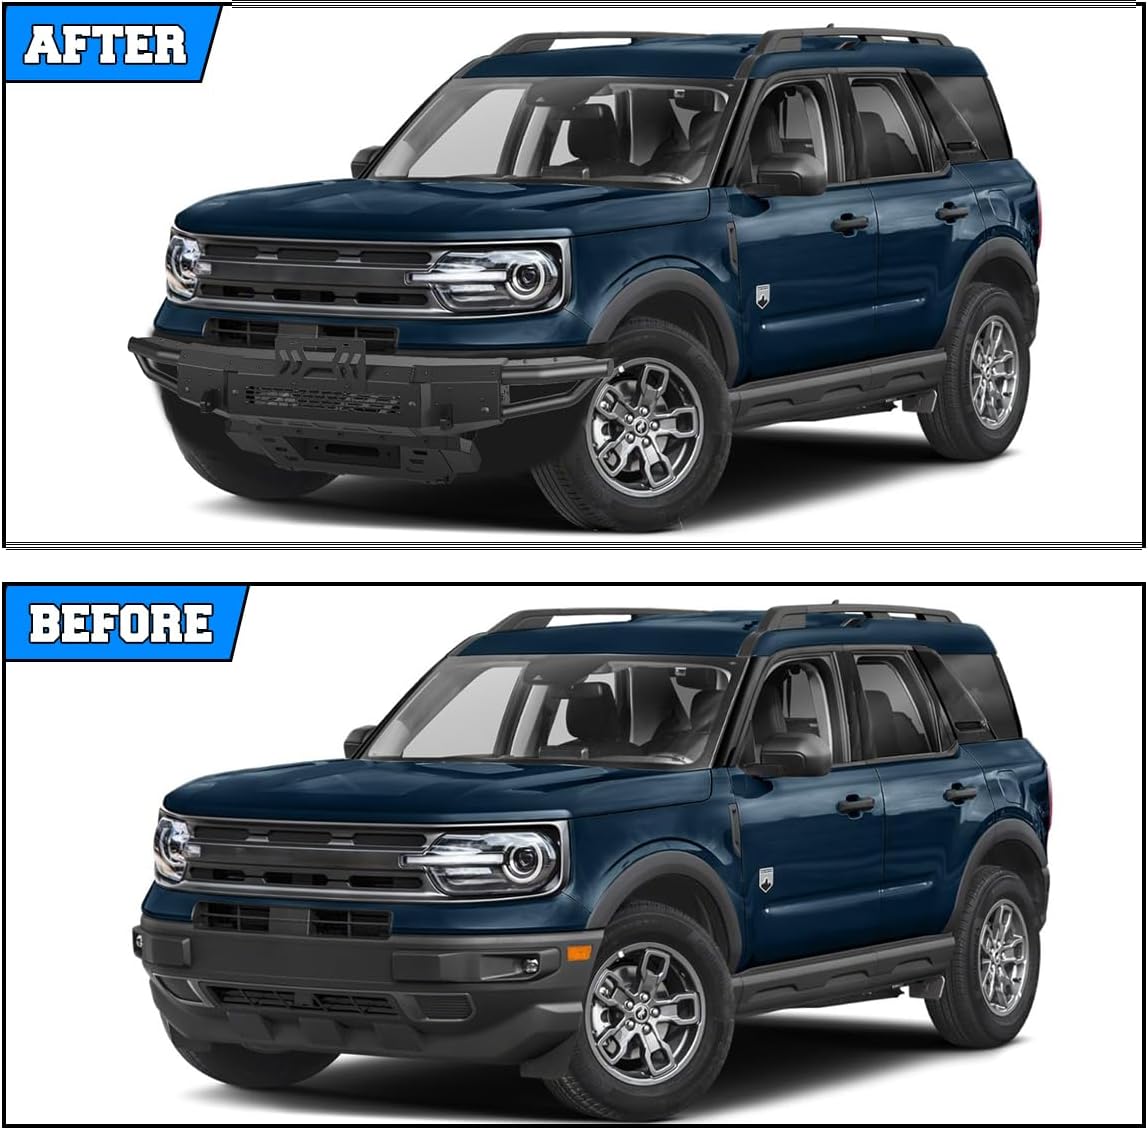
Important: This bumper is NOT compatible with Ford Bronco Sport or Bronco Raptor models.
It is designed to work with factory parking sensors.

3. Specifications
| Attribute | Detail |
|---|---|
| Brand | ROXX |
| Auto Part Position | Front |
| Material | Q235A Steel |
| Color | Black |
| Item Weight | 20.75 Kilograms (approx. 45.6 pounds) |
| Exterior Finish | Alloy Steel with Black Powder Coating |
| Product Dimensions | 46.26"D x 10.43"W x 10.43"H |
| Installation Type | Direct bolt-on, no drilling required |
4. Package Contents
The following items are included in your package:
- 1 x Front Bumper
- 2 x Front Bumper Side Wings
- 1 x Front Bumper Skid Plate
- Mounting Hardware (bolts, nuts, washers, etc.)

5. Features
The ROXX Front Bumper offers a range of features designed for durability and utility:
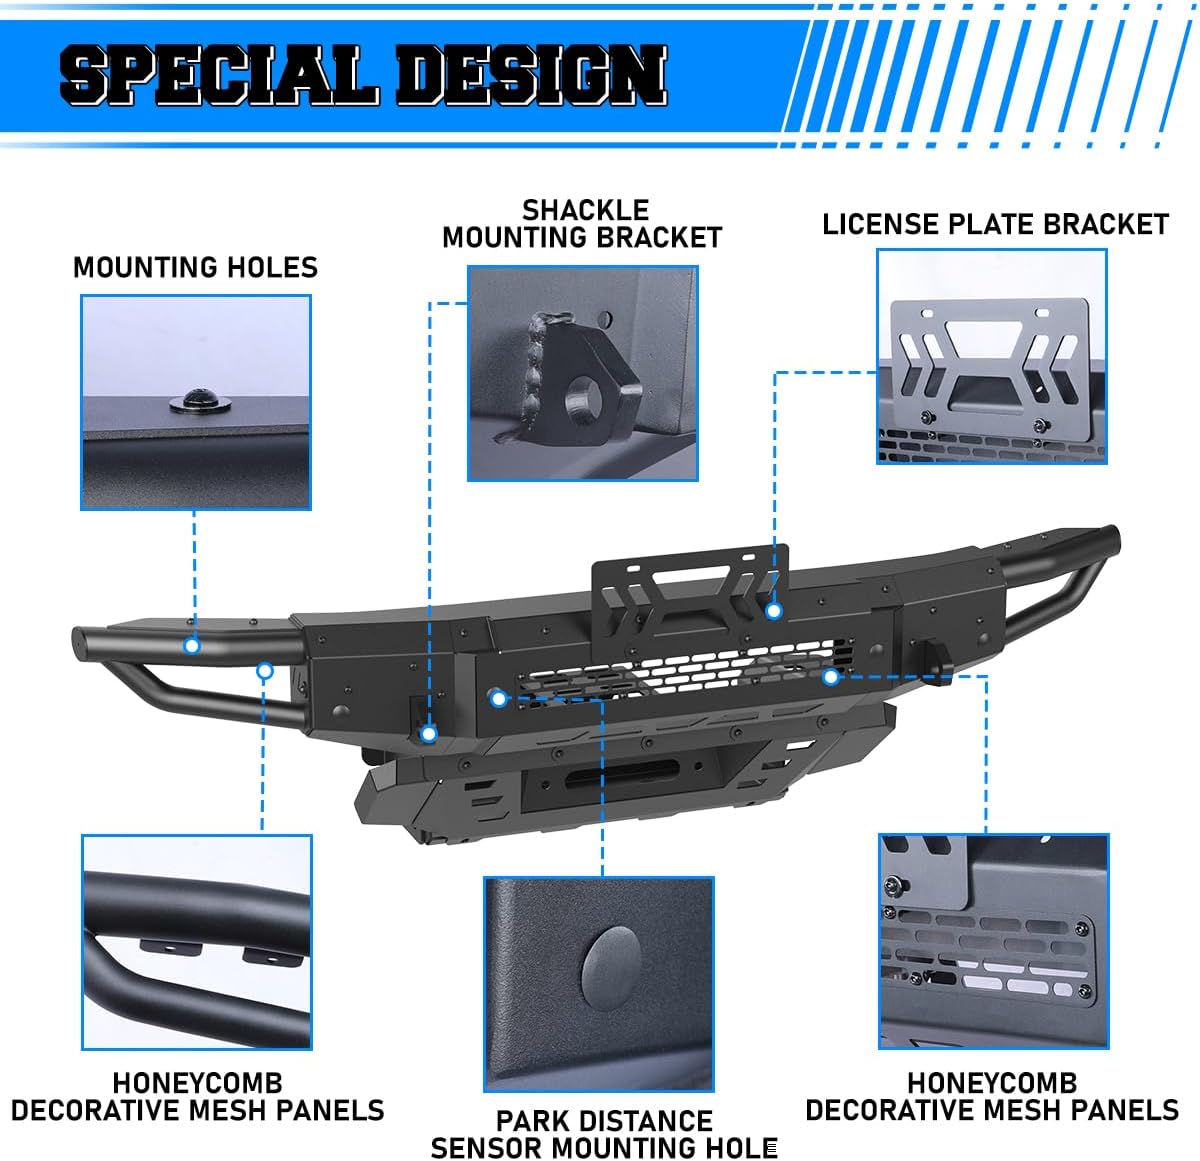
- Corrosion Resistance: Features a two-stage finish with E-Coat pre-coating and high-grade textured black powder coating for long-lasting protection against corrosion.
- Modular Design: Side wings are detachable, allowing for customization based on preference or specific off-road needs.
- Integrated Winch Plate: Built-in winch plate supports winches up to 12,000 lbs (winch not included).
- Recovery Points: Includes reinforced 18mm D-ring mounts for recovery operations.
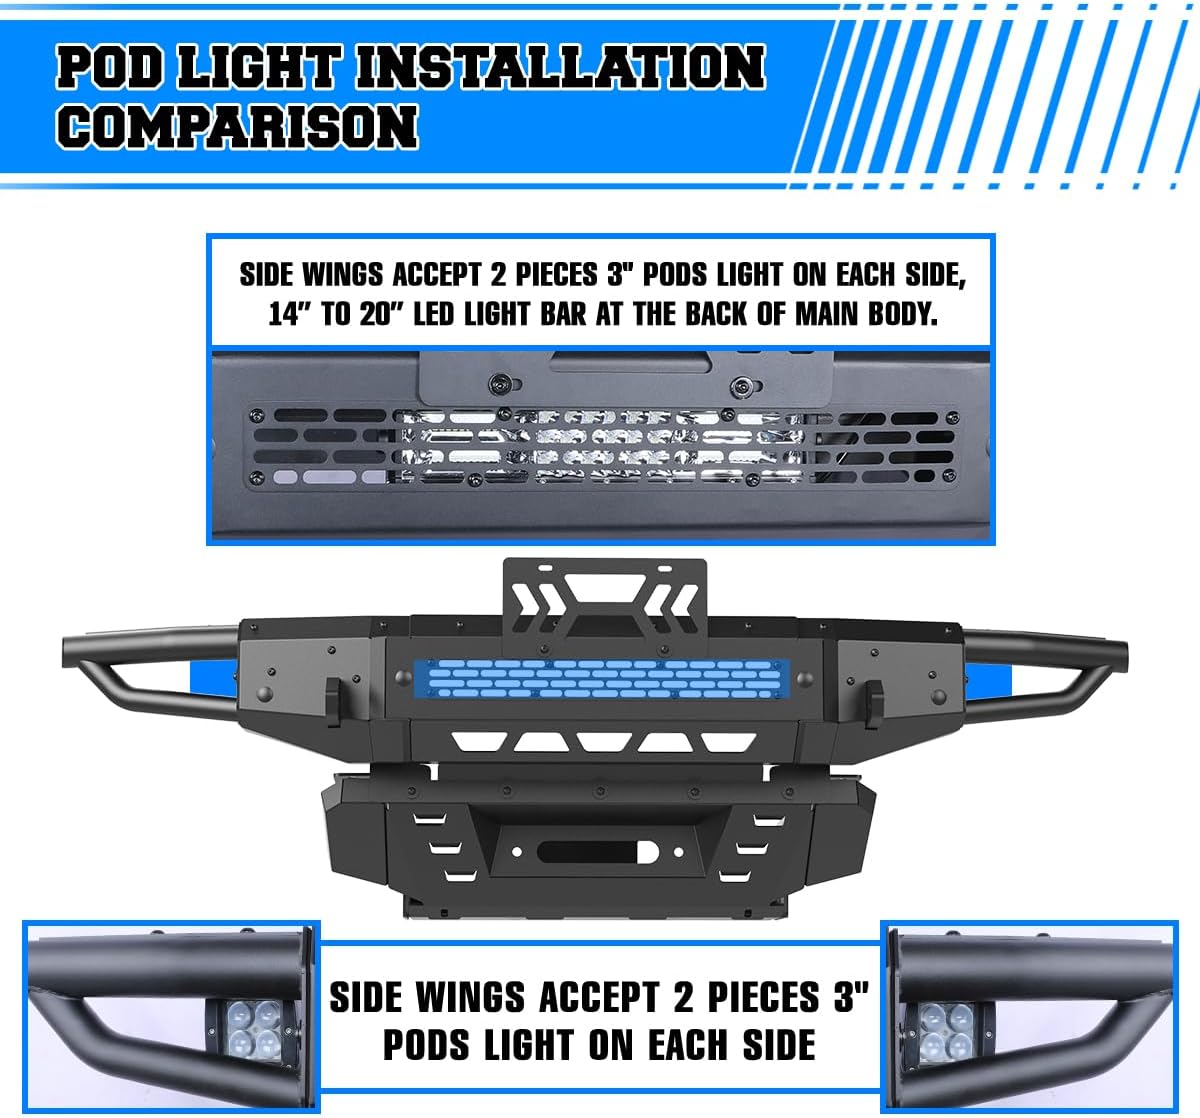
- Auxiliary Light Mounting: Pre-drilled holes on the side wings accommodate 3" or 4" pod lights on each side. The main body also supports a 14" to 20" LED light bar.
- Sensor Compatibility: Designed to work seamlessly with factory parking sensors.
- License Plate Bracket: Includes a dedicated bracket for license plate mounting.
- Mid-Length Design: Provides improved approach angles for off-road driving while maintaining a clean appearance.

6. Installation Guide
The ROXX Front Bumper is designed for a direct bolt-on installation, requiring no drilling. It is recommended to have two people for installation due to the weight and size of the bumper.
General Installation Steps:
- Safely lift and secure the vehicle.
- Remove the factory front bumper according to your vehicle's service manual.
- Carefully position the ROXX Front Bumper onto the vehicle's frame.
- Align the pre-drilled holes on the bumper with the mounting points on the vehicle.
- Secure the bumper using the provided mounting hardware. Ensure all bolts are tightened to the manufacturer's specifications.
- Install the side wings and skid plate using the designated mounting points and hardware.
- If applicable, transfer or install factory parking sensors into the bumper's sensor mounting holes.
- Verify all connections are secure before lowering the vehicle.
For detailed visual instructions, refer to professional installation guides or consult a certified mechanic.
7. Operation and Usage
Once installed, the ROXX Front Bumper provides enhanced protection and utility for your Ford Bronco:
- Winch Operation: If a winch is installed, follow the winch manufacturer's instructions for safe operation. The bumper's integrated winch plate provides a secure mounting point.
- Recovery Points: The D-ring mounts are designed for vehicle recovery. Always use appropriate recovery straps and follow safe recovery procedures.
- Auxiliary Lighting: Utilize the pre-drilled mounting points for installing additional lighting to improve visibility during off-road adventures.
- Parking Sensors: The bumper maintains the functionality of your vehicle's factory parking sensors, ensuring continued convenience and safety.

8. Maintenance
To ensure the longevity and appearance of your ROXX Front Bumper, follow these maintenance guidelines:
- Regular Cleaning: Clean the bumper regularly with mild soap and water to remove dirt, mud, and road grime. Avoid abrasive cleaners or harsh chemicals that could damage the powder coating.
- Inspect for Damage: Periodically inspect the bumper for any signs of damage, such as scratches, dents, or rust. Address minor damage promptly to prevent further deterioration.
- Check Fasteners: Routinely check all mounting bolts and fasteners to ensure they remain tight. Re-tighten as necessary to prevent loosening due to vibrations or off-road impacts.
- Finish Protection: The two-stage E-Coat and powder coat finish provides excellent corrosion resistance. If the finish is compromised, consider touch-up paint specifically designed for powder-coated surfaces to maintain protection.
9. Troubleshooting
If you encounter any issues with your ROXX Front Bumper, consider the following:
- Loose Fit: If the bumper feels loose after installation, re-check all mounting hardware to ensure they are properly tightened. Refer to the installation section for guidance.
- Sensor Malfunction: If factory parking sensors are not functioning correctly after installation, verify that they are properly seated in their designated holes and that all wiring connections are secure and undamaged.
- Unusual Noises: Check for any loose components or hardware that might be causing rattling or other noises.
For issues not resolved by these steps, please contact ROXX customer support.
10. Warranty and Support
ROXX provides a 12-month warranty from the date of purchase for this front bumper. This warranty covers manufacturing defects and material flaws under normal use.
For warranty claims, technical assistance, or any other inquiries, please contact ROXX customer support directly. Have your purchase details and product model number ready for faster service.
Contact Information: Please refer to your purchase documentation or the ROXX official website for the most current customer support contact details.