
Introduction
Thank you for choosing the Sejoy FC5091 Cordless Water Flosser. This portable oral irrigator is designed to provide effective plaque removal and improve gum health through powerful water pulsation. Please read this manual thoroughly before use to ensure proper operation and maintenance.
Important Safety Information
To ensure safe operation, please observe the following precautions:
- Avoid ingesting water used with the flosser.
- Exercise caution when using the device for the first time, especially if you have sensitive gums.
- Do not submerge the entire device in water for extended periods.
- Ensure the charging port is dry and covered before exposing the device to water.
- Keep out of reach of children.
Product Overview
The Sejoy FC5091 Cordless Water Flosser features a compact design with advanced functionalities for comprehensive oral care.
Key Features:
- Multiple Nozzles: Includes 6 nozzles (3 standard, 1 periodontal, 1 orthodontic, 1 tongue cleaner) for various oral care needs.
- 360° Rotating Nozzle: Allows for easy access to all areas of the mouth.
- 4 Cleaning Modes: Soft (25-65psi), Normal (70-110psi), Pulse (60-110psi), and DIY (20-110psi).
- 300ML Detachable Water Tank: Large capacity for uninterrupted flossing and easy cleaning.
- IPX7 Waterproof: Safe for use in the shower and bathroom.
- USB Rechargeable Battery: 2000mAh battery provides up to 30 days of continuous use on a 4-hour charge.

Image: The Sejoy FC5091 Cordless Water Flosser, showcasing its sleek design.
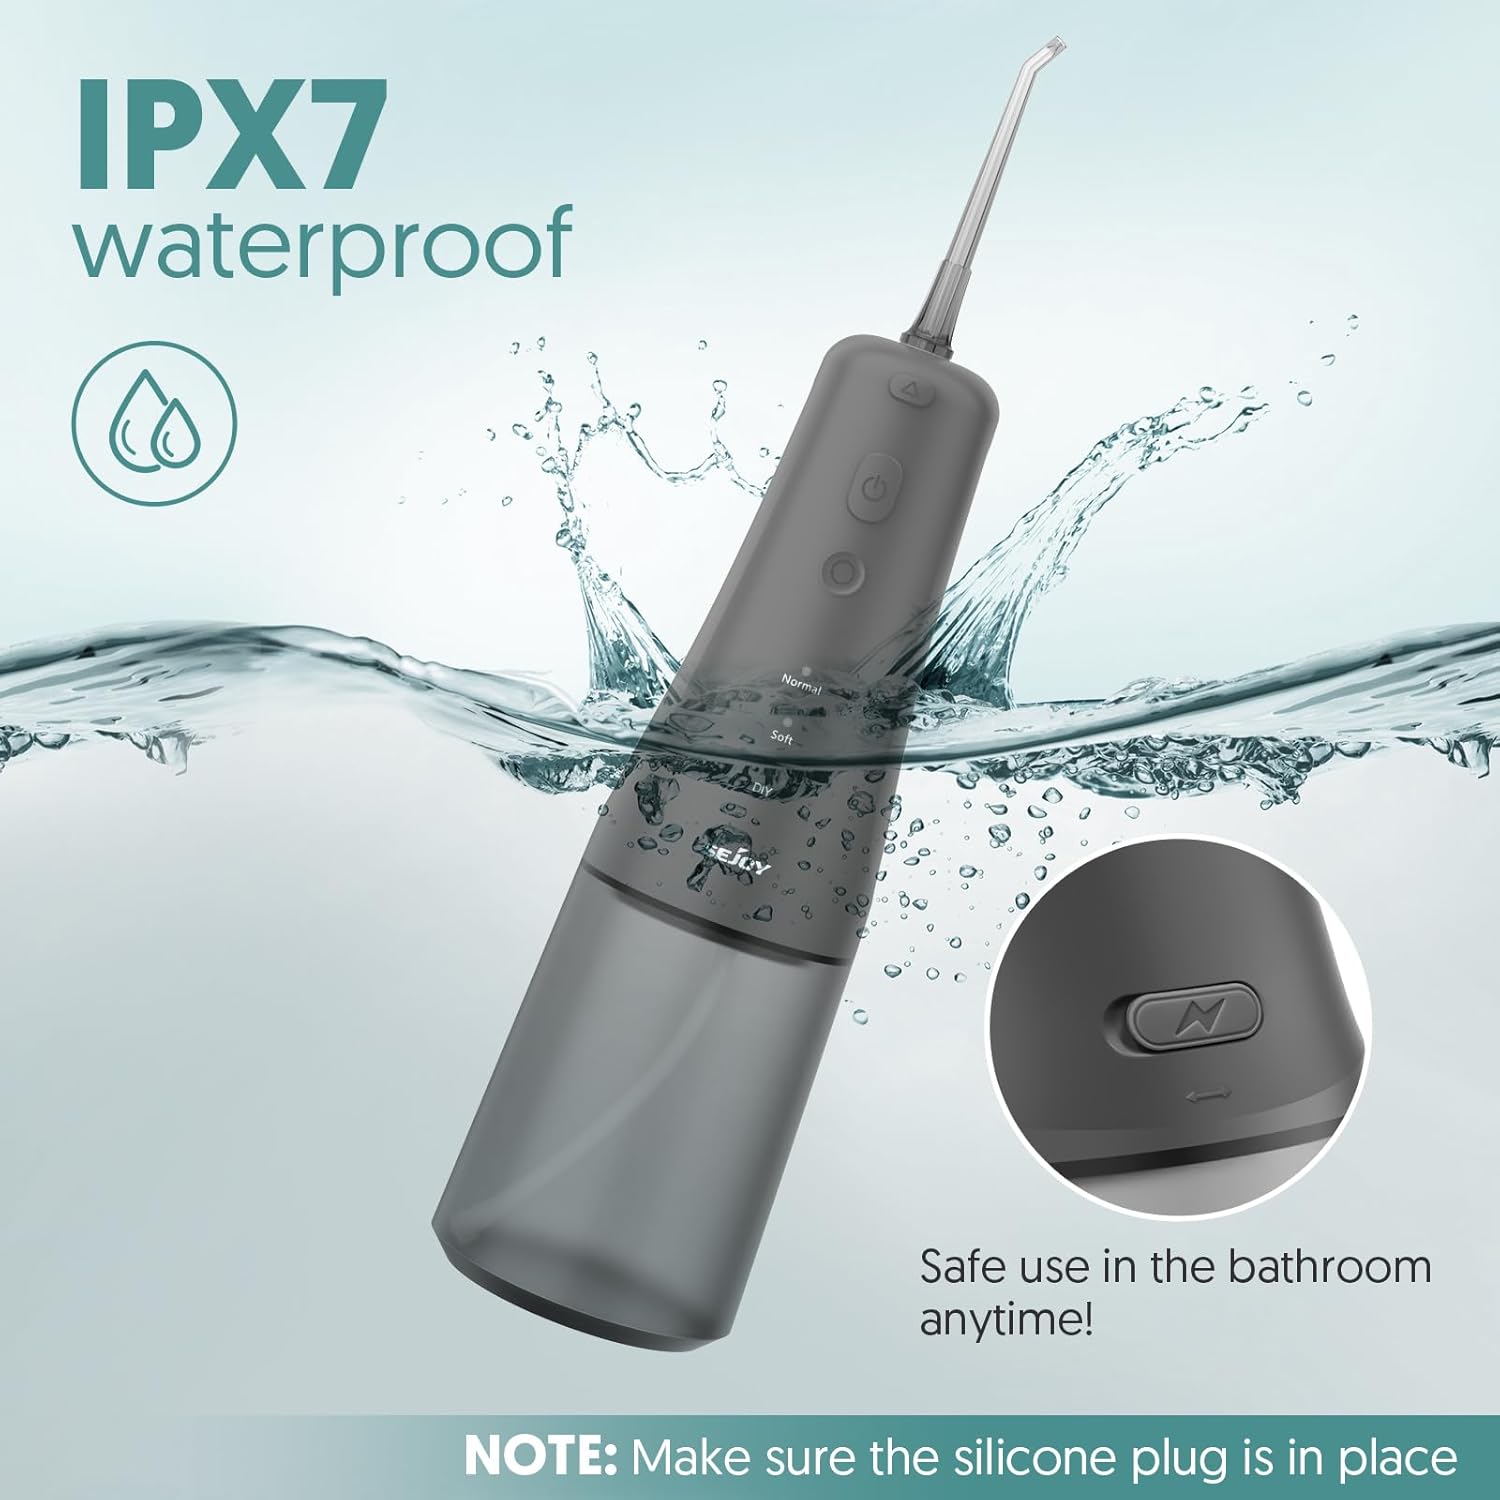
Image: Illustration of the six included nozzles: 3 standard, 1 periodontal tip, 1 orthodontic tip, and 1 tongue cleaner, each designed for specific oral care needs.

Image: Diagram illustrating the components of the water flosser, including the nozzle, uninstall button, switch button, mode selection button, indicator lights for modes (High-level, Low-level, DIY), and water tank. Dimensions are also shown.
Setup Guide
1. Initial Charging
Before first use, fully charge the device. The Sejoy FC5091 is USB rechargeable. Connect the provided USB cable to the charging port on the device and a suitable USB power source. A full charge takes approximately 4 hours and provides up to 30 days of continuous use.
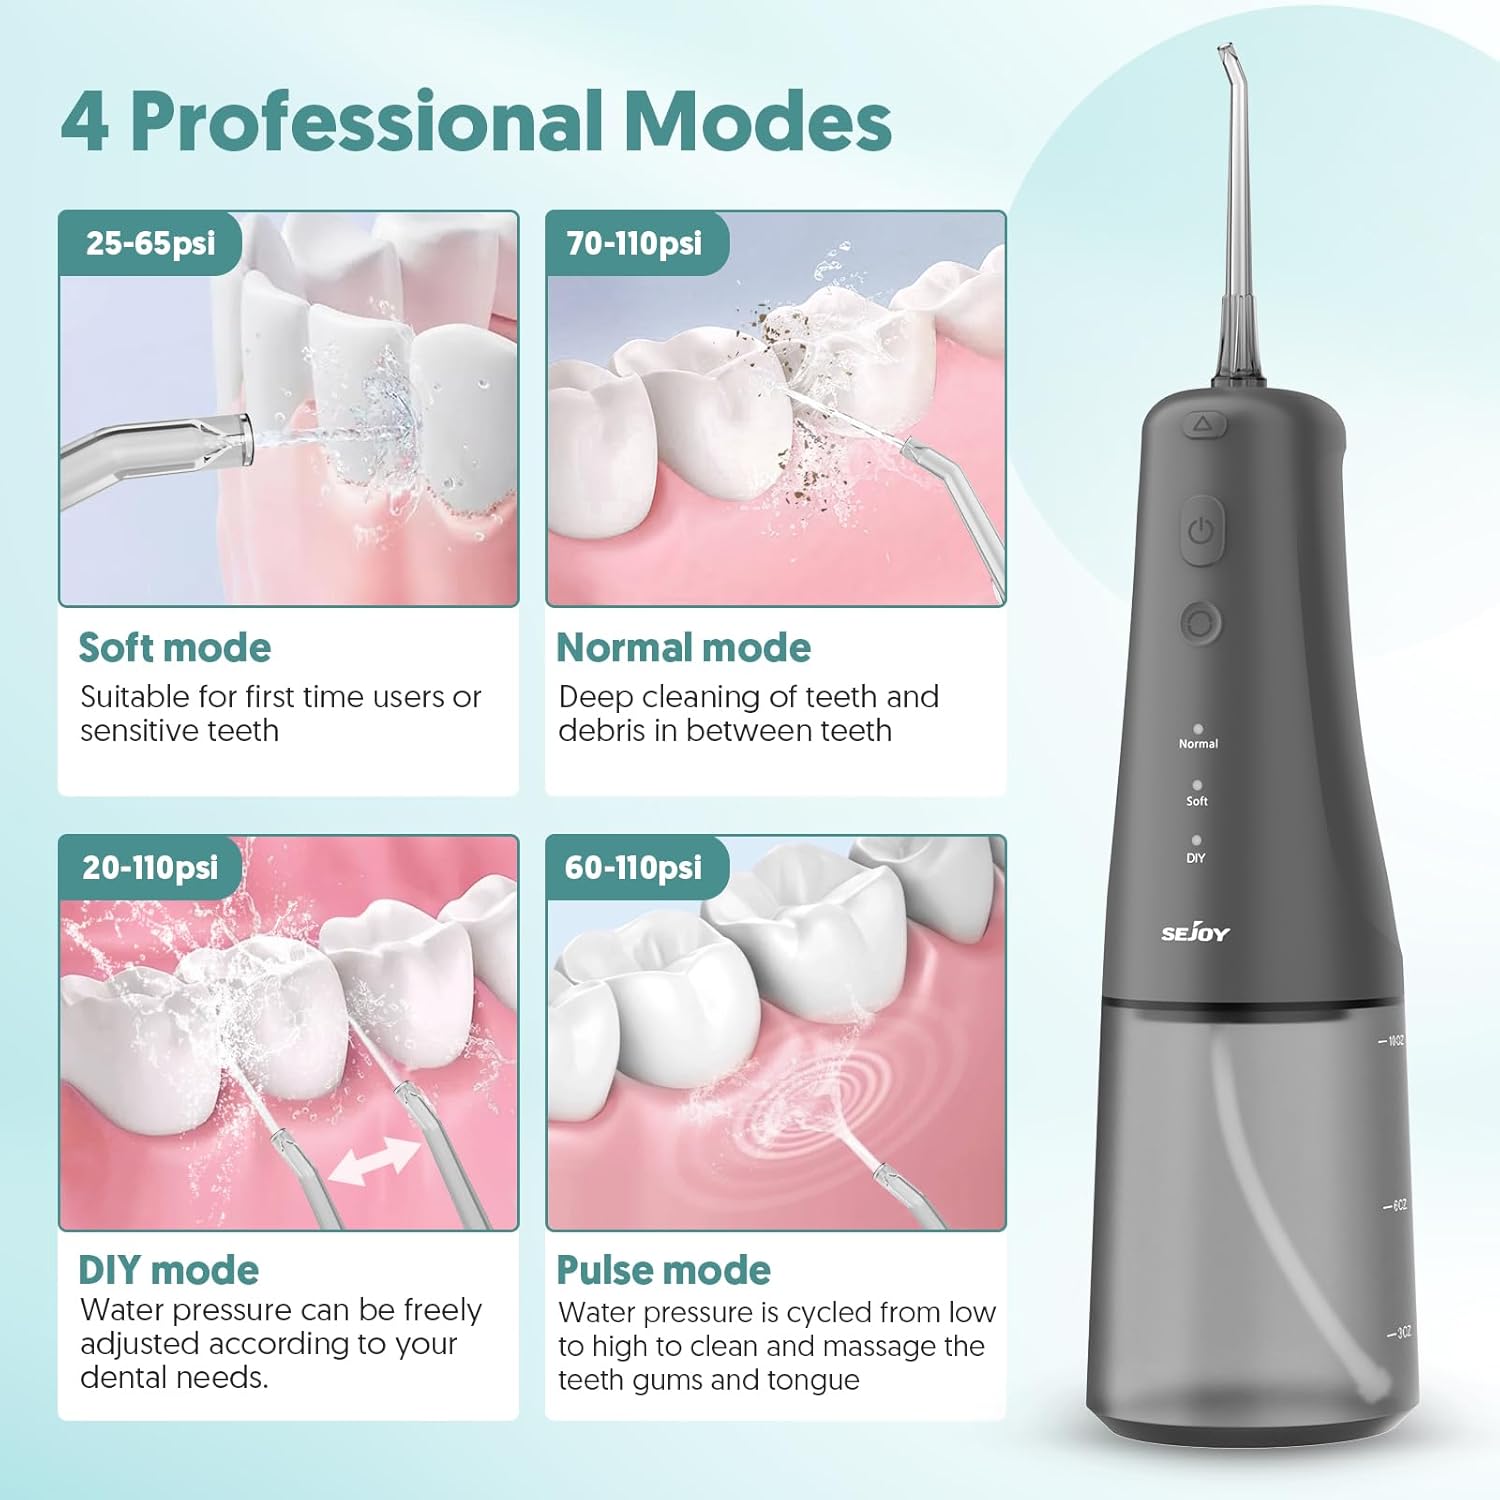
Image: The water flosser showing its 2000mAh powerful battery and 300ml large water tank, with an illustration of the USB charging port.
2. Attaching the Nozzle
Select the desired nozzle (standard, periodontal, orthodontic, or tongue cleaner). Insert the nozzle into the hole on the top of the controller until you hear a "click" sound, indicating successful installation. Rotate the nozzle to adjust the direction of water outflow as needed.

Image: Step-by-step visual guide showing how to add water, insert the nozzle tip, and press the mode switching button.
3. Filling the Water Tank
The 300ML water tank is detachable for easy filling and cleaning. Twist the bottom part of the device in the direction of the arrow to detach the tank. Fill the tank with lukewarm water. Reattach the tank by aligning it and twisting until secure. Ensure the silicone plug for the charging port is in place to maintain IPX7 waterproofing.

Image: The water flosser submerged in water, highlighting its IPX7 waterproof rating, with a close-up of the charging port cover.
Operating Instructions
1. Selecting a Mode
Press the mode button to cycle through the available cleaning modes. The indicator lights will show the selected mode:
- Normal Mode (70-110psi): For effective daily cleaning.
- Soft Mode (25-65psi): Recommended for first-time users or those with sensitive teeth/gums.
- DIY Mode (20-110psi): Allows for custom adjustment of water pressure.
- Pulse Mode (60-110psi): For gum massage and improved circulation.

Image: Visual representation of the four cleaning modes: Soft, Normal, DIY, and Pulse, with their respective pressure ranges and recommended uses.

Image: Detailed instructions on how to adjust the cleaning modes using the mode selection button, including how to set the DIY intensity.
2. Using DIY Mode
To adjust the intensity in DIY mode (20-110psi):
- Long press the power button to turn on the device.
- Short press the mode button to switch to DIY mode.
- Long press the mode button for 3 seconds. The DIY indicator light will flash, and the water pressure will cycle from low to high.
- Short press the mode button again when the desired pressure is reached to fix the intensity.

Image: Visual guide explaining the steps to activate and adjust the water pressure in DIY mode, showing the power button, mode button, and unlock nozzle button.
3. Flossing Procedure
After selecting the mode, press and hold the power button for 2 seconds to start the device. Place the nozzle tip into your mouth, directing the water jet at a 90-degree angle to your teeth. Keep your lips slightly closed to prevent splashing, but allow water to flow into the sink. Move the nozzle along your gumline and between teeth, pausing briefly between each tooth. Clean all areas of the mouth, including the back teeth and difficult-to-reach areas. The device has a 120-second auto-timer for optimal cleaning duration.
Image: A sequence of images demonstrating the flossing procedure: adding water, inserting the tip, selecting a mode, positioning the nozzle in the mouth, and turning on the power.
Maintenance
1. Cleaning the Water Tank and Nozzle
After each use, empty any remaining water from the tank. Detach the water tank by twisting it off. Rinse the tank thoroughly with clean water. For the nozzle, press the uninstall button and remove it. Rinse the nozzle under running water. It is recommended to replace nozzles every 3 months for hygiene.

Image: Two images demonstrating how to remove the water tank: twisting it in the direction of the arrow and then pulling it down firmly.

Image: Two images showing how to insert a new nozzle into the controller until it clicks, and how to remove a nozzle by pressing the uninstall button.
2. Device Storage
Store the water flosser in a cool, dry place away from direct sunlight when not in use. Ensure the water tank is empty and clean before storage.
Troubleshooting
| Problem | Possible Cause | Solution |
|---|---|---|
| Device does not turn on. | Low battery or not charged. | Charge the device fully (approx. 4 hours). |
| Weak water pressure. | Low battery, insufficient water in tank, or clogged nozzle. | Recharge the device, refill water tank, or clean/replace nozzle. Ensure DIY mode is set to desired pressure. |
| Water leakage. | Water tank not properly attached or silicone plug for charging port is open. | Ensure water tank is securely twisted into place. Close the silicone plug firmly. |
| Nozzle does not stay in place. | Nozzle not fully inserted. | Push the nozzle firmly until you hear a "click". |
Specifications
- Model Number: FC5091
- Brand: Sejoy
- Water Tank Capacity: 300ML
- Pressure Range: 20-110 PSI (varies by mode)
- Battery: 2000mAh Lithium Battery
- Charging Time: Approximately 4 hours
- Usage Time: Up to 30 days (based on 2 minutes/day)
- Waterproof Rating: IPX7
- Package Dimensions: 9.53 x 3.43 x 3.03 inches
- Item Weight: 14.11 ounces
Warranty and Support
For warranty information or technical support, please refer to the product packaging or contact Sejoy customer service directly. Keep your purchase receipt as proof of purchase.
Legal Disclaimer: Statements regarding dietary supplements have not been evaluated by the FDA and are not intended to diagnose, treat, cure, or prevent any disease or health condition. This product is intended for oral hygiene purposes only.