
Introduction
Welcome to the instruction manual for your GYMAX Garden Shed, Model FDBW4EIUCXS. This wooden cabinet is designed to provide organized storage for your garden tools and equipment. Please read this manual carefully before assembly and use to ensure safe and proper operation and to maximize the lifespan of your product.
Safety Information
Adhering to these safety guidelines is crucial for preventing injury and damage to the product.
- Always assemble the shed on a flat, stable, and level surface to ensure structural integrity.
- Ensure all screws, bolts, and fasteners are securely tightened during assembly and checked periodically thereafter.
- Do not overload shelves or compartments beyond their intended capacity. Distribute weight evenly.
- Keep children and pets away from the assembly area to prevent accidents.
- Wear appropriate safety gear, such as gloves and eye protection, during assembly.
- Periodically inspect the shed for any signs of wear, damage, or loose connections. Address issues promptly.
- Do not climb on or lean heavily against the shed.
Package Contents
Before beginning assembly, please verify that all parts listed below are present and undamaged. If any parts are missing or damaged, please contact customer support immediately.
- Wooden panels (e.g., side panels, back panel, door, roof sections)
- Removable shelves
- Hardware pack (includes screws, hinges, wooden latch, metal security brackets, various hooks)
- Foldable workbench component
- Assembly instructions (this manual)
Setup and Assembly
Follow these steps carefully to assemble your garden shed. It is recommended to have at least two people for assembly.

Image: Overall view of the GYMAX Garden Shed.
- Prepare the Base: Choose a level, stable outdoor location for the shed. Ensure the ground is firm and well-drained. The shed features a raised base for improved ventilation and protection from ground moisture.
- Assemble Side and Back Panels: Attach the side panels to the back panel using the provided screws. Ensure the grooves and pre-drilled holes align correctly.
- Install Shelves: The shed includes removable shelves. Insert the shelves into the designated slots on the left side of the cabinet. You can adjust their height or remove them to accommodate taller items. The right side offers a large open compartment for long-handled tools.
- Attach the Door: Secure the main door to the front frame using the anti-rust metal hinges. Ensure the door opens and closes smoothly without obstruction. Install the wooden latch for secure closure.
- Install the Roof: Place the asphalt-sanded roof panel on top of the assembled structure. Secure it with screws, ensuring it is properly aligned to provide comprehensive weather protection. The roof is designed to be rainproof and windproof.
- Attach Hooks and Foldable Workbench: Install the stainless steel and wooden hooks inside the cabinet as desired for hanging tools and small items. Attach the foldable workbench to the inside of the door for a convenient temporary workspace.
- Secure to Ground (Optional but Recommended): For added stability, especially in windy conditions, use the four metal security brackets to anchor the shed to the ground. This helps prevent tipping.

Image: Internal storage features including removable shelves and hooks.

Image: Details of the wooden latch, metal hinges, and security brackets.

Image: Detail of the weather-resistant asphalt-sanded roof.
Operating Instructions
This section provides guidance on how to effectively use your garden shed.
- Opening/Closing the Door: Use the wooden latch to securely close the main door. To open, simply lift the latch.
- Accessing Top Compartment: The shed features a smaller top compartment with its own door, ideal for storing smaller, frequently used items or delicate tools.
- Utilizing Storage: Arrange your garden tools and equipment efficiently on the adjustable shelves and in the large right-side compartment. Use the integrated stainless steel and wooden hooks for hanging items like gloves, small hand tools, or watering cans.
- Using the Foldable Workbench: Unfold the workbench on the inside of the door when you need a temporary surface for potting plants, mixing soil, or performing small repair tasks. Fold it back up when not in use to maximize internal space.
Maintenance
Regular maintenance will help preserve the appearance and functionality of your garden shed for years to come.
- Wood Treatment: The shed is constructed from selected fir wood with a waterproof finish. To further protect the wood from weathering and maintain its natural color, it is recommended to apply a wood sealant or stain annually, especially if the shed is exposed to direct sunlight or harsh weather conditions.
- Cleaning: Clean the shed periodically with a damp cloth to remove dirt and debris. Avoid using harsh chemical cleaners that may damage the wood finish. For stubborn dirt, a mild soap solution can be used, followed by rinsing and thorough drying.
- Hardware Check: Regularly inspect all screws, hinges, and latches for tightness. Tighten any loose fasteners to ensure structural integrity and security of the shed. Lubricate hinges if they become stiff.
- Roof Inspection: Check the asphalt-sanded roof for any damage, cracks, or wear, especially after strong winds or heavy rain. Ensure the roof remains securely attached and provides adequate weather protection. Repair any damage promptly to prevent water ingress.
Troubleshooting
This section addresses common issues you might encounter and provides solutions.
- Door does not close properly:
- Check if the shed is on a perfectly level surface. Uneven ground can cause the frame to twist, affecting door alignment. Ensure hinges are properly aligned and securely tightened. Adjust the wooden latch if it is not engaging correctly.
- Shed feels unstable or wobbly:
- Verify that all assembly screws are fully tightened. Ensure the shed is placed on a firm, level ground. For maximum stability, especially in areas prone to strong winds, use the provided metal security brackets to anchor the shed to the ground.
- Water leakage inside the shed:
- Inspect the asphalt-sanded roof for any damage, tears, or gaps. Ensure the roof panel is securely attached and sealed. Check for any cracks or gaps in the wooden panels, especially at joints, and seal them with an appropriate outdoor sealant if found. Ensure the door closes tightly.
Specifications
Detailed technical specifications for your GYMAX Garden Shed.
| Feature | Detail |
|---|---|
| Model Number | FDBW4EIUCXS |
| Dimensions (L x W x H) | 75 x 50 x 180.5 cm (29.5 x 19.7 x 71.1 inches) Image: Product dimensions diagram. |
| Material | Selected Fir Wood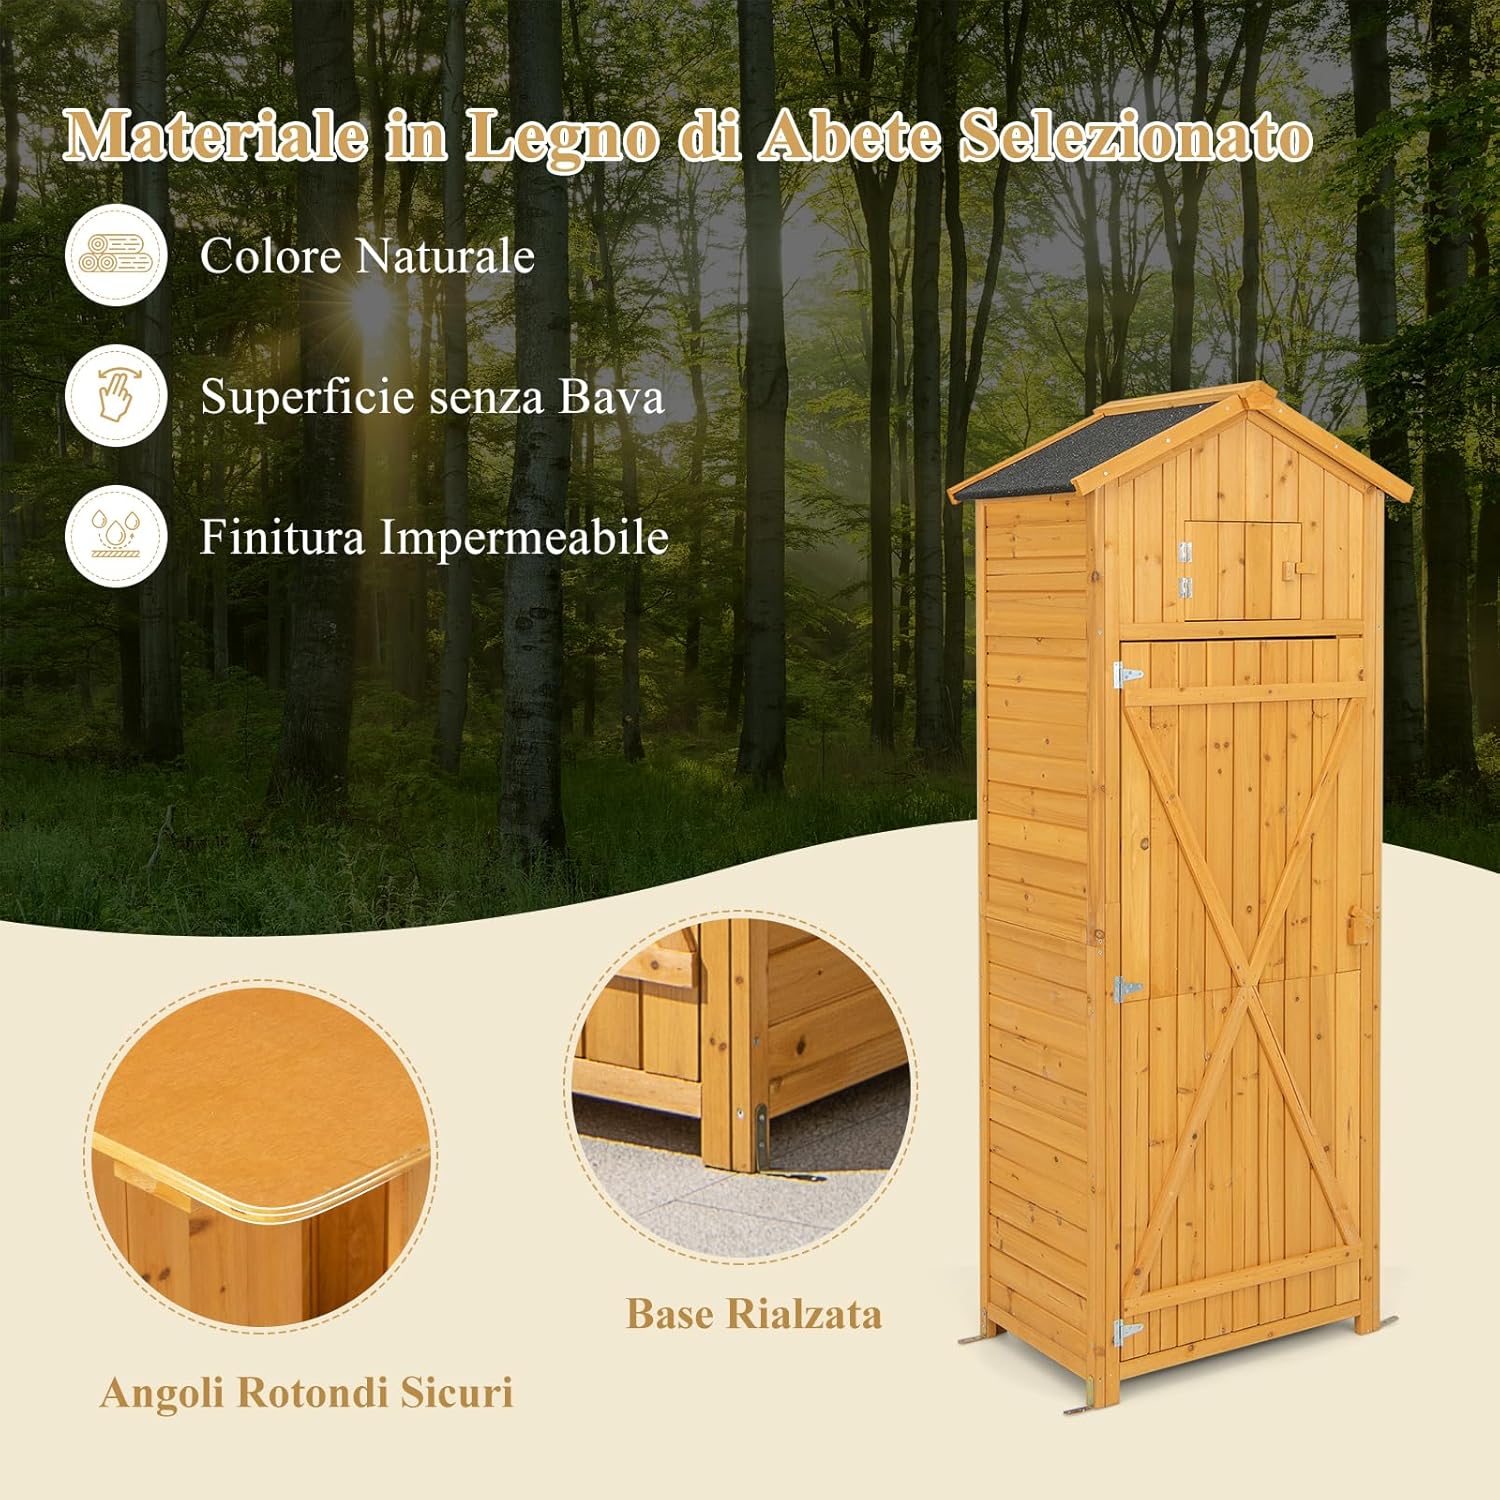 Image: Material quality and features. |
| Roof Type | Asphalt-sanded, Weather-resistant (Rainproof & Windproof) |
| Storage Features | 3 Removable Shelves, Large Open Compartment, Top Storage Compartment, Stainless Steel Hooks, Wooden Hooks, Foldable Workbench |
| Security | Wooden Latch, Anti-rust Metal Hinges, 4 Metal Security Brackets for ground anchoring |
| Color | Natural Wood |
Warranty and Support
For warranty information or technical support, please refer to the purchase documentation provided with your product or contact GYMAX customer service directly. It is important to keep your proof of purchase for any warranty claims.
If you have any questions during assembly, operation, or maintenance, please do not hesitate to contact us. We are committed to providing excellent customer service and aim to respond to inquiries within 24 business hours.
