Introduction
Thank you for choosing the TFA Dostmann 60.3550.16 Radio Controlled Wall Clock. This modern analogue clock offers high accuracy through radio signal reception, automatically adjusting for daylight saving time. Designed for clarity and ease of use, it features a clear dial with large numbers and a distinct second hand, protected by a glass cover. This manual provides essential information for setting up, operating, maintaining, and troubleshooting your new wall clock.

Image: Front view of the TFA Dostmann 60.3550.16 Radio Controlled Wall Clock. This image illustrates the clock's modern design, clear dial, and distinct hands.
Safety Information
Please read these safety instructions carefully before using the device to prevent injury or damage.
- This device is intended for indoor use only.
- Do not expose the clock to extreme temperatures, direct sunlight, or high humidity.
- Avoid dropping the clock or subjecting it to strong impacts.
- Keep batteries out of reach of children. If swallowed, seek immediate medical attention.
- Replace batteries promptly when low to prevent leakage, which can damage the device.
- Dispose of used batteries according to local regulations. Do not dispose of batteries in fire.
- Do not attempt to repair the device yourself. Contact qualified personnel for service.
Package Contents
Ensure all items are present in the package:
- 1x TFA Dostmann 60.3550.16 Radio Controlled Wall Clock
- 1x Instruction Manual
Note: 1x AA 1.5V battery is required and not included in the package.
Setup
1. Battery Installation
To power your clock, install one AA 1.5V battery:
- Remove the battery compartment cover on the back of the clock.
- Insert one new AA 1.5V battery, ensuring the correct polarity (+ and -).
- Replace the battery compartment cover securely.

Image: Rear view of the clock showing the battery compartment. This image helps identify where to insert the battery and locate control buttons.
2. Initial Time Synchronization
After battery insertion, the clock will automatically attempt to receive the DCF radio time signal. This process may take several minutes:
- The hands will move to the 12 o'clock position and then begin searching for the radio signal.
- Once the signal is successfully received, the clock will automatically set itself to the correct time.
- Place the clock near a window or in an open area for optimal signal reception during initial setup. Avoid placing it near electronic devices that may cause interference.
3. Manual Time Setting (If Radio Signal Unavailable)
In areas with poor radio signal reception, you may need to manually set the time. Refer to the back of the clock for control buttons:
- REC Button: Press this button to initiate a manual search for the radio signal.
- SET Button: If the radio signal cannot be received, press and hold the SET button to manually adjust the time. Each press will advance the minute hand.
4. Mounting
The clock is designed for wall mounting:
- Select a suitable location on a wall, ensuring it is sturdy enough to hold the clock's weight (approximately 455g).
- Use a screw or nail (not included) appropriate for your wall type.
- Hang the clock using the integrated hanging hole on the back of the device.
Operating
Automatic Time Adjustment
Once the radio signal is successfully received, your TFA Dostmann wall clock will automatically:
- Maintain precise time accuracy.
- Adjust automatically for Daylight Saving Time (summer/winter time changes).
The clock will periodically check and update its time signal to ensure continuous accuracy.
Maintenance
Cleaning
To clean your clock:
- Use a soft, dry, or slightly damp cloth.
- Do not use abrasive cleaners, solvents, or polishing agents, as these can damage the glass cover or casing.
Battery Replacement
When the clock hands stop moving or the time becomes inaccurate, it is time to replace the battery:
- Remove the old AA 1.5V battery from the compartment.
- Insert a new AA 1.5V battery, observing correct polarity.
- The clock will then attempt to resynchronize with the radio signal.
Troubleshooting
If you encounter issues with your clock, refer to the following common problems and solutions:
- Clock not setting time or displaying incorrect time:
- Ensure the battery is new and inserted with correct polarity.
- Press the 'REC' button on the back to initiate a manual signal search.
- Move the clock to a different location, preferably near a window and away from electronic devices (TVs, computers, microwaves) that may cause interference.
- Allow sufficient time (up to several hours) for the clock to receive the radio signal, especially during initial setup or after battery change. - Hands are stuck or not moving:
- Replace the battery with a fresh AA 1.5V battery.
- Check for any obstructions preventing the hands from moving freely. - Poor radio signal reception:
- The radio signal (DCF77) is transmitted from Mainflingen, Germany. Reception can be affected by geographical location, building materials, and local interference.
- Try placing the clock in different orientations or locations within the room.
- If consistent reception is not possible, use the manual time setting feature.
Specifications
| Feature | Detail |
|---|---|
| Model Number | 60.3550.16 |
| Display Type | Analog |
| Power Source | Battery Powered |
| Battery Type | 1x 1.5V AA (not included) |
| Material | Plastic, Glass |
| Dimensions (L x W x H) | 24.5 x 4.2 x 24.5 cm (approx. 9.65 x 1.65 x 9.65 inches) |
| Weight | 455g (approx. 1 lb) |
| Mounting | Wall hanging |
| Special Features | Radio Controlled, Automatic Daylight Saving Time Adjustment, Large Display |
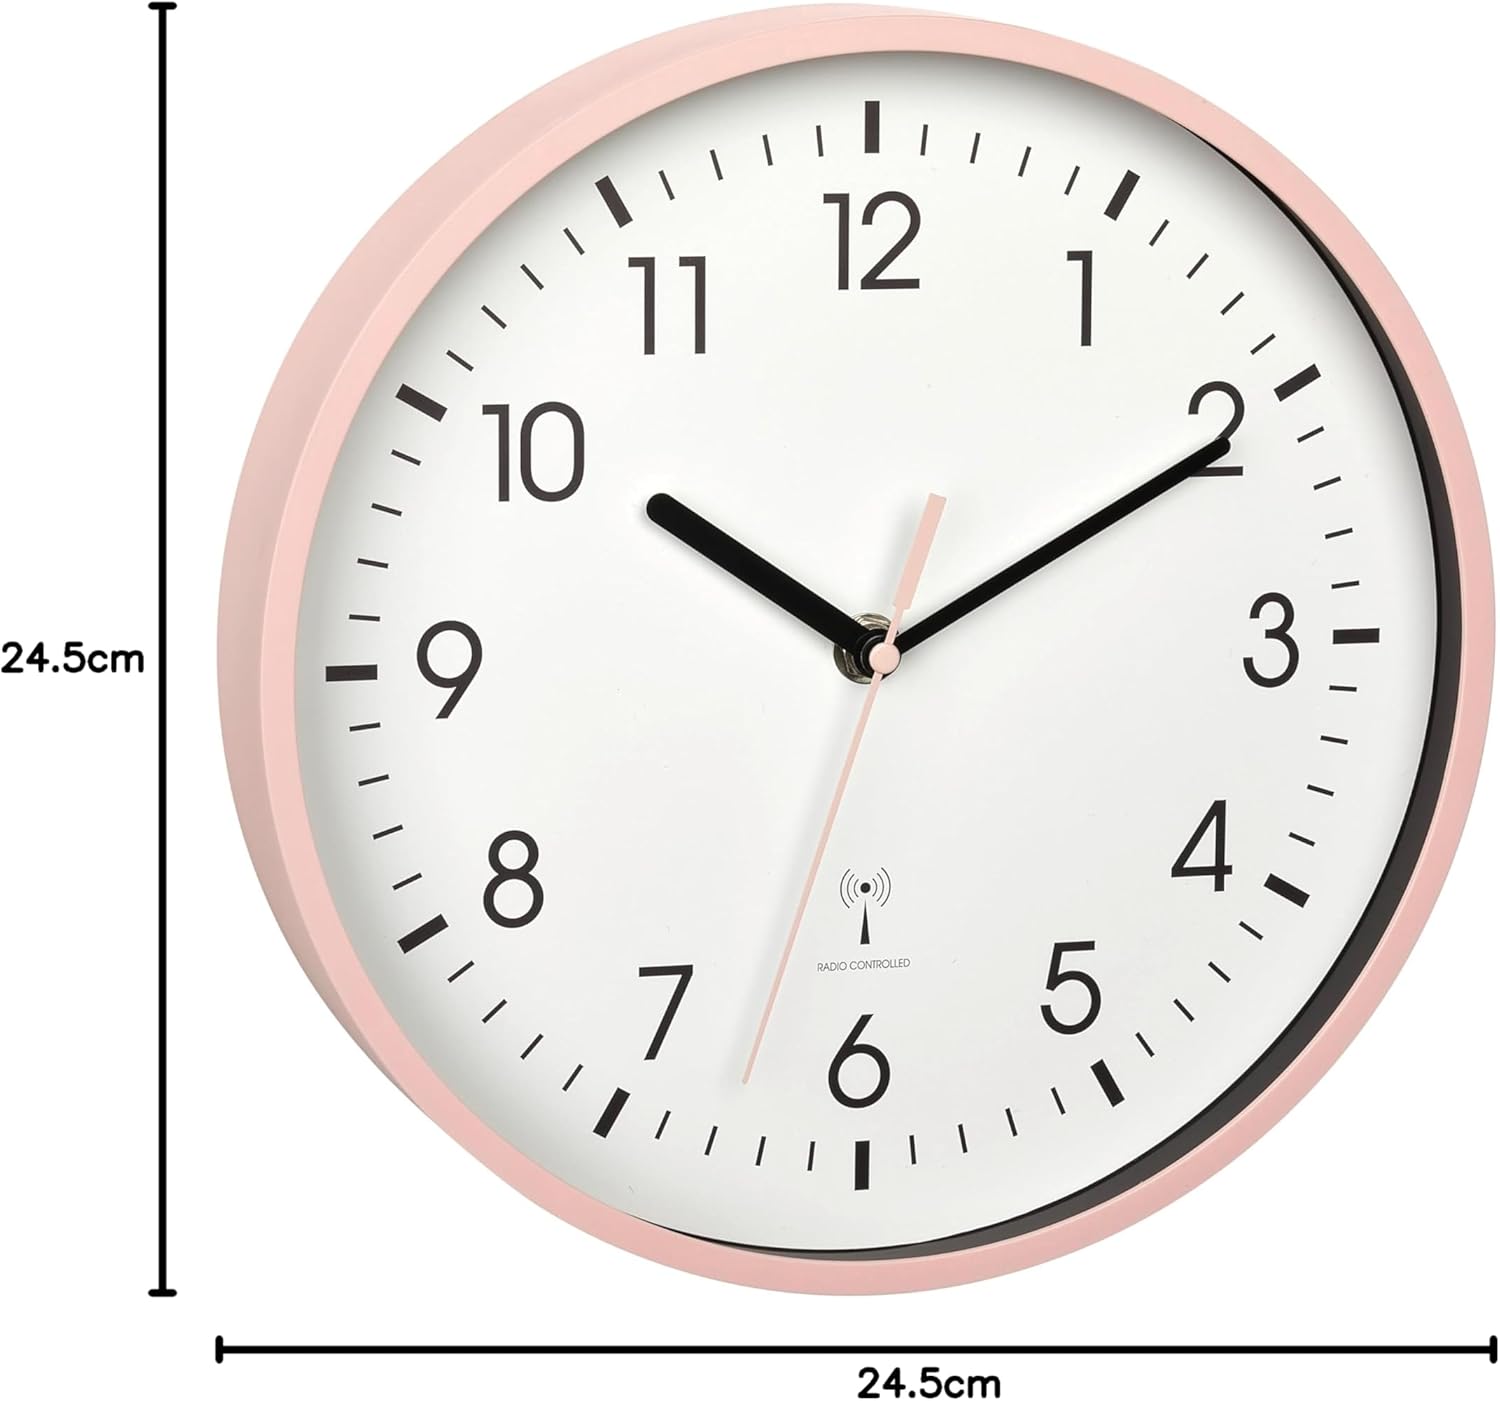
Image: Front view of the clock with dimensions. This image visually represents the physical size of the clock.
Warranty and Support
TFA Dostmann products are manufactured with quality and precision. For warranty information, please refer to the terms and conditions provided at the point of purchase or visit the official TFA Dostmann website. If you require technical support or have questions not covered in this manual, please contact your retailer or the TFA Dostmann customer service department.
Please retain this manual for future reference.


