
ID-COOLING SE-903-XT-BLACK
ID-COOLING SE-903-XT Black CPU Cooler Instruction Manual
Model: SE-903-XT-BLACK
Product Overview
The ID-COOLING SE-903-XT Black is a compact and efficient CPU air cooler designed to provide excellent heat dissipation for a wide range of Intel and AMD processors. Featuring three direct-contact heat pipes and a 92mm PWM fan, it ensures optimal cooling performance while maintaining a low noise level. Its 123mm height offers broad compatibility with various PC chassis, and its mini size prevents interference with RAM and PCIe slots, even on mini-ITX motherboards.

Figure 1: Overall view of the ID-COOLING SE-903-XT Black CPU Cooler.
Video 1: SE-903-XT Black CPU Cooler Overview. This video provides a brief visual introduction to the cooler's design and features.
Package Contents
Verify that all components are present in the package before beginning installation:
- Heatsink tower with pre-attached 92mm PWM fan
- Intel Backplate (for LGA1700/1851/1200/115X)
- Intel Brackets (for LGA1700/1851/1200/115X)
- Intel Standoffs (for LGA1700/1851/1200/115X)
- Intel Screws
- AMD Brackets (for AM4/AM5)
- AMD Standoffs (for AM4/AM5)
- AMD Screws
- Thermal Grease sachet
- Fan clips (pre-attached to fan)

Figure 2: Included mounting hardware for Intel and AMD platforms, along with thermal grease.
Specifications
| Feature | Detail |
|---|---|
| Model Number | SE-903-XT-BLACK |
| Product Dimensions | 3.9"L x 2.6"W x 4.8"H (100mm x 65mm x 123mm) |
| Weight | 1.1 Pounds (approx. 500g) |
| Heat Pipes | 3 Direct-Contact Ø6mm Heat Pipes |
| Fan Size | 92mm PWM Fan |
| Fan Speed | 500-2200 ±10% RPM (PWM) |
| Max. Air Flow | 45.8 CFM |
| Noise Level | 25.8 dB(A) Max. |
| Power Connector | 4-Pin PWM |
| Compatible Sockets | Intel LGA1700/1851/1200/1150/1151/1155/1156, AMD AM4/AM5 |
| Material | Aluminum Fins, Copper Heat Pipes |

Figure 3: Detailed dimensions of the SE-903-XT CPU cooler.
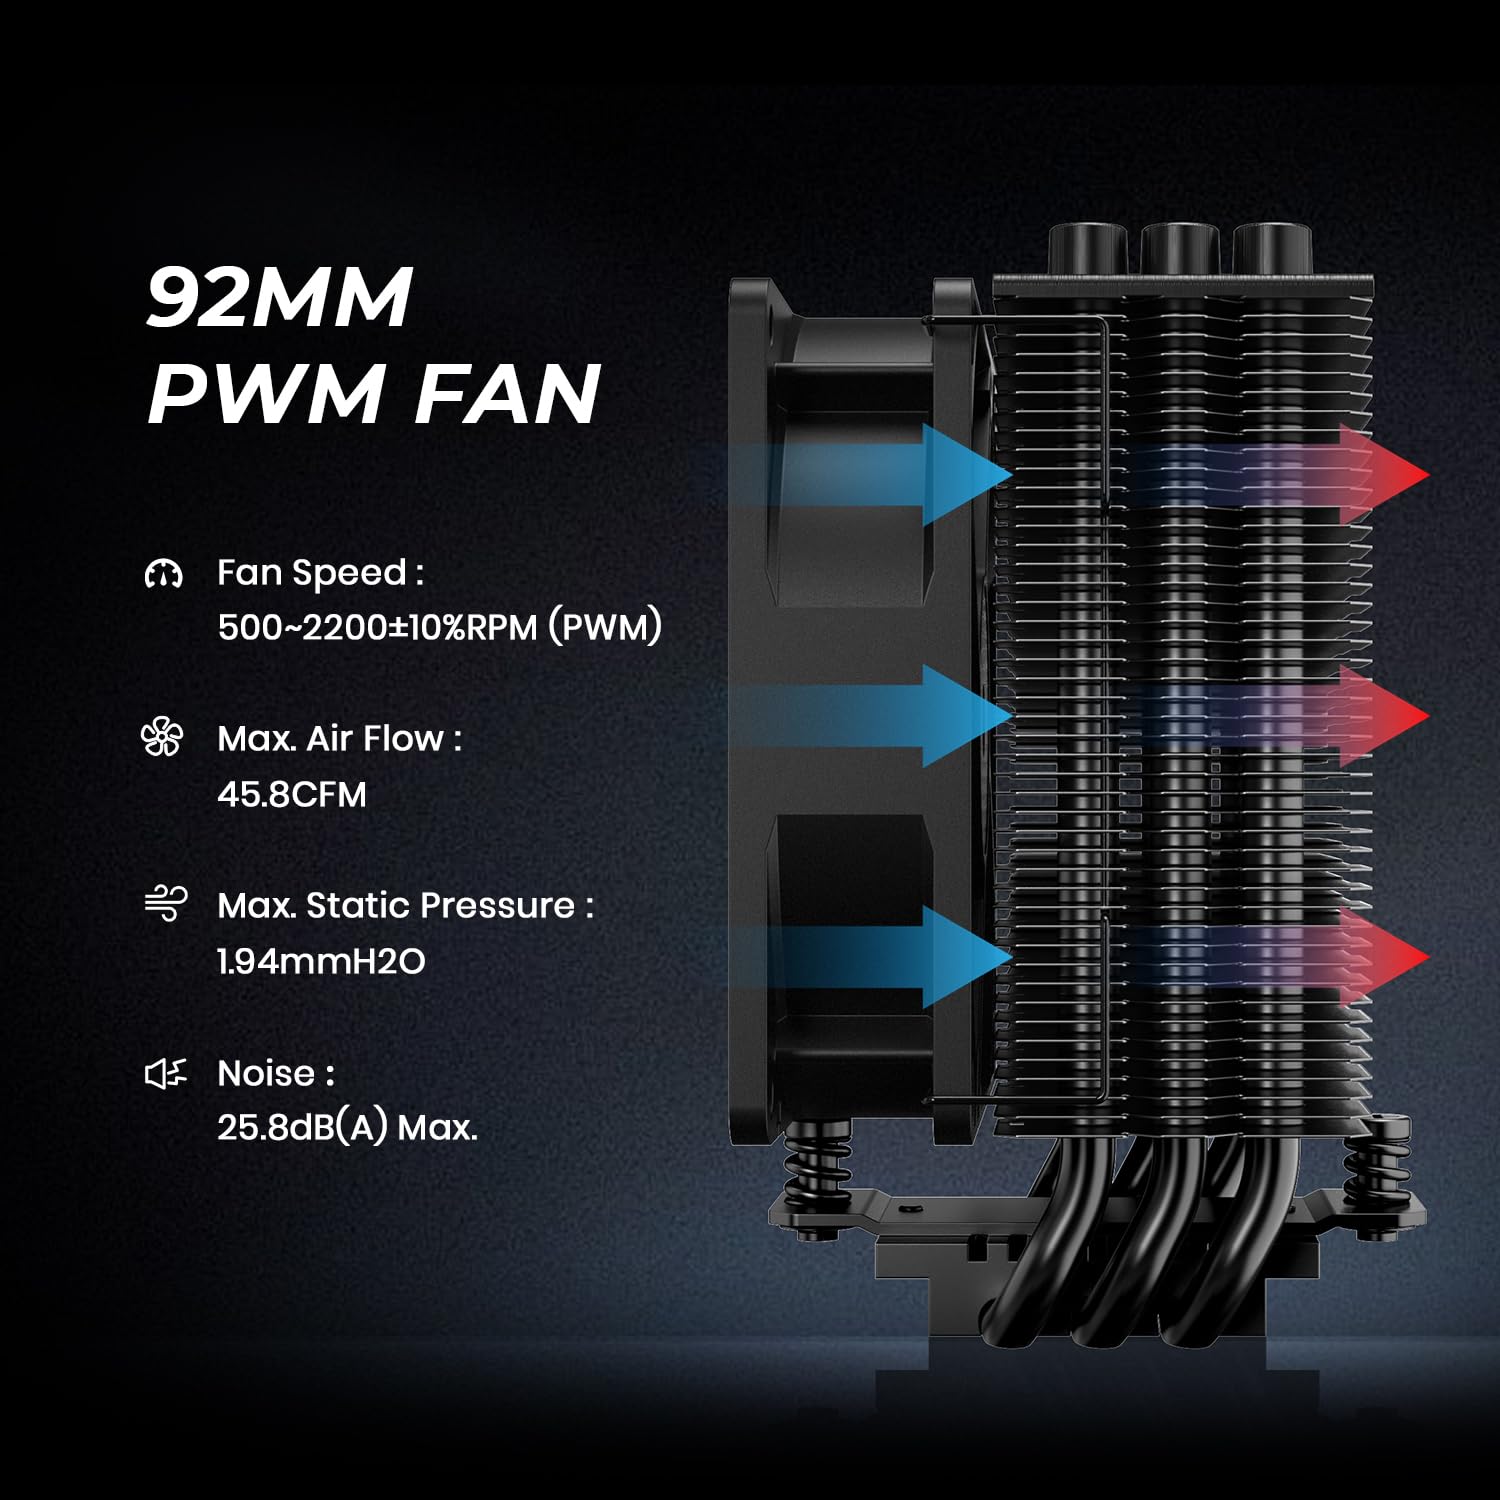
Figure 4: Specifications of the 92mm PWM fan, including fan speed, airflow, static pressure, and noise level.
Installation Guide
This section provides detailed instructions for installing the ID-COOLING SE-903-XT CPU cooler on both Intel and AMD platforms. Please refer to the accompanying video for a visual demonstration.
Video 2: Installation Guide for SE-903-XT Black. This video demonstrates the step-by-step installation process for both Intel and AMD platforms.
Intel Installation (LGA1700/1851/1200/115X)
Step 1: Prepare the Intel Backplate. Move the Intel backplate screws to the corresponding positions for your socket type (LGA1851/1700: pull outward; LGA1200/115X: pull inward). Remove the adhesive backing and install it on the back of the motherboard, aligning it with the CPU socket holes.

Figure 5: Adjusting the Intel backplate for LGA1851/1700 (outward) or LGA1200/115X (inward) and attaching it to the motherboard.
Step 2: Install Standoffs and Universal Bracket. Install the corresponding Intel standoffs onto the backplate screws from the front side of the motherboard. Place the universal Intel bracket over the standoffs and secure them with the provided Intel screws. Ensure the bracket is firmly attached.

Figure 6: Installing Intel standoffs and securing the universal bracket with screws.
Step 3: Apply Thermal Grease and Prepare Heatsink. Remove the fan from the heatsink tower by detaching the fan clips. Clean the CPU surface thoroughly. Apply a thin, even layer of the provided thermal grease onto the CPU's Integrated Heat Spreader (IHS). Peel off the protective sticker from the copper base of the heatsink.

Figure 7: Applying thermal grease to the CPU and removing the protective film from the heatsink base.
Step 4: Mount the Heatsink. Carefully place the heatsink tower onto the CPU, aligning the mounting screws on the heatsink with the holes on the universal bracket. Secure the heatsink by tightening the two screws on each side alternately until snug. Do not overtighten.
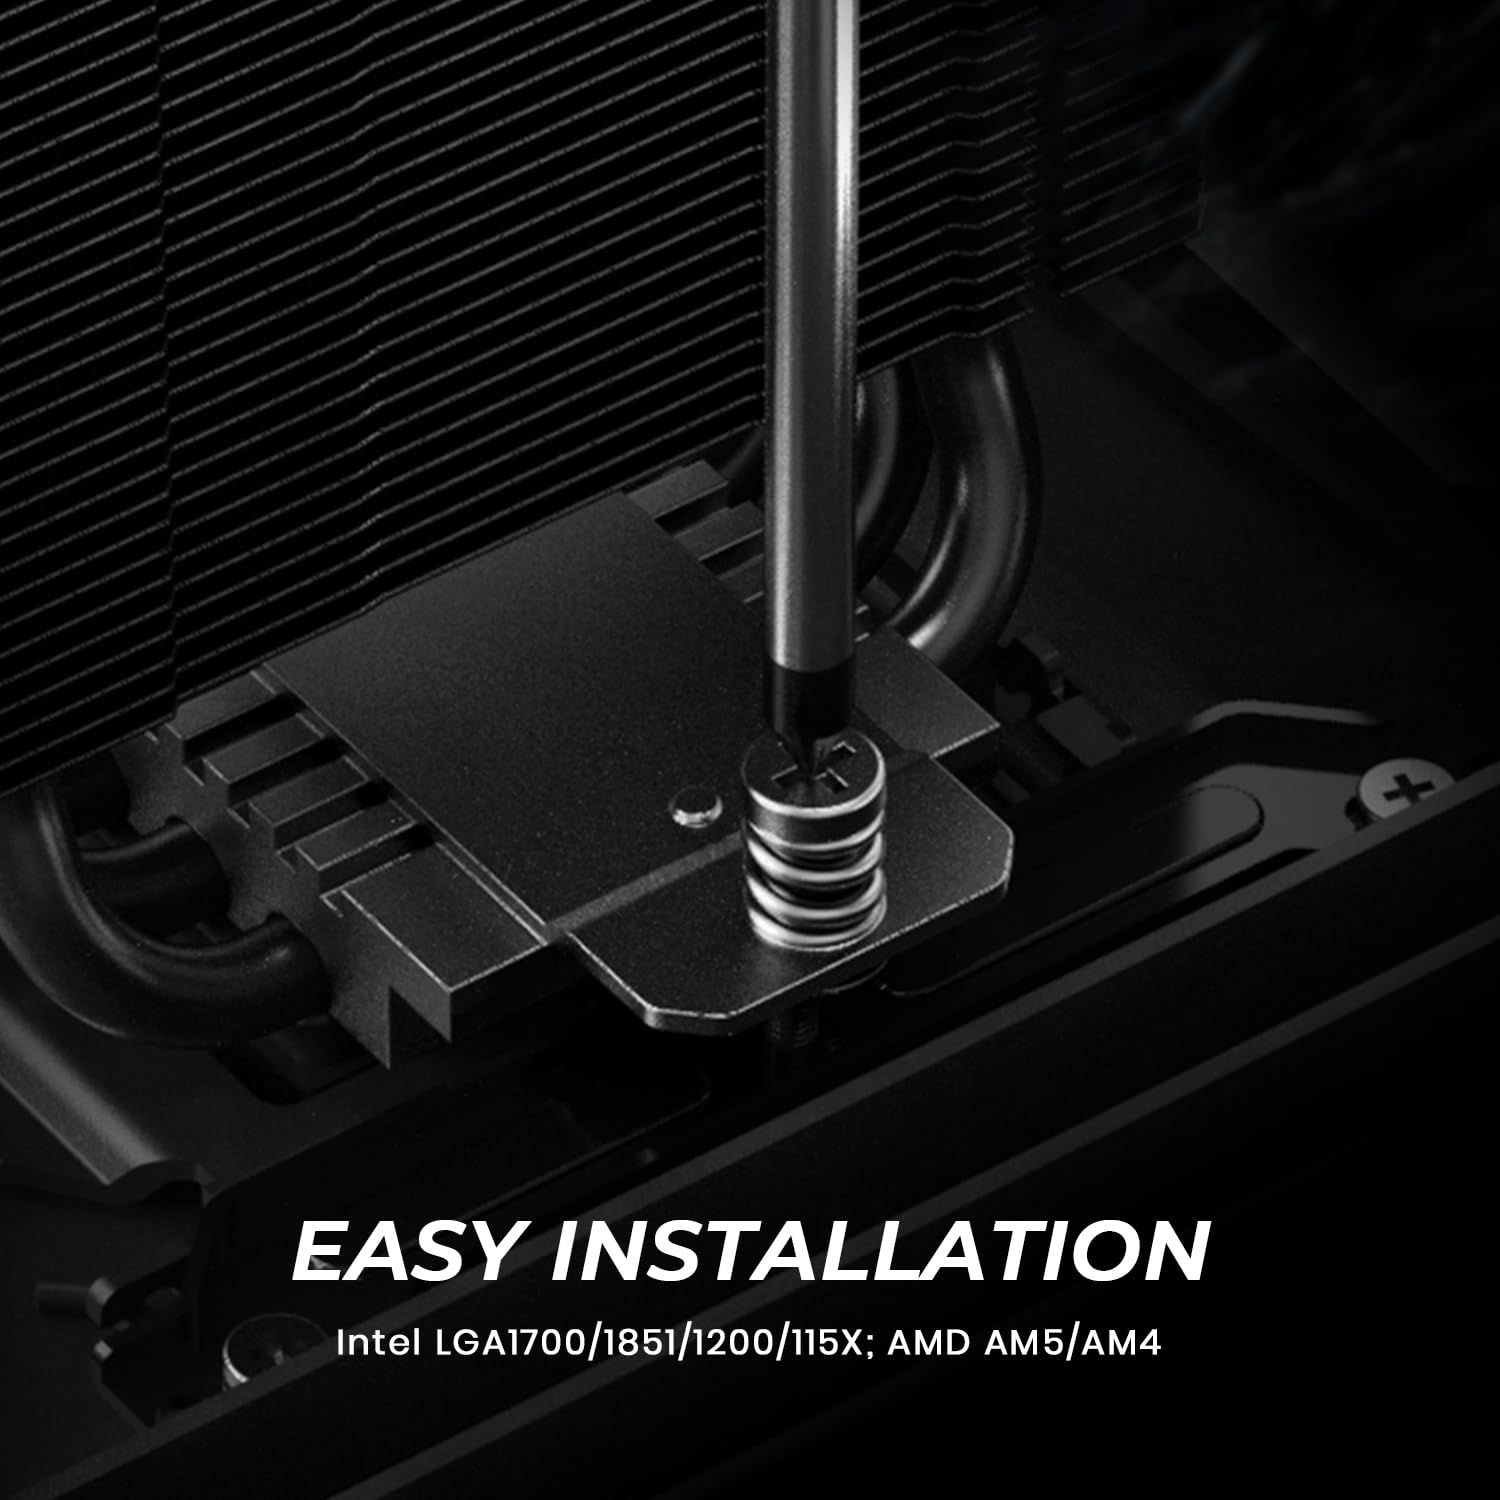
Figure 8: Securing the heatsink to the universal bracket on the motherboard.
Step 5: Attach Fan and Connect Power. Reattach the 92mm PWM fan to the heatsink tower using the fan clips. Ensure the fan is oriented correctly for optimal airflow (typically blowing towards the rear exhaust fan of the case). Connect the fan's 4-pin connector to the "CPU_FAN" header on your motherboard.

Figure 9: Attaching the fan to the heatsink and connecting the 4-pin power cable to the CPU_FAN header.
AMD Installation (AM4/AM5)
For AMD AM4/AM5 sockets, the stock backplate of your motherboard is required. Ensure it is present before proceeding.
Step 1: Remove Original Retention Frame. Remove the original AMD plastic retention frame from around the CPU socket. Keep the stock backplate on the motherboard.

Figure 10: Removing the original AMD plastic retention frame while keeping the stock backplate.
Step 2: Install AMD Standoffs and Universal Bracket. Install the red AMD standoffs onto the stock backplate screws. Place the universal AMD bracket over the standoffs and secure them with the provided AMD screws. Ensure the bracket is firmly attached.

Figure 11: Installing AMD standoffs and securing the universal bracket with screws.
Step 3: Apply Thermal Grease and Prepare Heatsink. Remove the fan from the heatsink tower by detaching the fan clips. Clean the CPU surface thoroughly. Apply a thin, even layer of the provided thermal grease onto the CPU's Integrated Heat Spreader (IHS). Peel off the protective sticker from the copper base of the heatsink.
(Refer to Figure 7 for visual guidance on applying thermal grease and removing the sticker.)
Step 4: Mount the Heatsink. Carefully place the heatsink tower onto the CPU, aligning the mounting screws on the heatsink with the holes on the universal bracket. Secure the heatsink by tightening the two screws on each side alternately until snug. Do not overtighten.
(Refer to Figure 8 for visual guidance on mounting the heatsink.)
Step 5: Attach Fan and Connect Power. Reattach the 92mm PWM fan to the heatsink tower using the fan clips. Ensure the fan is oriented correctly for optimal airflow. Connect the fan's 4-pin connector to the "CPU_FAN" header on your motherboard.
(Refer to Figure 9 for visual guidance on fan attachment and power connection.)
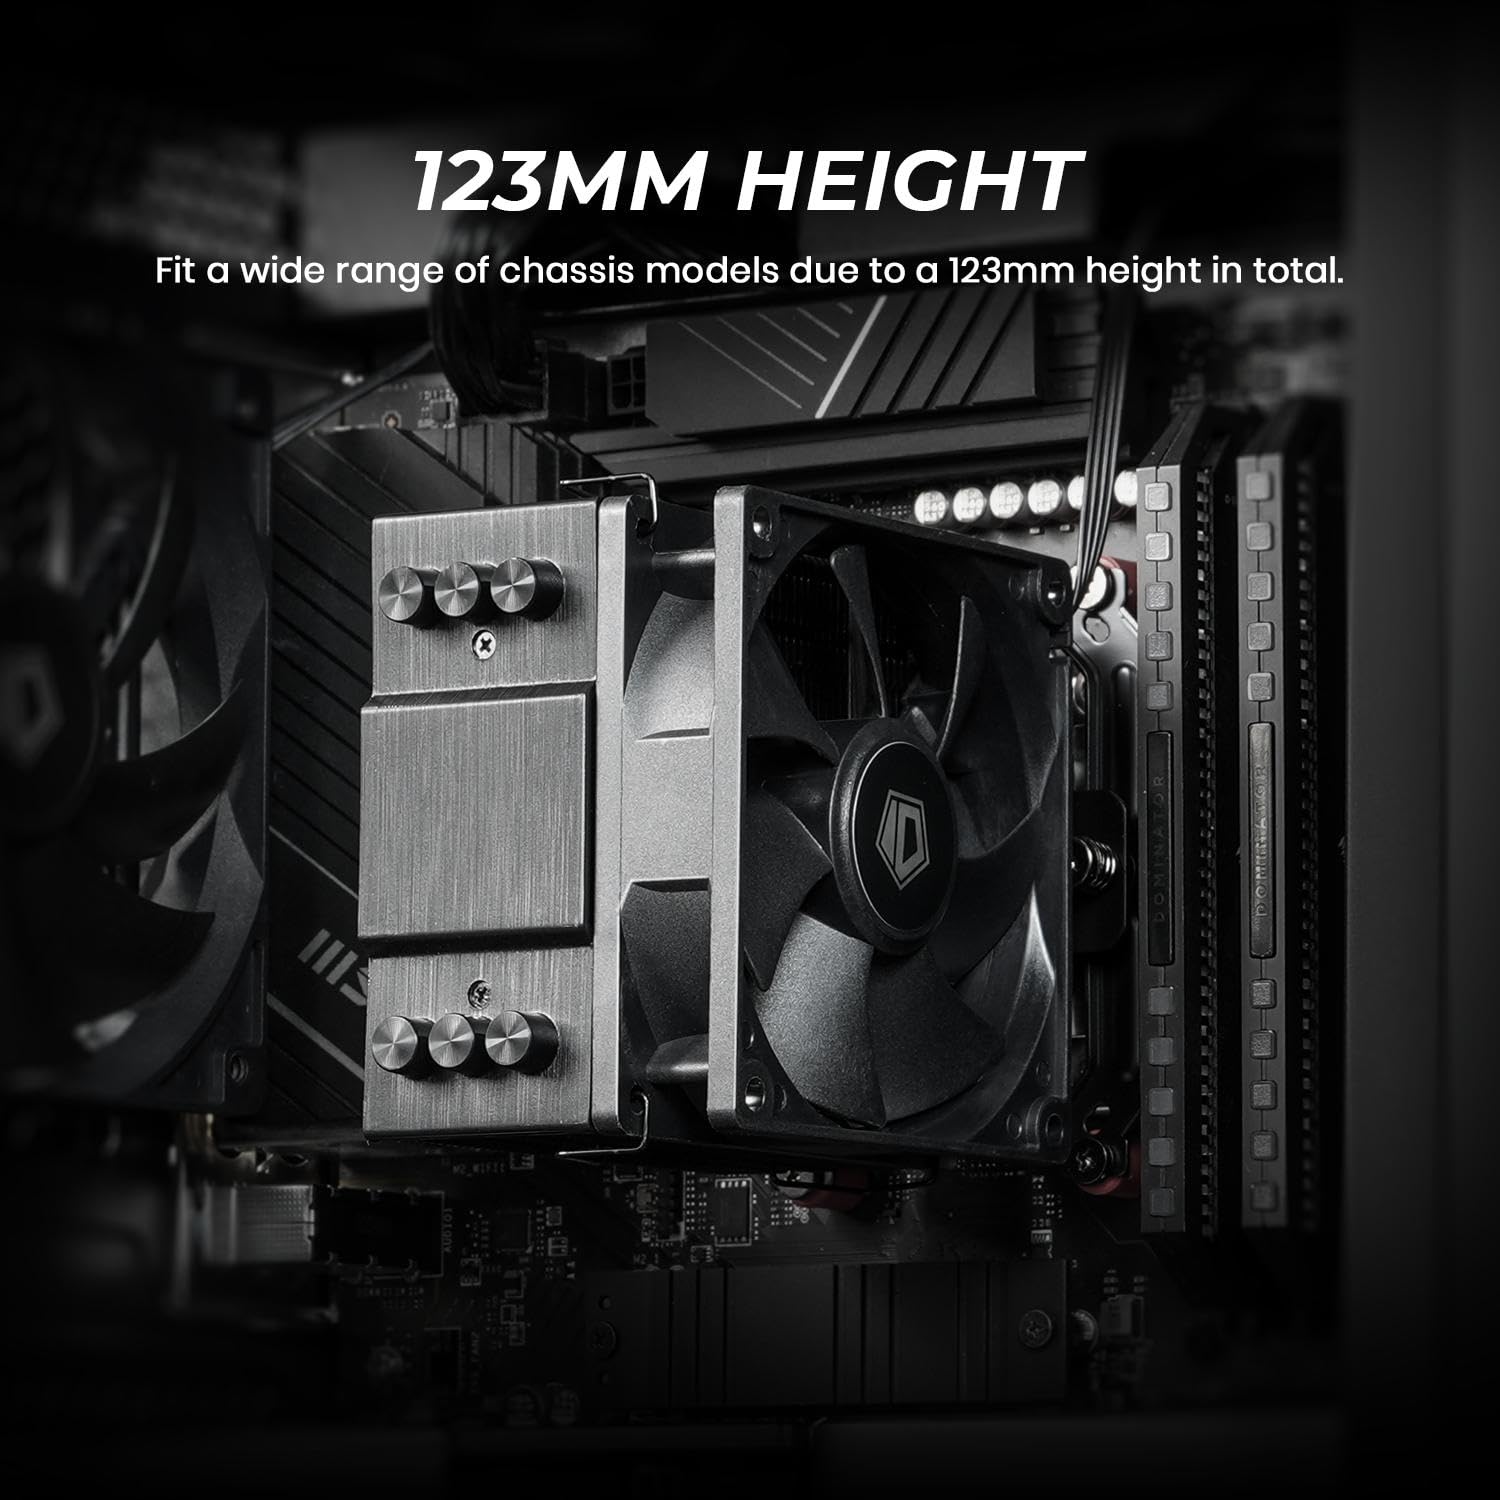
Figure 12: The SE-903-XT CPU cooler installed in a compact PC chassis, demonstrating its 123mm height compatibility.
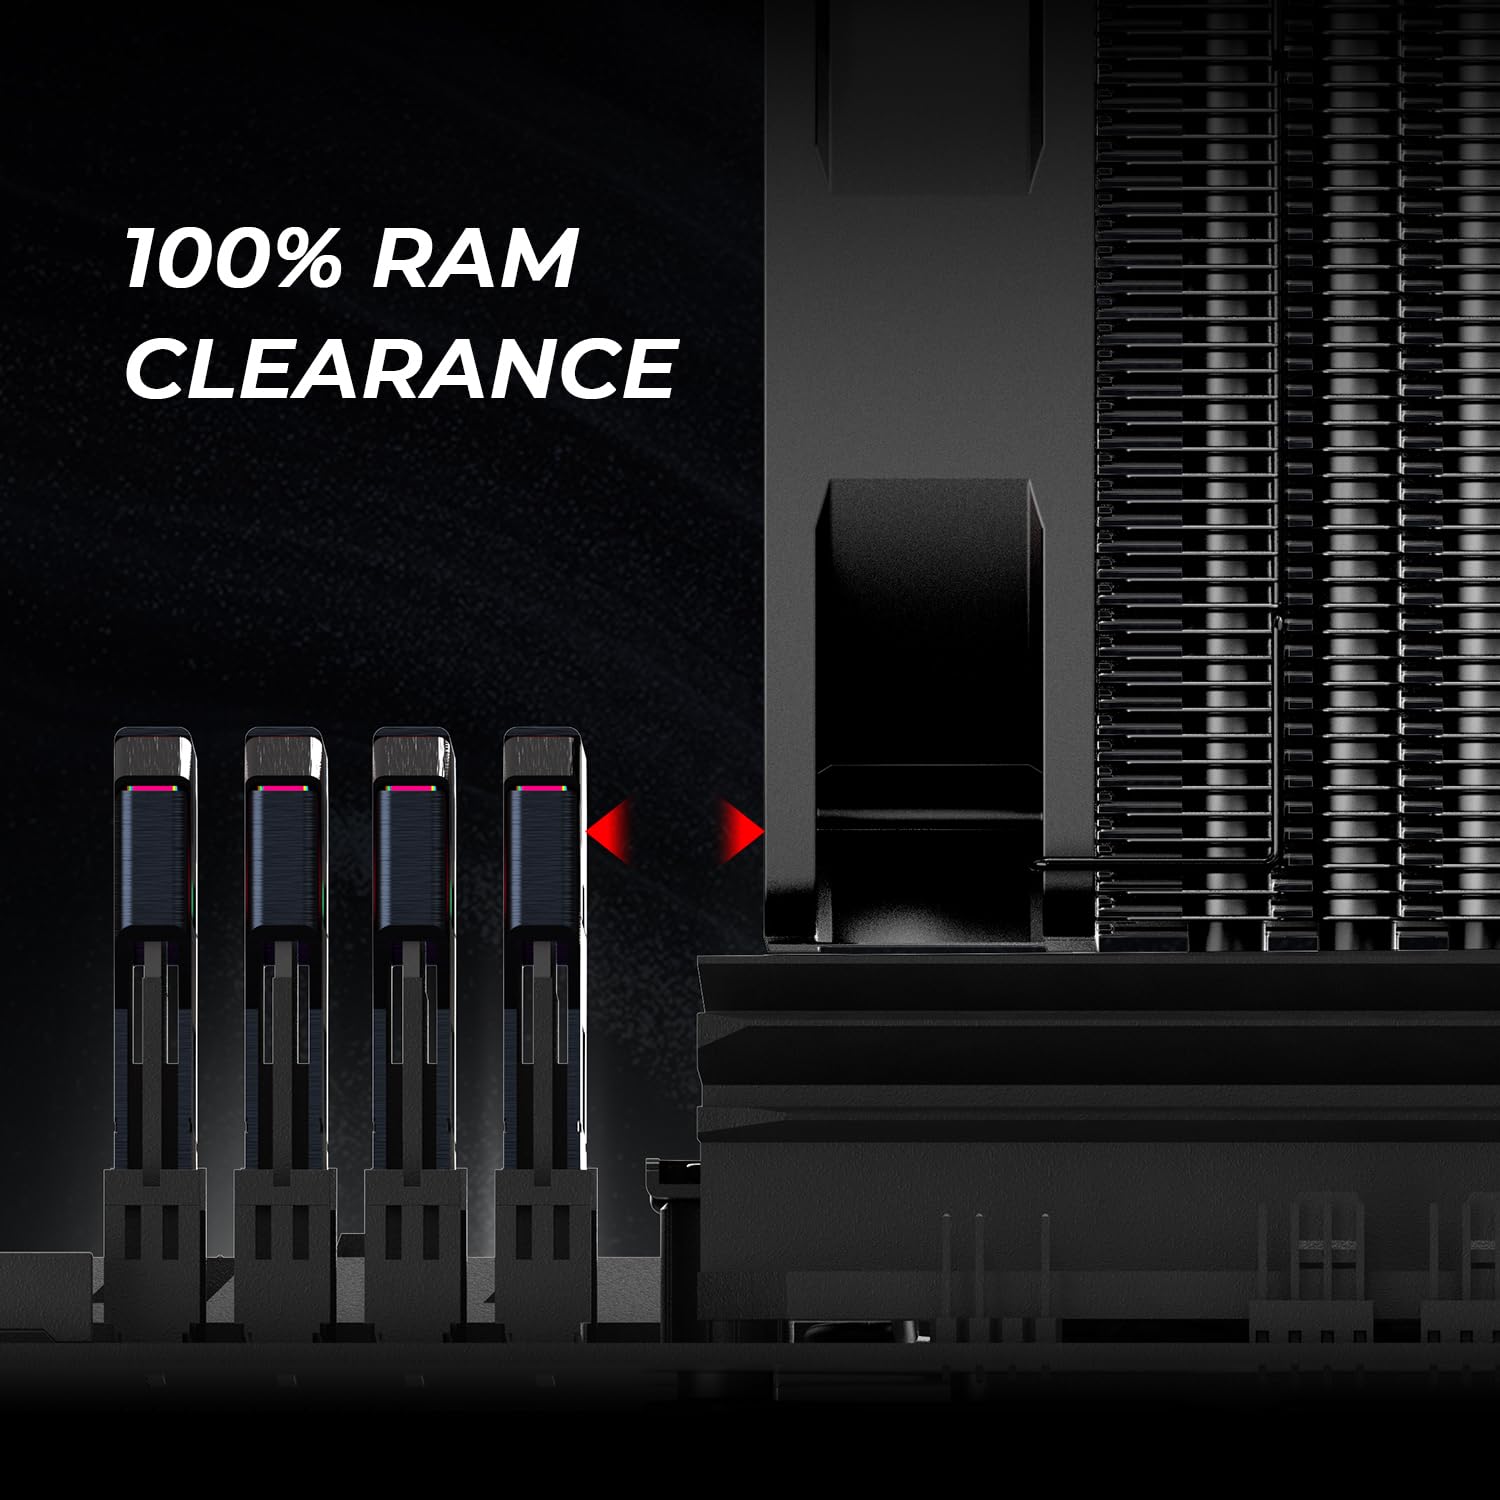
Figure 13: Illustration of 100% RAM clearance provided by the cooler's design, even with tall memory modules.
Operating Instructions
The ID-COOLING SE-903-XT CPU cooler operates automatically via its 92mm PWM fan. PWM (Pulse Width Modulation) allows the motherboard to control the fan speed based on the CPU temperature, ensuring efficient cooling when needed and quiet operation during lighter loads.
- Automatic Speed Control: The fan speed will dynamically adjust between 500 and 2200 RPM to maintain optimal CPU temperatures.
- Low Noise Operation: At lower loads, the fan operates quietly, with a maximum noise level of 25.8 dB(A) at full speed.
- Effective Heat Dissipation: The three direct-contact heat pipes efficiently transfer heat from the CPU to the aluminum fin array, which is then dissipated by the fan's airflow (up to 45.8 CFM).
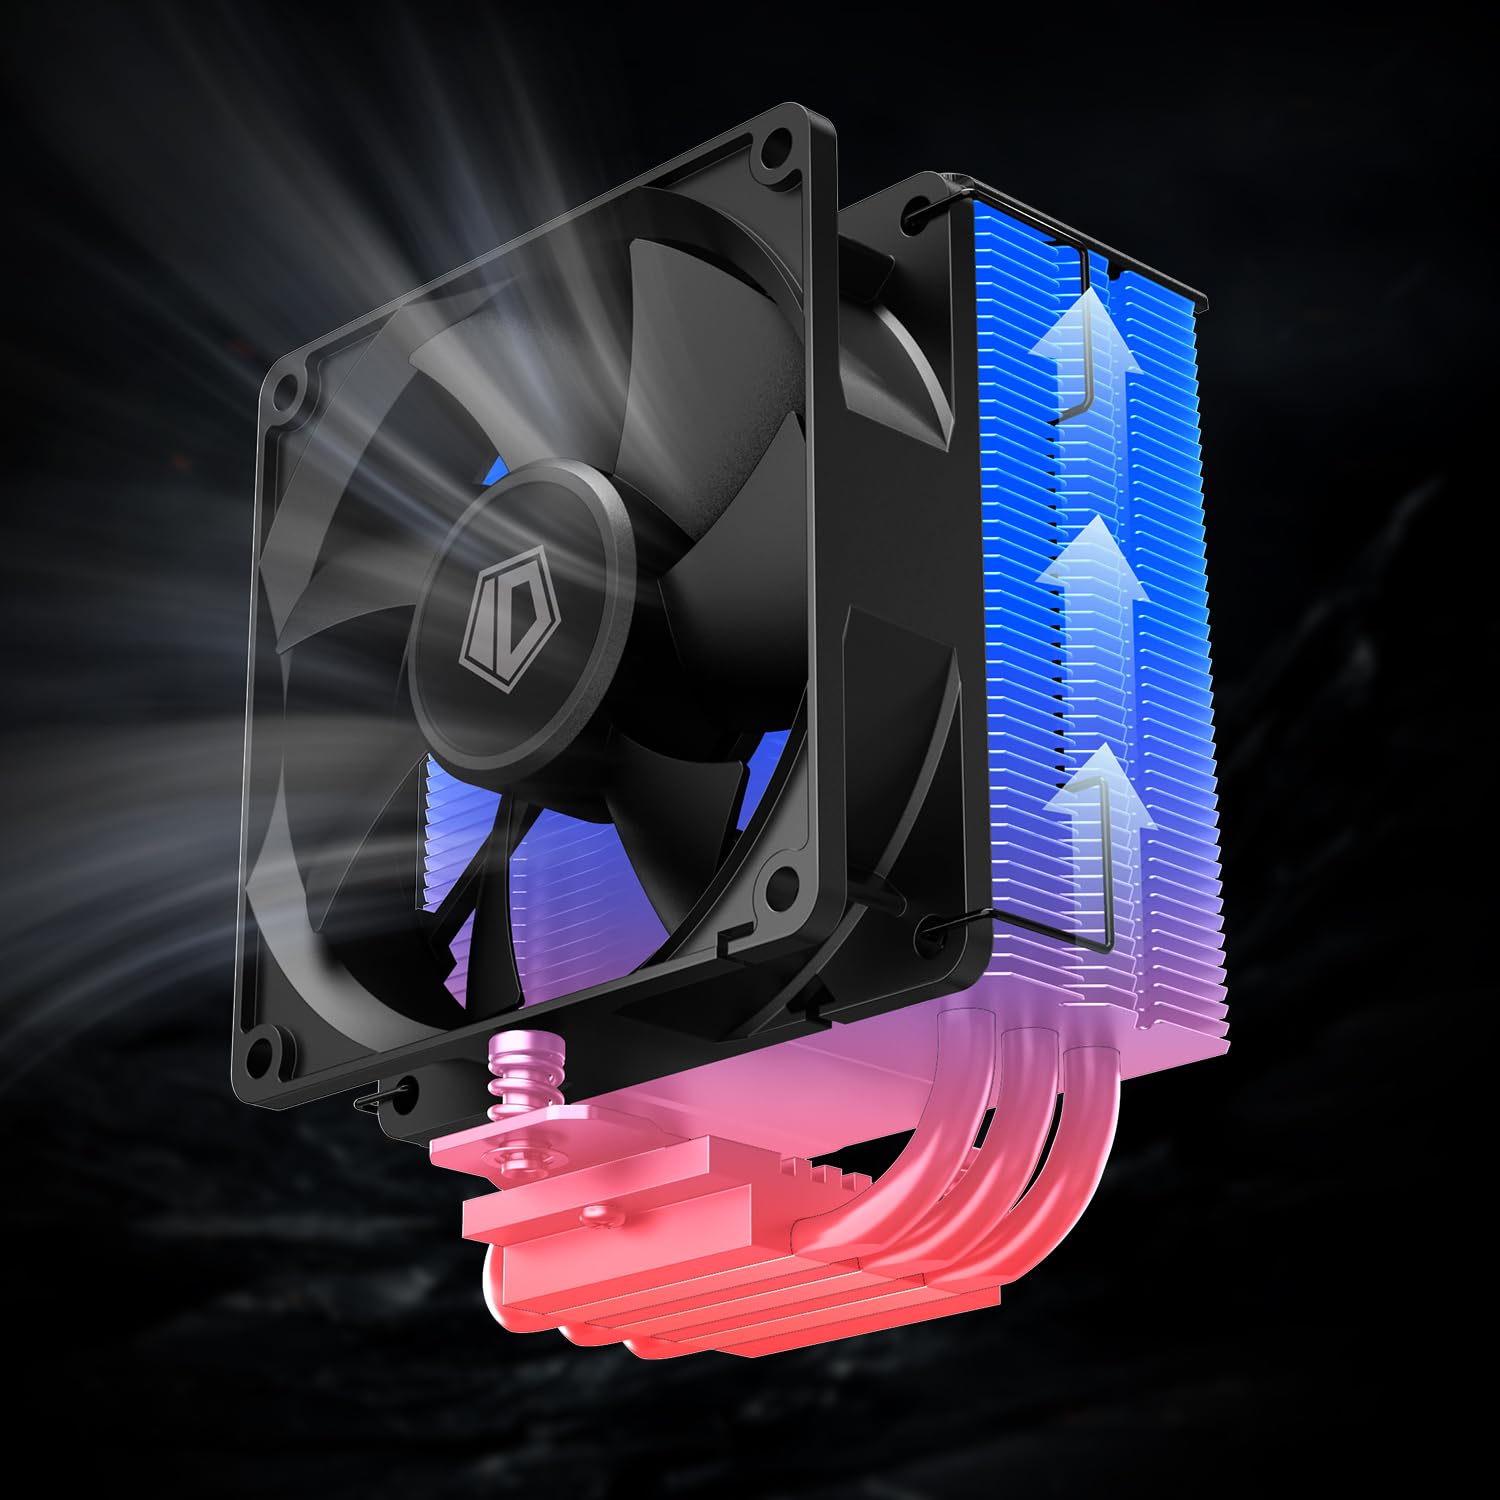
Figure 14: Visual representation of heat transfer from the CPU through the heat pipes to the heatsink fins, and dissipation by the fan.
Maintenance
Regular maintenance helps ensure the longevity and optimal performance of your CPU cooler:
- Dust Removal: Periodically clean dust from the heatsink fins and fan blades using compressed air or a soft brush. Ensure the fan is not spinning rapidly during cleaning to prevent damage to the bearings.
- Thermal Paste: The thermal paste typically lasts for several years. If you notice a significant increase in CPU temperatures, consider reapplying fresh thermal paste. This involves carefully removing the cooler, cleaning off old thermal paste from both the CPU and cooler base, and applying a new thin layer.
- Fan Inspection: Check the fan for any signs of wear, unusual noises, or wobbling. If the fan is faulty, it may need to be replaced.
Troubleshooting
| Problem | Possible Cause | Solution |
|---|---|---|
| Fan not spinning or spinning slowly |
|
|
| High CPU temperatures |
|
|
| Unusual fan noise |
|
|
Warranty and Support
ID-COOLING products are manufactured to high-quality standards. For warranty information, technical support, or service inquiries, please visit the official ID-COOLING website or contact their customer support directly. Keep your purchase receipt as proof of purchase for warranty claims.
For more information, visit the ID-COOLING Store on Amazon.
Related documentsSE-903-XT-BLACK


Ask a question about this manual
Ask about setup, troubleshooting, compatibility, parts, safety, or missing instructions. Manuals+ will review the question and use this page’s manual context to help answer it.