Introduction
Thank you for choosing the KRUPS EA910B Sensation Fully Automatic Coffee Machine. This manual provides essential information for the safe and efficient operation, maintenance, and troubleshooting of your new appliance. Please read it thoroughly before first use and keep it for future reference.
Safety Instructions
To prevent injury or damage, always observe the following safety precautions:
- Ensure the voltage indicated on the appliance corresponds to your mains voltage before connecting.
- Do not immerse the appliance, power cord, or plug in water or any other liquid.
- Keep the appliance out of reach of children. Close supervision is necessary when the appliance is used by or near children.
- Do not operate the appliance if the power cord or plug is damaged, or if the appliance malfunctions or has been damaged in any way.
- Always unplug the appliance from the mains socket before cleaning, filling, or when not in use.
- Avoid contact with hot surfaces. Use handles or knobs. Steam and hot water can cause severe burns.
- Only use accessories recommended by the manufacturer.
- Do not place the appliance on or near a hot gas or electric burner, or in a heated oven.
Product Overview
Familiarize yourself with the components of your KRUPS EA910B Sensation coffee machine.

Figure 1: The KRUPS EA910B Sensation fully automatic coffee machine in operation, dispensing coffee into two cups. This image highlights the sleek design and the user interface.

Figure 2: Front view of the KRUPS EA910B Sensation coffee machine, showcasing the control panel, coffee dispenser, and drip tray. The bean hopper is visible at the top.
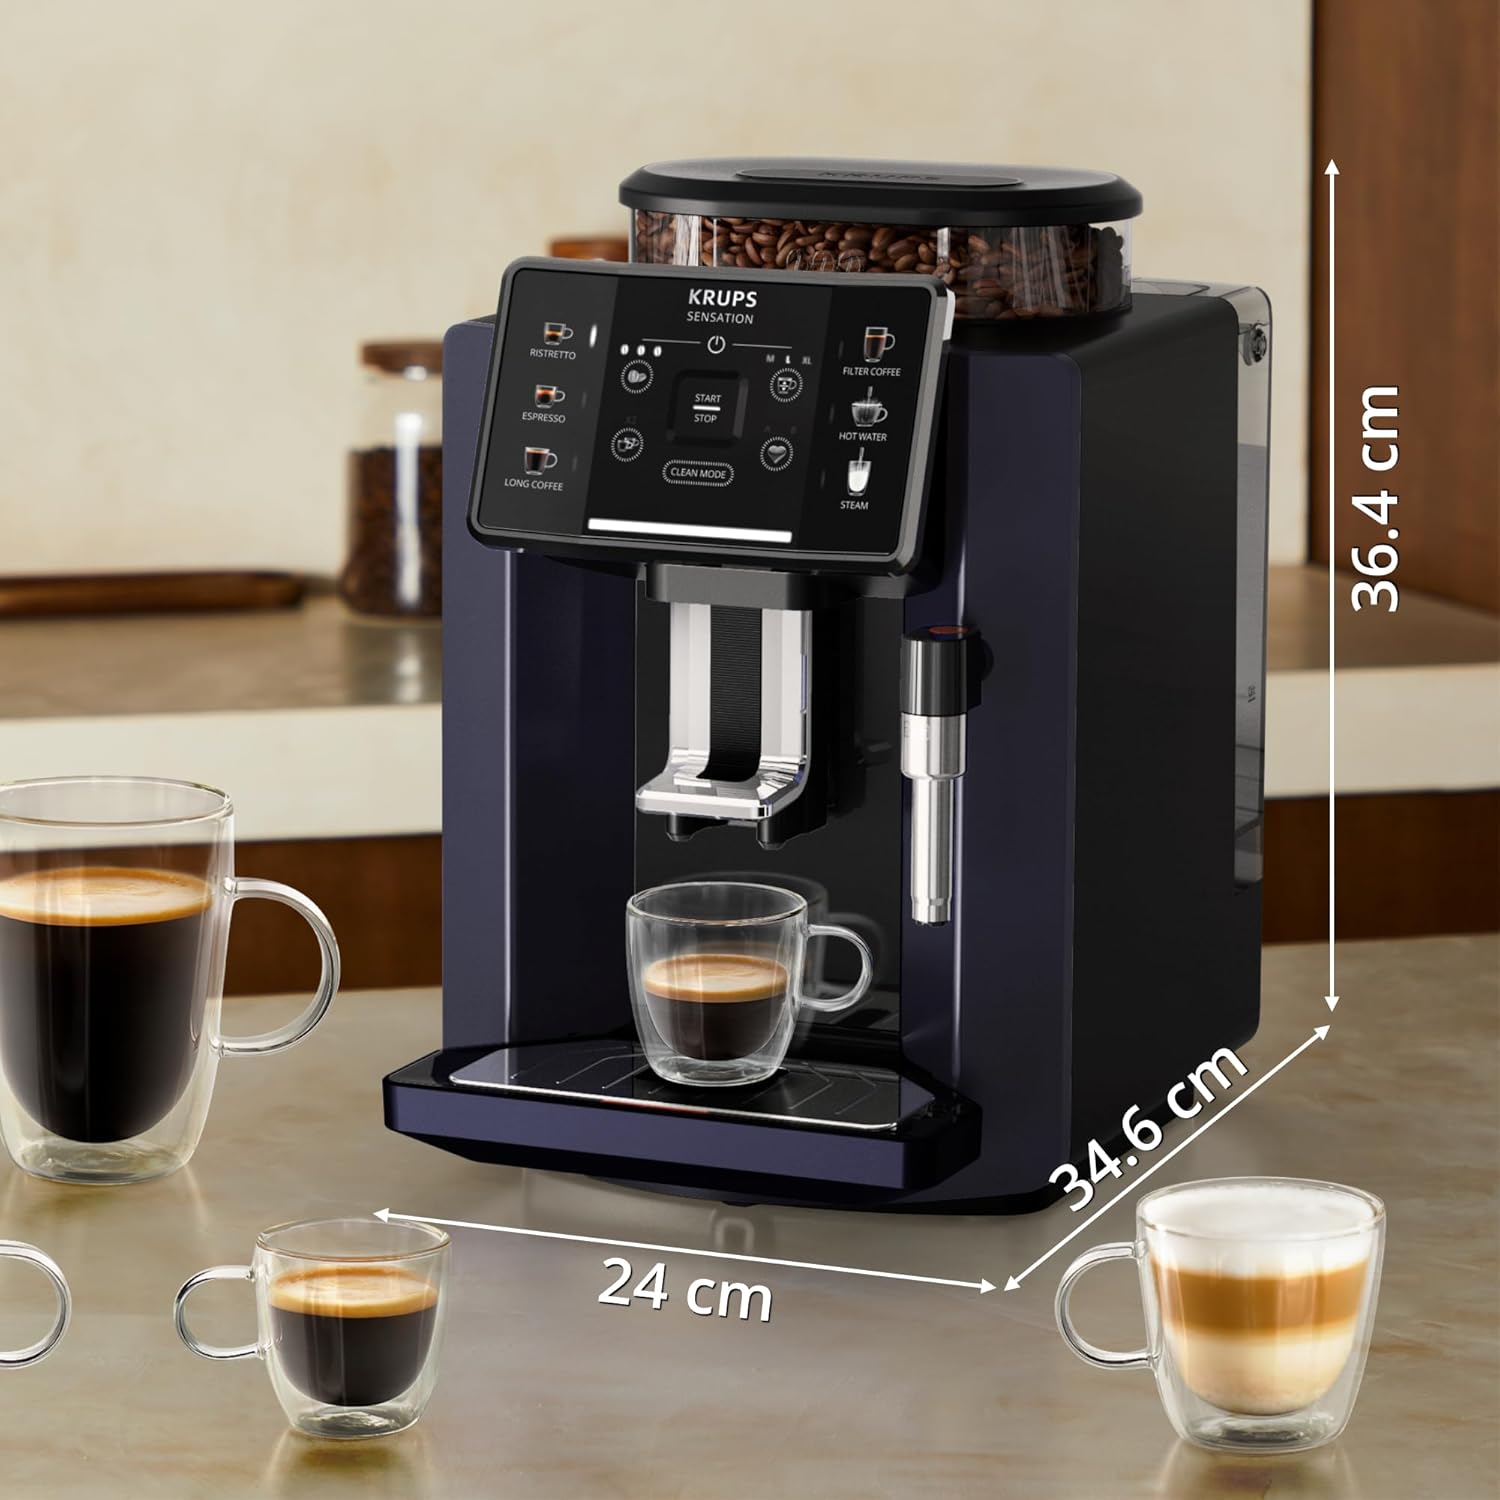
Figure 3: This image illustrates the dimensions of the KRUPS EA910B Sensation coffee machine: 36.4 cm in height, 24 cm in width, and 34.6 cm in depth. Various cup sizes are shown for scale.
Main Components:
- Bean Container: For whole coffee beans.
- Water Tank: Removable tank for fresh water.
- Control Panel: Touchscreen interface for selecting drinks and settings.
- Coffee Outlet: Adjustable height for various cup sizes.
- Drip Tray: Collects excess water and coffee drips.
- Coffee Grounds Container: Collects used coffee pucks.
- Steam Nozzle/Milk Frother: For frothing milk and dispensing hot water.
Setup
1. Unpacking and Initial Cleaning:
- Remove all packaging materials.
- Wipe the exterior of the machine with a damp cloth.
- Wash the water tank, drip tray, and coffee grounds container with warm soapy water, then rinse thoroughly.
2. Filling the Water Tank:
- Remove the water tank from the machine.
- Fill it with fresh, cold tap water up to the MAX level.
- Place the water tank back into the machine securely.
- Optional: Install the water filter provided in the box as per the filter instructions.
3. Filling the Bean Container:
- Open the lid of the bean container.
- Pour fresh, roasted coffee beans into the container. Do not use ground coffee, instant coffee, or caramelized beans.
- Close the lid firmly to preserve bean freshness.
4. First Use / Priming:
- Plug the machine into a grounded power outlet.
- Press the power button to turn on the machine.
- The machine will typically perform an automatic rinsing cycle. Place a container under the coffee outlet to collect the water.
- Follow any on-screen prompts or illumination warnings for initial setup, such as language selection or water hardness setting.
Operating Instructions
1. Powering On/Off:
- To Turn On: Press the power button (⏻ symbol) on the control panel. The machine will heat up and perform a rinse cycle.
- To Turn Off: Press and hold the power button. The machine will perform a final rinse cycle before shutting down.
2. Preparing Coffee:
- Place one or two cups under the coffee outlet. Adjust the height of the outlet to fit your cup.
- On the touchscreen, select your desired coffee type:
- Ristretto: A very short, concentrated espresso.
- Espresso: A classic, strong coffee shot.
- Long Coffee: A larger volume coffee, similar to an Americano.
- Filter Coffee: A milder, larger cup of coffee.
- Press the corresponding icon to start brewing. The machine will automatically grind the beans and brew the coffee.
3. Customizing Your Drink:
- Before brewing, you can often adjust settings like coffee strength (e.g., mild, medium, strong) and volume using the on-screen options.
- Some models allow saving customized recipes for quick access. Refer to the on-screen menu for "Custom Settings" or "My Recipes."
4. Hot Water Function:
- Select the "Hot Water" icon on the control panel.
- Place a cup under the steam nozzle.
- Press the button to dispense hot water for tea or other beverages.
5. Steam Function (Milk Frothing):
- Select the "Steam" icon. The machine will heat up to steam temperature.
- Fill a milk jug with cold milk.
- Submerge the steam nozzle into the milk.
- Activate the steam function (usually by pressing the steam button again or turning a knob).
- Move the jug up and down to create foam.
- Once desired foam is achieved, deactivate steam and clean the nozzle immediately.
Maintenance and Cleaning
Regular cleaning ensures optimal performance and extends the lifespan of your coffee machine. The KRUPS Sensation features a fully automatic cleaning program for convenience.
1. Daily Cleaning:
- Drip Tray and Coffee Grounds Container: Empty and rinse daily. These components are usually dishwasher safe or can be washed by hand with warm soapy water.
- Coffee Outlet: Wipe clean with a damp cloth.
- Steam Nozzle: After each use, wipe the nozzle with a damp cloth. Run a short burst of steam to clear any milk residue from inside.
2. Automatic Cleaning Program:
- The machine will prompt you when a cleaning cycle is required, often indicated by illumination warnings on the display.
- Follow the on-screen instructions to initiate the "Clean Mode" program. This typically involves placing a container under the coffee outlet and adding a cleaning tablet (if required by the machine).
3. Descaling:
- The machine will indicate when descaling is necessary based on water hardness settings and usage.
- Use a descaling solution recommended by KRUPS.
- Follow the detailed instructions provided by the machine's display for the descaling process, which involves filling the water tank with the solution and running a cycle.
4. Water Filter Replacement:
- If you use a water filter, replace it regularly as indicated by the machine or every two to three months, depending on usage and water hardness.
Troubleshooting
If you encounter issues with your KRUPS EA910B Sensation, refer to the table below for common problems and solutions. Illumination warnings on the display will often guide you to the specific issue.
| Problem | Possible Cause | Solution |
|---|---|---|
| No coffee dispensed / Machine not brewing. | Water tank empty; coffee beans empty; brewing unit clogged; air in the system. | Fill water tank; fill bean container; run a cleaning cycle; perform a priming cycle (dispense hot water). |
| Coffee is too weak or watery. | Insufficient coffee grounds; coarse grind setting; too much water. | Adjust coffee strength setting; adjust grinder to a finer setting; reduce coffee volume. |
| Machine leaks water. | Drip tray full; water tank not properly seated; internal component issue. | Empty drip tray; re-seat water tank firmly; if problem persists, contact support. |
| Error message or illumination warning. | Specific issue indicated by the warning (e.g., "Descale," "Clean," "Empty Grounds"). | Follow the on-screen instructions or refer to the specific warning in the full manual (if available). Perform indicated maintenance. |
| Milk frother not producing foam. | Steam nozzle clogged; milk not cold enough; incorrect milk type. | Clean steam nozzle thoroughly; use cold, fresh milk (preferably whole milk); ensure nozzle is properly submerged. |
Specifications
| Feature | Detail |
|---|---|
| Brand | KRUPS |
| Model Number | EA910B10 |
| Color | Blacks |
| Product Dimensions (D x W x H) | 34.6 x 24 x 36.4 cm |
| Item Weight | 9.22 Kilograms |
| Special Feature | Programmable |
| Coffee Machine Type | Espresso Machine |
| Included Components | Filter, Carafe, Milk Frother |
Warranty and Support
For warranty information and technical support, please refer to the warranty card included with your product or visit the official KRUPS website. Keep your proof of purchase for any warranty claims.
For further assistance, you may contact KRUPS customer service through their official channels.


