
THOKWOK TK-X2 Single
THOKWOK TK-X2 Motorcycle Bluetooth Headset User Manual
Model: TK-X2 Single
Brand: THOKWOK
1. Introduction
Thank you for choosing the THOKWOK TK-X2 Motorcycle Bluetooth Headset. This manual provides detailed instructions for the proper installation, operation, and maintenance of your device. Please read this manual thoroughly before use to ensure optimal performance and safety.
Safety Precautions:
- Always prioritize road safety. Do not operate the device in a manner that distracts you from riding.
- Ensure the device is securely mounted to your helmet before riding.
- Adjust volume to a safe level that allows you to hear ambient traffic sounds.
- Do not attempt to disassemble or modify the device. This may void the warranty and cause damage.
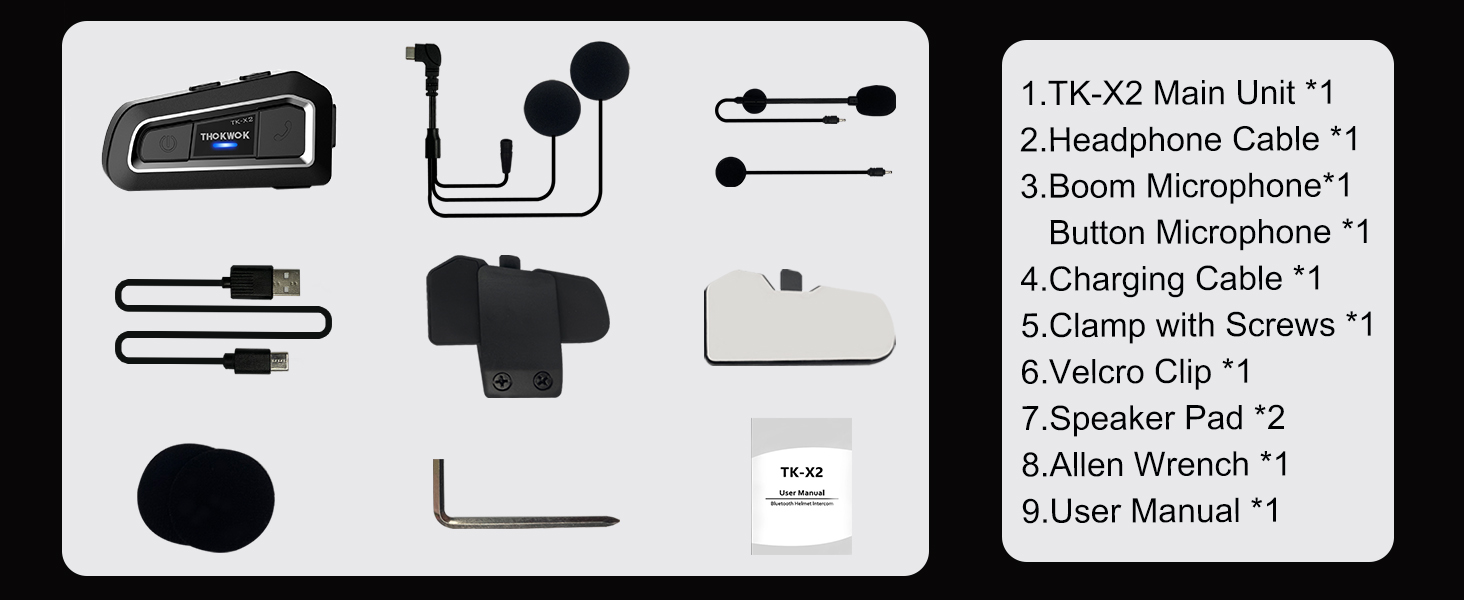
2. What's in the Box
Verify that all components are present before proceeding with installation.

TK-X2 Main Unit

Boom Microphone

Button Microphone

Headphone Cable & Charging Cable
Clamp with Screws
Velcro Clip
Speaker Pads
Allen Wrench
User Manual
3. Product Overview
The THOKWOK TK-X2 features an intuitive button layout for easy operation even with gloves. Below is a diagram highlighting the main unit and its components.
Main Unit: Power Button (left), Function Button (middle), Phone Button (right).
Key Features: Bluetooth 5.0, 3 Riders' Group, FM Radio, Hi-Fi Stereo, DSP&CVC Noise Reduction, Voice Assistant, IP67 Waterproof, 650mAh Battery.
4. Installation
The TK-X2 offers flexible installation options to suit various helmet types.
4.1. Mounting the Main Unit
Use either the clamp with screws or the velcro clip to attach the main unit to the side of your helmet. Ensure it is securely fastened and does not obstruct your vision or helmet functionality.
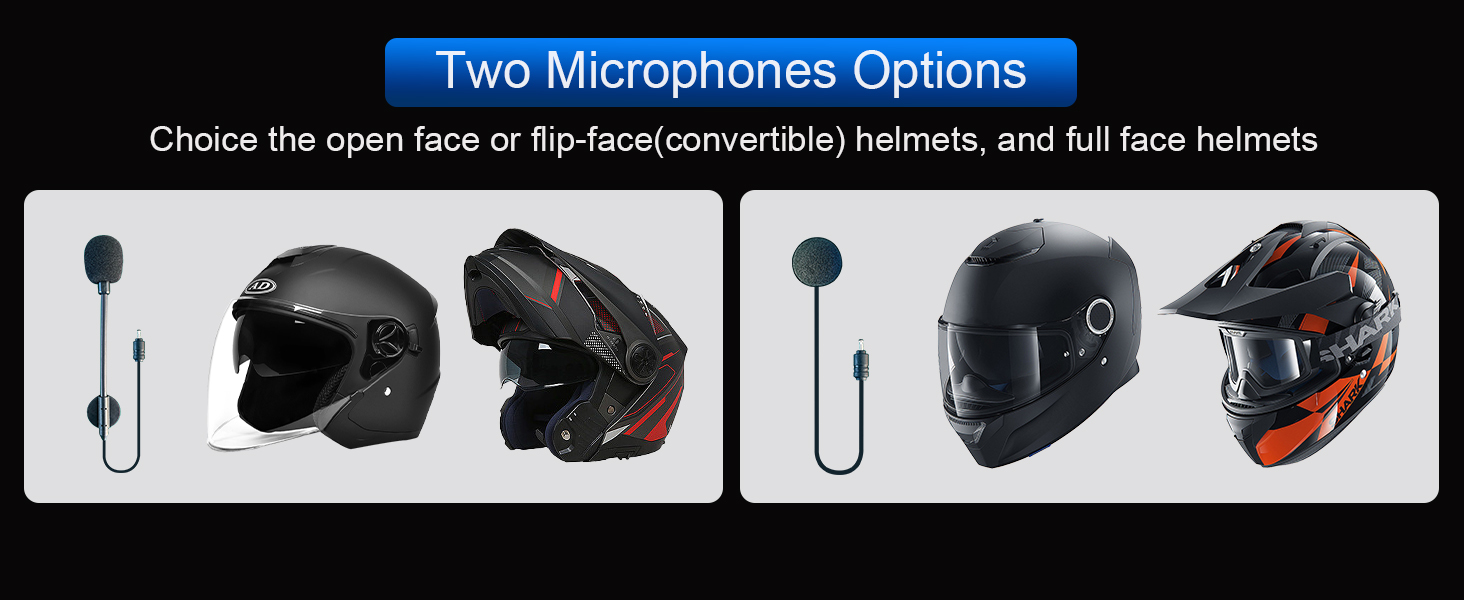
4.2. Microphone Options
The TK-X2 includes two interchangeable microphones for different helmet styles:
- Boom Microphone: Ideal for open-face or flip-face (modular) helmets.
- Button Microphone: Suitable for full-face helmets.

Choose the appropriate microphone for your helmet type.
5. Setup and Pairing
5.1. Bluetooth Pairing with Phone
To connect your TK-X2 headset to your smartphone:
- Ensure the TK-X2 is powered off.
- Long press the Power button for 4 seconds until the red and blue lights flash alternately. This indicates pairing mode.
- On your phone, turn on Bluetooth and search for "TK-X2".
- Select "TK-X2" to connect. Once connected, the blue light on the headset will flash slowly.
Video: Demonstrates pairing the TK-X2 with a smartphone for music and call functions.
5.2. Intercom Pairing (Multiple Units)
The TK-X2 supports intercom communication for up to 3 riders, with 2 riders talking simultaneously. Before pairing, ensure all units have their previous Bluetooth pairing records cleared by long pressing the Power and Phone buttons simultaneously for 8 seconds until pink lights flash twice.
5.2.1. Two-Way Intercom Pairing
- Turn on both TK-X2 units.
- On both units, long press the Power button for 4 seconds until red and blue lights flash alternately (pairing mode).
- Click the Power button on one of the units to initiate pairing.
- Once paired, the blue lights on both units will flash slowly, and you will hear "Intercom connected".
5.2.2. Three-Way Intercom Pairing
- Clear all previous pairing records on all three units (A, B, C) as described above.
- Turn on all three units.
- Pairing A and B: On units A and B, long press the Power button for 4 seconds until red and blue lights flash alternately. Click the Power button on unit A to pair. Once paired, blue lights flash slowly.
- Pairing B and C: On unit B, click the Power button to hang up the intercom. On units B and C, long press the Power button for 4 seconds until red and blue lights flash alternately. Click the Power button on unit B to pair. Once paired, blue lights flash slowly.
- Pairing C and A: On unit C, click the Power button to hang up the intercom. On units C and A, long press the Power button for 4 seconds until red and blue lights flash alternately. Click the Power button on unit C to pair. Once paired, blue lights flash slowly.
- Initiating 3-Way Intercom: Double-click the Power button on unit A to talk with C. Click the Power button on unit C to talk with B.
Video: Illustrates the process of pairing two and three TK-X2 units for intercom communication.
6. Operation
6.1. Basic Controls
- Power On/Off: Long press the Power button for 2 seconds.
- Music Play/Pause: Click the Function button.
- Next Song: Click the Phone button.
- Previous Song: Click the Power button.
- Volume Up: Long press the Phone button. You will hear a "Di" sound when maximum volume is reached.
- Volume Down: Long press the Power button.
- Answer/End Call: Click the Phone button.
- Reject Call: Long press the Phone button for 2 seconds.
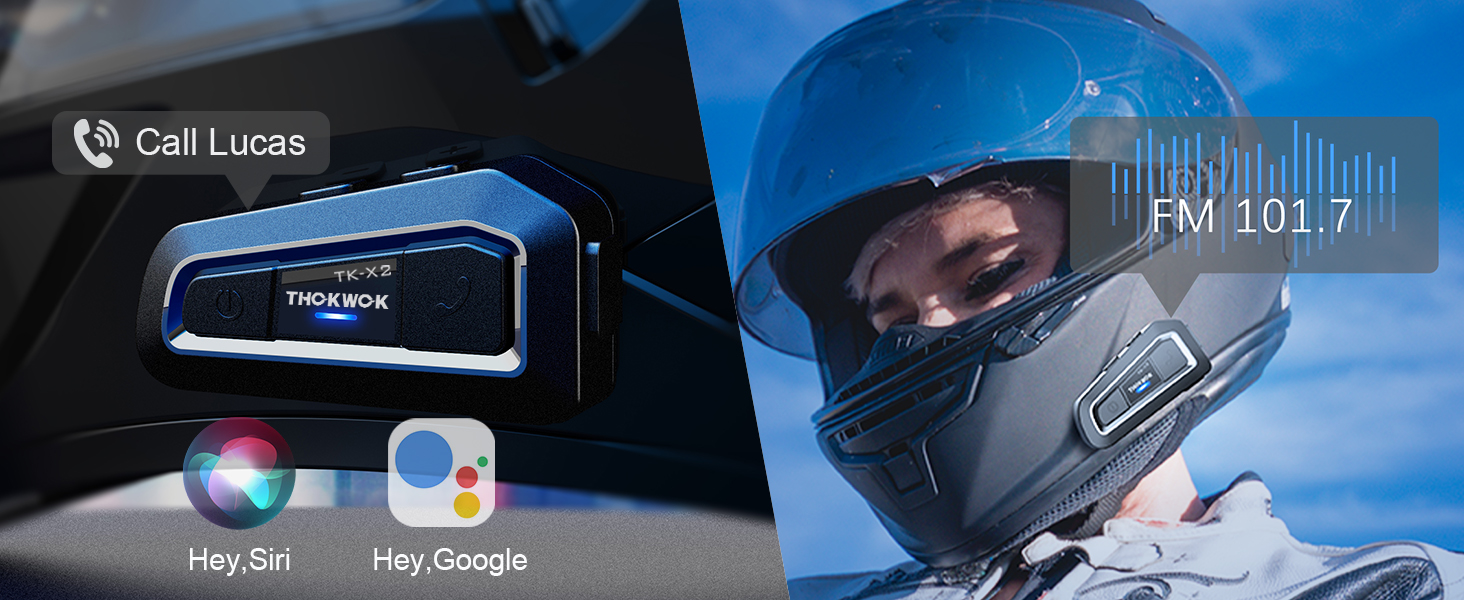
- Voice Assistant (Siri/S-Voice): Long press the Function button for 2 seconds. You will hear "Voice Dial".
- FM Radio On/Off: Double-click the Function button. You will hear "Turn on radio" or "Turn off radio".
Access voice assistant and FM radio with simple button presses.
6.2. Intercom Usage
- Start Intercom: Click the Power button (after successful pairing).
- End Intercom: Click the Power button.
- When an intercom call is active, music playback will automatically pause. Music will resume when the intercom call ends.
7. Maintenance
7.1. Charging
The TK-X2 features a built-in 650mAh Lithium Polymer battery. Connect the charging cable to the Type-C port on the unit and a suitable USB power source. A full charge takes approximately 2.5 hours. The device will broadcast battery status upon power-on: "Battery full", "Battery medium", or "Battery low".

Enjoy up to 24 hours of music or intercom time and 280 hours of standby time.
7.2. Cleaning and Storage
The TK-X2 has a waterproof design (IP67 rated), allowing use in various weather conditions. To clean, wipe the unit with a soft, damp cloth. Avoid using harsh chemicals or abrasive materials. Store the device in a cool, dry place when not in use.
The waterproof design ensures durability in various riding environments.
8. Troubleshooting
| Problem | Possible Cause | Solution |
|---|---|---|
| Cannot power on | Low battery | Charge the device for at least 2.5 hours. |
| Cannot pair with phone | Device not in pairing mode / Phone Bluetooth off / Previous pairing conflict | Ensure TK-X2 is in pairing mode (red & blue flashing). Turn on phone Bluetooth. Clear previous pairing records on TK-X2 and try again. |
| Intercom not connecting | Units not in pairing mode / Previous pairing conflict | Ensure all units are in pairing mode. Clear all previous pairing records on all units and re-pair. |
| Poor sound quality / Noise | Microphone/speaker placement / Environmental noise | Adjust microphone and speaker position inside the helmet. Ensure microphone is close to your mouth. The device features DSP & CVC noise cancellation for high-speed clarity. |
| FM radio not working | Weak signal / Feature not activated | Move to an area with better signal. Double-click the Function button to activate FM radio. |
9. Specifications
| Feature | Detail |
|---|---|
| Model Name | TK-X2 Single |
| Bluetooth Version | 5.1 |
| Intercom Distance | Up to 1000m (no obstacles) |
| Max Riders (Intercom) | 3 (2 simultaneous talk) |
| Noise Control | Active Noise Cancellation (DSP & CVC) |
| Battery Type | Lithium Polymer (650mAh) |
| Music/Intercom Time | Up to 24 hours |
| Standby Time | Up to 280 hours |
| Charging Time | Approx. 2.5 hours |
| Water Resistance Level | Waterproof (IP67) |
| Headphones Jack | Type-C |
| Dimensions | 3 x 1.6 x 0.83 inches |
| Item Weight | 8.4 ounces |
| Material | Acrylonitrile Butadiene Styrene (ABS) |
10. Warranty and Support
THOKWOK products are designed and manufactured to the highest quality standards. For warranty information, technical support, or customer service inquiries, please refer to the contact information provided on your product packaging or visit the official THOKWOK website.
Please retain your proof of purchase for warranty claims.
Ask a question about this manual
Ask about setup, troubleshooting, compatibility, parts, safety, or missing instructions. Manuals+ will review the question and use this page’s manual context to help answer it.