
SUNAPEX 1.8W Solar Battery Charger with Battery Voltage Tester
SUNAPEX 1.8W Solar Battery Charger with Battery Voltage Tester User Manual
Model: 1.8W Solar Battery Charger with Battery Voltage Tester
1. Introduction
This manual provides detailed instructions for the SUNAPEX 1.8W Solar Battery Charger with an integrated Battery Voltage Tester. This device is designed to maintain and test various 6V, 12V, 24V, and 48V batteries, ensuring optimal performance and longevity.
The solar charger utilizes advanced amorphous film technology for efficient power generation, while the built-in intelligent controller offers comprehensive battery protection. The included battery voltage tester provides quick and accurate readings for a wide range of battery types.
2. Key Features
- High Conversion Rate Solar Panel: 1.8W amorphous film solar panel with up to 30% conversion efficiency, ensuring stable output even in varying light conditions. Features an LED indicator for operational status.
- Intelligent Charger Controller: Built-in protection against reverse discharge, overcharge, over-voltage, and short circuits, safeguarding your battery.
- Durable and Weatherproof Design: Covered with ultra-clear PV glass for strong light transmission and resistance to hail, rain, and snow. Features a durable engineering ABS plastic housing.
- Integrated Battery Voltage Tester: Compatible with 6V/12V/24V/48V batteries (100-2000CCA), including FLD, AGM, LI, LifePO4, and GEL types.
3. Product Components

Figure 1: Overview of the SUNAPEX 1.8W Solar Battery Charger with Voltage Tester.
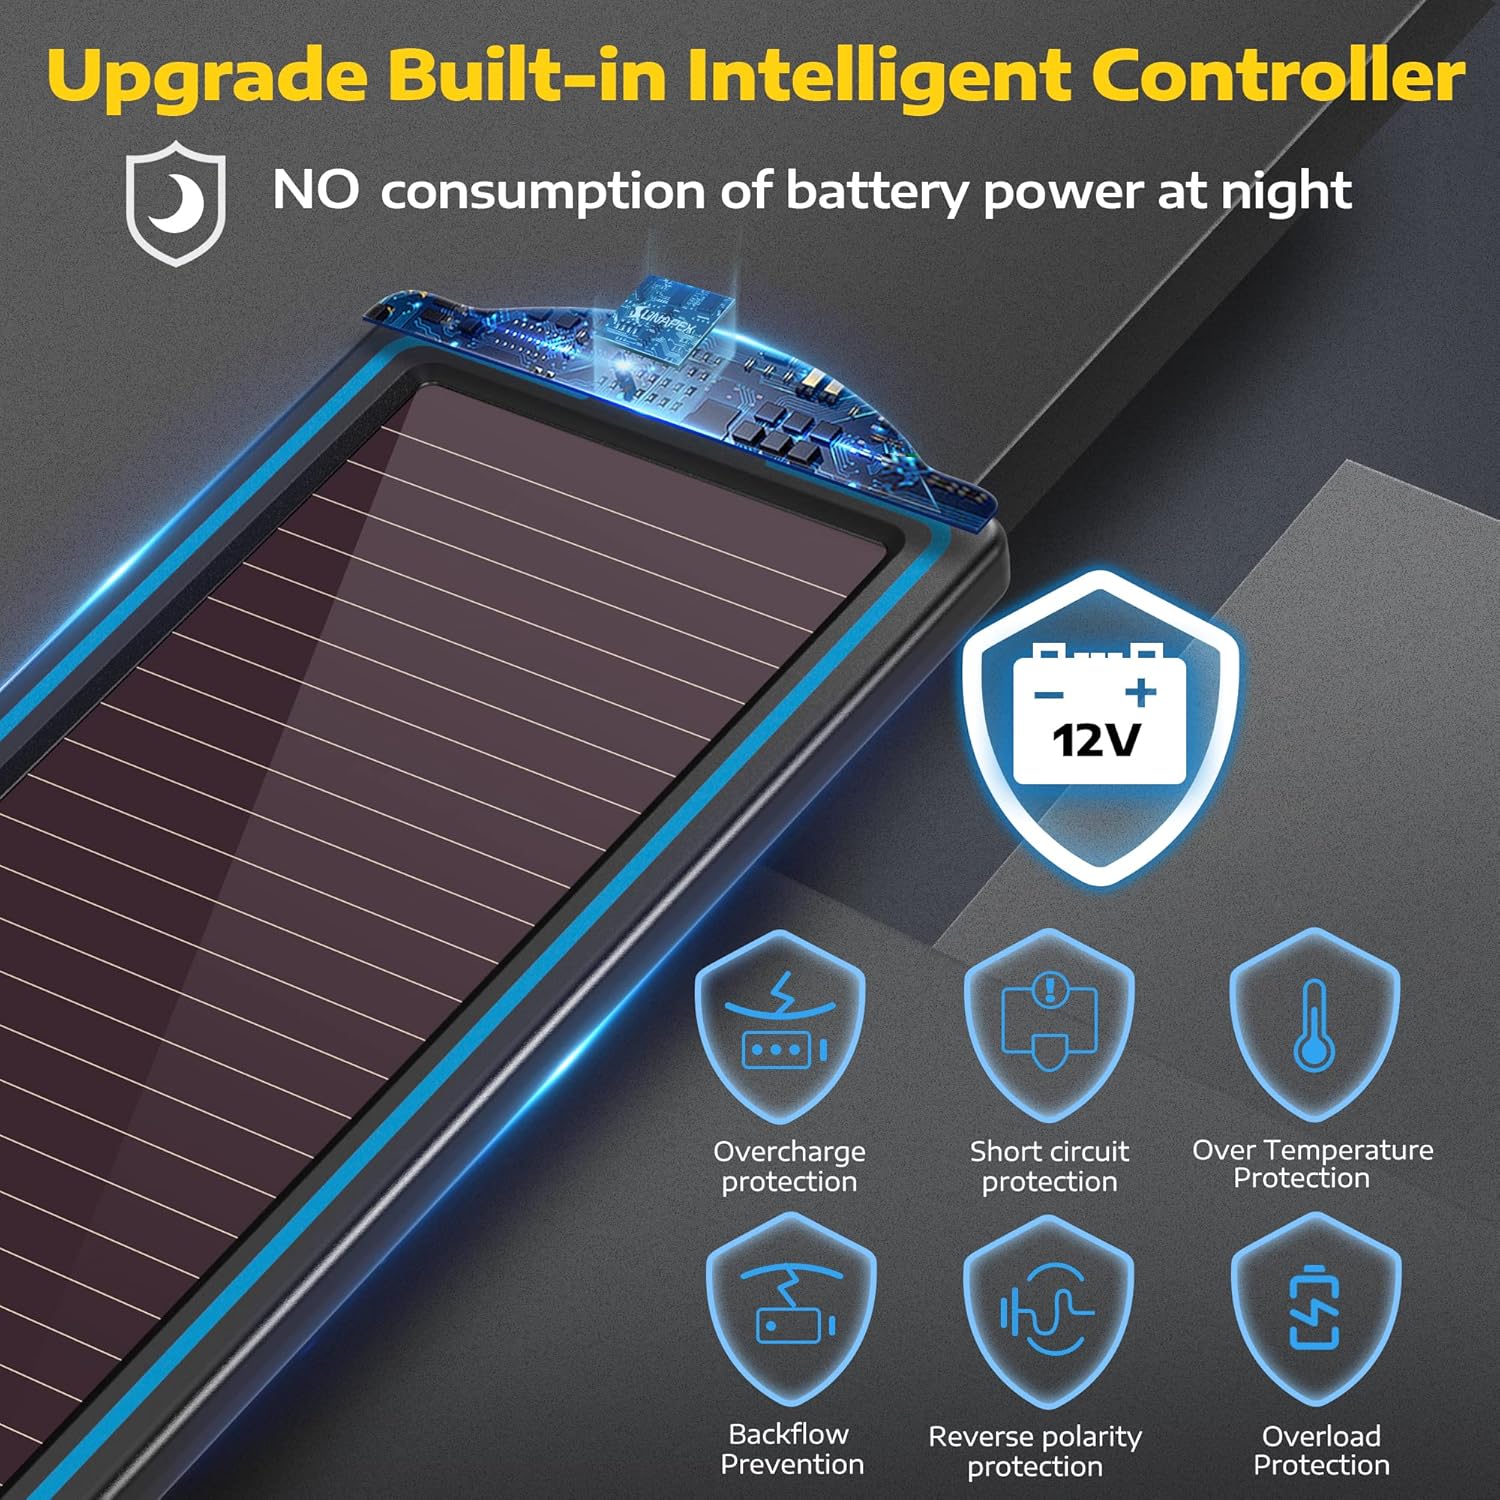
Figure 2: Detailed view of the solar panel, highlighting its high conversion rate and durable construction. Includes fixed mounting holes and an ABS plastic shell.

Figure 3: Illustration of the upgraded built-in intelligent controller, showing its various protection mechanisms such as overcharge, short circuit, and reverse polarity protection.

Figure 4: Demonstrates the weather-resistant properties of the solar charger, including waterproof, wind and snow resistance, hail resistance, and resistance to oxidation.
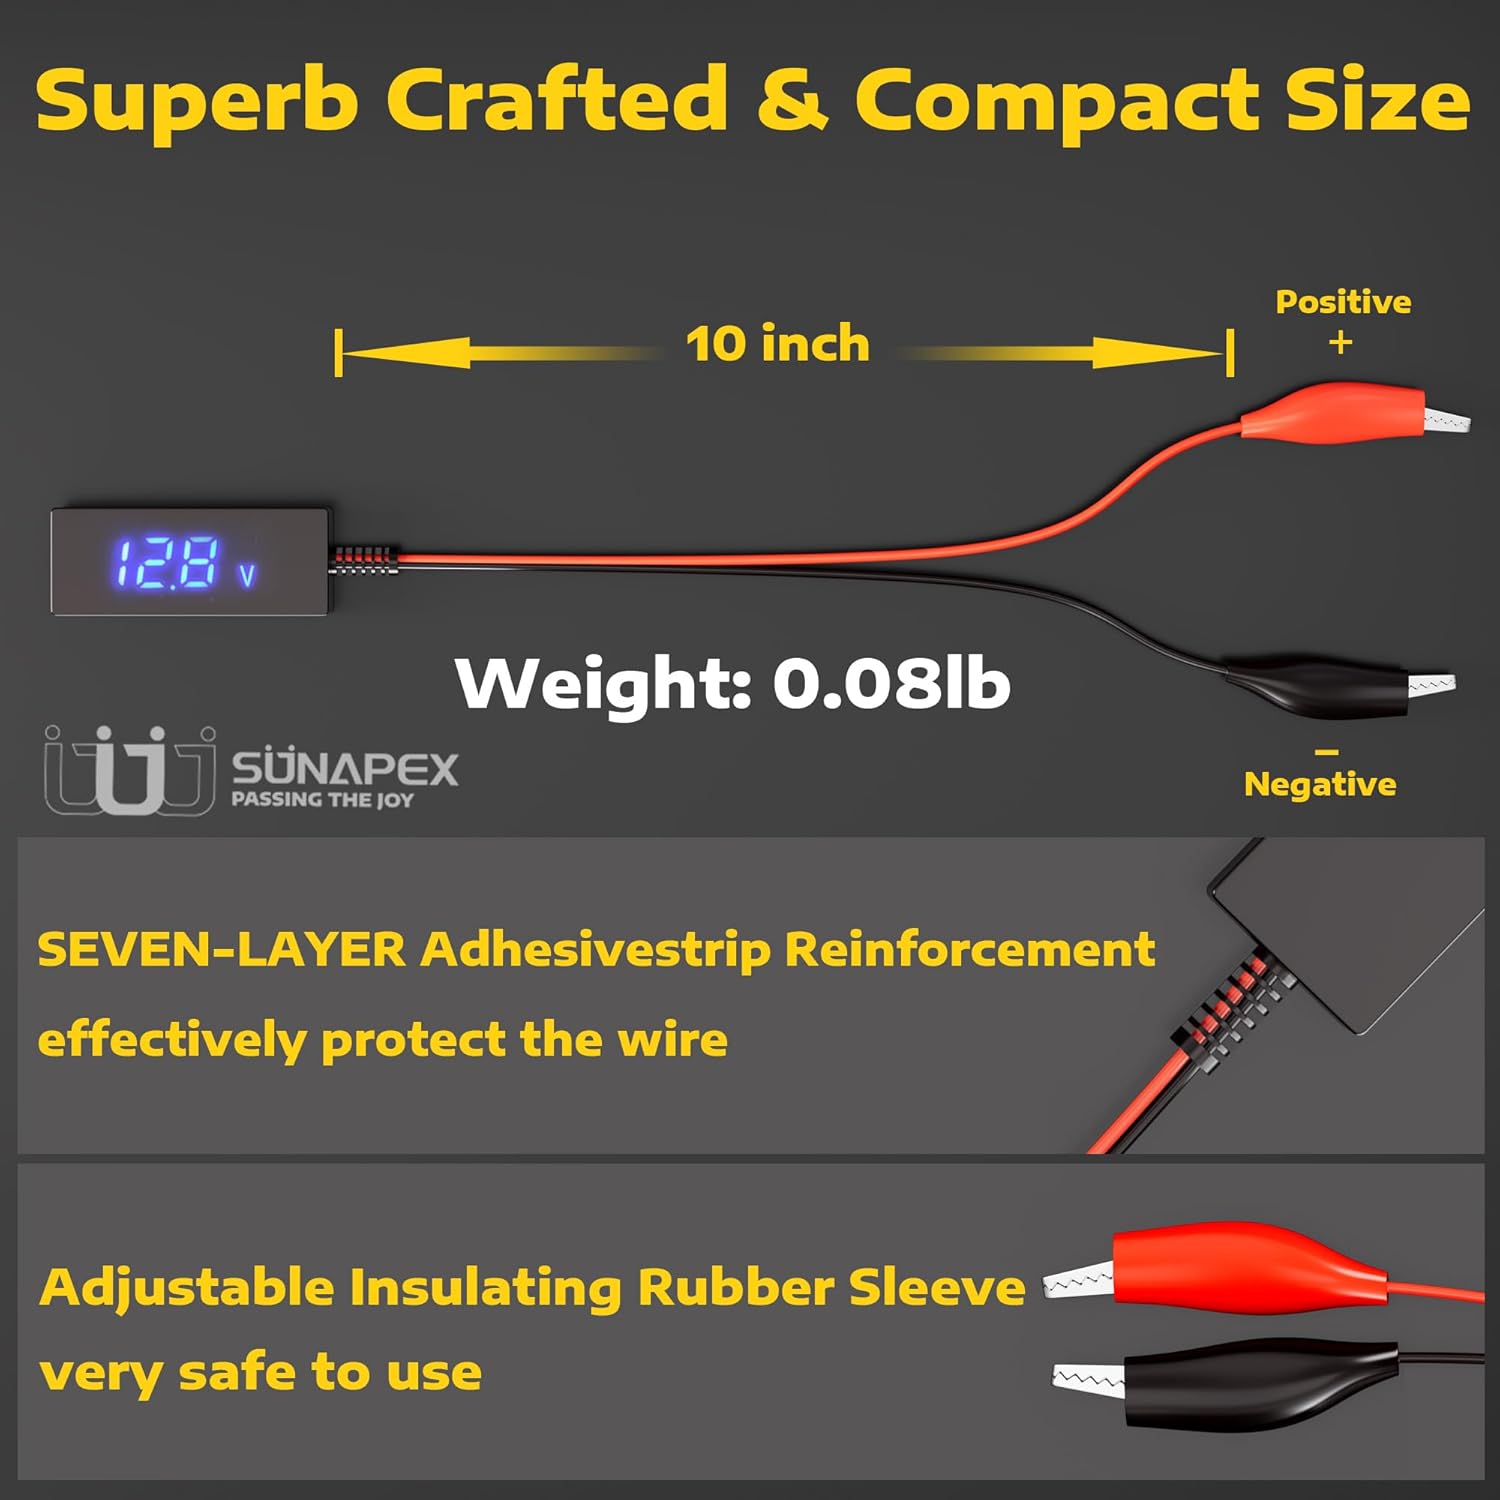
Figure 5: Shows the battery voltage tester's compatibility with various battery types (FLD, GEL, AGM, EFB, LifePO4) and its testing range of 5V-60V.
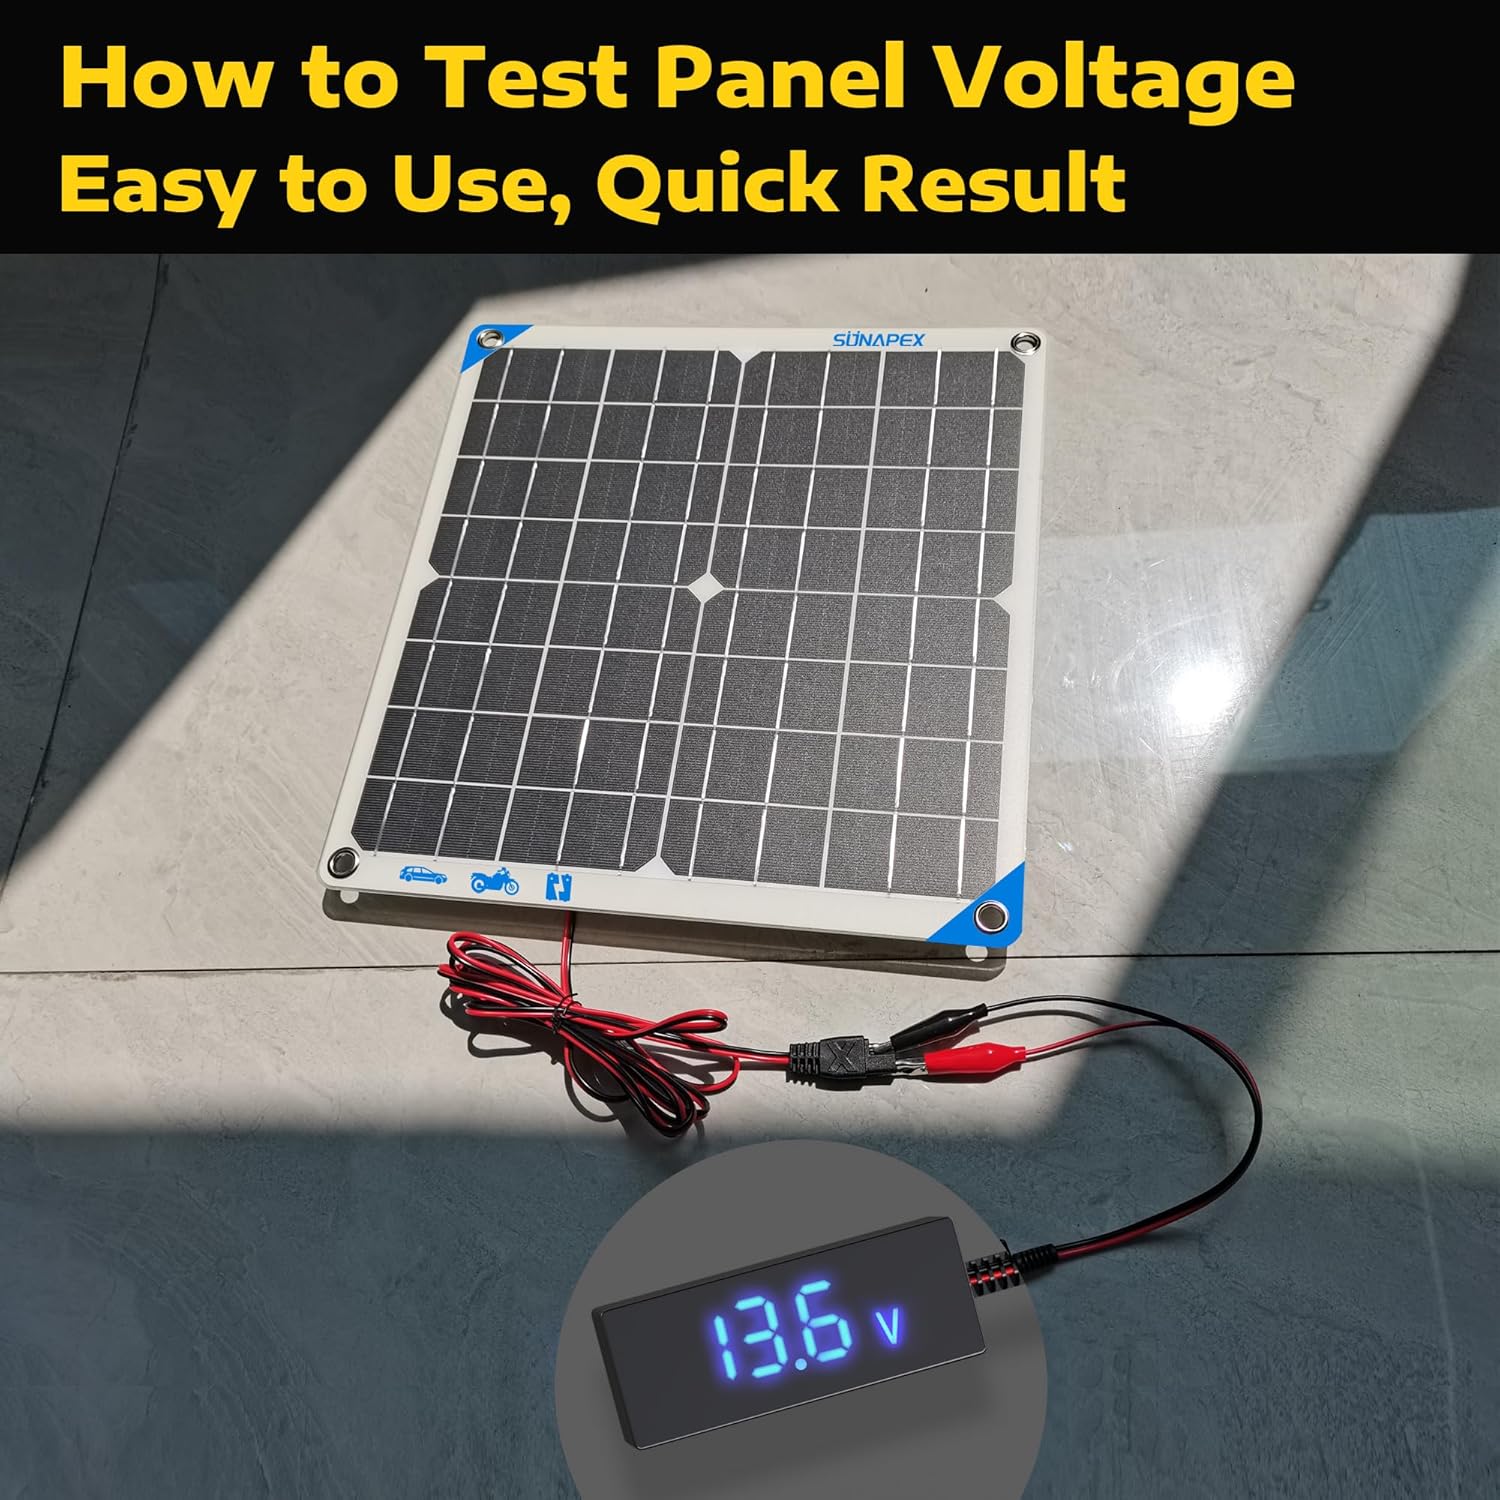
Figure 6: Illustrates the compact size (10 inches) and lightweight design (0.08lb) of the product, along with details on the seven-layer adhesive strip reinforcement and adjustable insulating rubber sleeve for safety.
4. Setup Instructions
4.1. Solar Battery Charger Setup
- Placement: Position the solar panel in a location that receives maximum direct sunlight throughout the day. Ensure no obstructions block the sunlight.
- Mounting: Utilize the fixed holes on the solar panel for secure installation on various surfaces or subjects.
- Connection: Connect the solar panel's output cable to your 12V battery. Ensure correct polarity: red to positive (+), black to negative (-). The intelligent controller will manage the charging process.
- Verification: Once connected and exposed to sufficient sunlight, the green LED indicator on the solar panel will light up, indicating that charging is in progress.
4.2. Battery Voltage Tester Setup
- Preparation: Ensure the battery terminals are clean and free of corrosion for an accurate reading.
- Connection: Connect the red clip of the voltage tester to the positive (+) terminal of the battery. Connect the black clip to the negative (-) terminal of the battery.
- Reading: The battery voltage will be displayed on the LCD screen of the tester immediately upon connection.
5. Operating Instructions
5.1. Using the Solar Battery Charger
- The solar charger is designed for trickle charging and maintaining 12V batteries. It is not intended for rapid charging of deeply discharged batteries.
- Ensure the solar panel is exposed to direct sunlight for optimal charging. Partial shading will reduce charging efficiency.
- The green LED indicator confirms that the solar panel is generating power and attempting to charge the battery.
- The intelligent controller automatically prevents overcharge, reverse discharge, and other potential issues, allowing for continuous connection.
5.2. Using the Battery Voltage Tester
- Connect the tester clips to the battery terminals as described in the setup section.
- The LCD screen will display the current voltage of the battery.
- The tester is compatible with 6V, 12V, 24V, and 48V batteries. It automatically detects the battery voltage.
- For accurate results, ensure the battery is not actively being charged or discharged during the test.
6. Maintenance
- Solar Panel Cleaning: Regularly clean the surface of the solar panel with a soft, damp cloth to remove dust, dirt, or debris. This ensures maximum light absorption and charging efficiency. The ultra-clear PV glass is designed for easy cleaning.
- Cable and Connector Inspection: Periodically check all cables and connections for any signs of wear, damage, or corrosion. Ensure connections are secure.
- Storage: If storing the unit for an extended period, disconnect it from the battery and store it in a cool, dry place away from direct sunlight.
7. Troubleshooting
| Problem | Possible Cause | Solution |
|---|---|---|
| Solar charger LED indicator is off. | Insufficient sunlight; incorrect connection; battery fully charged. | Ensure the panel is in direct sunlight. Check cable connections for correct polarity. If the battery is fully charged, the charger may enter maintenance mode, and the LED might not be continuously lit. |
| Battery voltage tester shows no reading or incorrect reading. | Loose or corroded connections; battery completely dead. | Clean battery terminals and ensure clips are securely attached. Verify the battery is not completely discharged below the tester's operational range. |
| Solar charger not maintaining battery charge. | Panel is dirty; insufficient sunlight; battery has internal issues. | Clean the solar panel surface. Relocate the panel to an area with more direct sunlight. Have the battery professionally tested if issues persist. |
8. Specifications
| Feature | Detail |
|---|---|
| Brand | SUNAPEX |
| Model | 1.8W Solar Battery Charger with Battery Voltage Tester |
| Solar Panel Power | 1.8 Watts |
| Solar Panel Technology | Amorphous Film |
| Solar Panel Conversion Rate | Up to 30% |
| Battery Voltage Compatibility (Tester) | 6V / 12V / 24V / 48V |
| Battery CCA Range (Tester) | 100-2000 CCA |
| Compatible Battery Types (Tester) | FLD, AGM, LI, LifePO4, GEL |
| Connector Type | 2-Pin |
| Color | Black |
| Housing Material | Engineering ABS Plastic |
| Panel Cover Material | Ultra Clear PV Glass |
9. Safety Information
- Always ensure correct polarity when connecting to a battery (Red to Positive, Black to Negative).
- Do not attempt to disassemble or modify the device.
- Keep the device away from open flames or excessive heat.
- Avoid direct contact with the solar panel's electrical contacts.
- The intelligent controller provides protection against common electrical faults, but proper handling is always recommended.
Ask a question about this manual
Ask about setup, troubleshooting, compatibility, parts, safety, or missing instructions. Manuals+ will review the question and use this page’s manual context to help answer it.